SDKs, drivers and roots - Oh, my!
Hey, all. Introducing a new feature to our AndroidCentral readers. It's a little space where we can discuss and feature the weeks best in the Android modding and hacking community, in terms that even those new to Android can understand.
This won't be device or carrier specific, so think of it as a showcase of everything Android has to offer us because of its open nature. Our seasoned veterans may find some of this redundant, but we're going to try to keep things on a level all can understand so we stay on the same page. This week's version is going to be a bit long so we can introduce some things, so bear with me.
Please keep in mind I can't be everywhere at once (until I perfect my cloning machine!) so it's possible I'll miss something that you didn't. The best way to keep that from happening is to send me your tips and links about all the cool ways we are customizing our phones. Just like the customizing community let's make this a joint effort!
Now on to the goodies.
Each week we're going to feature some of the tricks you can do with just the command prompt and the data cable. While there are downloads and zip files and ROMs and all other sorts of coolness you can do with your phone, often the simplest tricks can make the most impact.
The Android SDK
This week we're going to start at the beginning. Installing the Android SDK -- that's short for Software Development Kit -- which is what lets developers do their thing. And now you can, too.
Step 1: Prep work and download
Get the latest news from Android Central, your trusted companion in the world of Android
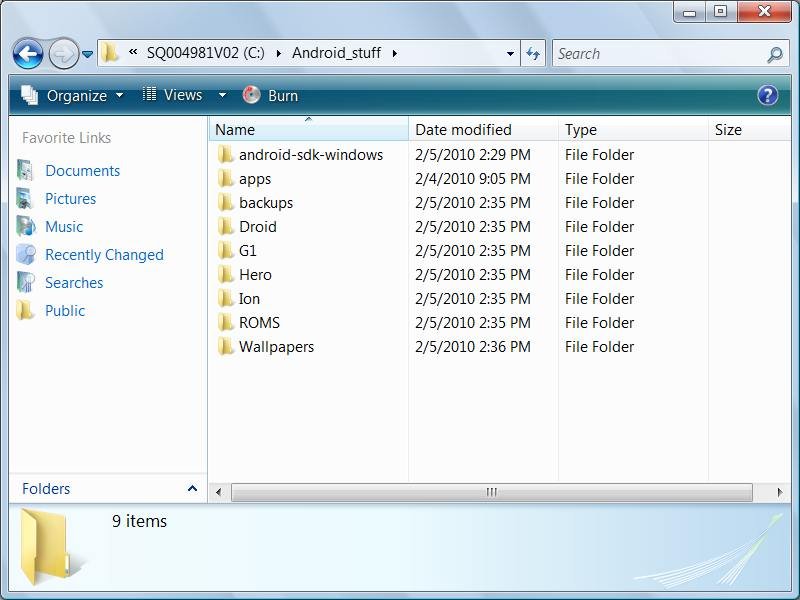
First, let's prepare a workspace on your PC. My suggestion is to create a folder in the top level of your hard drive so it's easy to get to from the command line. C:\Android_stuff is much easier to remember than C:\users\gbhil\documents\tools\devices\Android\stuff. I use my workspace for backups, wallpapers, ROMs, and tools as well as the SDK. Simply make a separate folder inside your workspace for each. Click the image below to enlarge it and see how I have my Android_stuff folder set up.
Now it's time to download the SDK. Head to https://developer.android.com/studio. You'll see downloads for Windows, Mac OS X, and Linux. Pick the appropriate category and download the file to your desktop. Don't be put off by the license agreement. Have a read and you'll see it's pretty standard.
Unzip the download with your favorite archiving tool and drag the folder you extracted into your Workspace. Don't open the folder, just drag the whole thing over. That's it. The Android SDK is now installed.
Step 2: Install the USB driver - a necessary evil
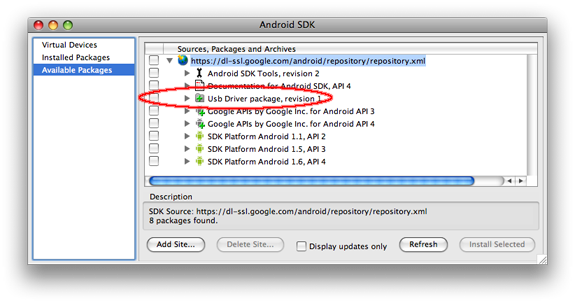
Installing the USB driver is almost as simple, though it takes a few steps, and you'll need to do it if you're running Windows. Open the SDK folder that you just moved over, and double-click "SDK Setup.exe" in the SDK directory. You'll be see a window like the one below.
Make sure "Available Packages" in the left pane is selected.
Click the triangle beside the globe on the top line to expand the list.
What I have circled in red in our example picture needs to be checked. That will download the USB driver. Unless you have an interest in software development or running an Android device emulator, you can leave everything else unchecked. If you decide to install the other portions, be prepared for a 1 Gigabyte download.
Click install selected. The driver will download itself into the SDK.
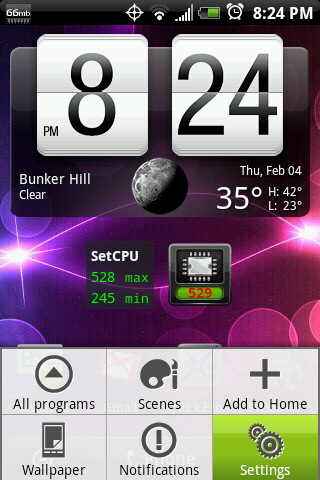
Now on your device, hit the menu button. Choose Settings (fig 1), then choose Applications (fig 2). Now click Development (fig 3), and make sure USB debugging is checked (fig 4). Use the back key to exit back to your desktop.
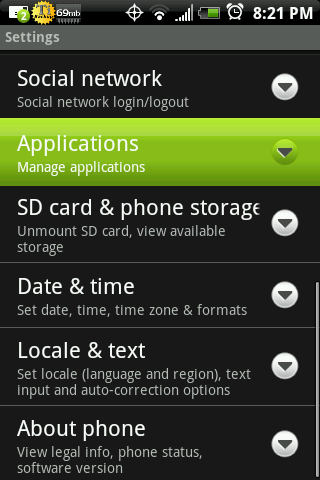
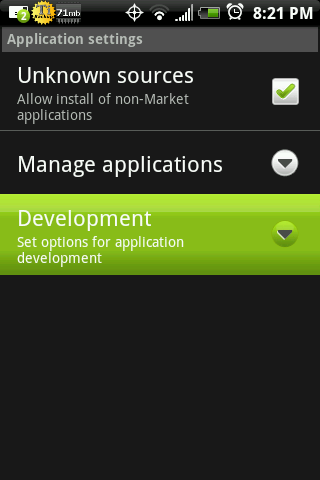
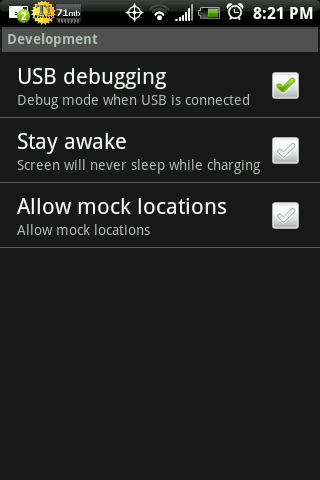
Now, plug your phone in, just as if you were going to transfer a song or a picture. But this time don't pull down the shade and mount the SD card. You'll get a "Found New Hardware" message from Windows.
Select "Locate and install driver software."
Select "Don't search online."
Select "I don't have the disk. Show me other options."
Select "Browse my computer for driver software."
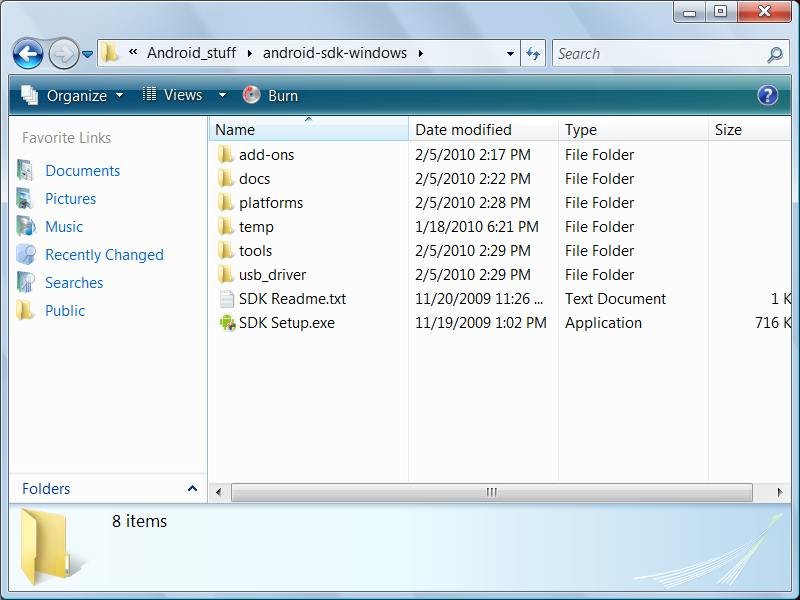
Now browse to the SDK folder, and point Windows to the folder named usb_driver. Click the image below to enlarge it and see the usb_driver folder inside your Android SDK.
Leave "Include subfolders" checked, and click "Next." Windows might ask you if you're sure. Say yes if it does. When windows does it's thing, and asks you if you want to install the "Google ADB interface driver" say yes.
Of course if we want to run emulators or program applications there's more to it. But for our purposes, we're done. Unplug your phone and reboot your computer.
Now is a good time to mention that you probably shouldn't ever reboot your PC while your phone is plugged in. Some newer PC's can boot from a USB device, and will try to load Android to your PC if you do. As interesting as that sounds, it won't work, and could lead to problems.
Funny how the hardest part of the whole operation is setting up Windows isn't it?
First test: Back up your apps
Here's a trick that anyone can do, even with an unrooted phone. Plug your phone into the computer, the same way you would if you were transferring pictures or a song, except once again don't pull down the shade and mount the SD card. Anytime we're interacting with the phone through the command prompt, the card will need to stay unmounted.
Now open your command prompt. In Windows, just hit the start menu and type (either in the Windows 7 search field or the "run" command in XP) "cmd." Don't let that 1960s computer look scare you off, this is going to be easy.
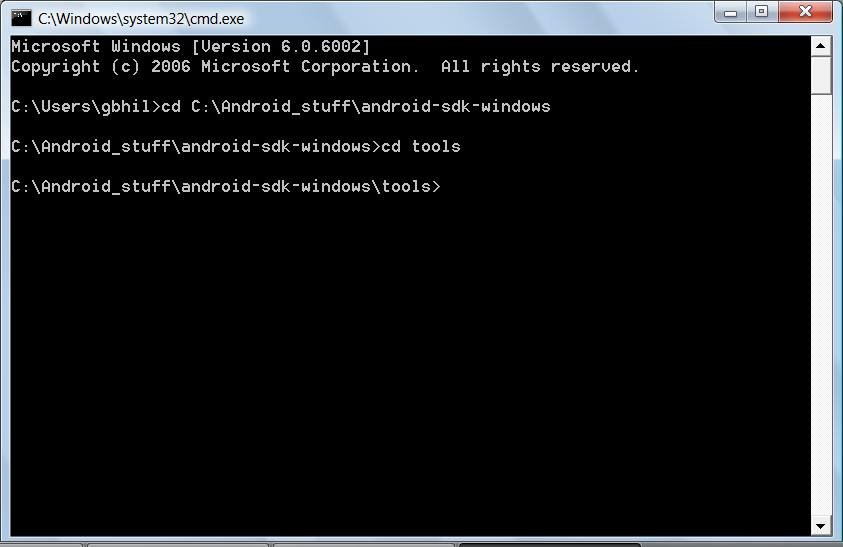
At the prompt, navigate to the location you put the Android SDK. If you're following our example, just type (or copy and paste) the following in your command line:
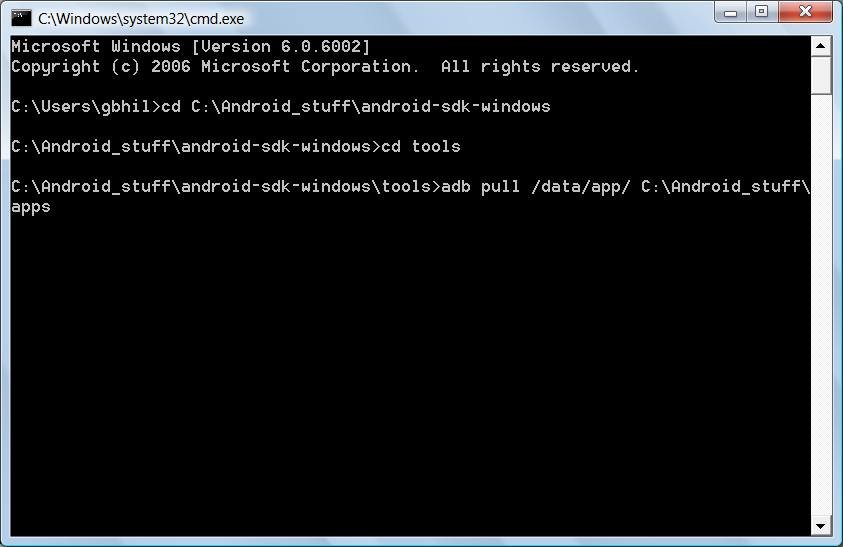
cd C:\Android_stuff\android-sdk-windows
If you are using a different location, modify the command to point to the location you've placed your Android SDK.
Inside the SDK there are some other folders. The one we will usually be working with is the tools folder. Navigate into it by typing the following into your command prompt:
cd tools
Click the picture below to get a larger view of the commands typed into the Windows command prompt.
Now open up your file manager, and in your workspace make a folder called apps. We're going to back up all of our applications here. The market keeps a record of what you've paid for, but sometimes finding the free ones again can be a pain, so lets keep our own copy. If you scroll up the page to the image of my Android_stuff folder, you'll see an apps subfolder is already in there.
At your prompt type in the following:
adb pull /data/app/ C:\Android_stuff\apps
Just copy and paste it. What it means is -
- use the adb program (provided by Google as part of the Android SDK) to pull files.
- The files we are pulling from the phone are located in /data/app on the phone itself.
- When a file is pulled off, we want to paste it to C:\Android_stuff\apps.
Why are the slashes different from the first part of the command to the second part?
It's because we are dealing with two different file systems. In a Windows file system, the slashes are backwards, like so " \ " . Unix file systems use the forward slash " / " to separate folders. /data/app/ is on the phone, and uses a Unix file system. C:\Android_stuff\apps is on your PC so it uses the Windows file system.
You might see a message about a server being out of date, or a server getting killed. This refers to the adb server, and the command will refresh it if necessary. Don't be concerned, it's automatic. You'll see the window start to scroll, with the output from adb telling you it's copied each application. There's no interaction needed, just let it scroll. When it's finished, you'll be back at your command prompt. Now a copy of all your free market applications are stored on your PC for safe keeping. The files all have an ".apk" extension. This is the standard Android installation format, so these files can't be used in Windows.
No root. No convoluted shell commands. Just an easy way to back up all your applications. These applications can be copied over to your SD card, and installed with any app that can read the card and install apk files. If you don't have an app for this, search for Astro in the market. It serves as a file explorer (like My Computer in Windows) and offers some other great tools for application management.
This is just the tip of the iceburg. Until Android comes out with an easy-to-use iTunes-style application to interact with the device, I'm here to help you work with the command line. Each week we'll focus on something similar. Happy hacking :)
Picks of the Week
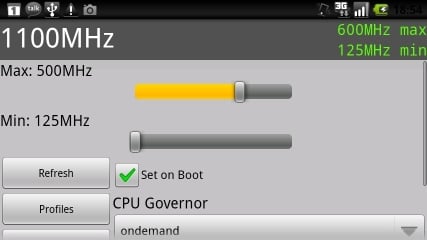
Overclocking your Droid (root required!)
The most popular Android device now has the most requested feature upgrade. The kernel has been tweaked and the processor has been overclocked. Here's the developers thread about it, and A/C user thebizz has started up a discussion in our own forums.
WARNING: There is potential here to ruin your device (as with all modifications), but the developer has done a good job making it foolproof. He even has set up a dedicated support area for questions. It's my personal opinion that the Droid's processor can take a bit more abuse than Moto has it set at, so this could be a very useful update indeed. If you try this out, be sure to share your experiences in the forums, as many people seem to be on the fence with this one. Of course you'll need to be rooted and have a custom recovery image flashed. If this is all Greek to you. You'll find plenty of help in the forums.
Cyanogen's Nexus One ROM (root required!)
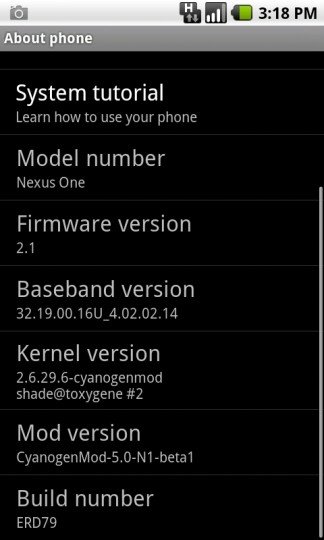
Legendary Android Hacker/Cooker/Modder/Guru Cyanogen has released a custom ROM for you lucky Nexus One owners. Some of his G1 hacks aren't included, as there's no need with the great hardware of the Nexus One. But that's not to say this isn't full of the goods. Here are a few highlights:
- Latest 2.6.29.6 kernel, which supports tethering, vpn, and other modules (cifs, nfs, aufs, fuse)
- Built in USB tether
- FLAC audio support
- Includes BusyBox, htop, nano, powertop, openvpn, and all engineering commandline utilities
Of course there's more, that's just the short list. Cyanogen's work is always top-notch, enough so that many of his changes have been included in the Android source tree. It's a tall order to make the Nexus One perform better than it already does, but I can tell you this – it does everything but fly using this build, and I highly recommend you have a look.
Cyanogen Mod homepage http://www.cyanogenmod.com/ . A/C user rsvpinx has started A/C's discussion topic about the ROM here in our forums.
MetaMorph (root required!)
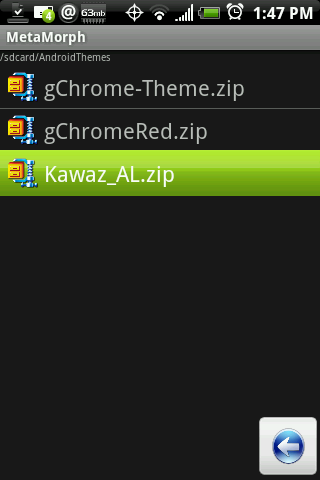
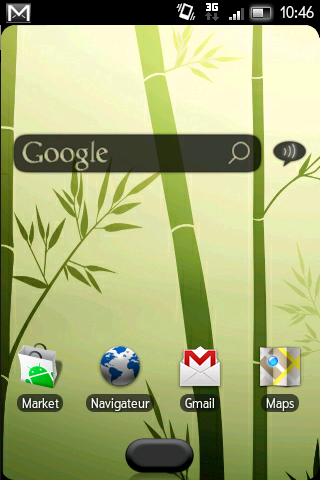
Maybe MetaMorph is an application. Maybe it would be better served with a full blown review in the Application forums. But I just can't get enough of this tool. What it does is allow the end user to download a custom theme and load it on the phone without the hassle of recovery images and ROM flashing. I talked to Stericson over at XDA developers and asked him a few questions about the application:
Your app is a huge breakthrough in the way themes and visual elements are changed by the end user. How did you think of it?
I will probably get shot when I say this, but the iPhone project that essentially does the same thing turned me on to the idea.
What resources do you recommend someone new to Android and your application take a look at to make it easier to use MetaMorph?
Watch all of my videos. They will pretty much explain every detail about MetaMorph. You can watch them all here: https://forum.xda-developers.com/showthread.php?t=591329
You're giving your users very timely updates. Can you give us any news about upcoming features?
Well, the theme repository is coming soon. I got a bit burned out on working on MetaMorph only so I am currently working on my other app, CodeSpeak, but I am still working on MetaMorph. I also have some people who are wanting to come on board and assist with the Development of MetaMorph as well so I am also giving them a chance to put some time in on the project.
The decision to provide the same feature set in the free and donate version was great for the consumer. Do you feel it crippled any potential for real profit?
No. I never made MetaMorph to be a for-profit app. The donate version of MetaMorph came about because people kept asking me how they could donate to me for the work that I have done. The easiest remedy was to supply a donate version of MetaMorph. Then the donate version somewhat turned into a beta testing version of sorts :)
Where would a budding theme developer look to start creating MetaMorph themes?
Watch the videos :) (Link above)Also take a look at how any of these themes are done on this page: https://forum.xda-developers.com/showthread.php?t=589315That should give a very good idea of how to do them with lots and lots of examples :)
I'd like to thank Stericson for taking the time to answer a few questions for us, and for the great application. Using MetaMorph, anyone with a talent for graphics work can easily become an Android theme developer.
As Stericson pointed out, the official support thread for the app along with a ton of info is at XDA developers here. A/C user mclarryjr has started up a nice discussion in our forums about how to make the magic with this one here at our forums . Hit the QRcode from your phone (or click it in your Android browser) to go straight to the market and grab MetaMorph.
Hope you enjoyed this week's installment of Inside Android. Remember I'm always looking for tips and opinions Find me on the forums or drop me a line gbhil.hero@gmail.com

Jerry is an amateur woodworker and struggling shade tree mechanic. There's nothing he can't take apart, but many things he can't reassemble. You'll find him writing and speaking his loud opinion on Android Central and occasionally on Threads.
