
Before you do anything, make sure you've got an unlocked Google Pixel. If you bought your phone through a carrier like AT&T, Verizon, or T-Mobile, it's likely your phone is locked and cannot be used for this guide. If your phone isn't unlocked and you're not able to get your carrier to unlock it, this guide won't be of any use.
Regular software updates are wonderful. Google Pixel phones update every month with new security patches and include Pixel Feature Drops once each quarter. Even though these patches go through lots of testing before being rolled out to the public, a bad one will pop up every once in a while, causing problems that didn't exist before.
That's exactly what happened with the March 2025 Google Pixel update. Users have reported all sorts of issues, from screen brightness problems to broken haptics, network connectivity issues, and more. Google has a web-based flash tool that makes going back "easy," but it takes a fair bit of work to get there if you've never done it before. As always with firmware flashing, I wouldn't recommend doing this if the Pixel you want to downgrade is the only phone you have available to use.
If you still want to take the chance, we recommend charging your phone to 100% and backing things up before going forward. To get flashing, you'll need a computer, USB cable, and developer options enabled on your Pixel phone.
Back it up
Most likely, you've already got Google backup enabled on your phone, but it's always good to make sure before you do something drastic. For this step, you'll need to have Google One on your Google account. All Google Pixel phones come with a Google One trial, so it's likely you may still have a free trial available even if you don't already pay for it.
Here's how to verify you've got Google One backup enabled on your Google Pixel.
1. Open Settings. You can find the icon in your app drawer or by swiping down twice on the status bar.
2. Select "Back up or copy data" from the list.
3. Make sure the right Google account is selected at the top.
4. Click the slider to enable Google One backup.
5. Select Backup Now to perform an immediate backup. We recommend putting your phone on the charge while it performs the backup.

Google One Backup will automatically include app data for all the apps you have installed, MMS and SMS messages, call history, device settings, and other Google account data like contacts and calendar.
Your photos should also be backed up through Google Photos, but that may need to be done separately. Here's how to backup your photos and videos through Google Photos.
If you don't have Google One or just want to make sure a backup of your device data is in more place than one, our ultimate guide to Android backups will give you several options for how to accomplish this.
Get your phone ready
Rolling back an update isn't a simple click of a button, unfortunately, but Google's Android Flash Tool makes it easy enough so long as you have a computer to plug your phone into. First, you'll need to enable developer options and OEM unlocking. Follow these steps for that:
1. Open Settings. You can find the icon in your app drawer or by swiping down twice on the status bar.
2. Scroll down to and select About phone.
3. Scroll to the bottom and tap Build number seven times until you see the toast notification that developer options have been enabled.

4. Go back to the main settings window and select System from the list.
5. Scroll down to Developer options.
6. Find USB debugging under the "Debugging" section and enable it.
7. Scroll back up and enable OEM unlocking. Your phone may ask you to reboot after enabling this.

Hop on your computer
For this section, I'm using a Windows 11-based PC, but the instructions should be similar for other desktop operating systems. To complete the flashing process, you'll need a USB cable that can connect your phone to your PC. The one that's included with your Google Pixel will work so long as your PC has a USB-C port. Follow these steps to get started:
1. Navigate to the official Google Pixel factory images page.
2. Select your device from the list on the right. Mine is a Google Pixel 9 Pro XL.
3. Scroll down to the build you want to flash. For this tutorial, I'm using 15.0.0 (AP4A.250205.002, Feb 2025). MAKE SURE you are selecting the right build. If you don't know which one is the right one or are unsure, I would recommend stopping now and waiting for Google to roll out a fixed update.
4. Click the Flash link next to the build.
5. Select Allow ADB access on the window that appears.

6. Connect your phone to your computer using a USB-C cable.
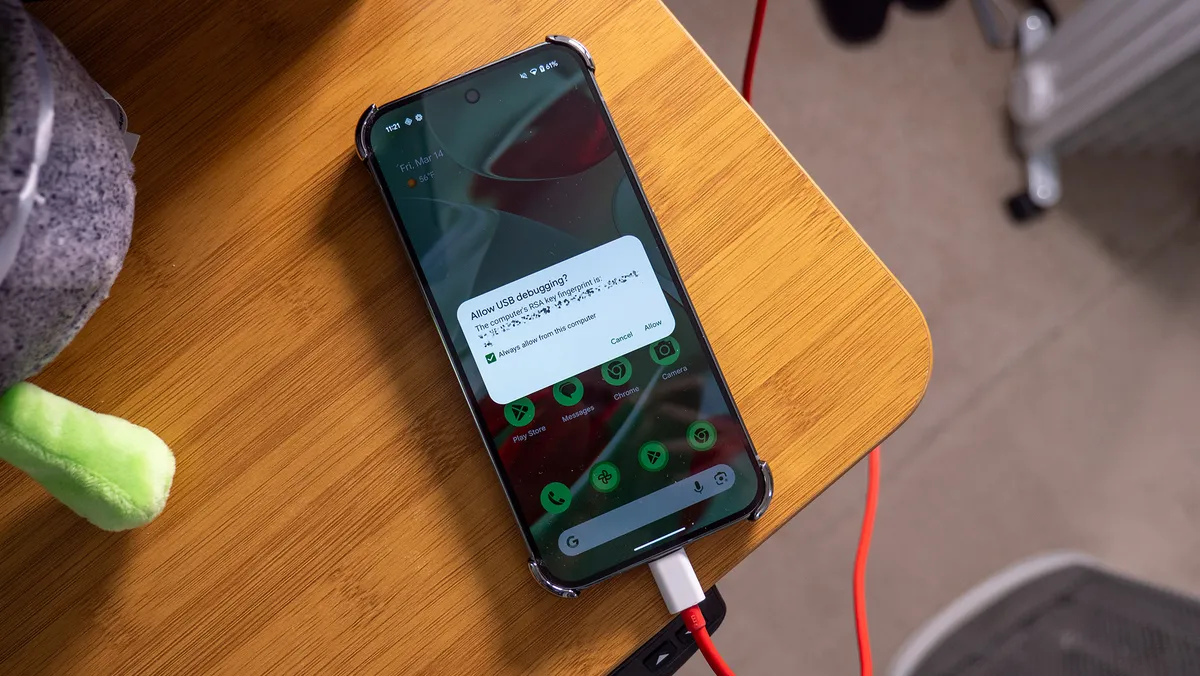
7. An USB Debugging prompt will appear on your computer. Select the Always allow from this computer checkbox, then click the Allow button.
8. Back on your computer, scroll down and tap Add new device.
9. Select your device from the list and then click connect.
10. Scroll down and select the boxes for Wipe device and Lock bootloader.
11. Tap the Install build button.

At this point, your phone should have rebooted and is now in a debug menu. In order to continue, you'll need to tap the Reselect device button and select your phone from the list.
Roll back that update
Now that your phone is in the recovery menu, you'll need to unlock the bootloader. The Android Flash Tool gives you a warning that continuing will wipe all data from your device. If you don't want to do that, now is a great time to call it quits. Otherwise, tap the Start button.

Your phone's display will now ask you to confirm unlocking the bootloader. Click the Volume up button to change the action to Unlock the bootloader. Click the power button to select the unlock action. Your phone may reboot.

Once the bootloader has been unlocked, the Android Flash Tool should automatically begin the flashing process. This can take half an hour or so to finish, so keep your computer awake and your phone plugged into it. Your phone will look like this photo the entire time:

Finalizing the process
Once the process has been completed, your phone will reboot and the bootloader will need to be locked again. On your computer, you'll be presented with a dialog to lock the bootloader again. Tap the start button when you're ready to continue.
1. On your phone, click the Volume up button to change the action to Lock the bootloader.
2. Click the power button to lock the bootloader. Your phone will reboot.

From here, your phone should be good as new and back to the Android version you selected. Once you've set the phone up, go ahead and re-enable developer options, then disable automatic updates from the developer options list. This will keep your Pixel from automatically updating to the March patch.
Additionally, you'll want to disable OEM unlocking from the list to make sure everything is locked and secure. Otherwise, things like Google Pay may not work properly, and you could be vulnerable to security risks.

You must confirm your public display name before commenting
Please logout and then login again, you will then be prompted to enter your display name.
