How to install a heatsink on your PS5 SSD
Installing a heatsink is incredibly easy and should only take a few minutes.
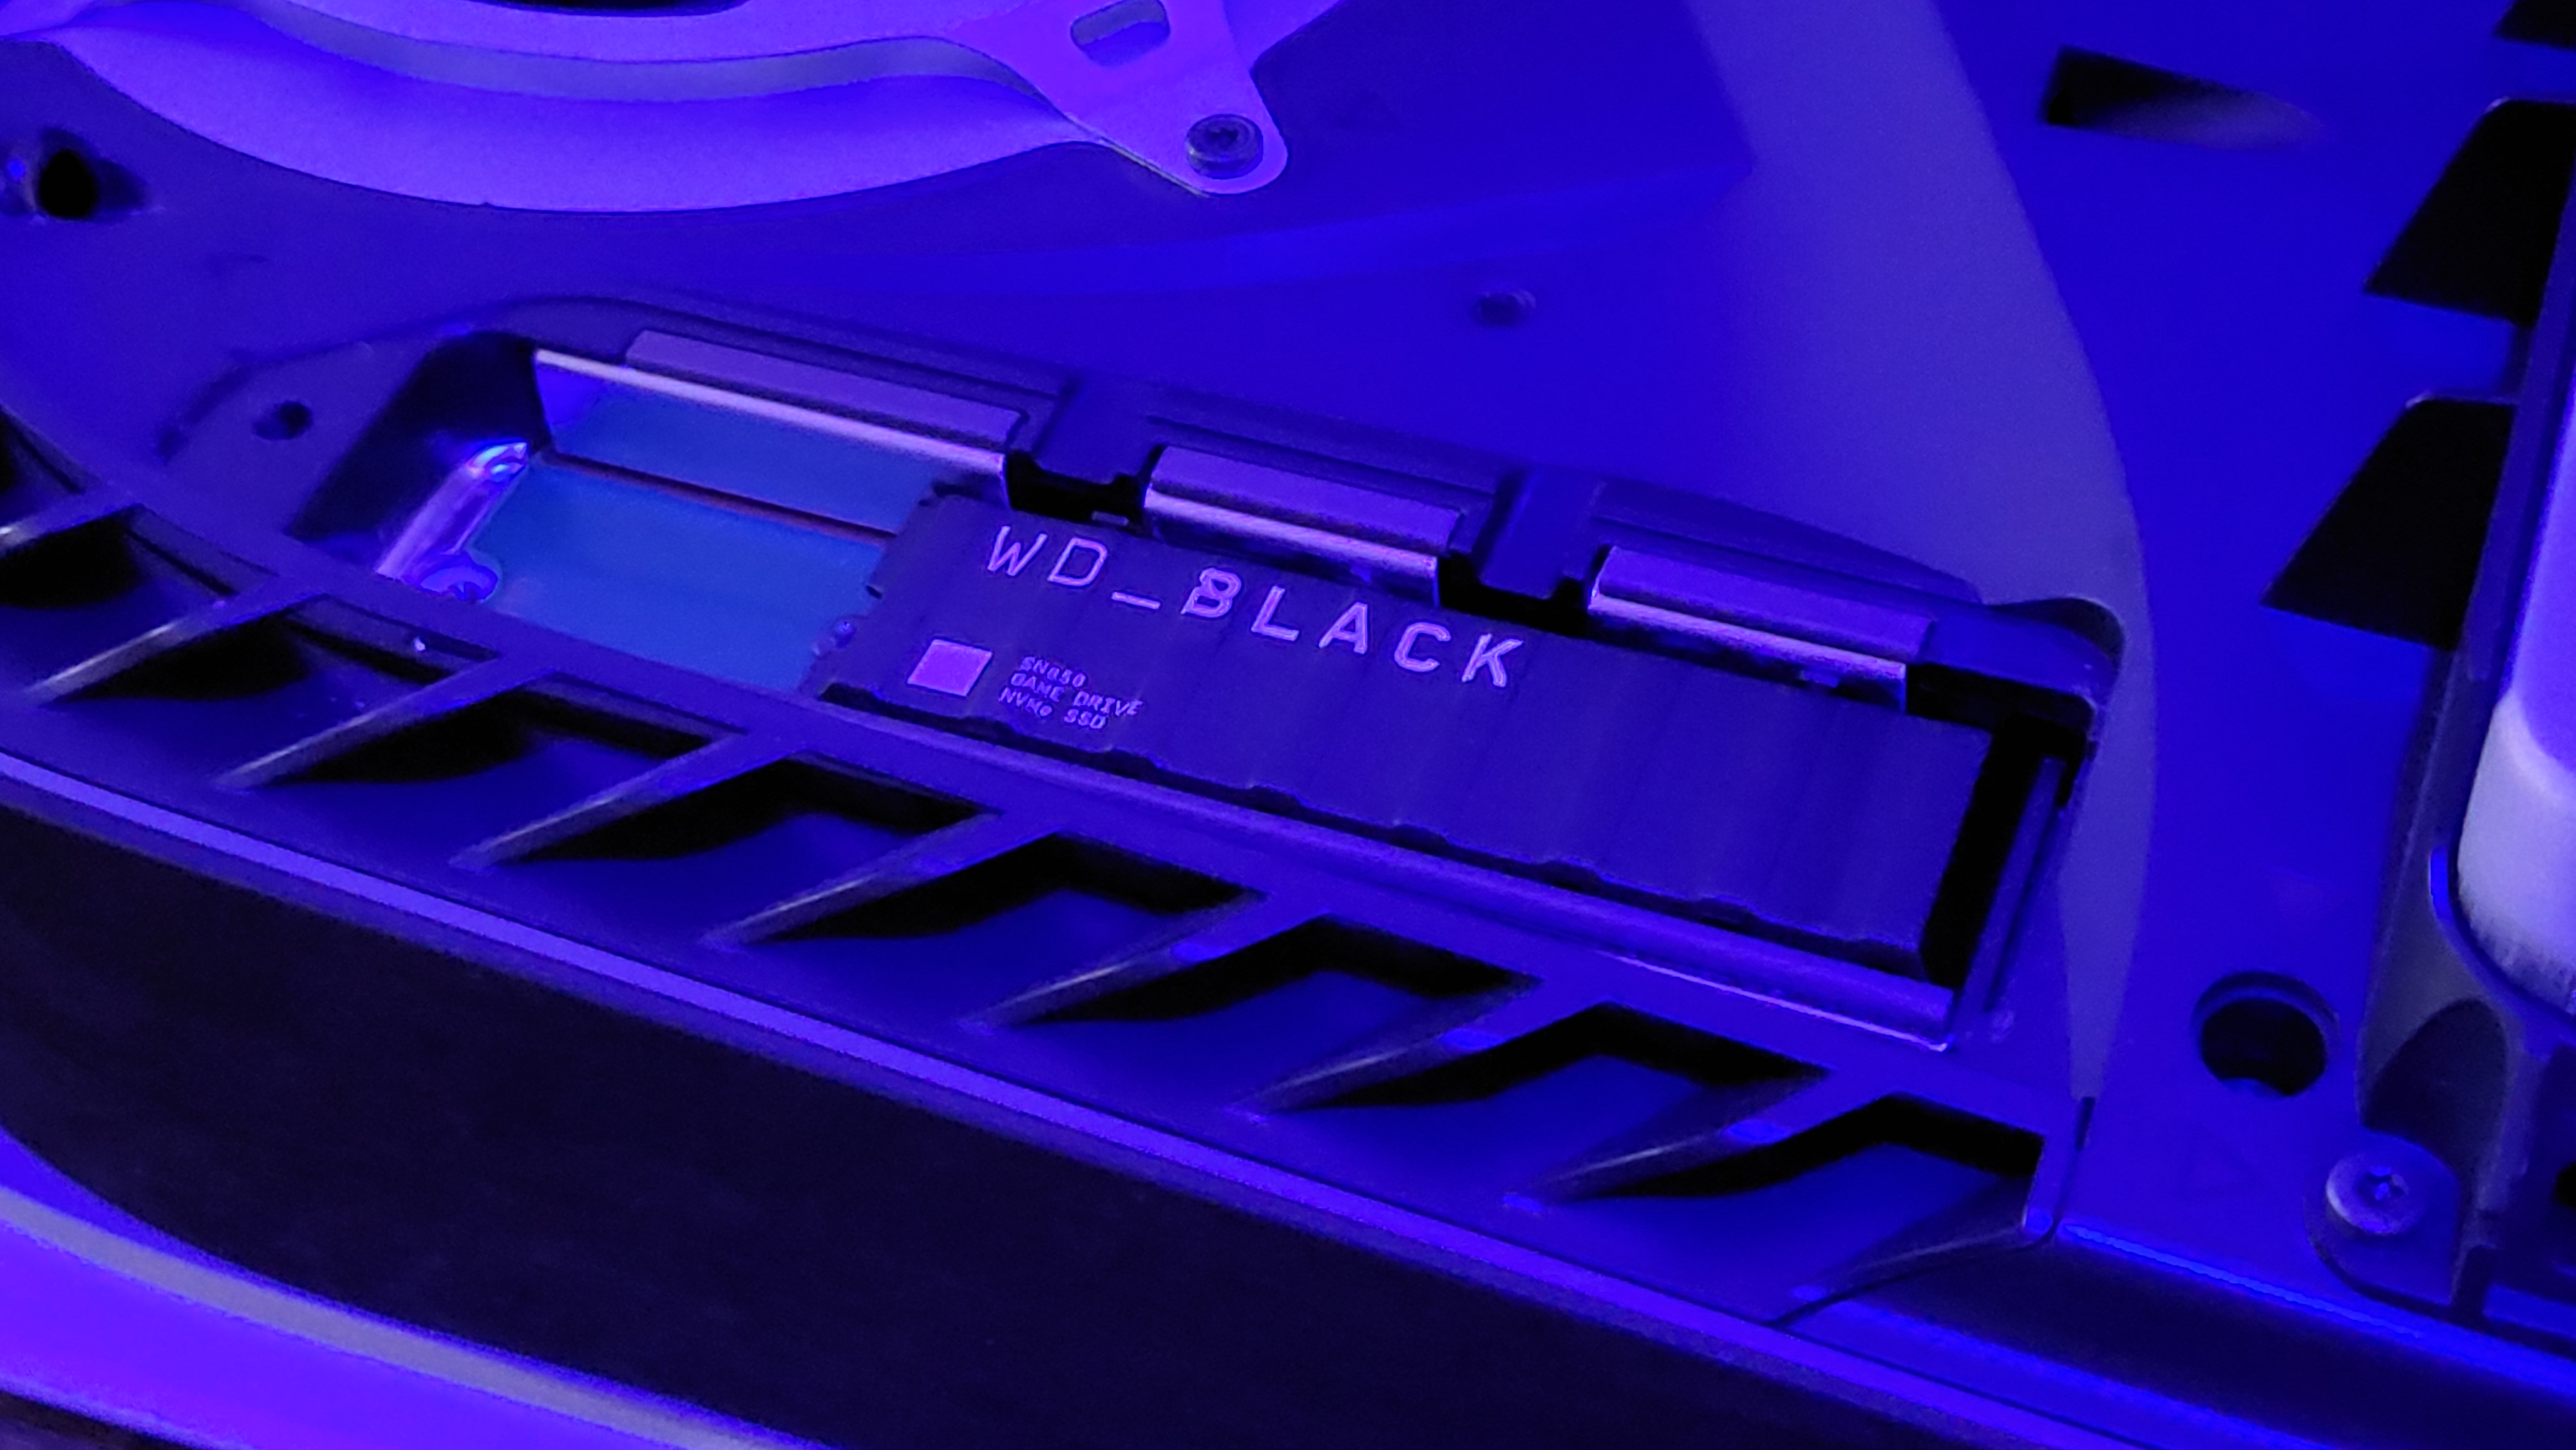
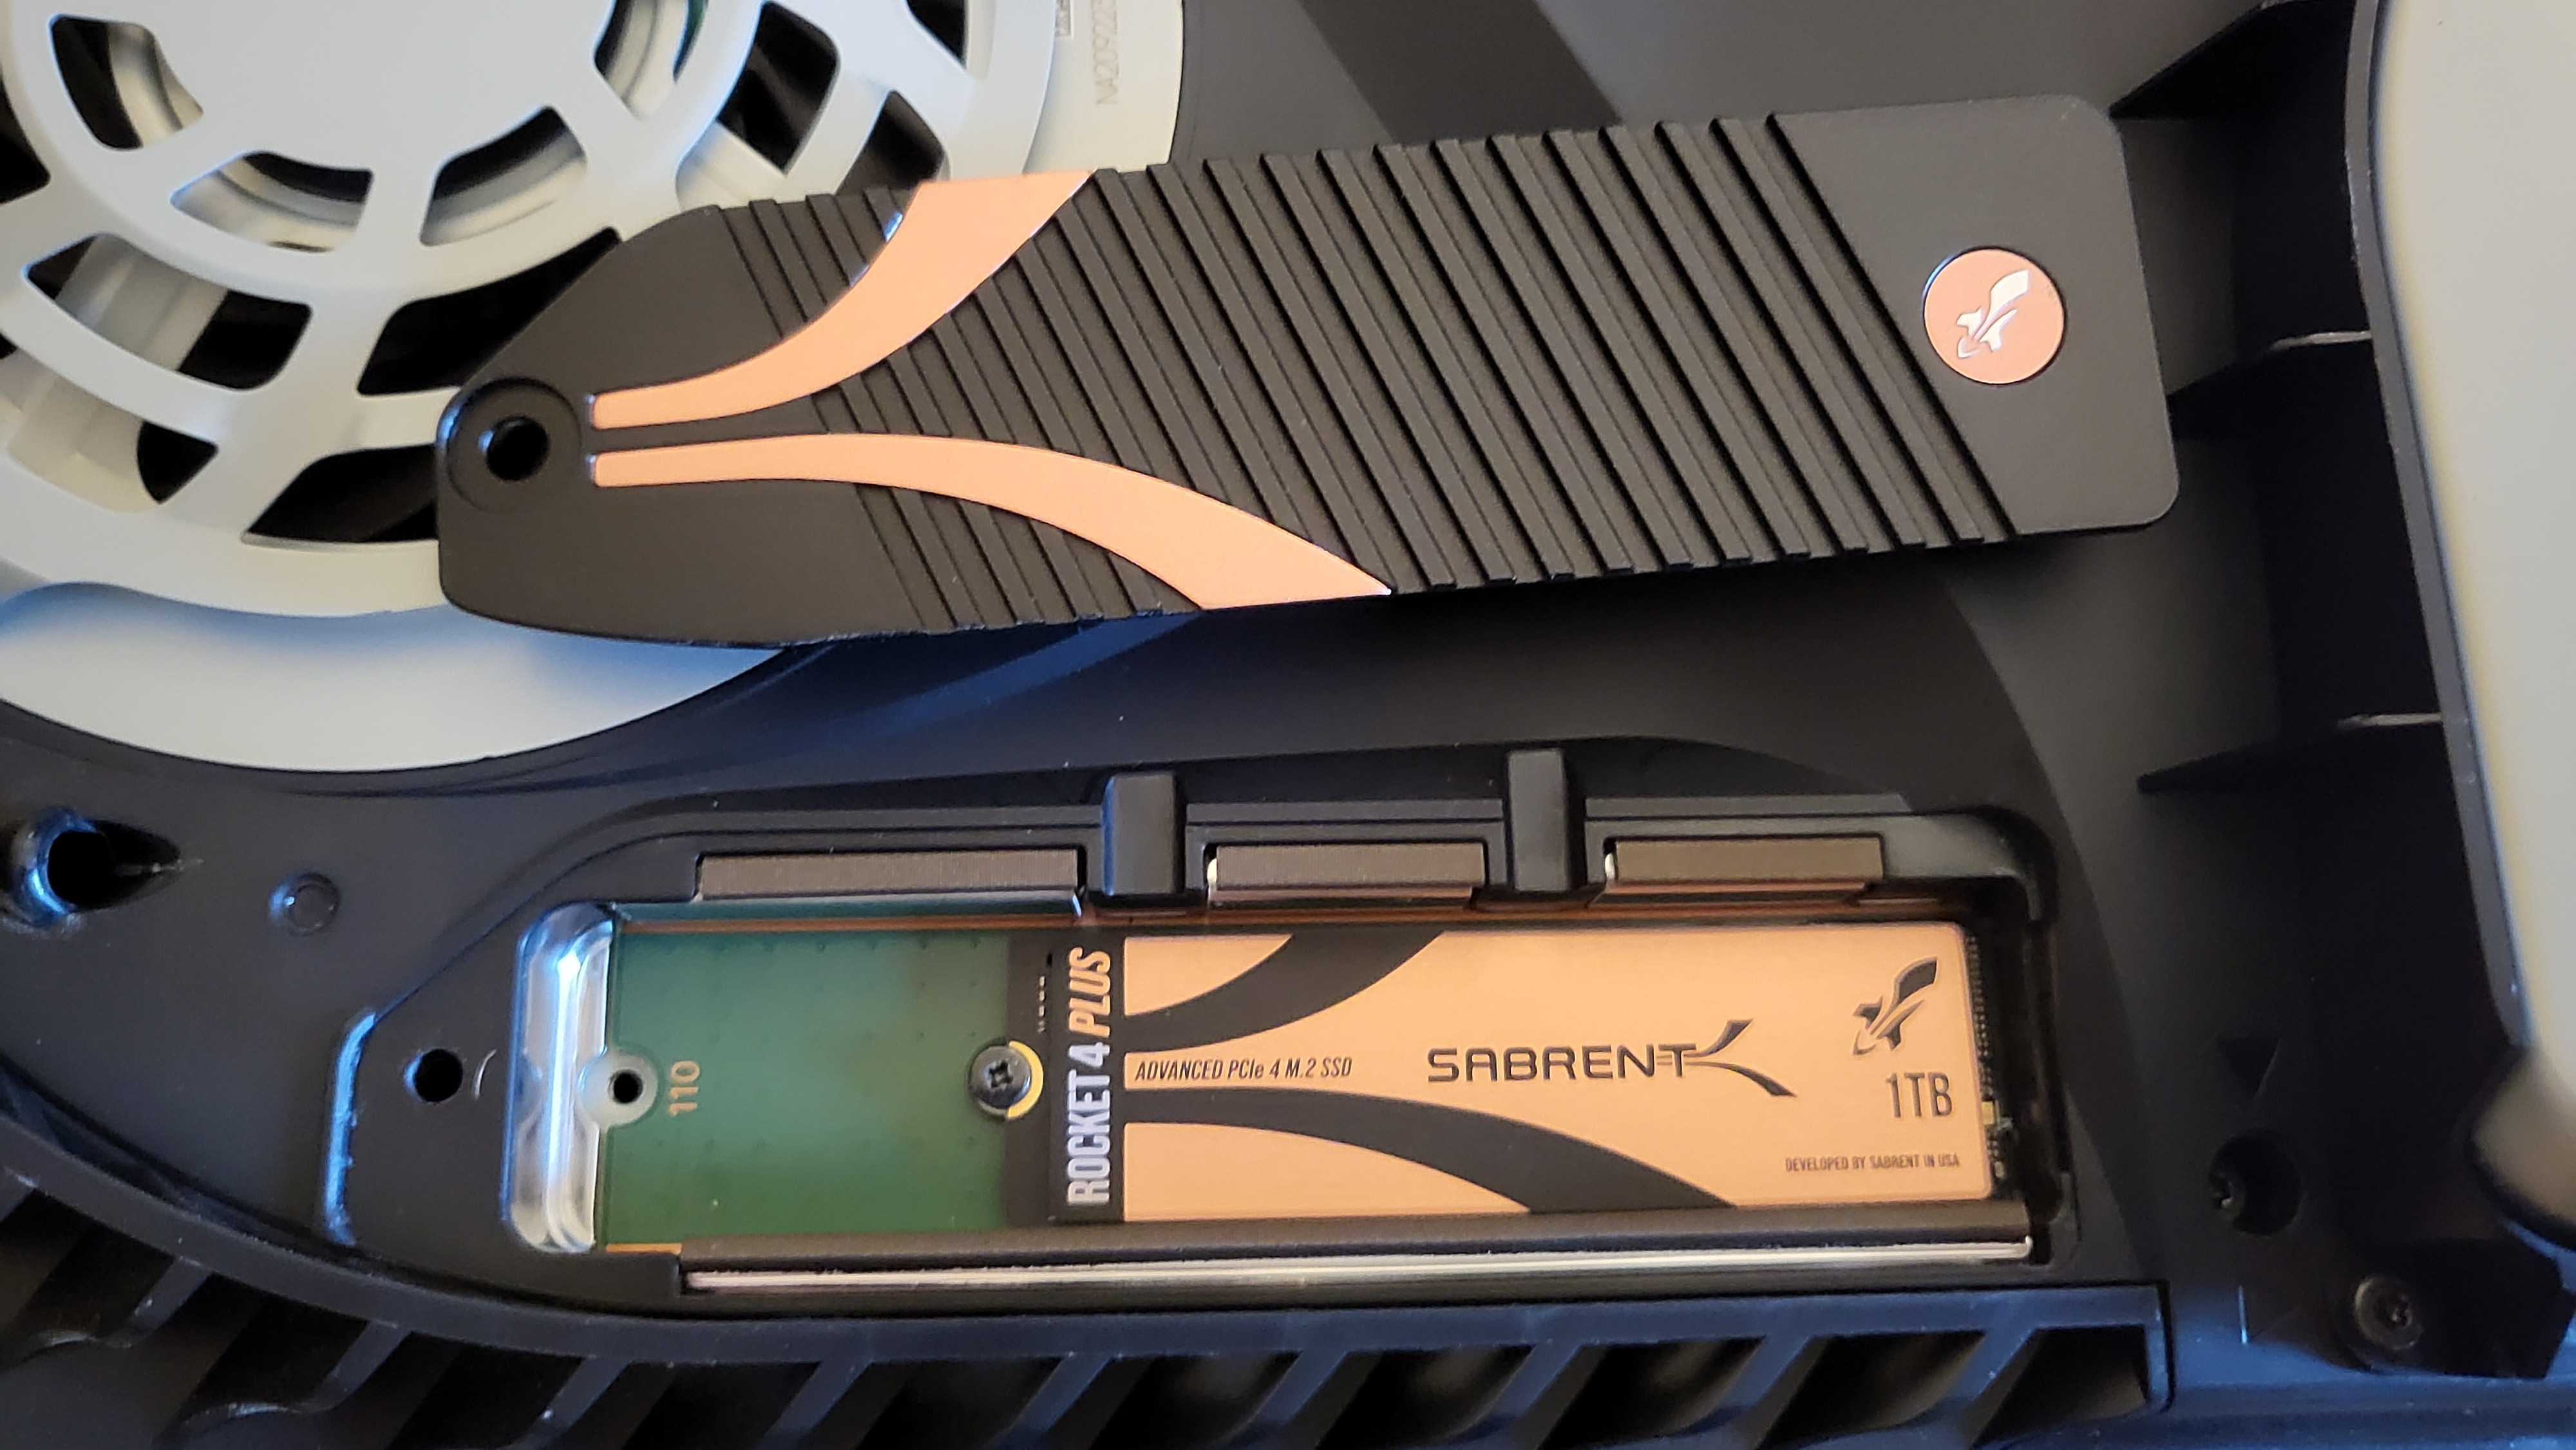
While the PlayStation 5 fan works well and keeps the console cool without too much noise, installing a solid-state drive increases the chances of it overheating. It's highly recommended that anyone purchasing an SSD for their PS5 buy one with a heatsink already built-in, but with product shortages and an increase in demand, sometimes that's not feasible. Thankfully, it's easy to get your hands on a separate heatsink to attach and they're usually fairly cheap. Even better, they're easy to install.
How to install a heatsink on your PS5 SSD
If you've already installed an internal SSD in your PS5, adding a heatsink should be a walk in the park. That's because you've already gotten the hard parts out of the way: opening up the PS5 and unscrewing the SSD panel. Whether you need to remove your SSD to add a heatsink depends on whether you purchased a double or single-sided heatsink. Both are compatible with the PS5, though Sony recommends using a single-sided heatsink for an easier fit.
1. Grab the back-left corner of the PS5 cover and pop it off. You'll feel a click and you will have to pull quite firmly.
2. Do the same to the front-left corner, pulling up until you hear a click.
3. To pull the whole cover off, you'll need to try and pull up while also sliding it to your right, towards the base of the console. Again, you'll need to be firm.
4. Once the cover comes free, make sure the console is positioned so the fan and metal cover is in front of you.
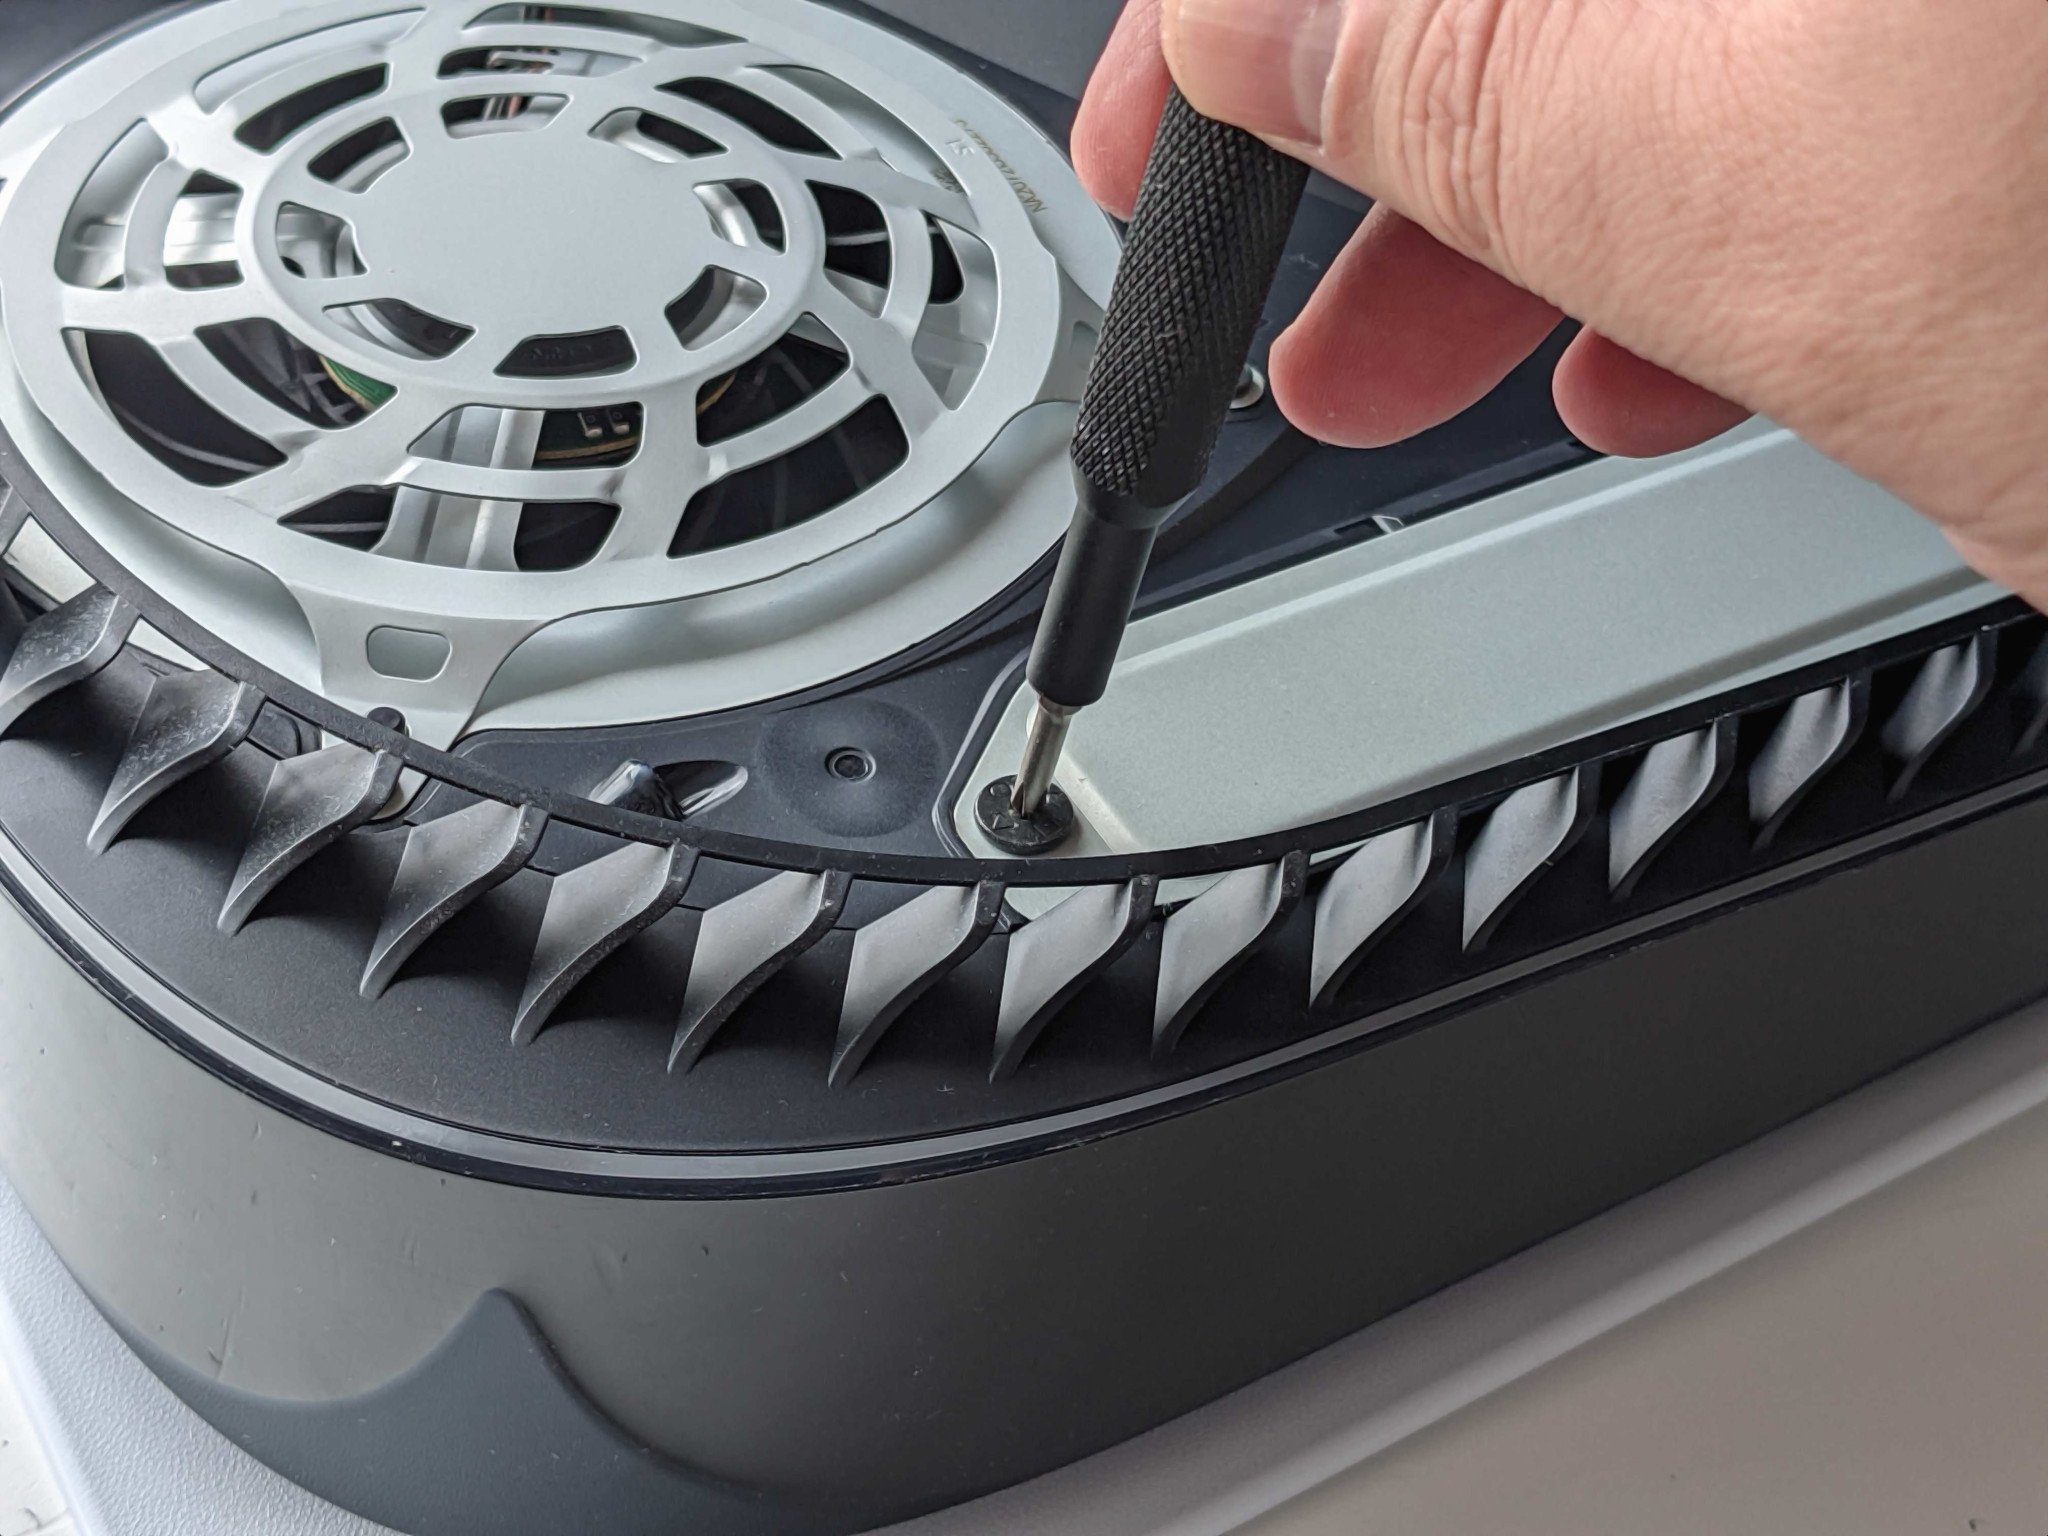
5. Grab your crosshead screwdriver and remove the retaining screw over the metal panel.
Be an expert in 5 minutes
Get the latest news from Android Central, your trusted companion in the world of Android
6. Pull the panel away and set it to one side.
7. Unscrew the SSD retaining screw that you find inside and remove it and the metal spacer.
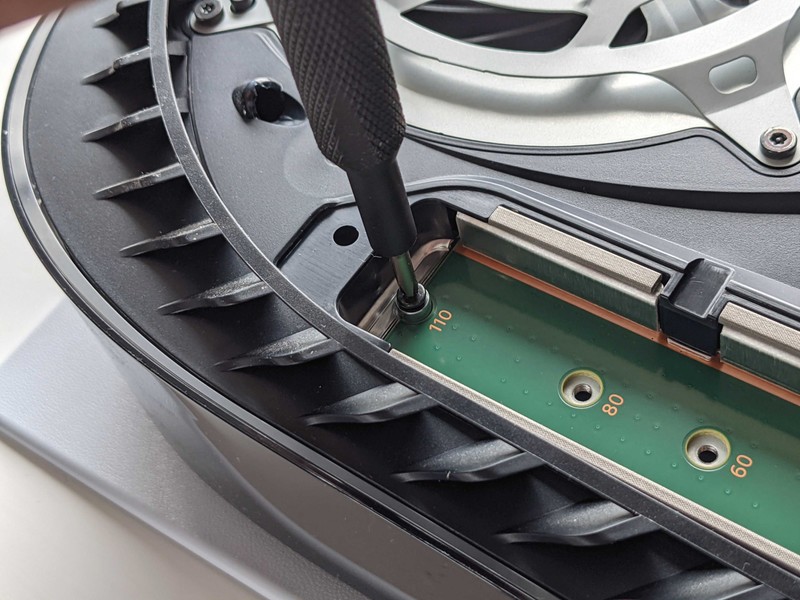
8. The metal spacer is to be installed in one of the cutouts, depending on the size of your SSD. You'll have to match it up depending on what you buy, but the 80 mark is where you'll be if you bought a standard size PC SSD.
9. Insert the SSD at an angle into the slot and push gently until it doesn't move anymore.
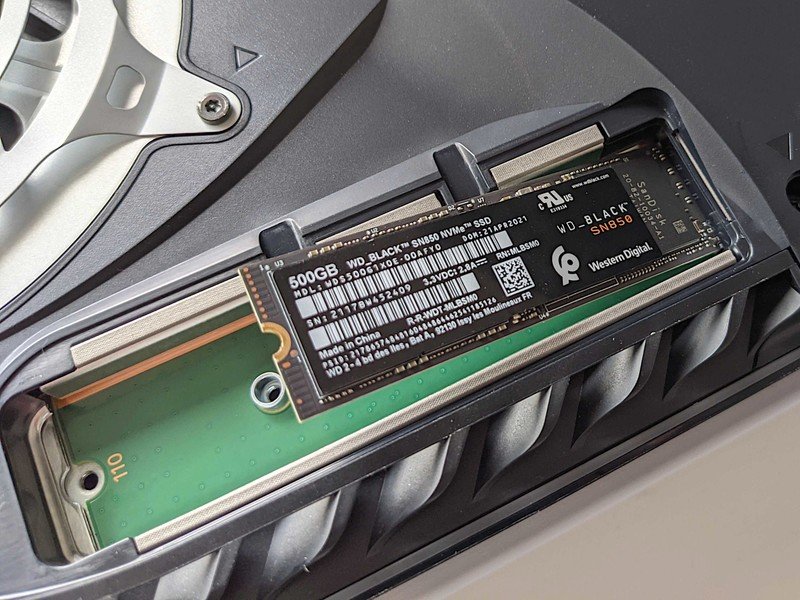
10. Push the SSD down and fix it with the retaining screw.
11. Reinsert the metal panel (or an SSD heatsink, if it's the Sabrent model) and screw it back in.
12. To reattach the PS5 cover, carefully line up the lugs and slide it up from the base towards the fan while pushing down until it clicks into place.
- Adding a single-sided heatsink like the Sabrent model is usually as simple as placing it where the SSD cover normally is. For a double-sided heatsink, you may need to sandwich the SSD between the two halves using the tape provided to keep it in place, and install it in the PS5 like you would any other SSD.
Because heatsinks are just meant to absorb and disperse heat, they're usually simple in design. Sometimes they can be a single piece of metal with a silicon gel strip to go in between. All you need to do to attach one is to put it on top of the SSD and screw it in place (if it's one that needs to be screwed).
Sony has a few diagrams showcasing exactly how heatsinks fit with an SSD. Sabrent's heatsink in particular sits right where the SSD cover panel would be and screws into place.
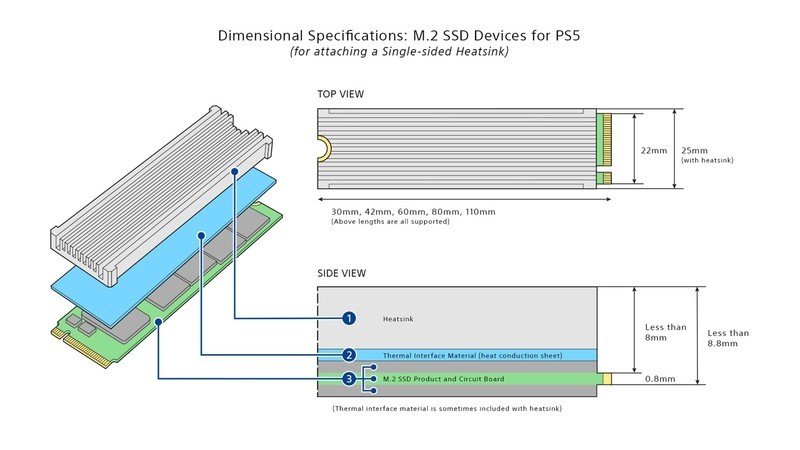
Installing a single-sided heatsink
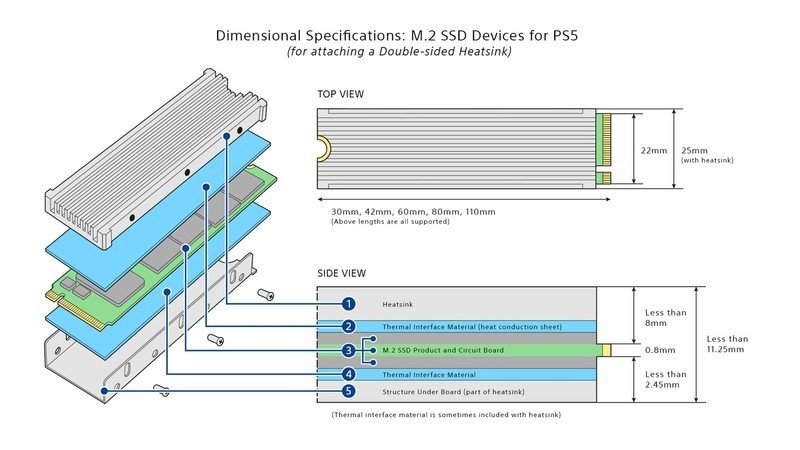
Installing a double-sided heatsink
Though it can be a bit intimidating opening up your PS5 for the first time, it's well worth it. The built-in SSD only has around 667GB of usable storage, and with some games coming at at nearly 100GB, that leaves very little room. If you don't want to keep deleting and redownloading games, an SSD is the way to go. And for anyone who buys a compatible SSD without a heatsink, there's no reason you shouldn't add one to it.

Jennifer Locke has been playing video games nearly her entire life. You can find her posting pictures of her dog and obsessing over PlayStation and Xbox, Star Wars, and other geeky things.
