How to switch users on a Chromebook
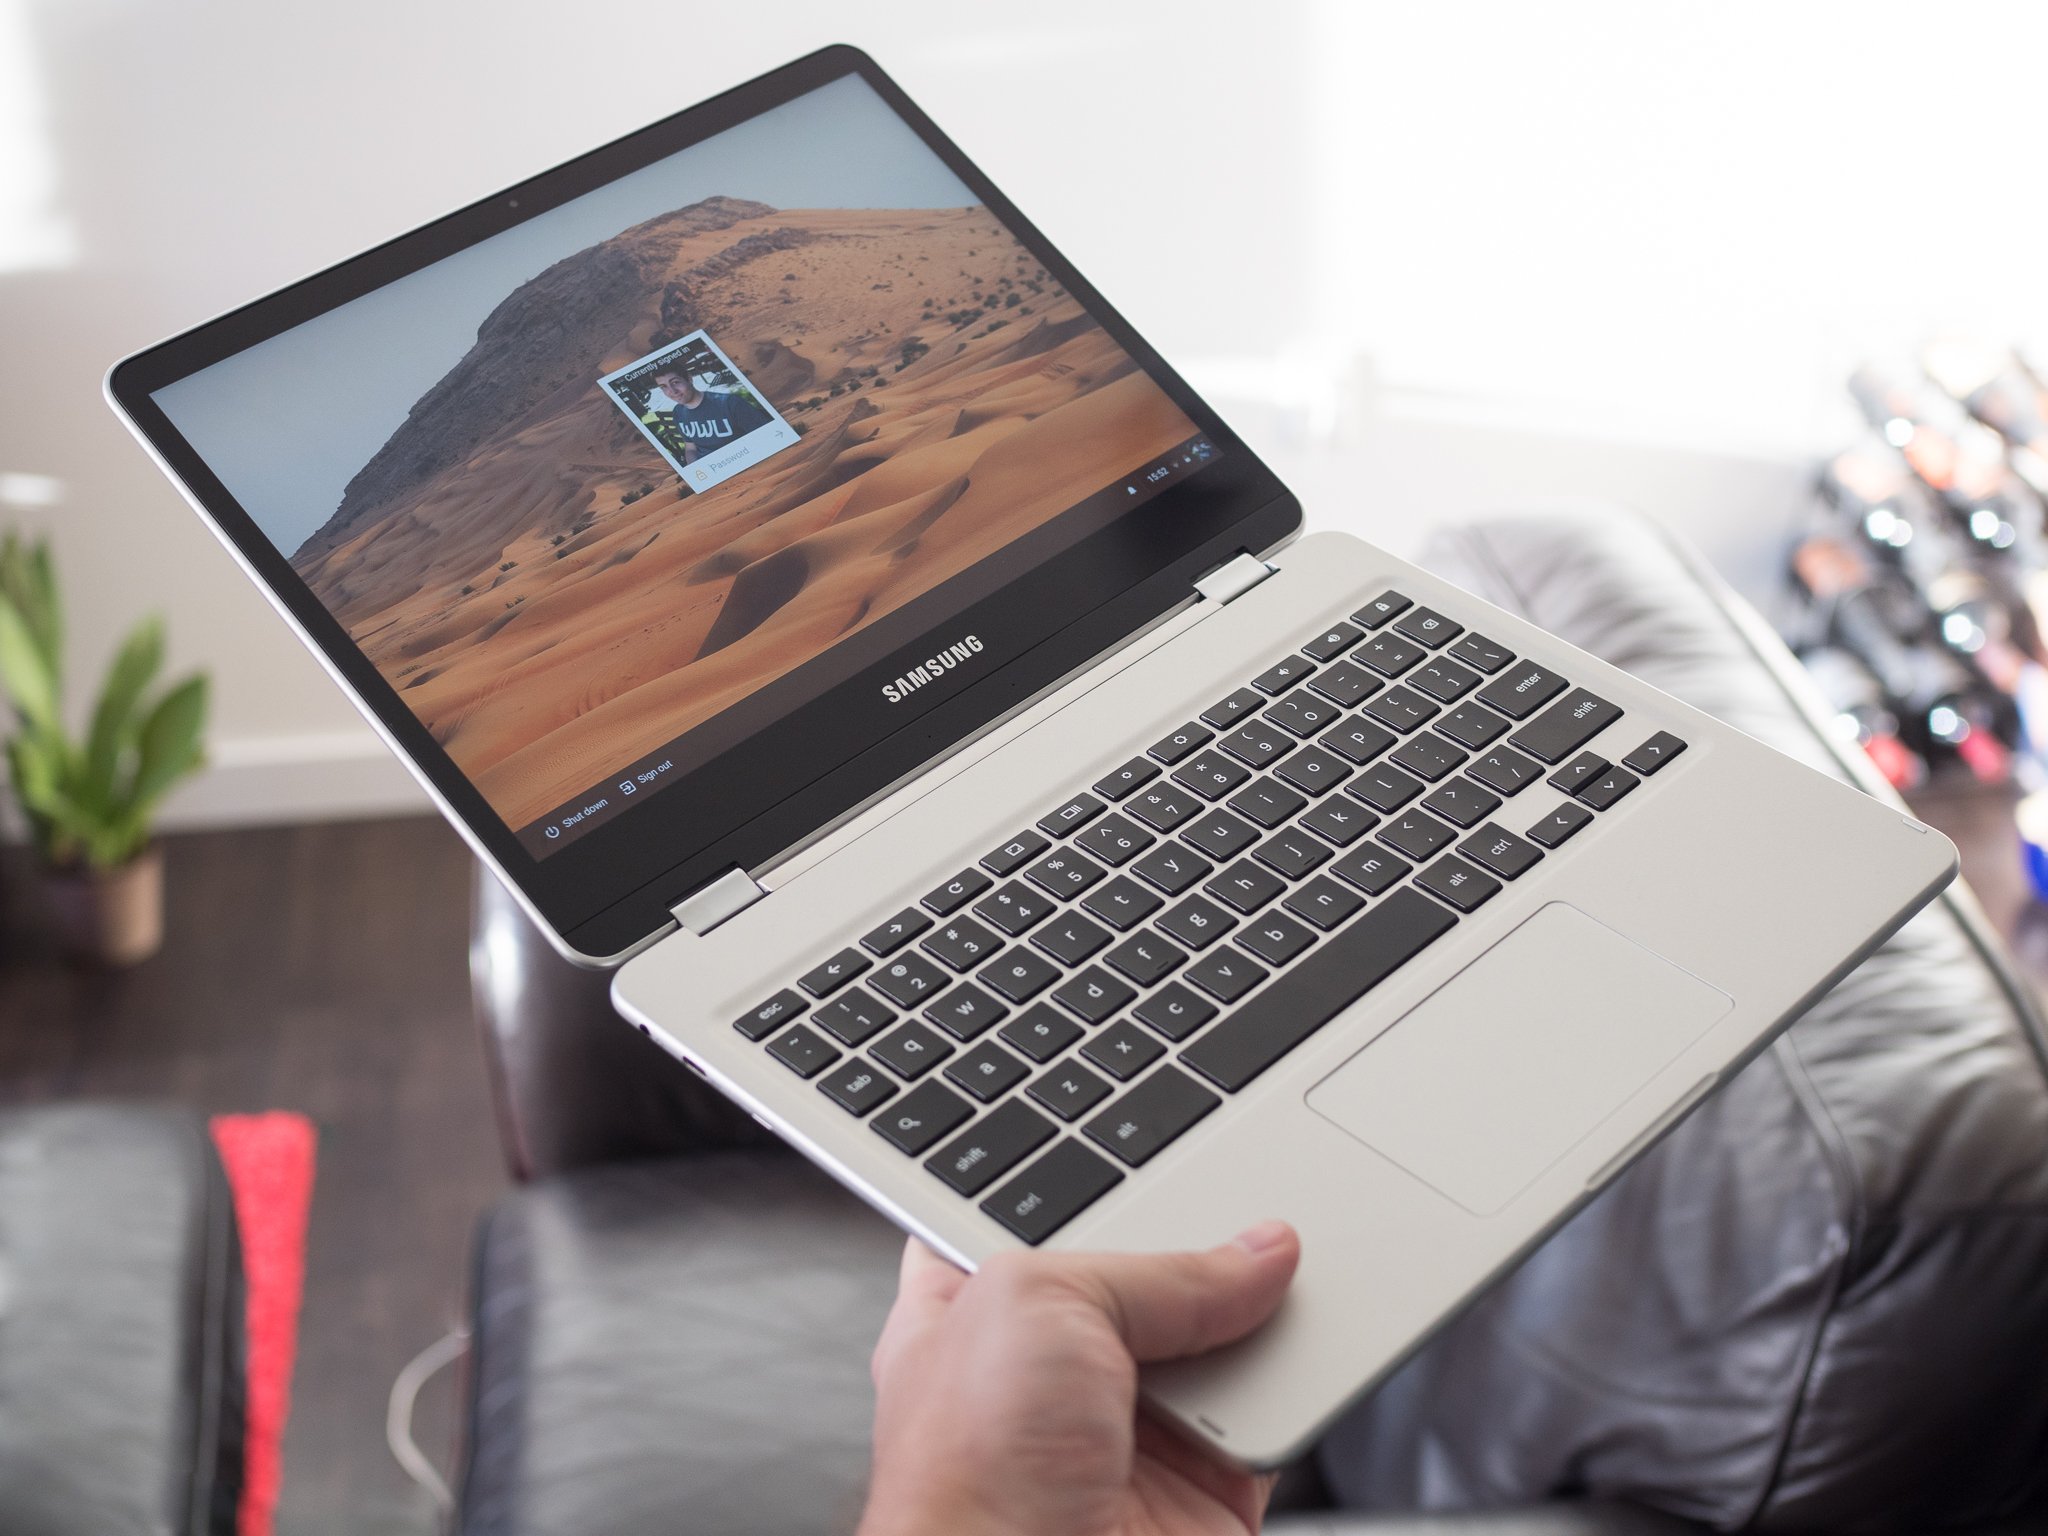
Whether you're using a Chromebook at the office as a workstation or at home as a family computer, one of the most underrated features of these versatile devices is the ability to switch between users quickly and easily. We'll show you how, and offer up a few suggestions to make the process even more powerful for you.
How to add users on a Chromebook
Before you can switch users on a Chromebook, you, as the laptop owner/administrator, will need to add them to the device. Here's how to get started.
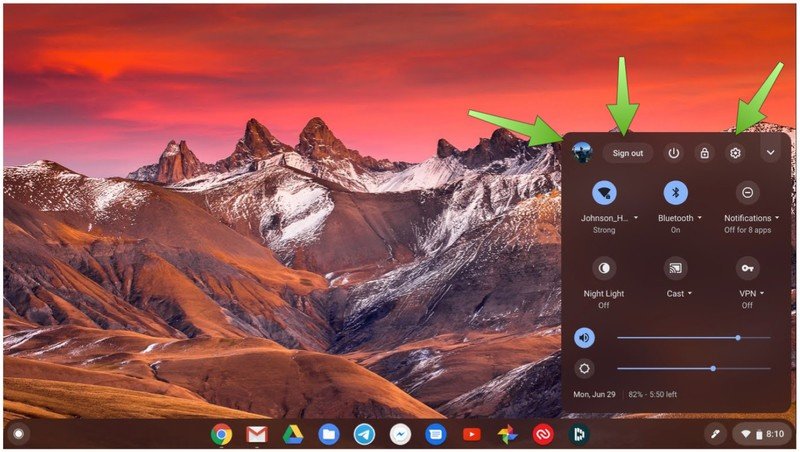
- Click on the lower right corner of the screen where the clock is to pull up the quick settings menu.
- Click on the gear icon to the right of your name and avatar and the Sign out button.
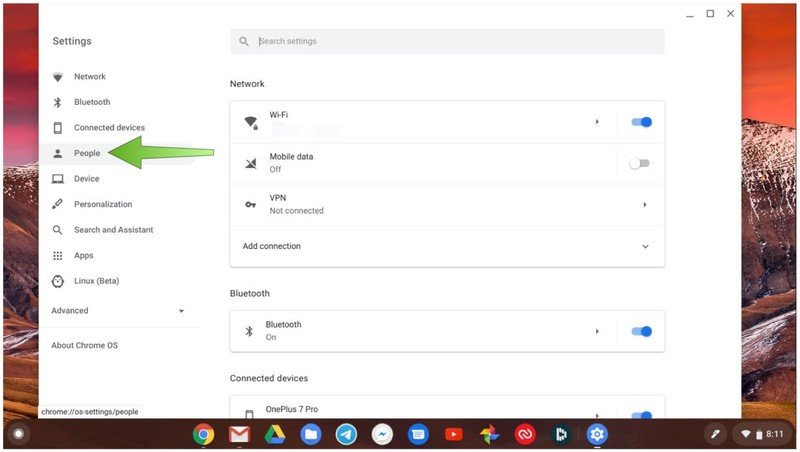
- This will pull up the Chromebook settings panel. Click on People on the left navigation bar.
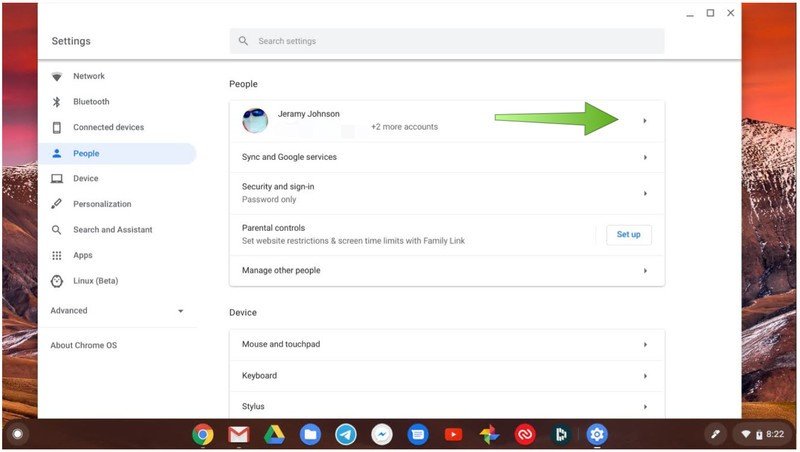
- Click on your account at the top of the People card.
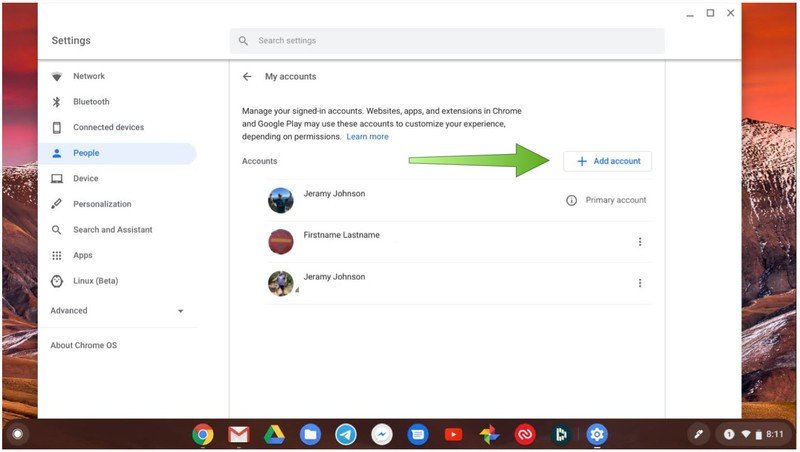
- Click on + Add account to add more people to the device.
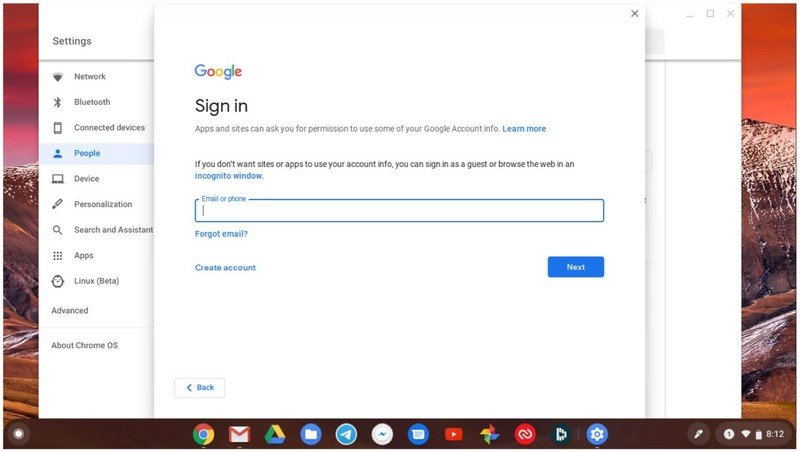
- Have the additional people sign in to their Google account, and click Next.
- Click on Manage other people.
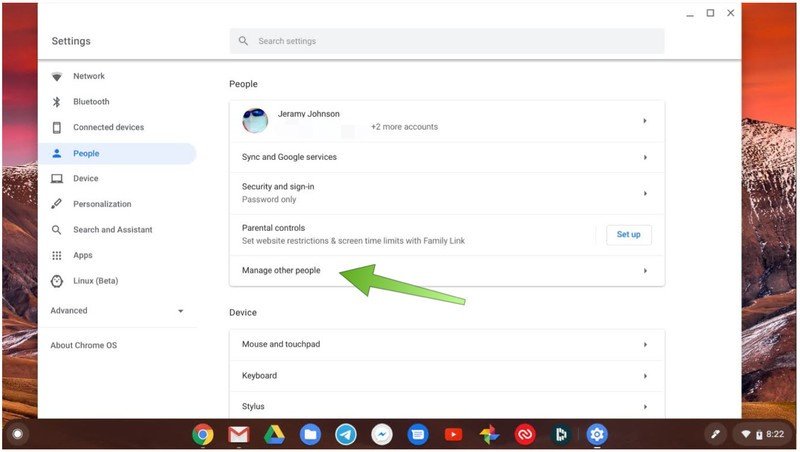
- Toggle on or off Enable Guest browsing, Show usernatmes and photos on the sign-in screen, and Restrict sign-in to the following users.

Now, whoever you added can sign into the Chromebook and use it as if it were their own machine, and have access to all of their Google account information. If you enabled guest browsing, you can feel confident handing off your device to a friend who can then use Chrome to casually browse the web for their own limited purposes, without having any access to your accounts or data.
Now, let's take a look at how to switch between the users that you added to your Chromebook.
How to switch users on a Chromebook
Now that you have more than one user on your Chromebook, here's how easy it is to switch between them.
- Click on the lower right corner of the screen where the clock is to pull up the quick settings menu.
- Click on the Sign out button next to your name and avatar, OR;
- Click on your name and avatar in the top left portion of the pop-up box.

- Click on Sign in another user...
- The available accounts should appear on the screen. The new user should enter their password.
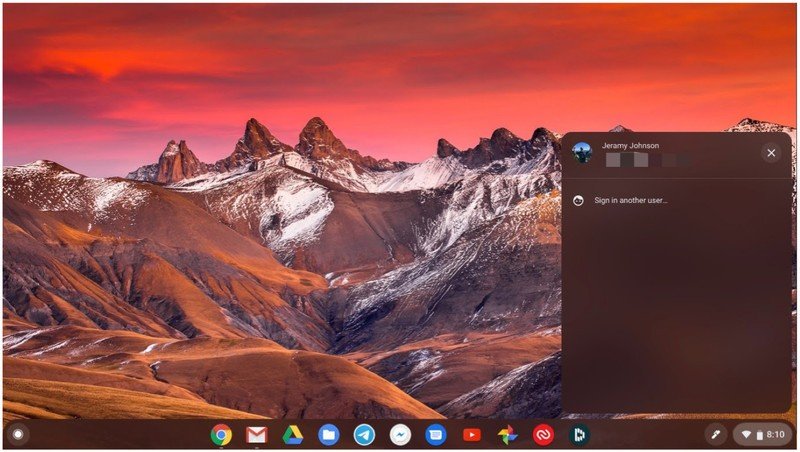
Now the new user is logged into the Chromebook, with access to their Google account and personal information. They will not be able to see or modify the data of any other user who has access to that Chromebook. This is a great way for multiple family members to share a device without interfering with each other's work. If you have children and set up the Chromebook with Google's Family Link, you can also put time and content restrictions in place to better manage your child's screentime. It can also be a valuable way for corporate administrators to free up additional machines for use around the office so that people can grab a device as needed.
How to restrict access to contacts across accounts
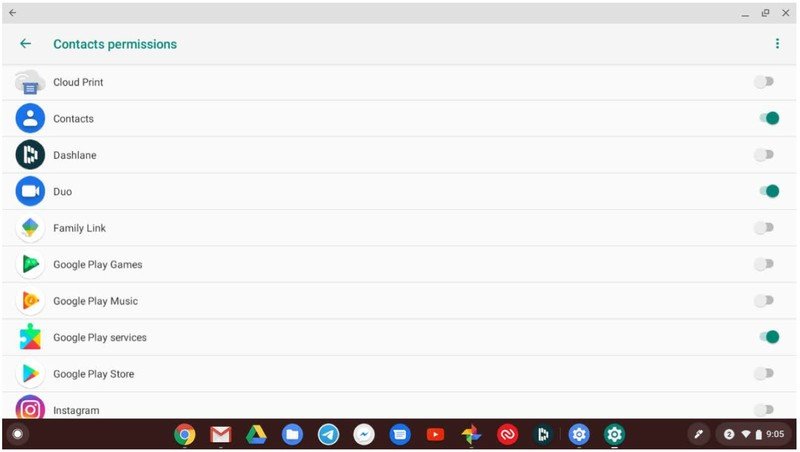
Note that some Android apps, Chrome extensions, and websites may have access to contact information across accounts, depending on what access you granted when you set them up. To check on and manage this access, you'll want to do as follows:
Be an expert in 5 minutes
Get the latest news from Android Central, your trusted companion in the world of Android
- Click on the lower right corner of the screen where the clock is to pull up the quick settings menu.
- Click on the gear icon to the right of your name and avatar and the Sign out button.

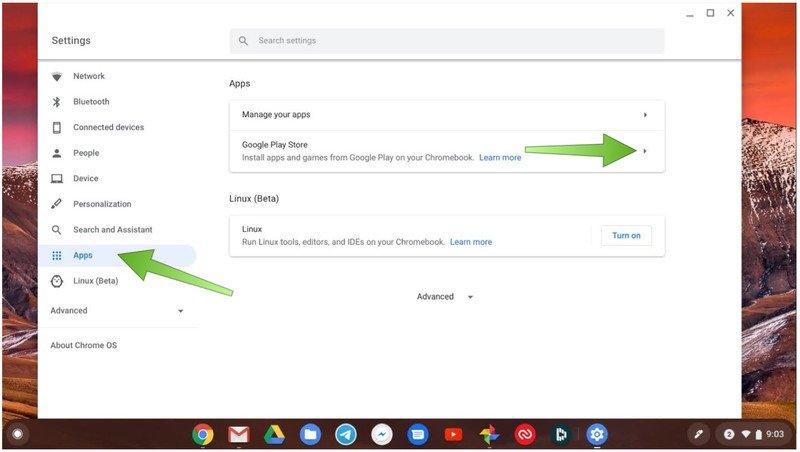
- Click on Apps in the left navigation bar.
- Click on Google Play Store.
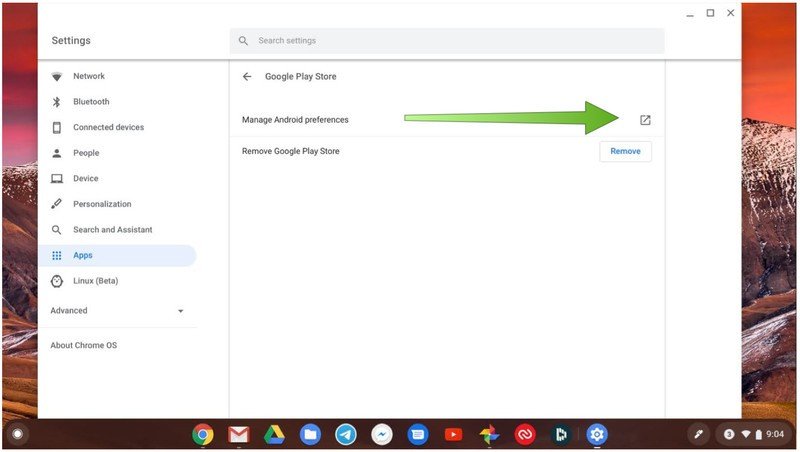
- Click on Manage Android preferences.
- Click on Apps & notifications.
- Click on App permissions.
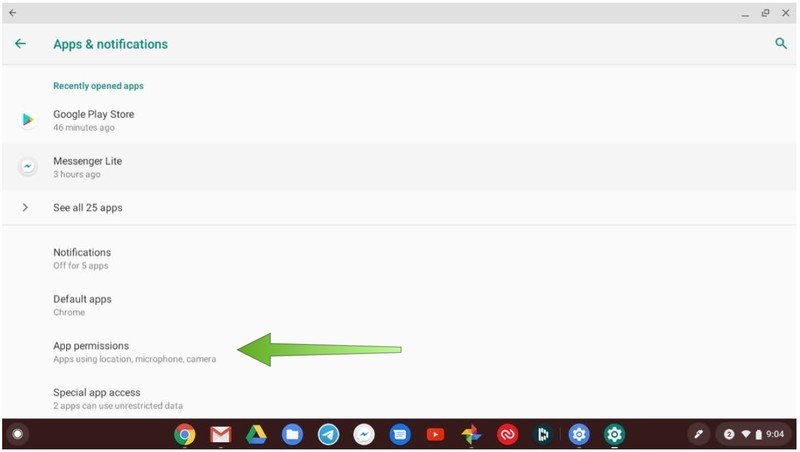
- Click on Contacts.
Our top equipment picks
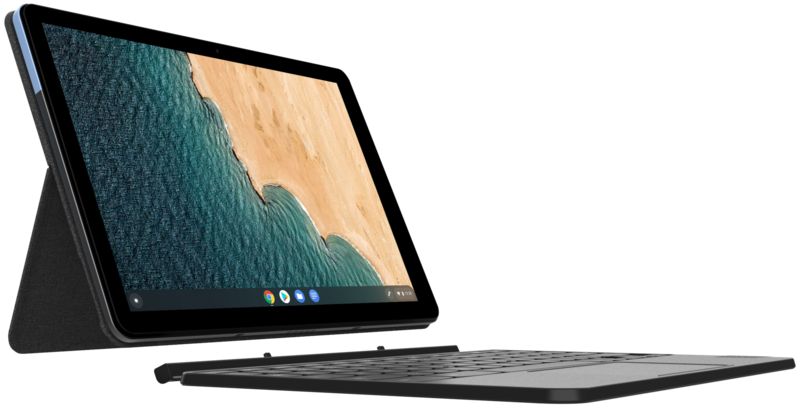
If you're in the market for a great portable Chrome OS device for sharing, we recommend you take a look at the Lenovo Chromebook Duet.

Jeramy was the Editor-in-Chief of Android Central. He is proud to help *Keep Austin Weird* and loves hiking in the hill country of central Texas with a breakfast taco in each hand.
