How to sideload apps on the Oculus Quest 2 and Quest Pro
It's easy as pie once you get it set up.
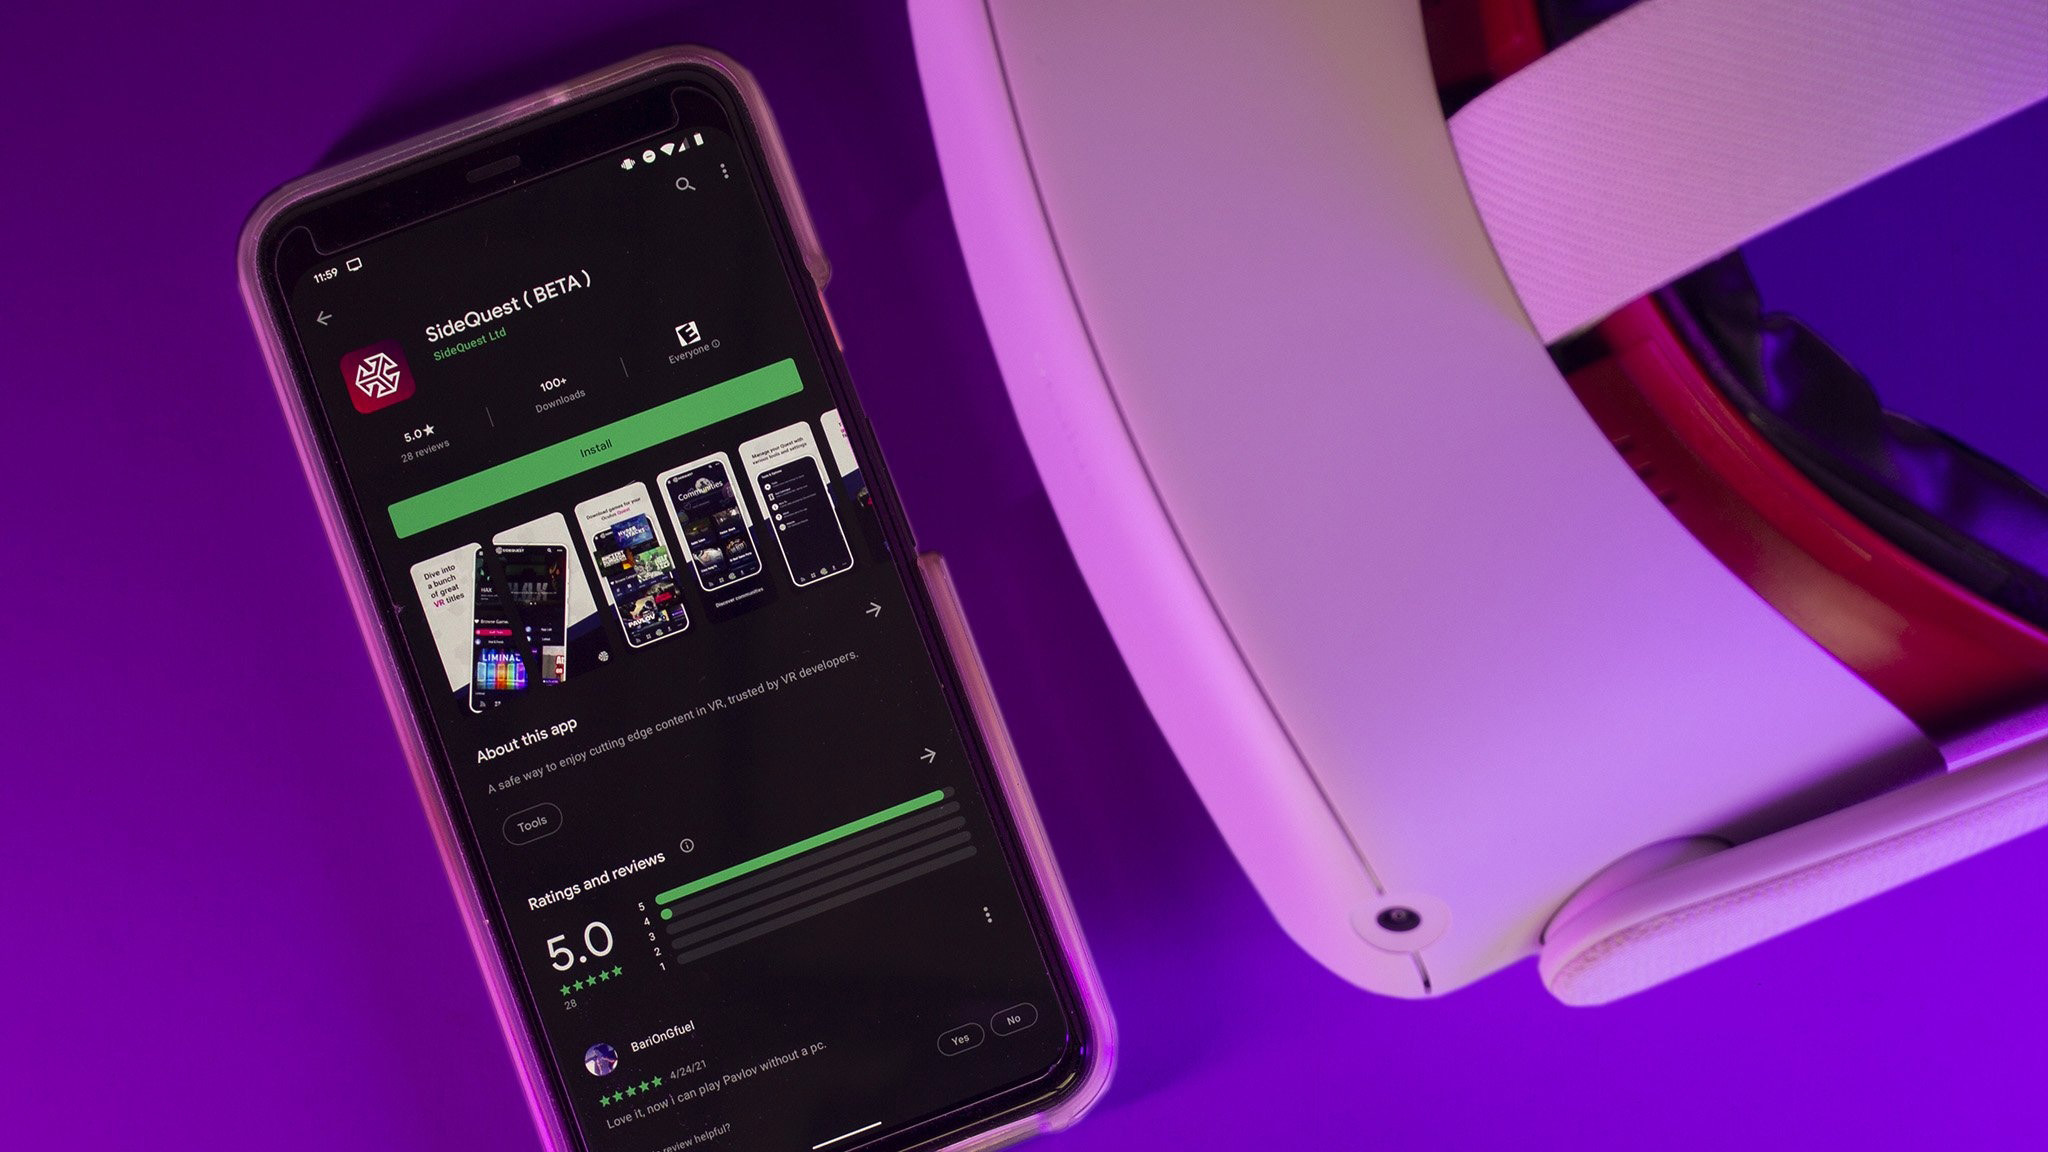
The Meta Quest family of devices has a fantastic library of apps and games available, but you can open up new possibilities with the SideQuest marketplace. The Oculus Quest 2 and Quest Pro are Android devices at their core so you can put APK files onto it just like an Android phone.
This means you can install anything from the Android version of Netflix to games and apps that Meta wouldn't normally approve of having on the official Quest store. SideQuest used to be a more complicated process but, these days, there's an official SideQuest app that works in-headset and lets you download new games right from VR, just like you would with official Quest store games.
How to unlock developer mode
No matter which way you end up using SideQuest to connect to your Quest, you'll need to enable developer mode on your Quest. This is done through the Meta Quest app on your phone. Get it on Android or iOS if you don't already have it.
- Open the Meta Quest app.
- Select your headset on the top banner of the app.
- Tap headset settings under the Manage Your Device section.
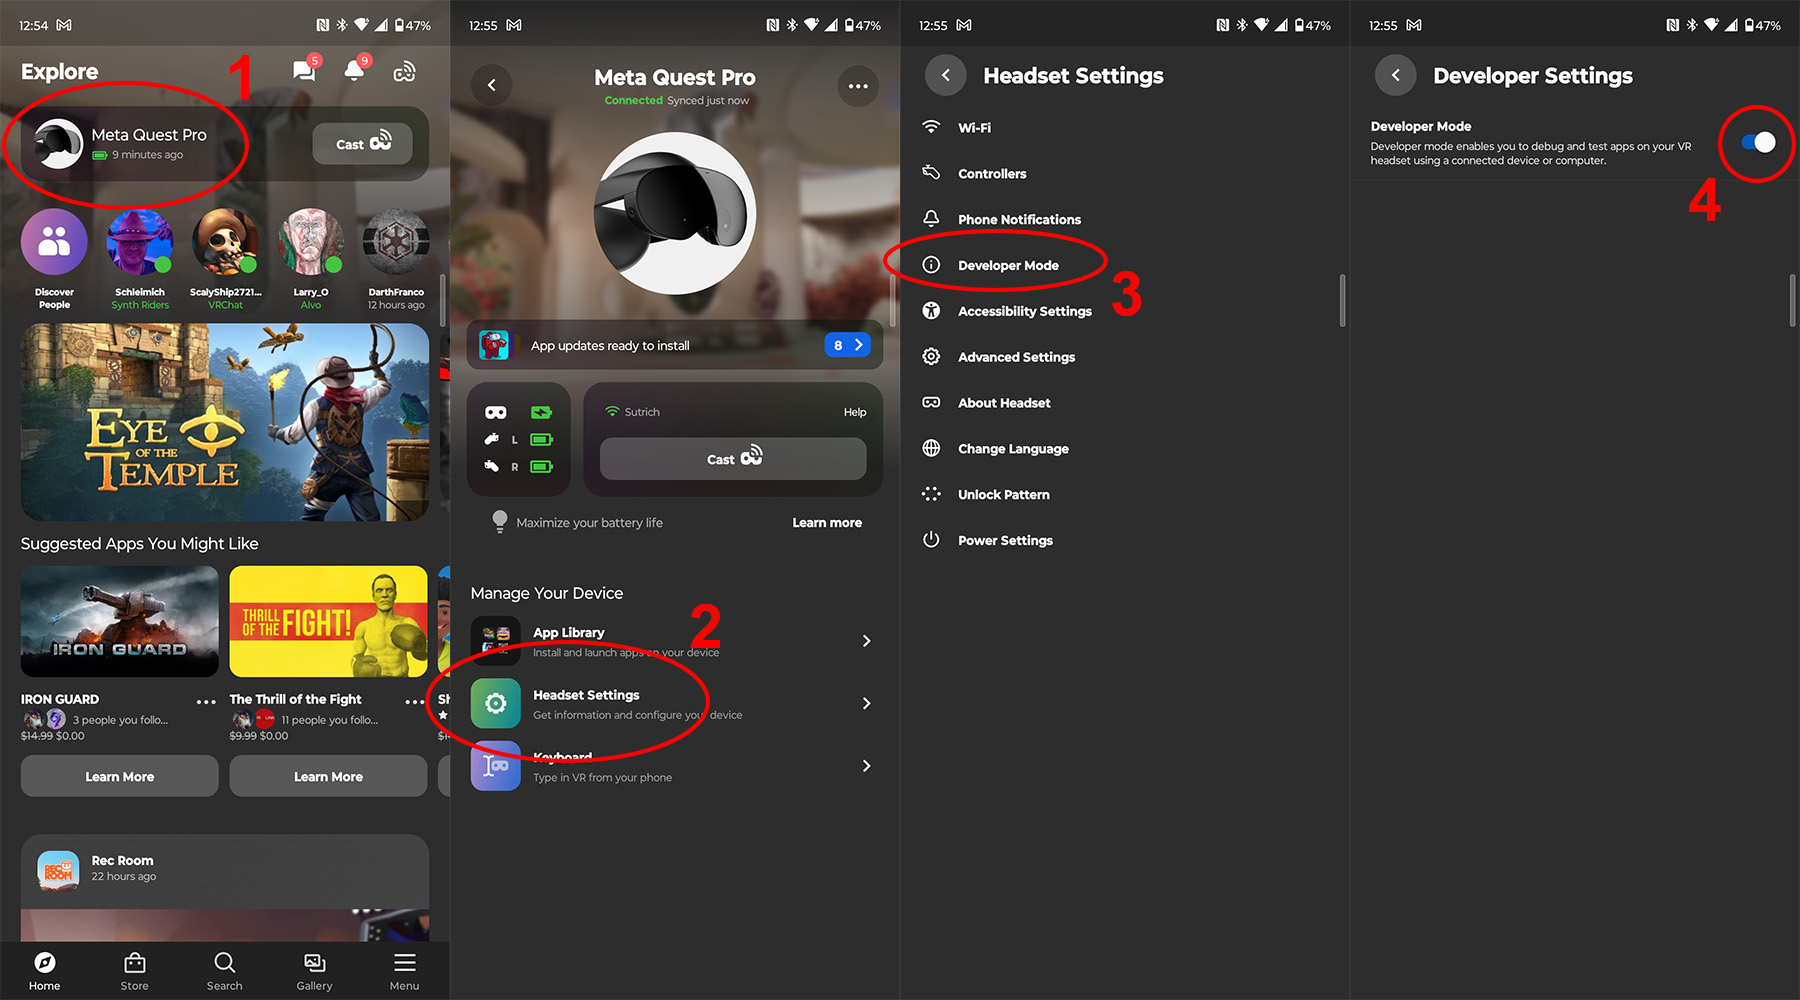
- Select developer mode from the list of options.
- Toggle the developer mode switch to on.
If this is the first time you've enabled developer mode, you'll need to follow the steps presented in the app to create a developer account. A developer account doesn't cost any money, however, you'll have to enter a debit or credit card number to verify your identity.
Set up SideQuest
To install SideQuest on your Meta Quest headset, you'll need a USB Type-C cable. The one that's included in the Quest's box will work just fine, but some of the best USB cables for Quest might give you a bit more slack. Once you've got your PC, Quest, and a USB-C cable in hand, follow these instructions:
1.) On your PC, navigate to the SideQuest website.
2.) Select Easy Installer from the list of options.
Be an expert in 5 minutes
Get the latest news from Android Central, your trusted companion in the world of Android
3.) Follow the installer instructions to get SideQuest installed on your Quest headset.
Once SideQuest is installed, you can launch the app from your headset by following these steps:
1.) Tap the Oculus button on the right controller to open the universal menu.
2.) Select the app drawer on the bottom right. It's the icon that looks like a grid of dots.
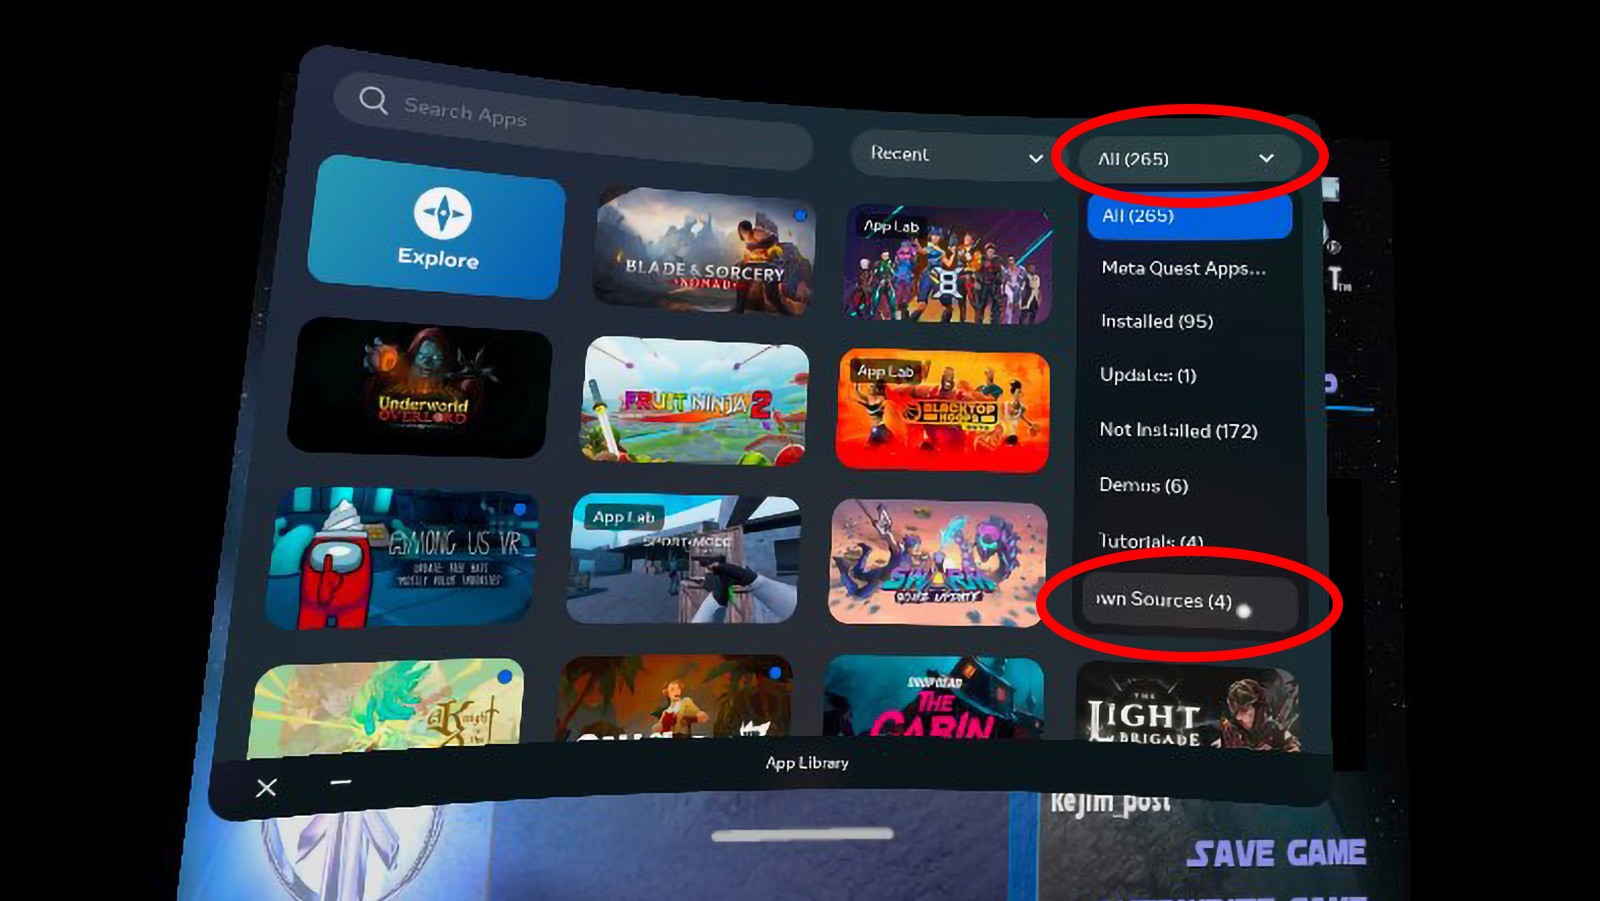
3.) On the top right, select the drop-down menu to change the filter.
4.) Select Unknown Sources from the list of options.
5.) Select SideQuest from the list of options.
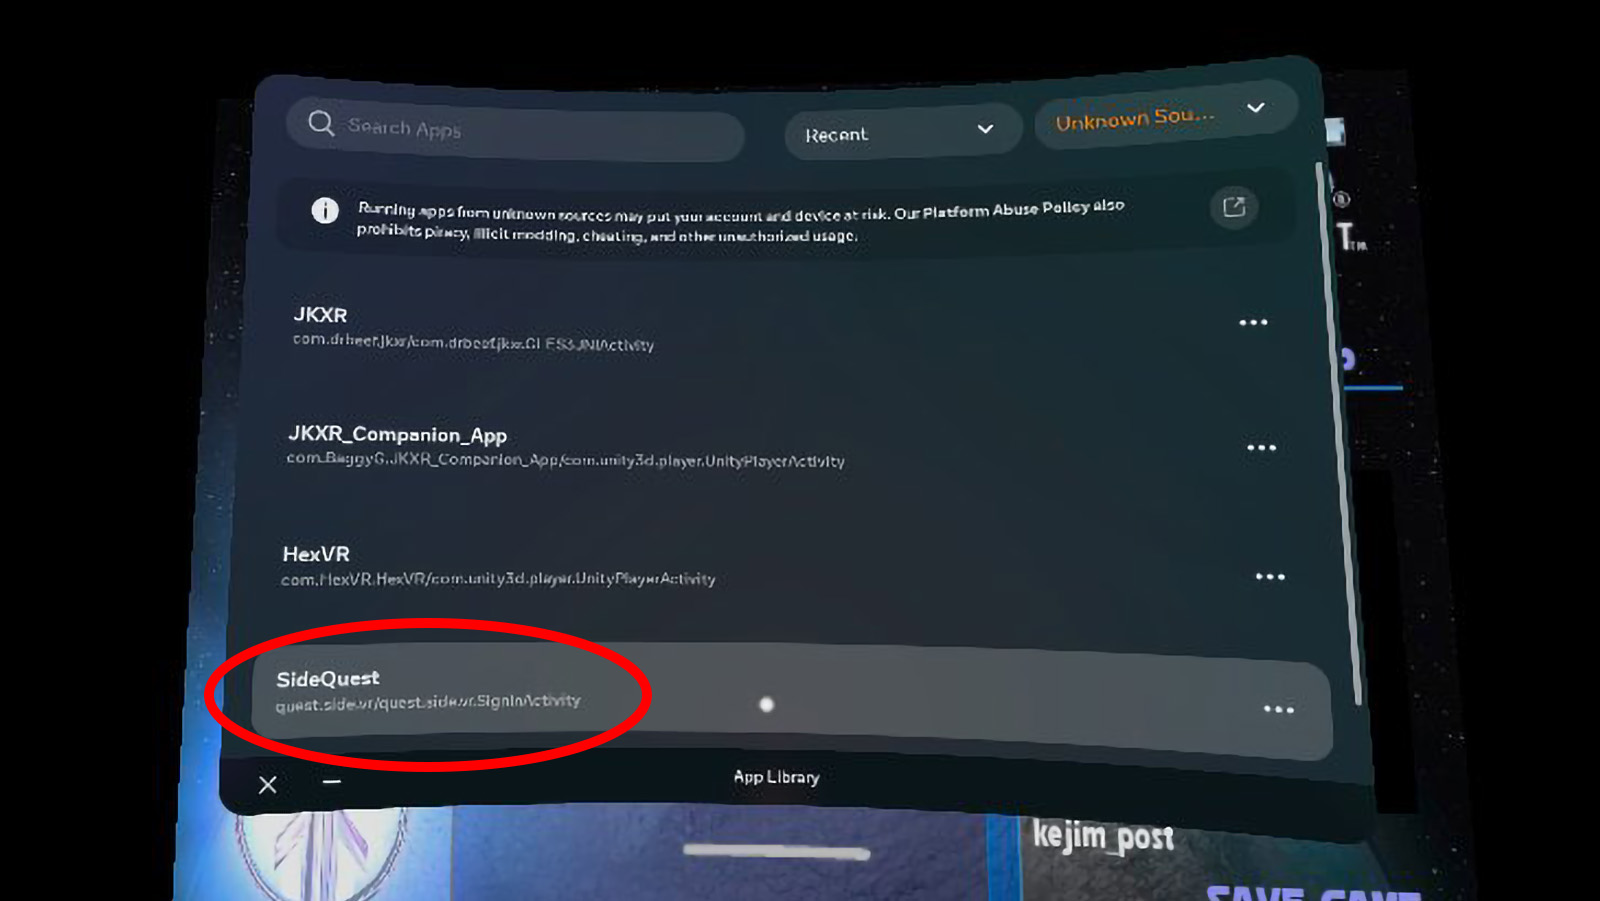
This Unknown Sources section is also where you'll find any games you install with SideQuest, so you'll want to get familiar with this filtering process so that you can find your games.
How to connect your Quest with SideQuest on PC
SideQuest in the Quest headset works well for installing new games, but the SideQuest app on a PC lets you do a bit more including changing some system-level options on the Quest itself. You can also transfer files between your headset and PC using the SideQuest app. Here's how to get them connected.
- Connect your Oculus Quest or Quest 2 to your PC using a USB cable.
- SideQuest should recognize the headset and show a green circle with the name of your headset on the top bar.

- Put on your headset, and select Allow USB debugging.
- Make sure to check Always allow from this computer.
Now that the setup is out of the way, you can sideload apps. If you've done everything correctly, you won't have to repeat any of the steps above.
Installing APKs from elsewhere
- Click the Install APK file from a folder on computer button at the top of SideQuest.

- Select your APK of choice from the pop-up dialog box and click open

