How to set up the Samsung Galaxy S6 and S6 edge
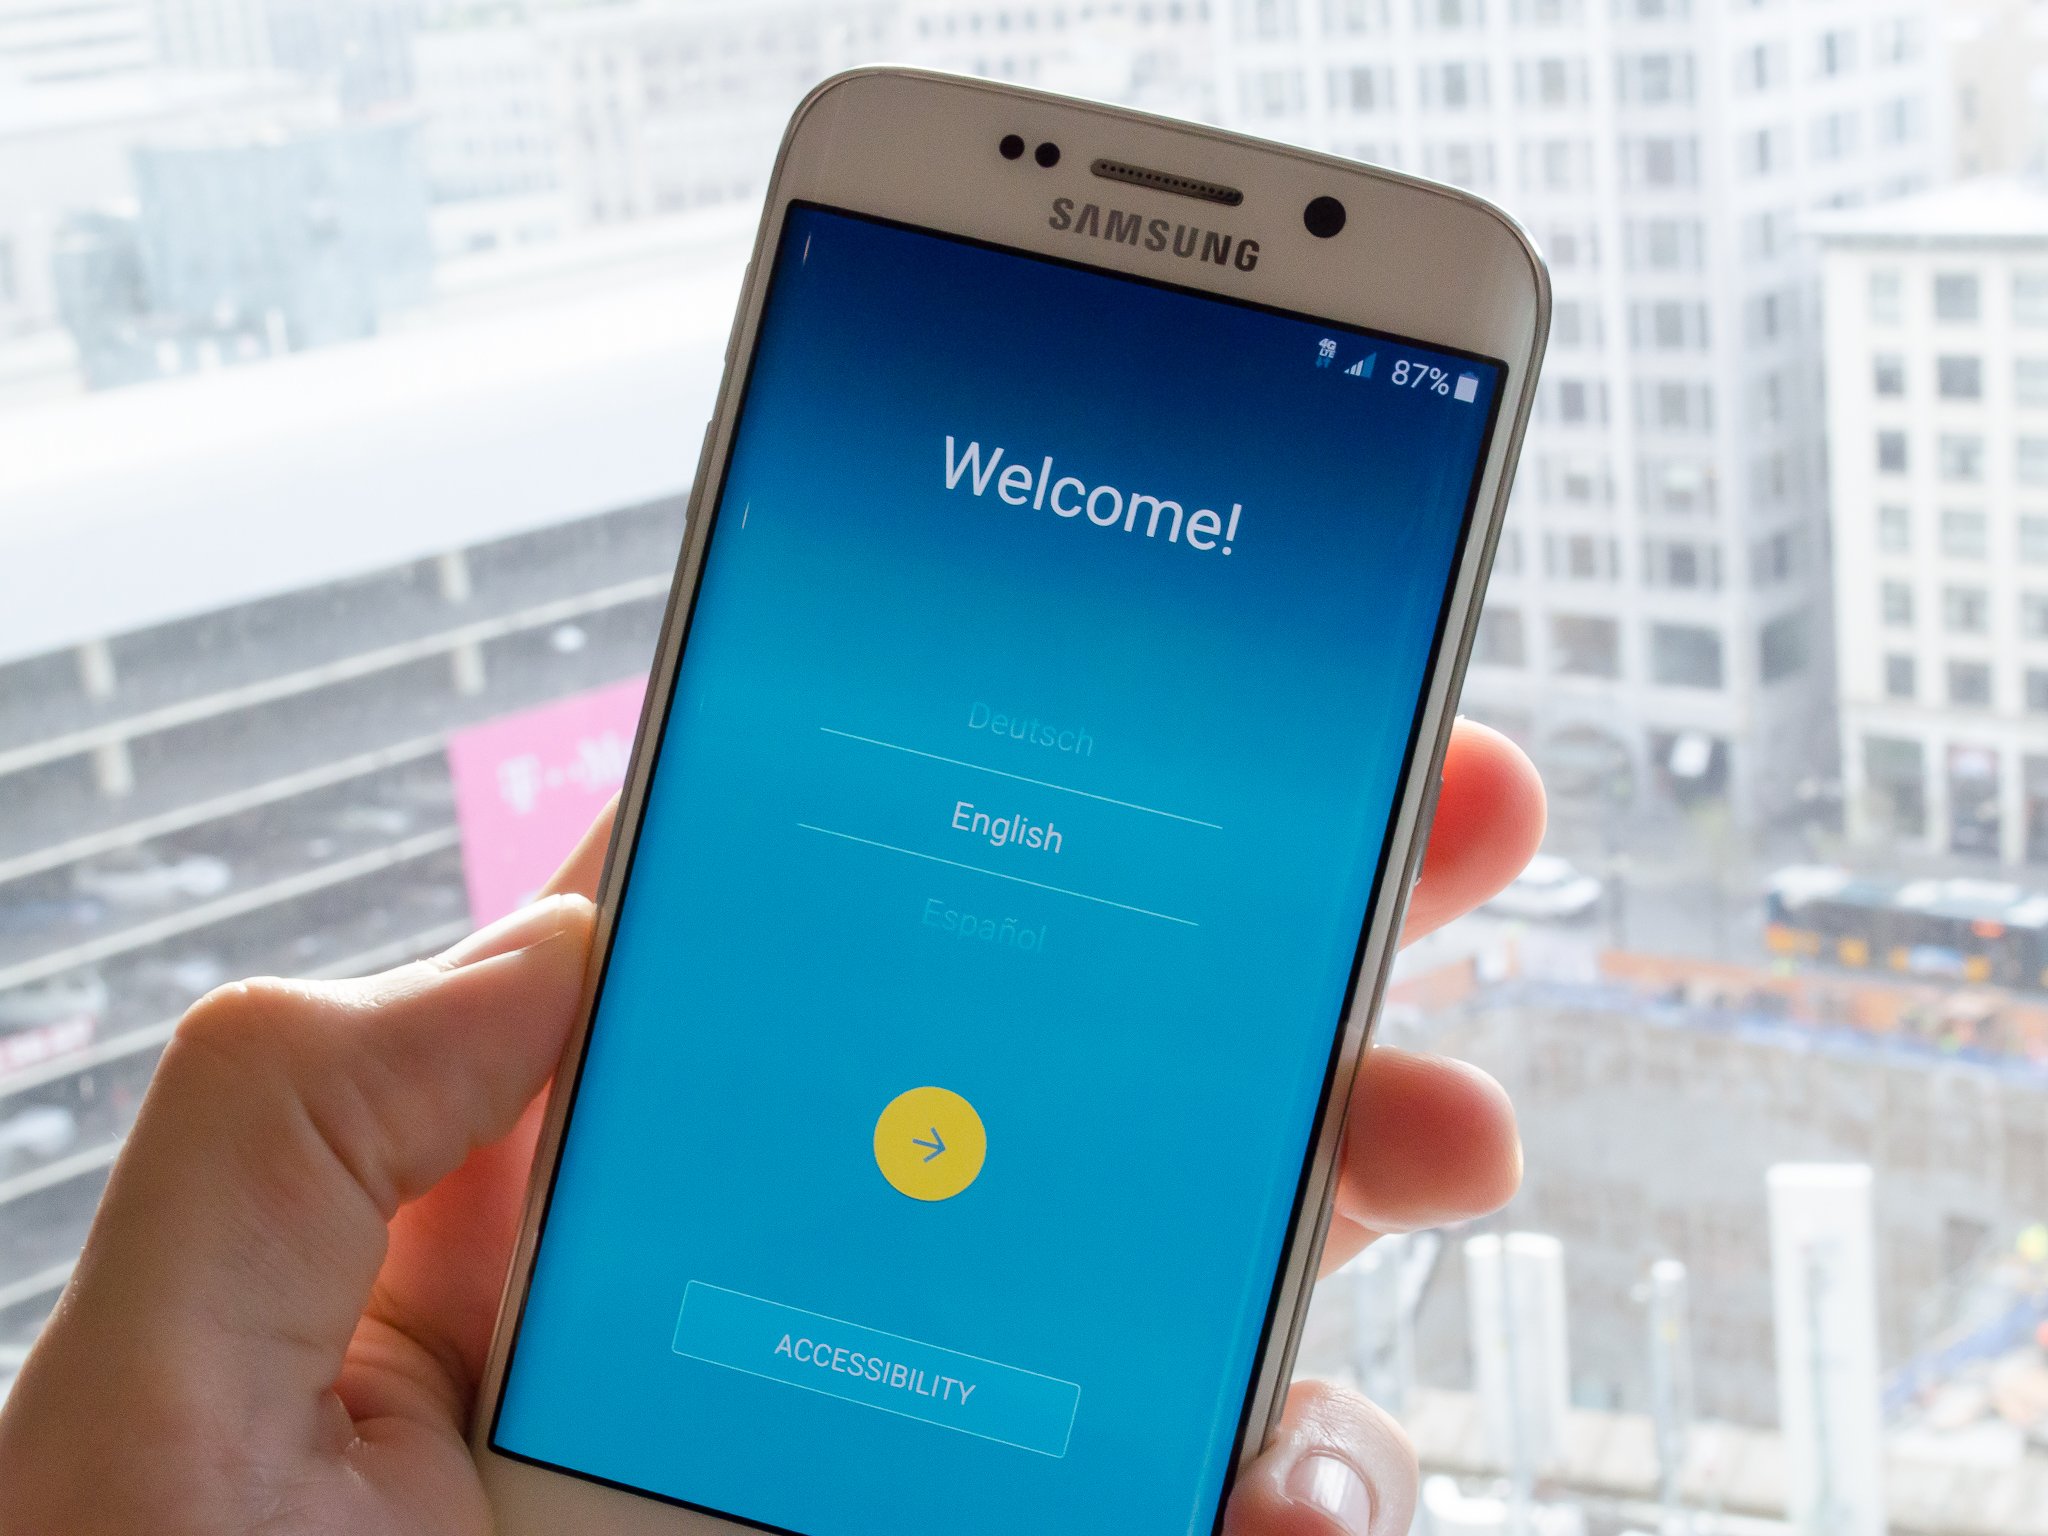
While it sure would be nice for every phone to have the same exact setup process when you first turn it on, that just isn't the case. Even within manufacturers, new versions of software usually bring a new setup process, and while they may be familiar they aren't always the same. The Galaxy S6 and S6 edge guide you through the process pretty smoothly and get a lot done in just a few steps — let us walk you through it.
READ NOW: How to set up the Galaxy S6 and S6 edge
Wifi connection and End User License Agreement
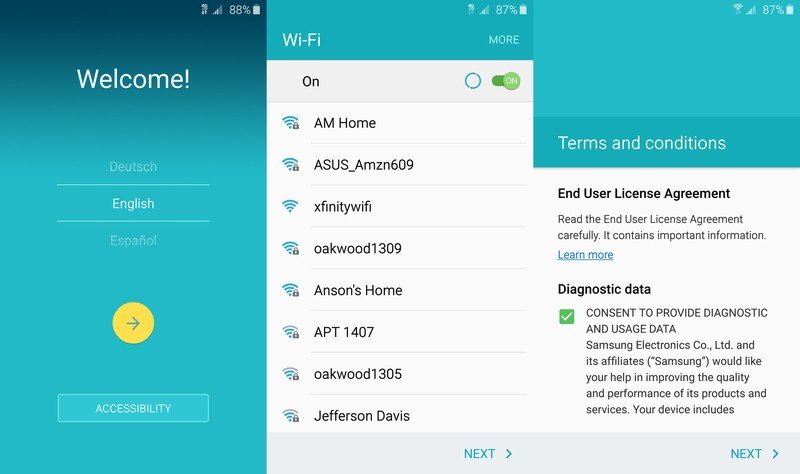
Things kick off pretty easily — select your language, and turn on accessibility features from the first screen if you need them. Then you'll choose a Wifi network — even if you have an active SIM in your phone, we recommend getting Wifi connected for when the phone starts syncing data in the later stages of setup.
And then it wouldn't be a phone setup without a licensing agreement. Samsung pops up a basic EULA about the terms of using its software. By default the phone has a box checked to send diagnostic data about the phone back to Samsung for analysis — you can uncheck this if you don't wish to send that data. Tap "Next" to move on to more interesting things.
'Tap & Go' and your Google Account

Now that you have Wifi connected, this is where you can start really making the phone your own. Google introduced a new feature in Android 5.0 Lollipop called "Tap & Go" that lets you simply place a new phone back-to-back with your old Android phone and transfer your account information to the new phone via NFC and Bluetooth. That feature is the next thing you'll be greeted with on your phone, and it's a great way to switch to your new phone if you are coming from an Android phone. This will copy over the Google Account credentials from the old phone to the new one so you don't have to enter them manually. Depending on the security level of your account you may need to enter a password, but it's far easier than doing everything manually.
If you're not coming from another Android phone or don't have your old phone available anymore, simply touch "skip" and move on to the standard Google Account setup. You'll enter your primary Google Account name and password, as well as a two-step authentication code if you've turned that on for your account. If you have more than one Google account, enter the primary one you use for your data here, and you can always add additional accounts (Google or otherwise) in the settings later.
Restore your apps and agree to Google's services
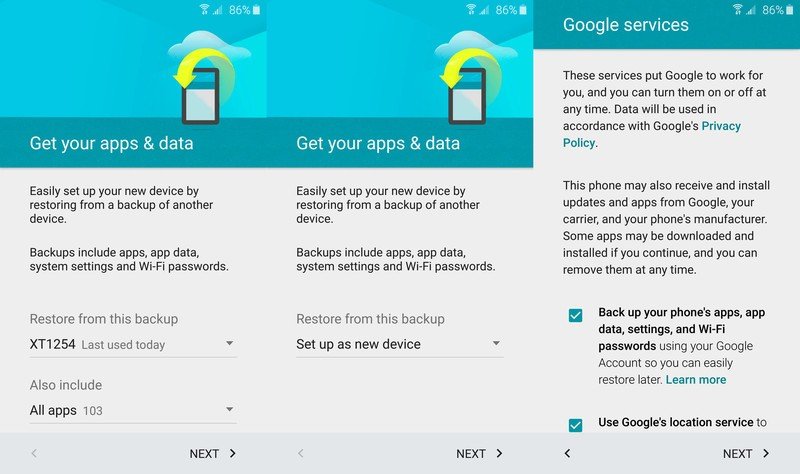
Once your Google Account is entered, we go to another screen that's new for Lollipop devices. Google now lets you choose to restore apps and data from a specific device you have had connected to your Google Account, rather than just the most recent one. Tap the drop-down for "Restore from this backup" and select the phone you want to restore from — it's generally still hit-or-miss on which parts of the system will be restored, but expect things like Wifi network settings, sync options and wallpapers to make the jump. You can also select to restore the apps (but not app data) from that backup — choose "Also include" to select which apps (or no apps at all) to restore from that phone.
Be an expert in 5 minutes
Get the latest news from Android Central, your trusted companion in the world of Android
If you'd prefer to start fresh with your new device — which is often advisable to avoid issues — you can instead choose "Set up as new device" from the top drop-down menu and select "Next." After you choose your restore options, you'll be faced with a screen where you now have to confirm you're aware of another licensing agreement and Google's service policies. The boxes for backing up your information privately to Google's servers is checked automatically, as is the box to use Google's location services — both generally make your phone experience better, and you can choose at any time to turn either one off if you change your mind.
Samsung Account and sync
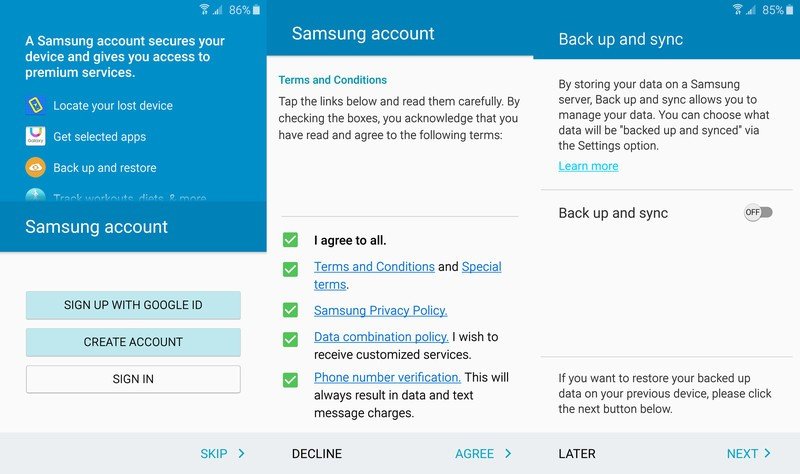
Now it's Samsung's turn to get in on the account game — the next steps involve getting signed in to (or signed up for) your Samsung Account. If you've ever had a Samsung phone or tablet before you likely have a Samsung Account, which is used for syncing data in apps like S Health, Milk Music and the Galaxy Apps store. If you have the account, sign in with your user name and password here.
If you don't have an account, we recommend just signing up for one here so it's out of the way and already into the phone for the times when you use Samsung's apps. The nice thing is that Samsung now lets you associate your Samsung Account with a Google Account, so you can use one set of credentials for both — little reason not to do it.
And look, more licensing agreements! After signing into your Samsung Account, you'll be faced with more terms, conditions, policies and agreements. You can read through the terms with each link and select them as you go, or just tap the "I agree to all" option and get on with setup. After doing that, you'll be prompted to choose to back up your data now a second time to Samsung's servers. Chances are you won't need this if you're going with Google's backup service, and you can always choose to turn it on later if you wish.
Set wake-up command and scan fingerprint
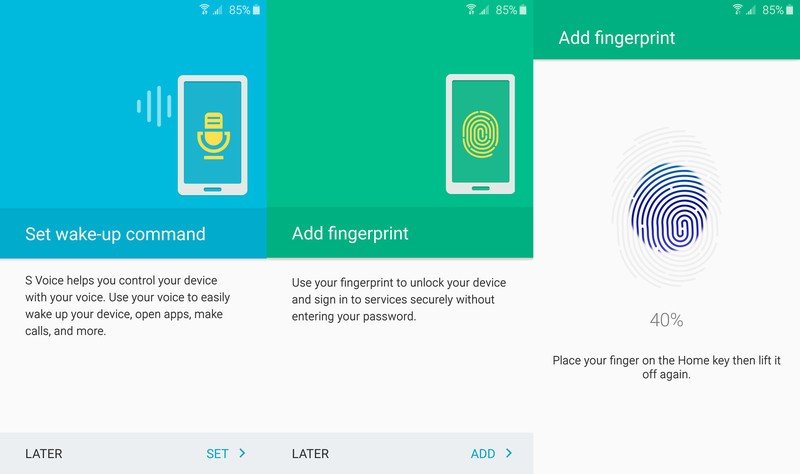
The final two steps aren't really necessary for the function of your phone, but if you have the time it's good to just do them while they're in front of you. S Voice on the Galaxy S6 has a wake-up command option that lets you get the phone's attention and give it commands without ever touching the phone, and on this screen you can set that up. You choose the phrase — or you can go with "Hi Galaxy" as it suggests — and repeat it multiple times so that the phone knows how you'll be addressing it.
Next is fingerprint scanning, which the phone can use to lock your phone simply but securely, and also use for authenticating in apps that support the sensor. The process is pretty simple — just follow the on-screen prompts to put a finger on the home button multiple times at varying angles to get a full scan of the finger. You only get to register one finger at first, but you can always go into the security settings of the phone to add additional fingerprints.
And that's it! You're up and running on your brand new Galaxy S6.
Andrew was an Executive Editor, U.S. at Android Central between 2012 and 2020.

