How to open and edit photos on a Chromebook
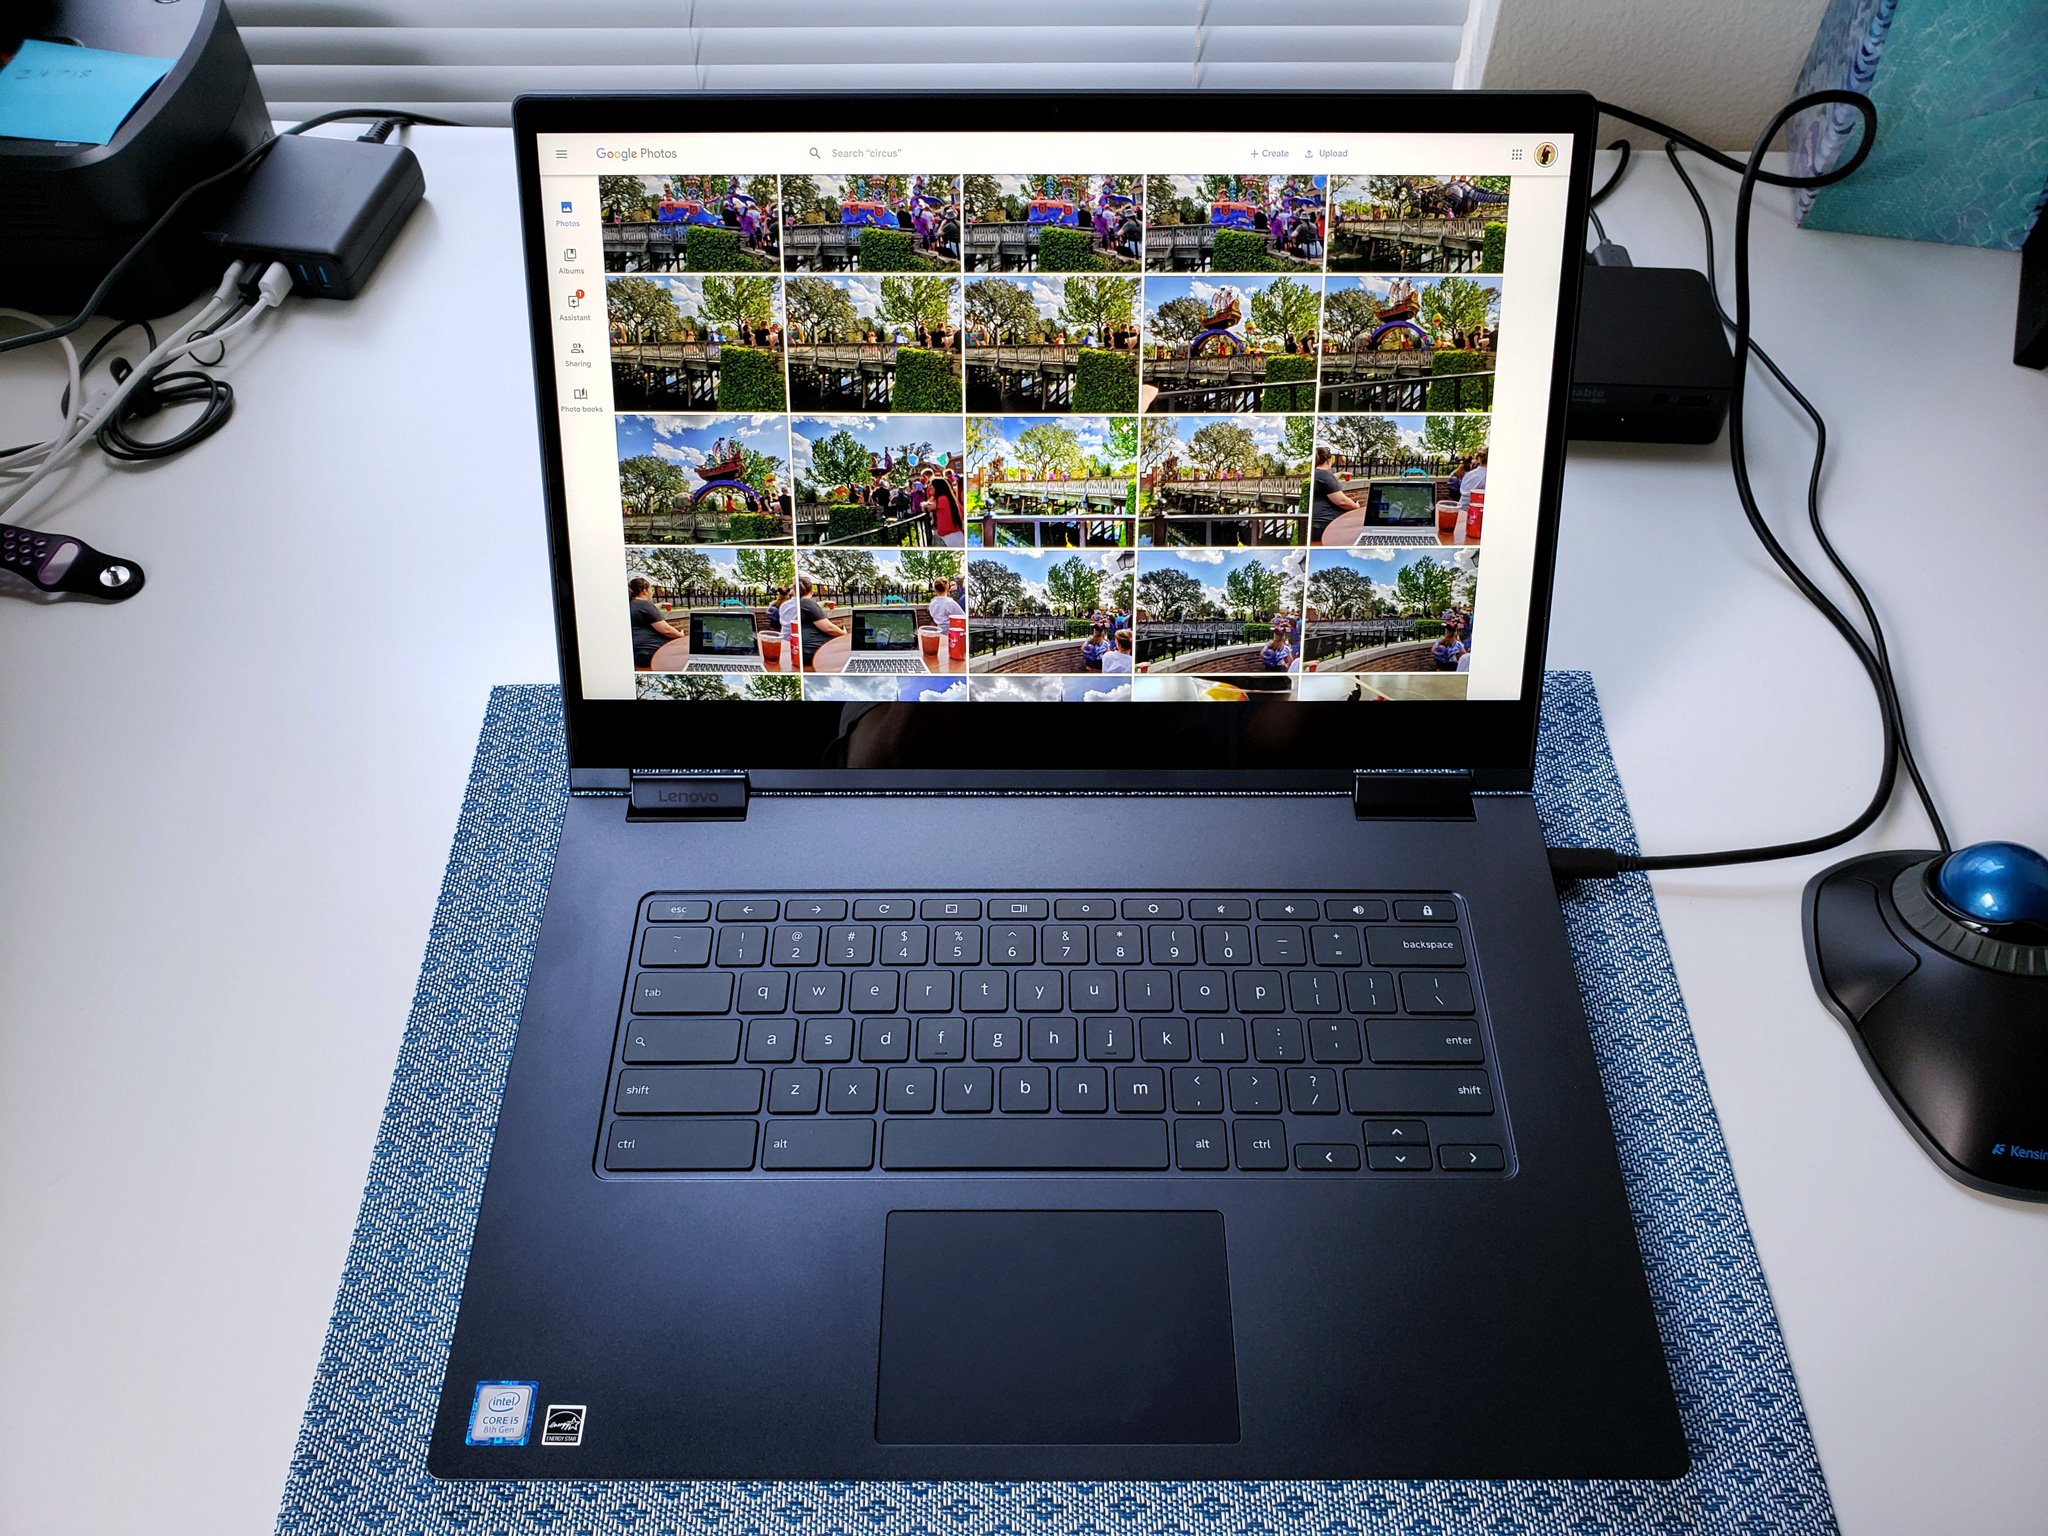
One of the many, many myths around Chromebooks is that you can't edit photos on them, which is just patently untrue because I edit 95% of the photos I use for my articles on Chrome OS. Just because the full-featured and full-priced Adobe Photoshop doesn't live on Chromebooks yet doesn't mean that you can't do simple tweaks or advance photo editing here. There's a basic photo editor built right into the Gallery app on every Chromebook, and among the myriad of photo editors out there, Google Photos' web editor can do a lot more than you'd think.
How to edit photos in the Gallery app
The Gallery app is one of the pre-loaded apps on a Chromebook, and while most of us just use it to see which screenshot is which in our folder — oh, that's just me? Okay, then — it does in fact have an editing mode that you can use to do the following actions:
- Crop an image
- Resize an image
- Adjust the brightness/contrast of an image
- Rotate an image
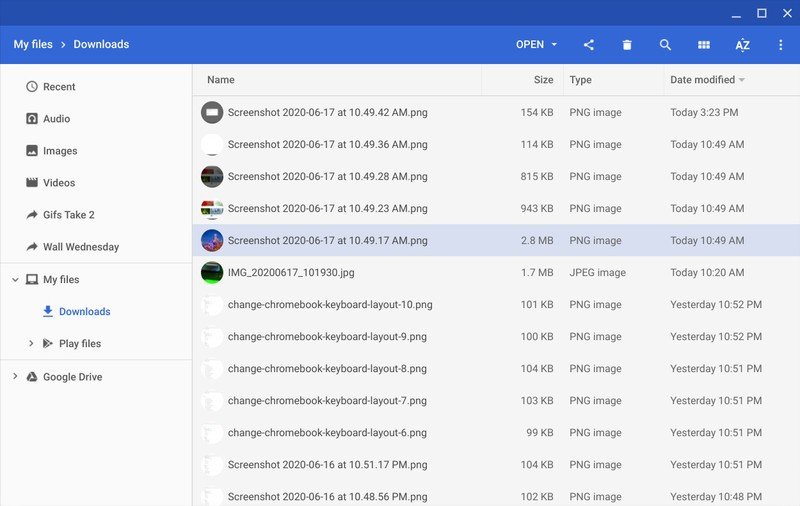
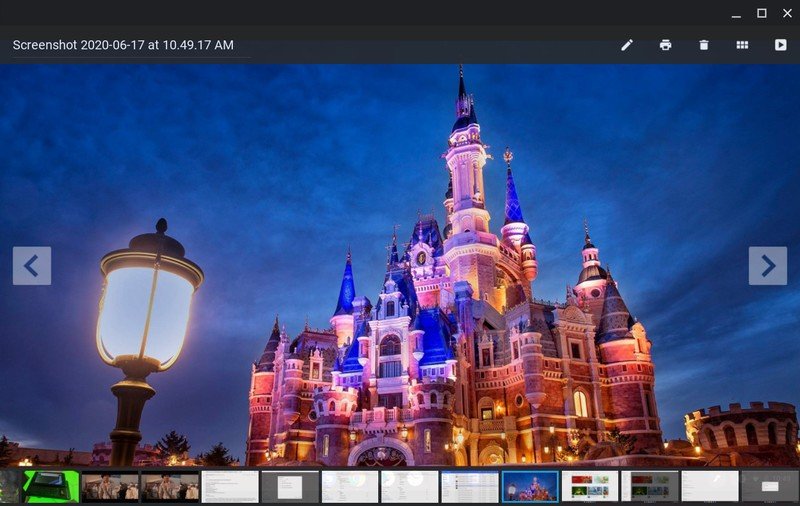
By default, the Gallery app is opened whenever you double-click an image in the Files app or when you tap an image from the Download complete notification. By default, editing an image in the Gallery app will overwrite the original unless it is a file type that Gallery cannot save as — such as a .WEBP image.
- Open the Files app in your app drawer.
- Double-click an image in your Files that you want to edit.
- Tap the pencil icon in the top bar of the app or type E to open Edit mode.
- To "auto-fix" an image, which adjusts the contrast/brightness based on algorithms, tap the magic wand icon.
- To crop an image, cutting off extraneous parts of a picture, tap the overlappying right angles icon. You can use a freeform crop or crop according to five preset aspect ratios.
- To resize an image, adjusting the number of pixels that make up an image, tap the photo inside a larger frame icon. You can resize it with a fixed scale or you can tap the lock icon to adjust the width and height independently.
- To adjust the brightness and contrast, making a picture brighter or darker, tap the sunshine icon. There are two sliders for brightness and contrast you can drag to the left or right.
- To rotate a picture to the picture to the left or right, tap the circular clockwise or counterclockwise arrow icons.
- To undo the last step of your editing, tap the backwards arrow icon.
- To re-do an undone editing step, tap the forwards arrow icon.
- To finish editing and save your image, tap Exit in the bottom right corner.
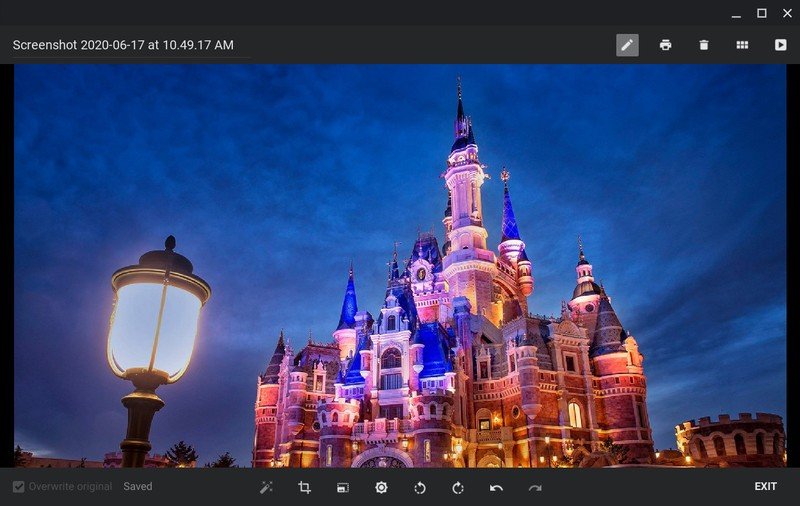
I use the crop tool the most — cropping people out of my Walt Disney World photos, cropping my tabs out of a screenshot I'm sending to a support page, et cetera, but the tools here should be enough for most basic editing.
How to edit photos on Google Photos
If you're trying to edit a photo that you took on your phone, chances are that photo is backed up to Google Photos. This means that you don't have to bother plugging your phone into your computer to edit it, and there's already a pretty great photo editor built into Google Photos for easily editing the phone either on your phone or on your Chromebook. Google Photos is what I use to edit photos I take for reviews and guides, allowing me to adjust the lighting and coloring with a little more control than the default editor.
While you can also edit in the Google Photos app, when you're on a Chromebook, the web editing interface is a little better laid out, so I highly recommend using the website over the app when possible.
- Open the Google Photos website in the Chrome browser.
- Tap the photo you want to edit.
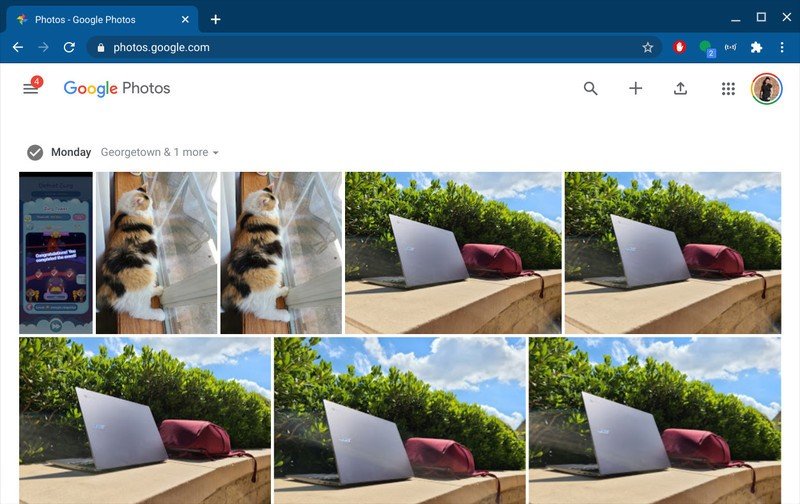
- Tap the sliders icon in the top bar of the window or type E to open Edit mode.
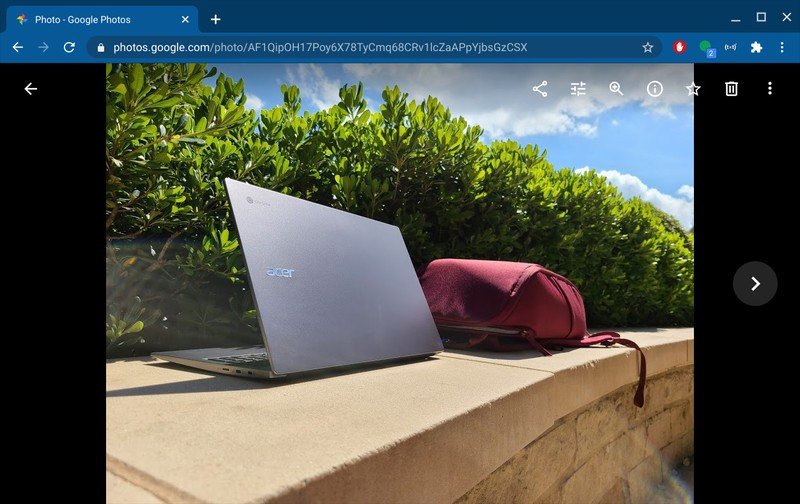
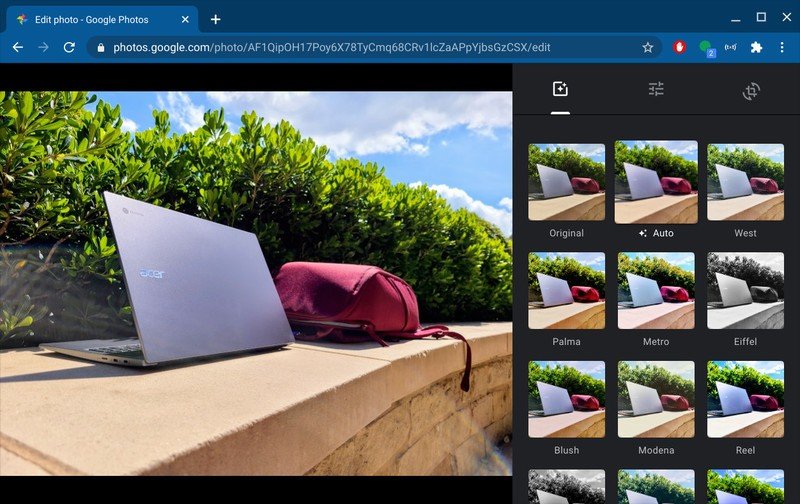
- You begin in the Filters tab. You can tap Auto or another preset filter to apply it to the photo.
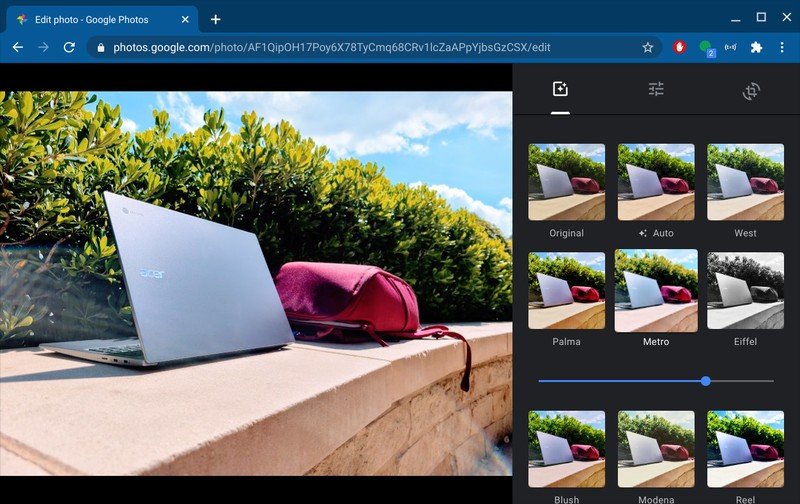
- When you tap a filter preset other than auto, you can then drag the slider below it to vary the potency of the filter.
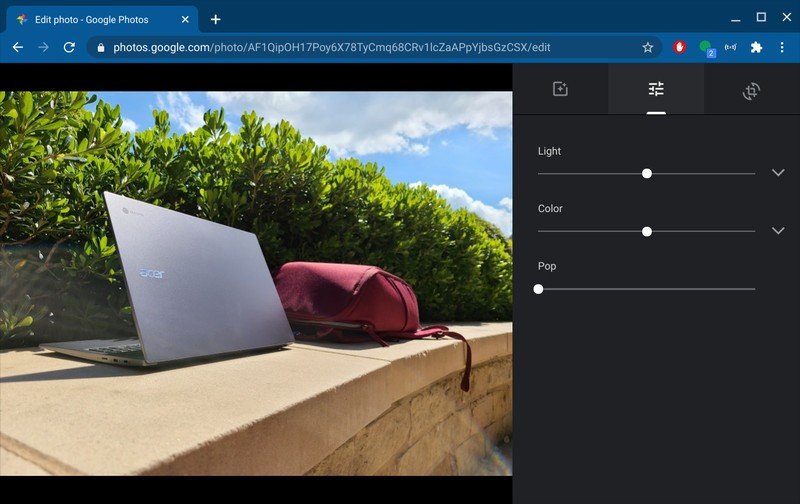
- To edit a photo's colors, contrast, and brightness, tap the sliders icon indicating the Basic adjustments tab.
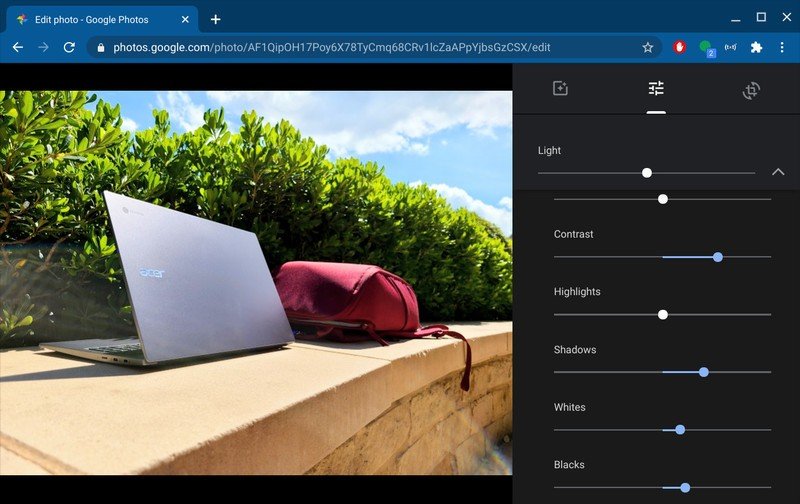
- Tap the down arrow next to the Color and Light sections to expand the full controls.
- Drag the sliders left and right to adjust the image as desired.
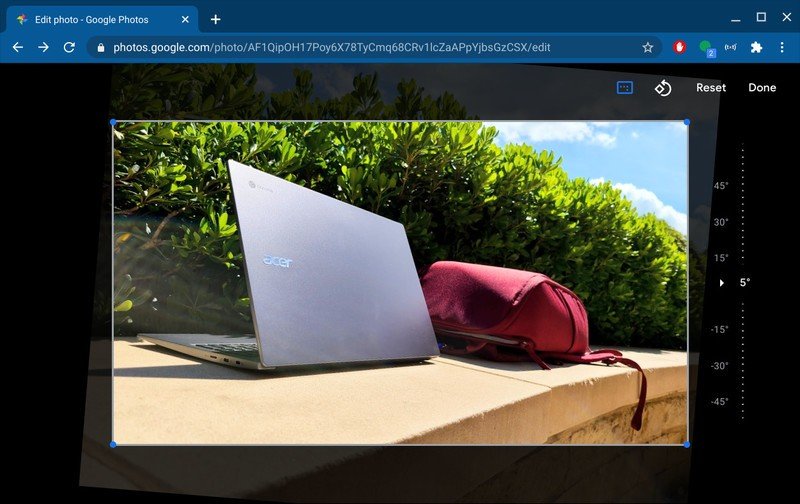
- Tap the crop/rotate icon to open the crop/rotate tab.
- Tap the resized rectangle icon to choose between preset aspect ratios and freeform cropping.
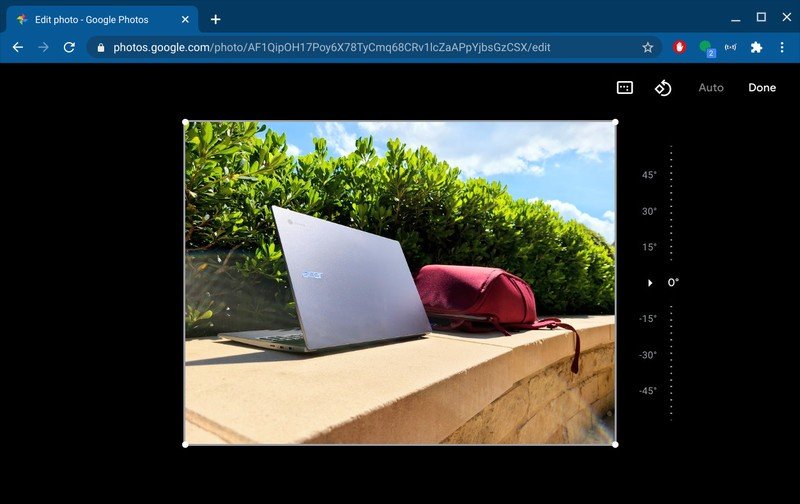
- Drag the edges of the highlighted rectangle to adjust the crop.
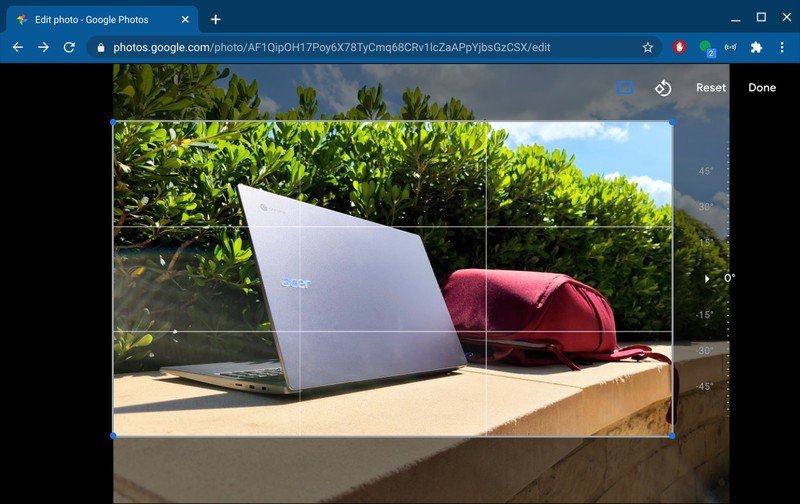
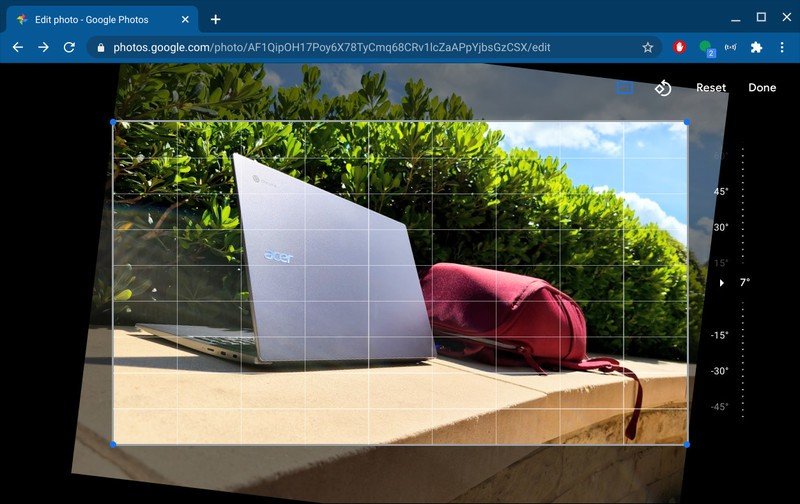
- Drag the 0° up or down to slightly rotate the image a smaller amount to the left or right.
- Tap the rotate icon in the top bar to rotate the image a full 90 degress.
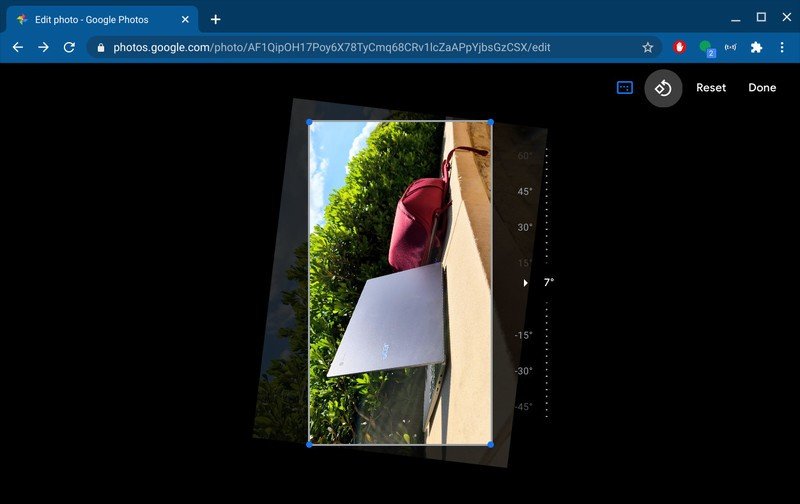
- Tap Done when you're done cropping the image.
- Tap Done when you're done editing the image in order to save your changes.
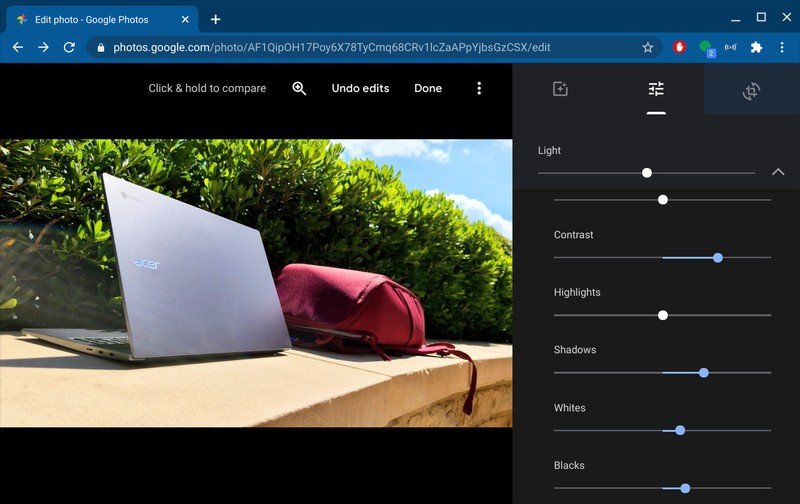
If at any point you want to compare your edits so far to the original image, click and hold towards the middle of the image — if you do this too far to the left/right, Google Photos will save your work so far and switch to the next/previous photo in your library. At this point you can download the image — that shortcut is Shift + D — or share it directly from Google Photos to Twitter, Facebook, and other platforms.
Be an expert in 5 minutes
Get the latest news from Android Central, your trusted companion in the world of Android
Need more options?
If you need to do more nuanced photo editing or need to do more specific editing like blurring a face or blanking out personal information, there are a variety of web editors and Android photo editing apps out there for use on your Chromebook. Each has its strengths and weaknesses, but the one I turn to most often outside Google Photos is Pixlr X, which is good for marking up a screenshot or stitching photos together. I've always been perfectly content with the free version, but you can pay to ditch the ads and add the extra sticker/stencil/text options if you prefer.
Need a new Chromebook?
There are a lot of great Chromebooks out there, but if you want to use one for photo editing more regularly, chances are you're going to want one with a great, high-def screen so that you can check every pixel for focus and vibrance. Here are some Chromebooks that are great for photo editing.
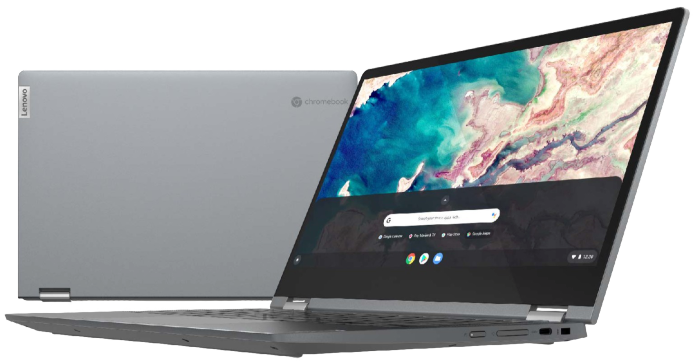
Lenovo Flex 5 ($410 at Amazon)
This 2-in-1 sports a 13-inch 1080p touchscreen and an Intel i3 processor into a compact package that is barely any bigger and some 11.6-inch Chromebooks. This is also one of most affordable Chromebooks with a backlit keyboard, and its speakers are loud.
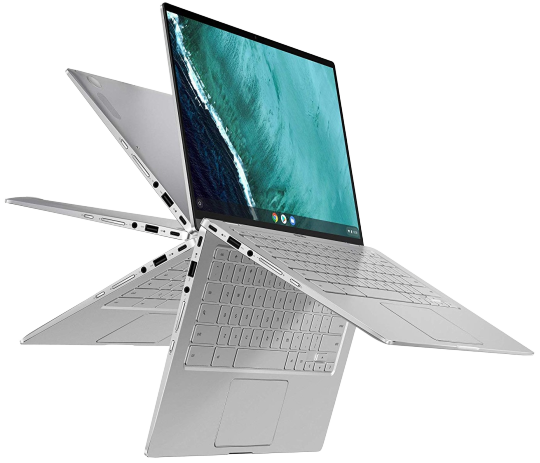
ASUS Chromebook Flip C434 (From $560 at Amazon)
The 14-inch touchscreen on the C434 is what I edited the majority of my own article photos on last summer, and while 14-inch Chromebooks are a bit big to carry day-to-day, this one is perfect for propping up stand style on your desk riser.
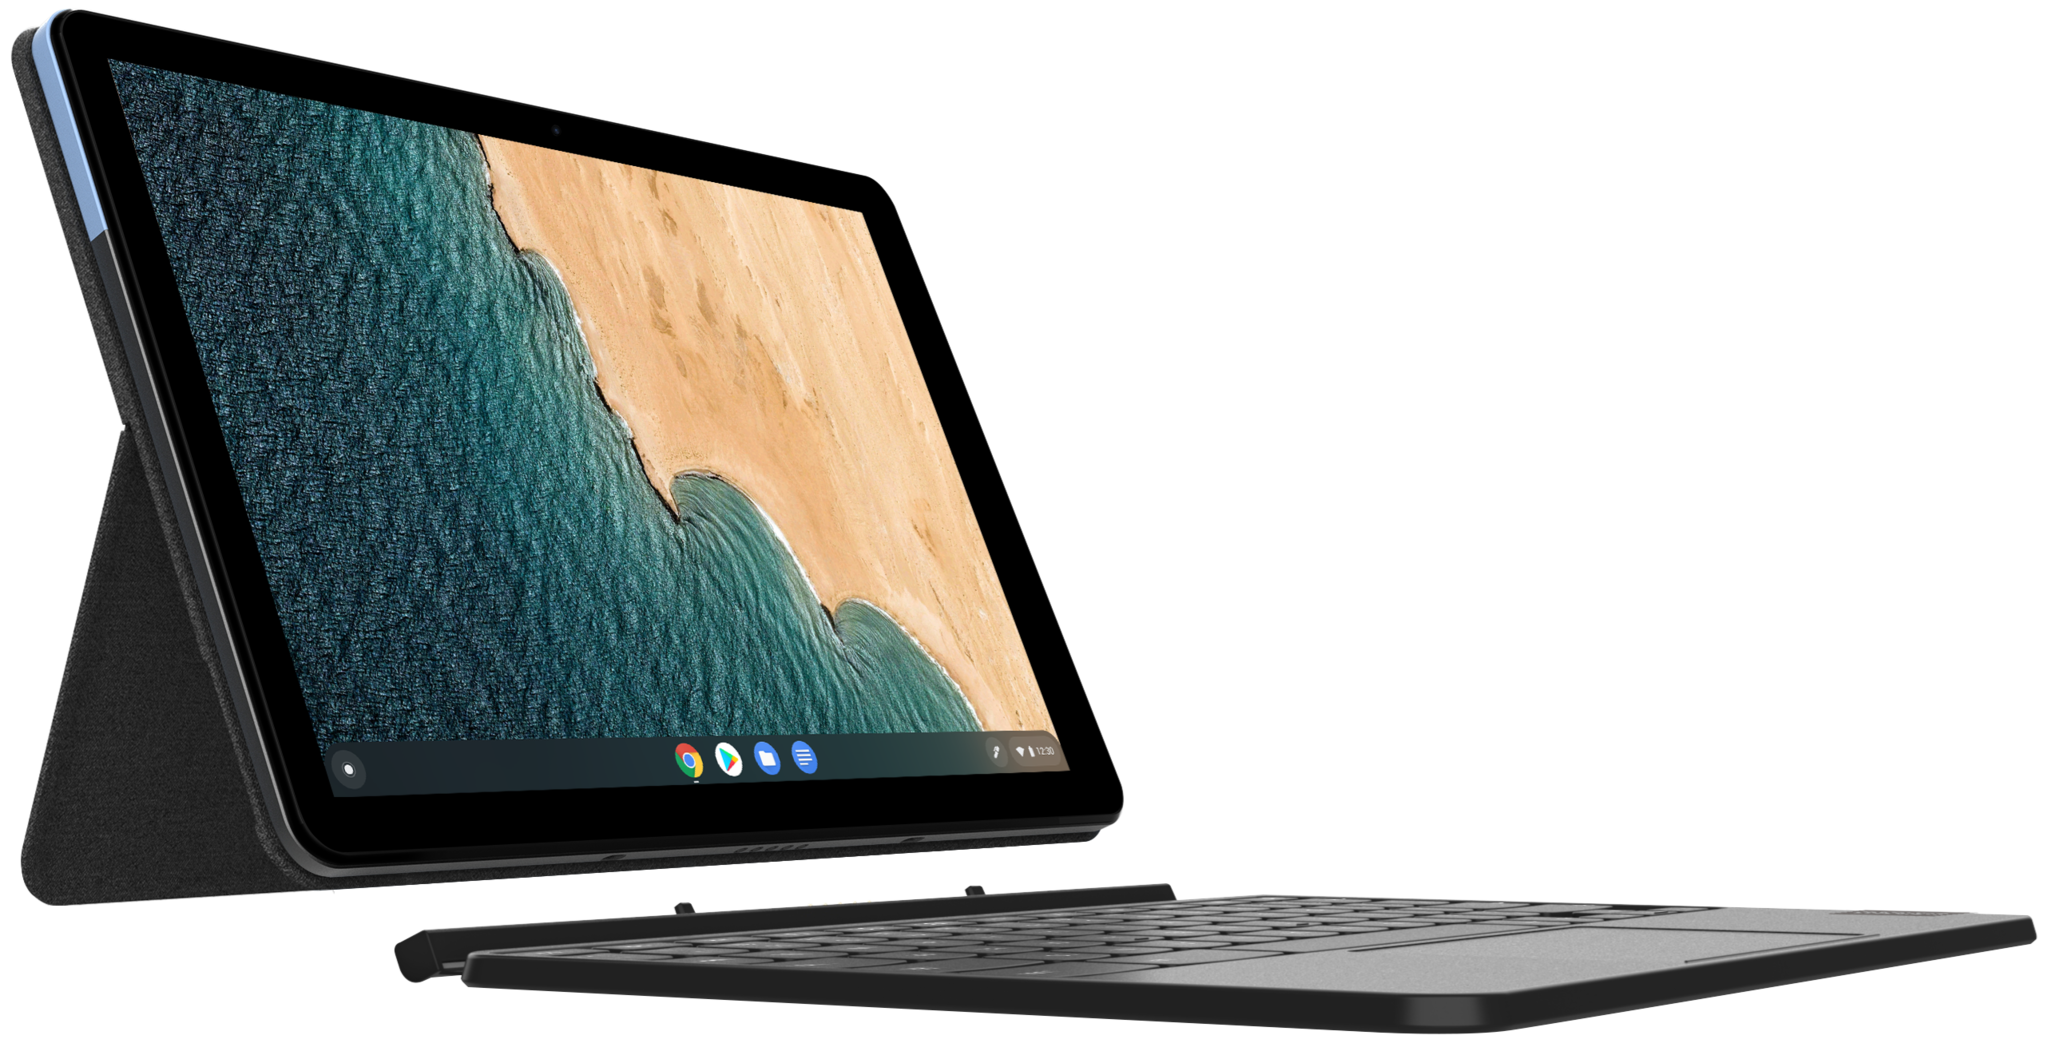
Lenovo Chromebook Duet ($299 at Best Buy)
The screen here is only 10.1 inches, but it's a bright 1080p screen that's easy to stow in your purse and use to check photos while you're out on a shoot before you drive an hour home only to realize that last series was totally out of focus.
Ara Wagoner was a staff writer at Android Central. She themes phones and pokes YouTube Music with a stick. When she's not writing about cases, Chromebooks, or customization, she's wandering around Walt Disney World. If you see her without headphones, RUN. You can follow her on Twitter at @arawagco.
