How to Install Windows 10 on Your Kano Computer
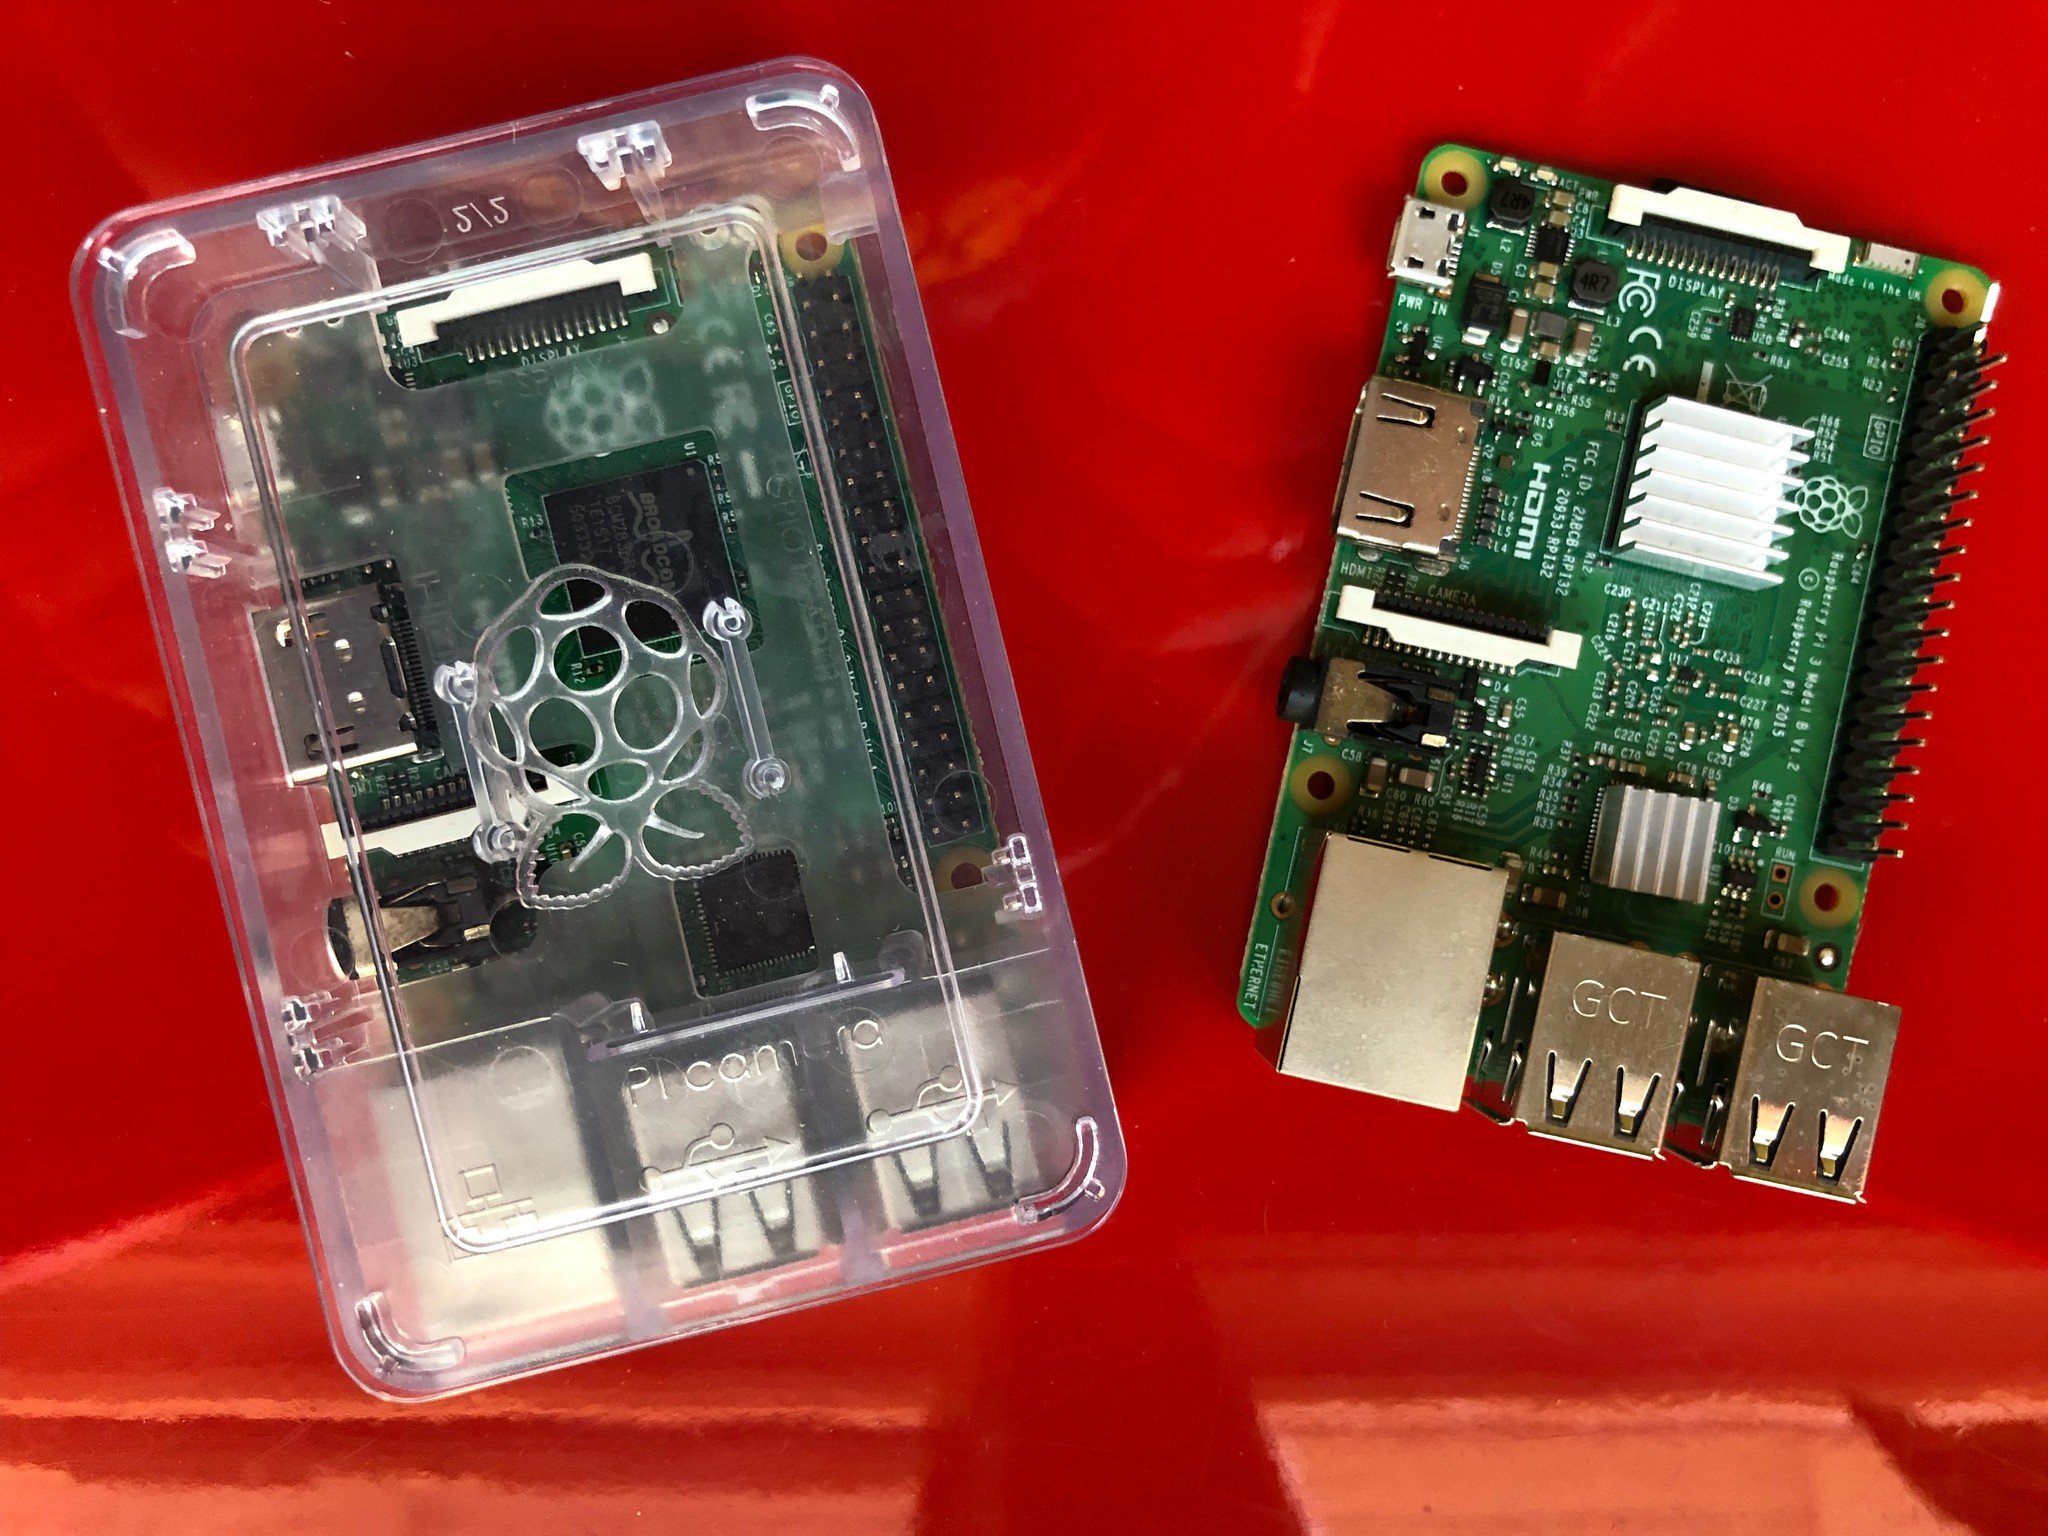
Windows 10 is a tricky subject when it comes to the Raspberry Pi, particularly the Raspberry Pi 3. While you're able to install Windows IoT, an optimized version to be run on smaller devices, on the Raspberry Pi 3 with no real problems, Windows 10 is something else entirely. In this guide, I'll explain just how you can get Windows 10 to run on your Raspberry Pi 3, but I've got to warn you: it can be a long and trying process - and that isn't even going into detail on the problems you'll encounter after installing it.
Products used in this guide
- PiShop US: Raspberry Pi 3 Model B ($35)
- Andreiw: Tiano Core UEFI for Raspberry Pi (Free)
- MiniTool: MiniTool Partition Wizard Free (Free)
- UUP: UUP Generation Project (Free)
- WinZip: WinZip (Free Trial)
- GitHub: Win10 on Pi Download File (Free)
- SourceForge: Window 10 Lite (Free)
The Guide
- Download the Win10 on Pi file and place it in a folder dedicated to installing Windows 10 on Pi.
- Visit the Winzip website and download the application.

- Download the UEFI zip file from Andreiw. It'll open up with a number of folders.
- Click the Binary folder and then head to the 'pre-built' images folder.
- Click the WoA-GCC29 file and then go to the Debug folder.
- Extract the Debug folder into the folder mentioned in point 1. You'll need it later.
- Head to the UUP website and insert the information shown in the image.

- Click the link that comes up at the side of the UUP website. It'll download and will be opened up in WinZip.
- Make a new folder and put everything that's been extracted by WinZip in there.
- Run the **CreatingISO batch file. It will compile a lot of files, so this process can take up to 20 minutes to even an hour. When you're done you'll get a prompt telling you to exit. You know what to do.
- Click the 17134.1.180410-180_RS4 Release disc image file. It'll bring up a number of folders.
- Click the Source folder. A number of files will show up.
- Hunt for the install.wim file and copy it to the folder you've been using for the Windows 10 on Pi process.
- Open up Win10 on Pi and it'll have all the folders you'll need.
- Only extract the systems32 folder — nothing else!
- Eject the DVD drive.
Using the Command Prompt
- Open up a command prompt by searching for it in your computer's start menu - make sure to run it as an administrator or this may not work.
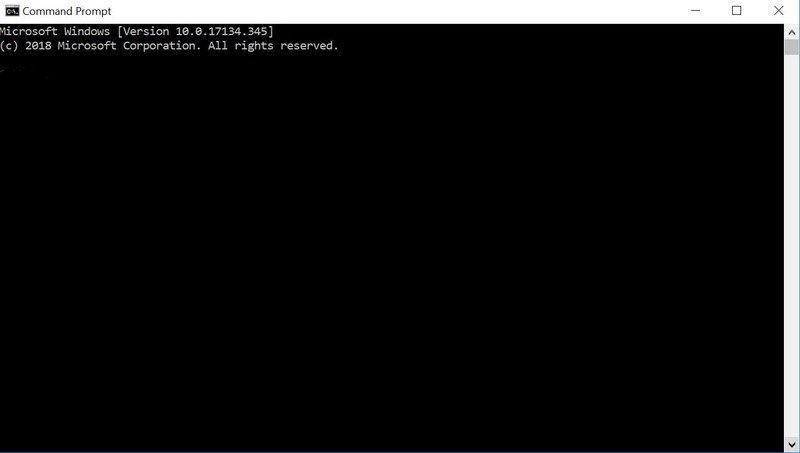
- Copy the directory where you've compiled all of your Windows 10 on Pi stuff.
- Insert the directory into the command prompt.
- Make a new folder that is labelled m. Do not give it any other name, otherwise this will not work.
- Copy and paste the command dism /mount-image /imagefile:install.wim /Index:1 /MountDir:m into the command prompt. Here you'll need to wait for a few moments for the image to be compiled.
- Copy and paste the command dism /image:m /add-driver /driver:foldername /recurse /forceunsigned into the command prompt. Again, you'll need to wait a little while.
- Copy and paste the command dism /unmount-wim /mountdir:m /commit.
- Plug in your SD card.
Create Partitions in Mini Tool
- Open up MiniTool.
- If you have any existing Partitions on your SD card, delete them. If not, carry on reading.
- Click on Create and input the following.
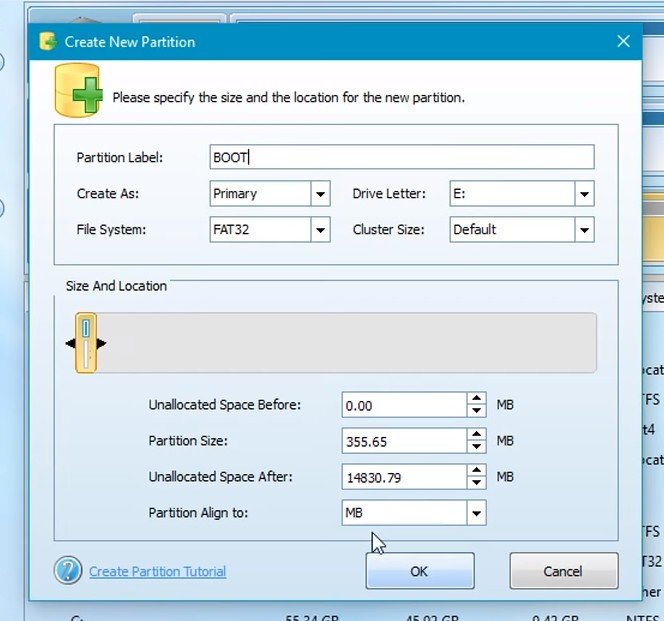
- Click on Create and input the following. This will be your second partition.
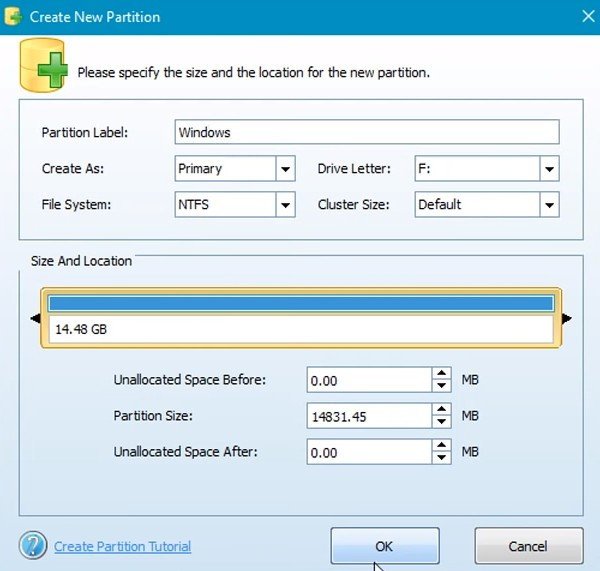
- Press apply. You'll have to wait a few moments.
- Do you remember the files we got from the Debug folder? Copy them over to the BOOT partition that you've just made in MiniTool.
Inserting The Code into Command Prompt and SourceForge
- Bring up Command Prompt once more.
- Insert **dism /apply-image /imagefile:install.wim /index:1 /applydir:F:** into Command Prompt. Wait a few moments after.
- Depending on the drive you've used, you may need to change it from F into the name of the drive you've used.
- Insert bcdboot F:\Windows /s E: /f UEFI into Command Prompt and wait.
- Insert bcdedit /store E:\EFI\Microsoft\Boot\bcd /set { default } testsigning on into Command Prompt and wait.
- Insert bcdedit /store E:\EFI\Microsoft\Boot\bcd /set { default } nointegritychecks on into Command Prompt and wait.
- Now head to SourceForge and copy the text between the two cut here points.
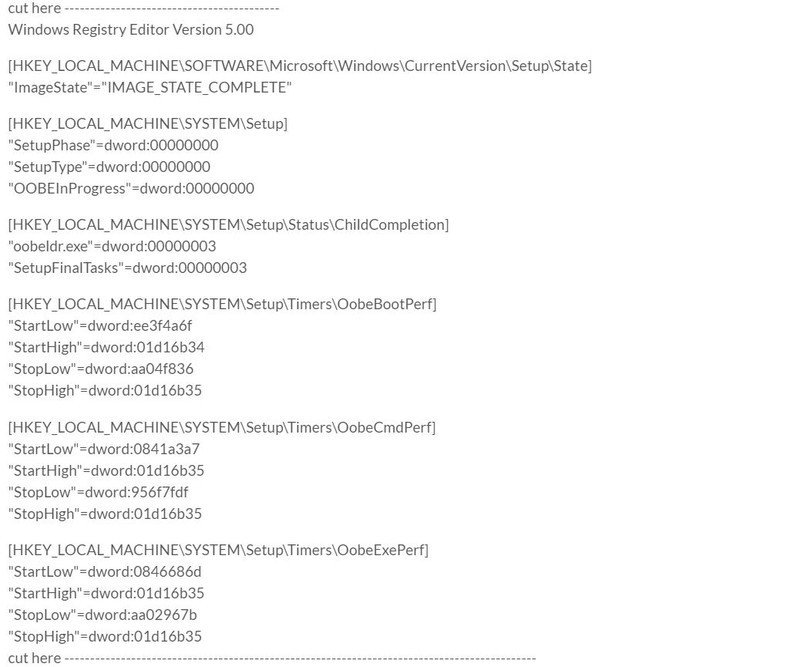
- Paste this text into a Notepad document and save it to your desktop.
- Move that file to your SD card.
Loading up Windows 10
- Put your SD card into your Raspberry Pi to start installing Windows 10. If you've done everything right, you'll see the following screen.

- An error code will pop up. Hit Shift F10. This will trigger Command Prompt to appear.
- Insert mmc after the first /system32/ you see on your screen. This will open up a window.
- Go to File.
- Click Add/Remove snap-in. Another window will appear.
- Click Computer Management and hit add.
- Click Finish and computer management should be added to the previous window.
- Under the tab Computer Management on the left side of your screen, you'll see Local Users and Groups. Click it.
- Click Users.
- Then click Administrator. It will open up a new window.
- Unclick account is disabled and then hit OK.
- If you want you can right-click Administrator and set a password. It can be anything you'd like.
- Click off from the window and an error message will appear. Click OK and ignore it.
- Remember the code you copied before into the Notepad? Paste the code into the Command Prompt.
- Run the file by inserting the following code shown below.
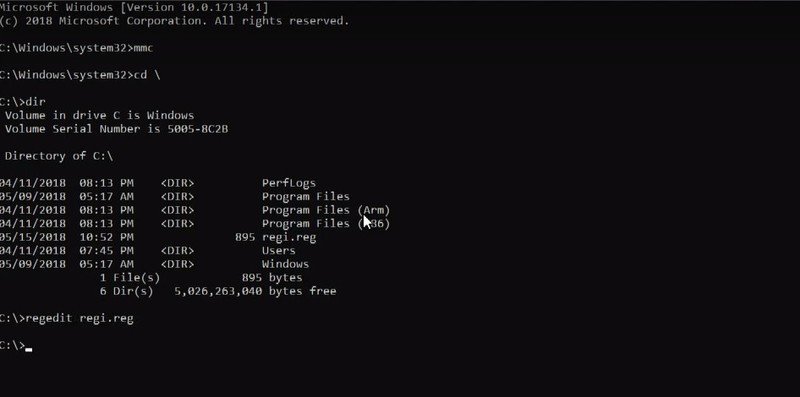
- Another error message will pop it. Just click OK.
- Go back to Command Prompt and insert "shutdown /r " to reboot your Kano Computer. If this doesn't work, remove it by the plug.
- Be prepared to wait a long while until the Windows 10 screen pops up.
- You're officially finished.
- For a more visual guide, check out the following video
After a very long time waiting, you should now be able to start up Windows 10 on your Kano Computer and use 32-bit applications like Office.
Be an expert in 5 minutes
Get the latest news from Android Central, your trusted companion in the world of Android
Windows 10 versus Windows IoT
Even though now you've installed Windows 10, it isn't all smooth sailing. In fact, let me be clearer: Windows 10 was not meant to run on the Raspberry Pi 3 and it is likely that you'll run into numerous problems while installing. For example, there is no access to Wi-Fi, which in my eyes, is a complete deal breaker. Your USB drives are also buggy, and depending on your SD card, the card can run very slow.
In comparison to Windows IoT, it seems obvious that folks with a Raspberry Pi 3 should probably just stick to Windows IoT. In fact, there's still a lot you can do with Windows IoT that's worth mentioning. You can create your own apps using Microsoft Visceral Studio and much more. You'll also be able to use the internet, which gives it a massive advantage over Windows 10 on the Raspberry Pi 3.
Our product picks
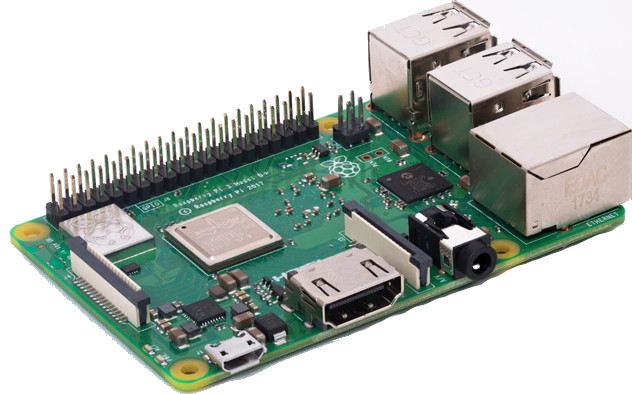
Necessary
This is where the magic happens. You won't be able to perform the Windows 10 update without a Raspberry Pi 3, so make sure you get this before you attempt to do anything in this guide
This is the brain that will make your Kano Computer, and thus Windows 10, function. Without this, you'll have done everything in this guide for nothing.

