How to enable cloud save backup on Oculus Quest 2 (and how they work)
Never worry about deleting games or saves again!

Once upon a time, uninstalling games from an Oculus Quest or Meta Quest 2 would result in losing your game saves. No one wants to lose their progress in a game just because they're taking a break and needed to make room for another game but, thankfully, Meta has a way to prevent that: Quest cloud backup.
Whether you own an Oculus Quest or Oculus Quest 2, enabling cloud backup means all your local save files will get safely uploaded to the cloud so you can safely delete games and make space for others. When you're ready to reinstall the best Quest 2 games, cloud backup will automatically restore the save and get you squared away. Here's how to enable cloud save backup on Oculus Quest.
How to enable cloud save backup on Oculus Quest
1. Put on your Oculus Quest and press the home button on the right controller to bring up the universal menu.
2. Select the clock/settings panel on the left side of the menu bar at the bottom.
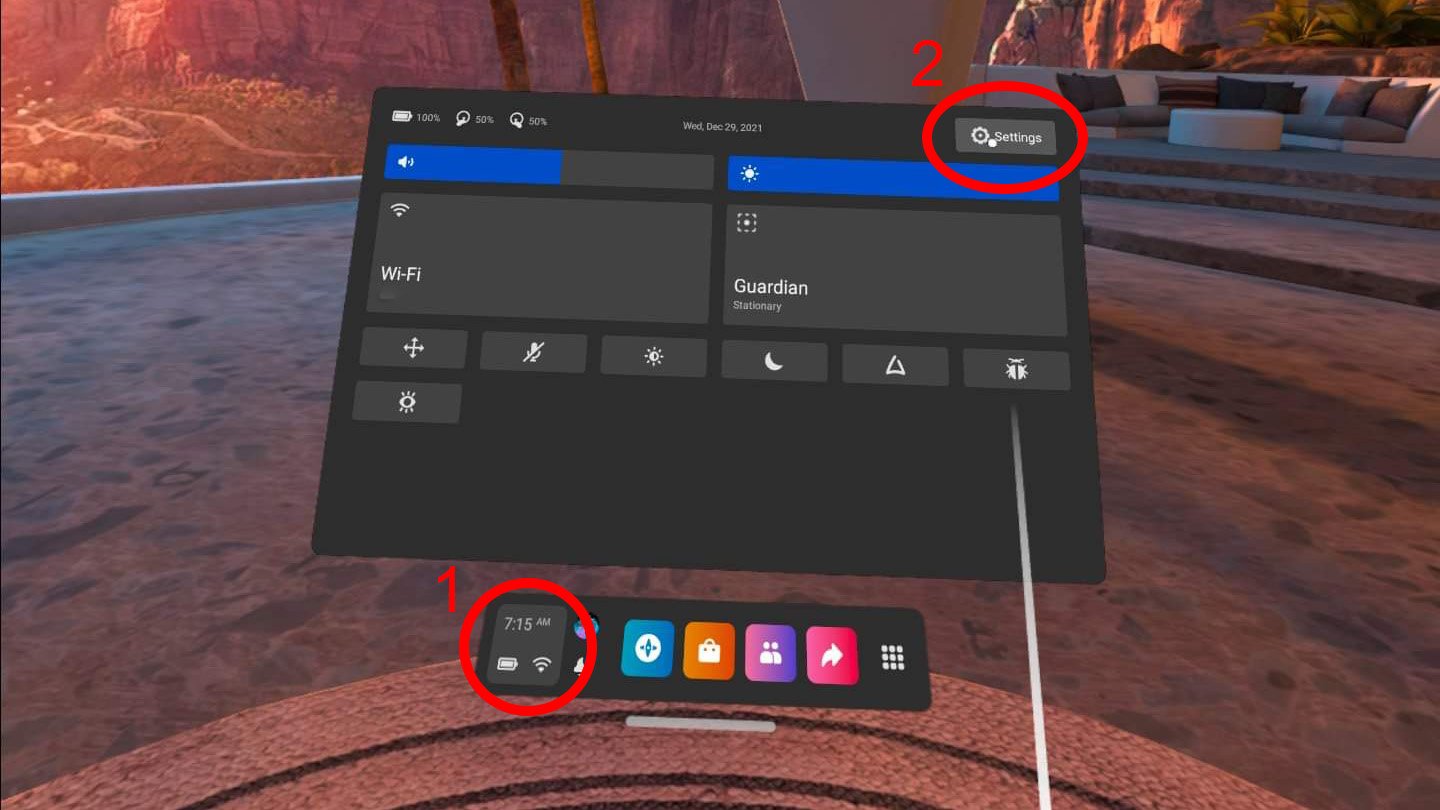
3. Select Settings from the list.
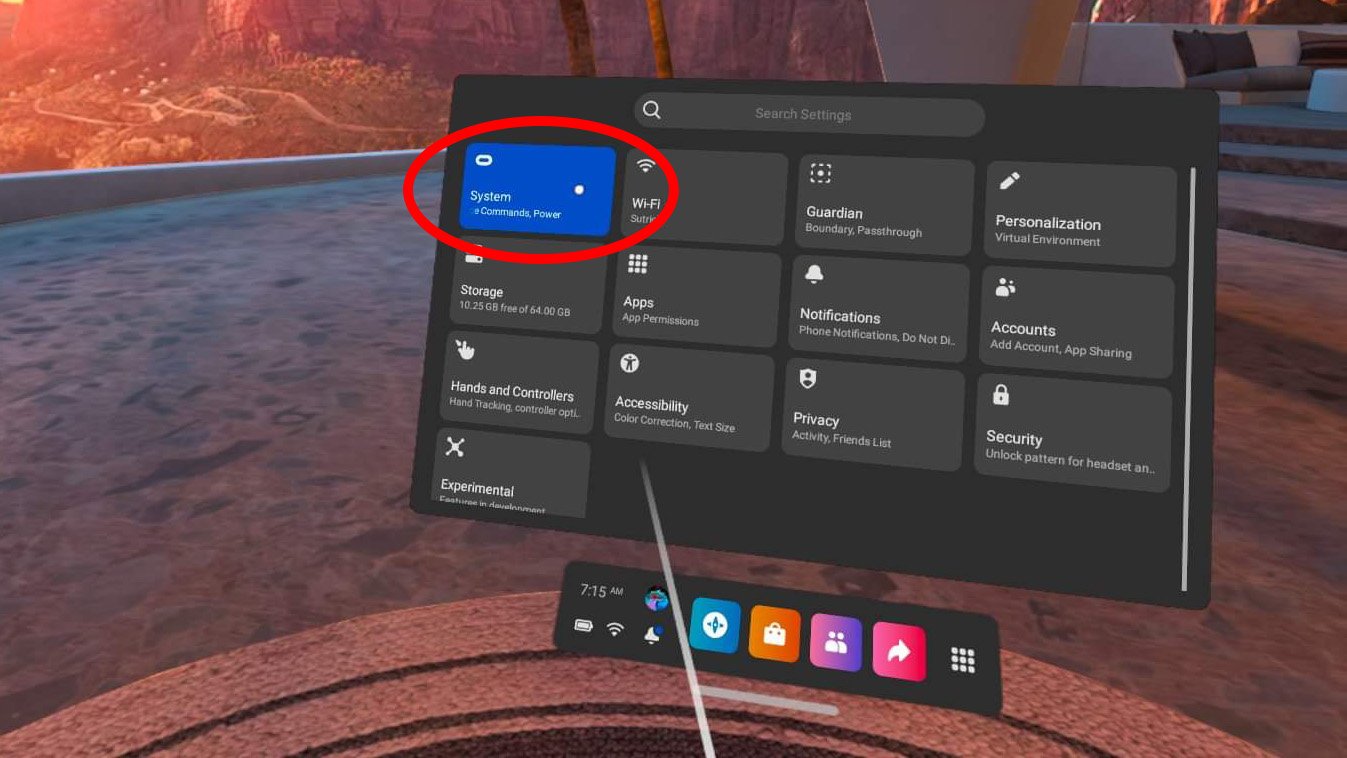
4. Select Backup from the left menu.
5. Ensure that Cloud backup is toggled on. The toggle will be blue when enabled.
Be an expert in 5 minutes
Get the latest news from Android Central, your trusted companion in the world of Android
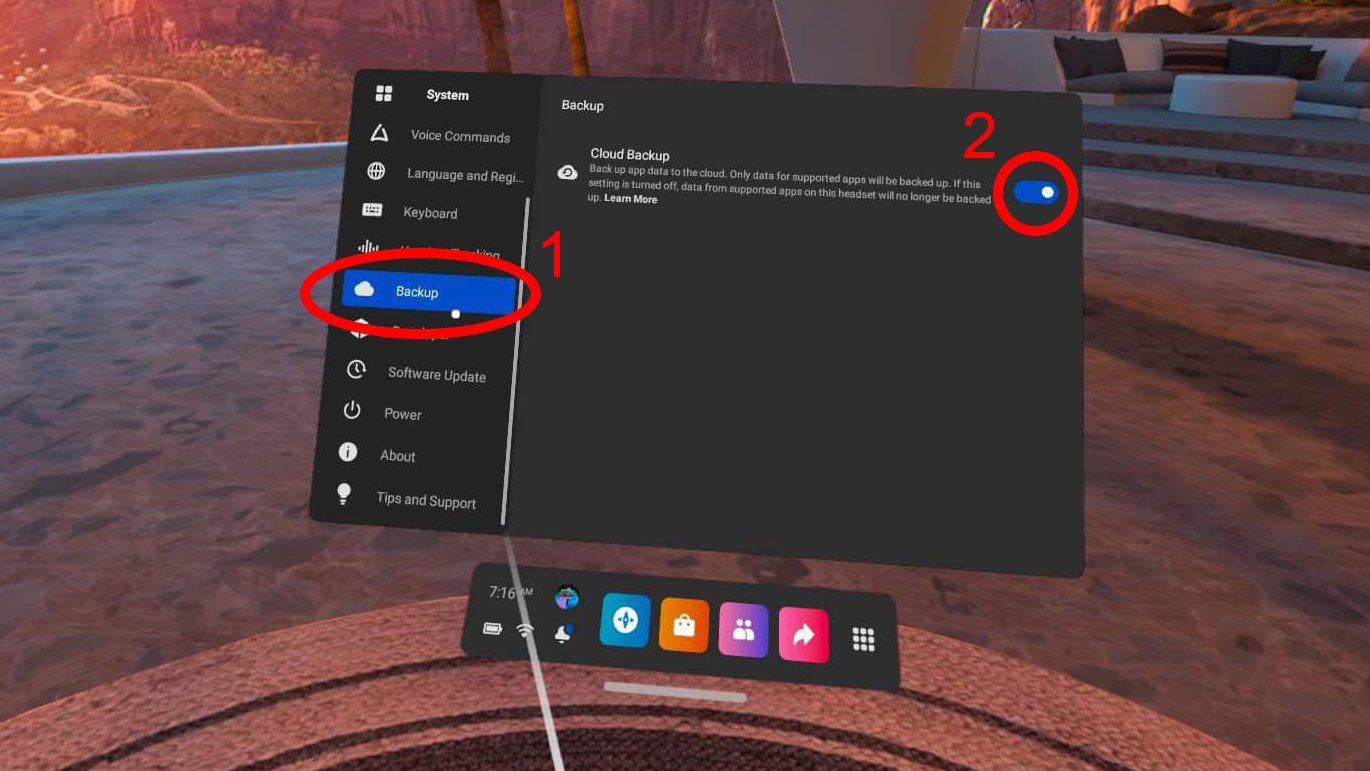
With cloud backup enabled, any installed games that support cloud saves will automatically back those save files up to your Oculus account.
How to manage your Oculus cloud saves
Once cloud backup is enabled, all game saves on your headset will automatically be backed up to your Oculus account for safe storage. That is, of course, so long as your app or game of choice supports cloud backup. To verify that a game or app has its saved data backed up, you'll need to open a web browser and navigate to the Oculus website. This can be done on the Quest 2, on your smartphone, or on any computer.
1. Open a web browser and navigate to the Oculus website.
2. Select the profile icon on the top-right of the page. You may need to log in with your Facebook Oculus account first.
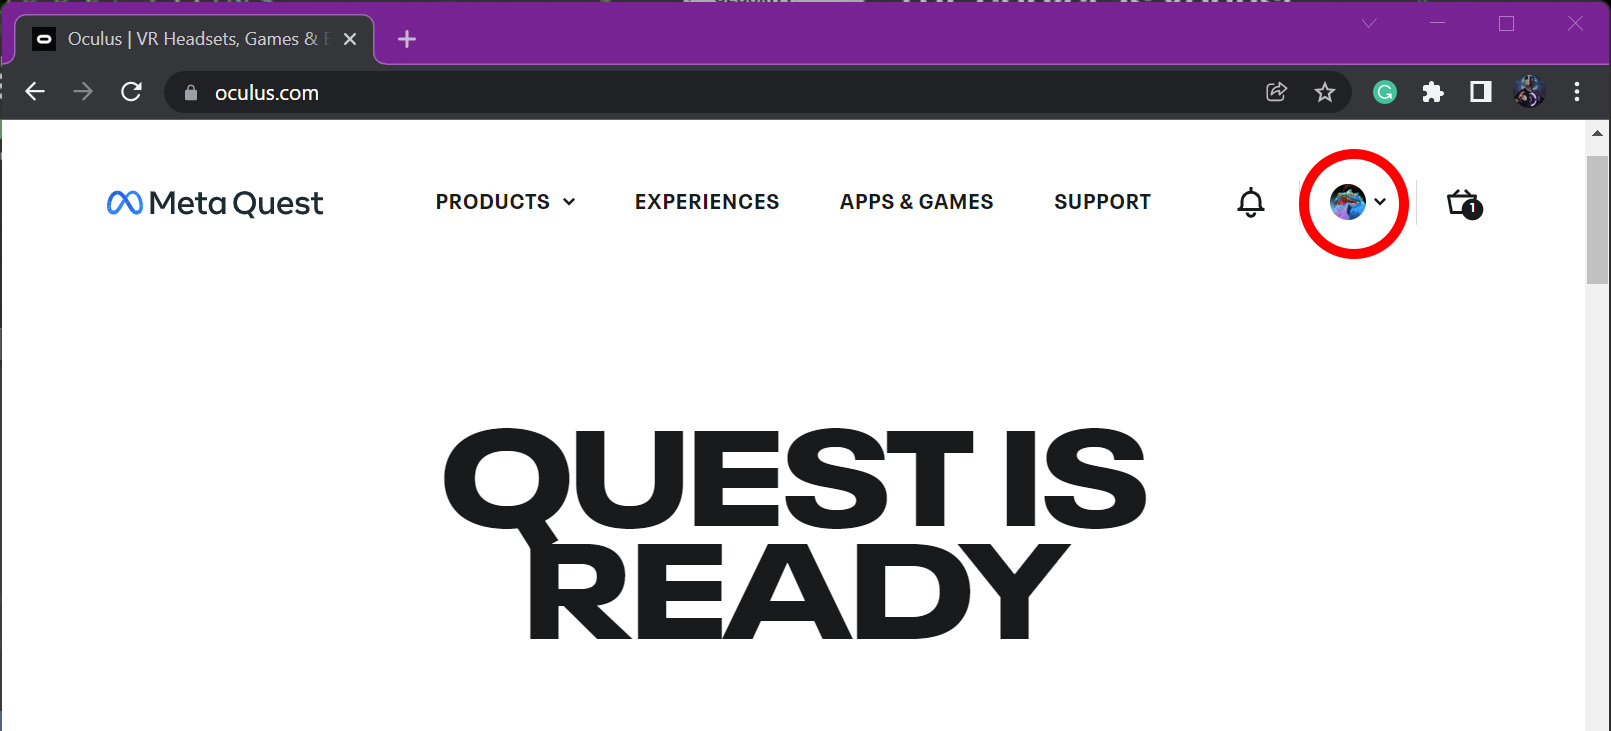
3. Select Devices from the menu that appears.
4. Select Cloud Backups from the menu on the left.
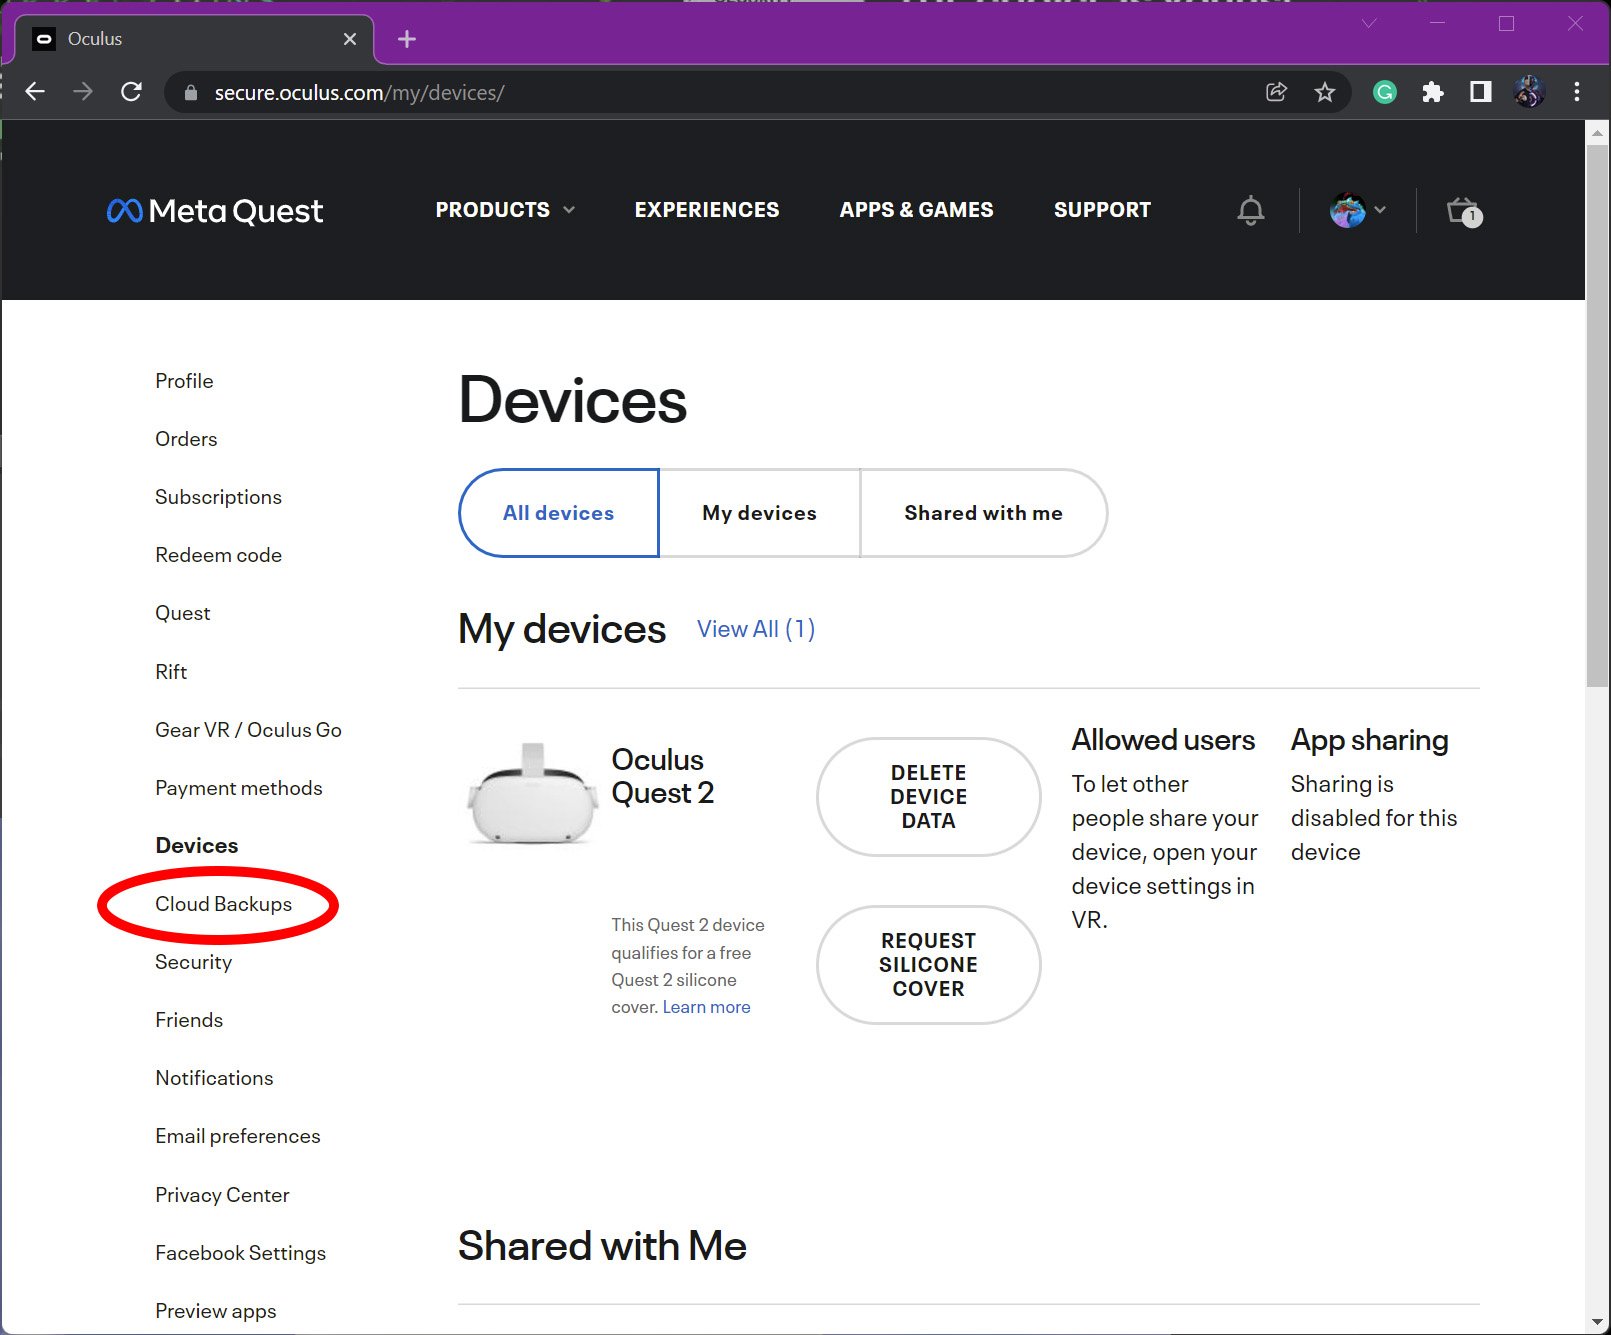
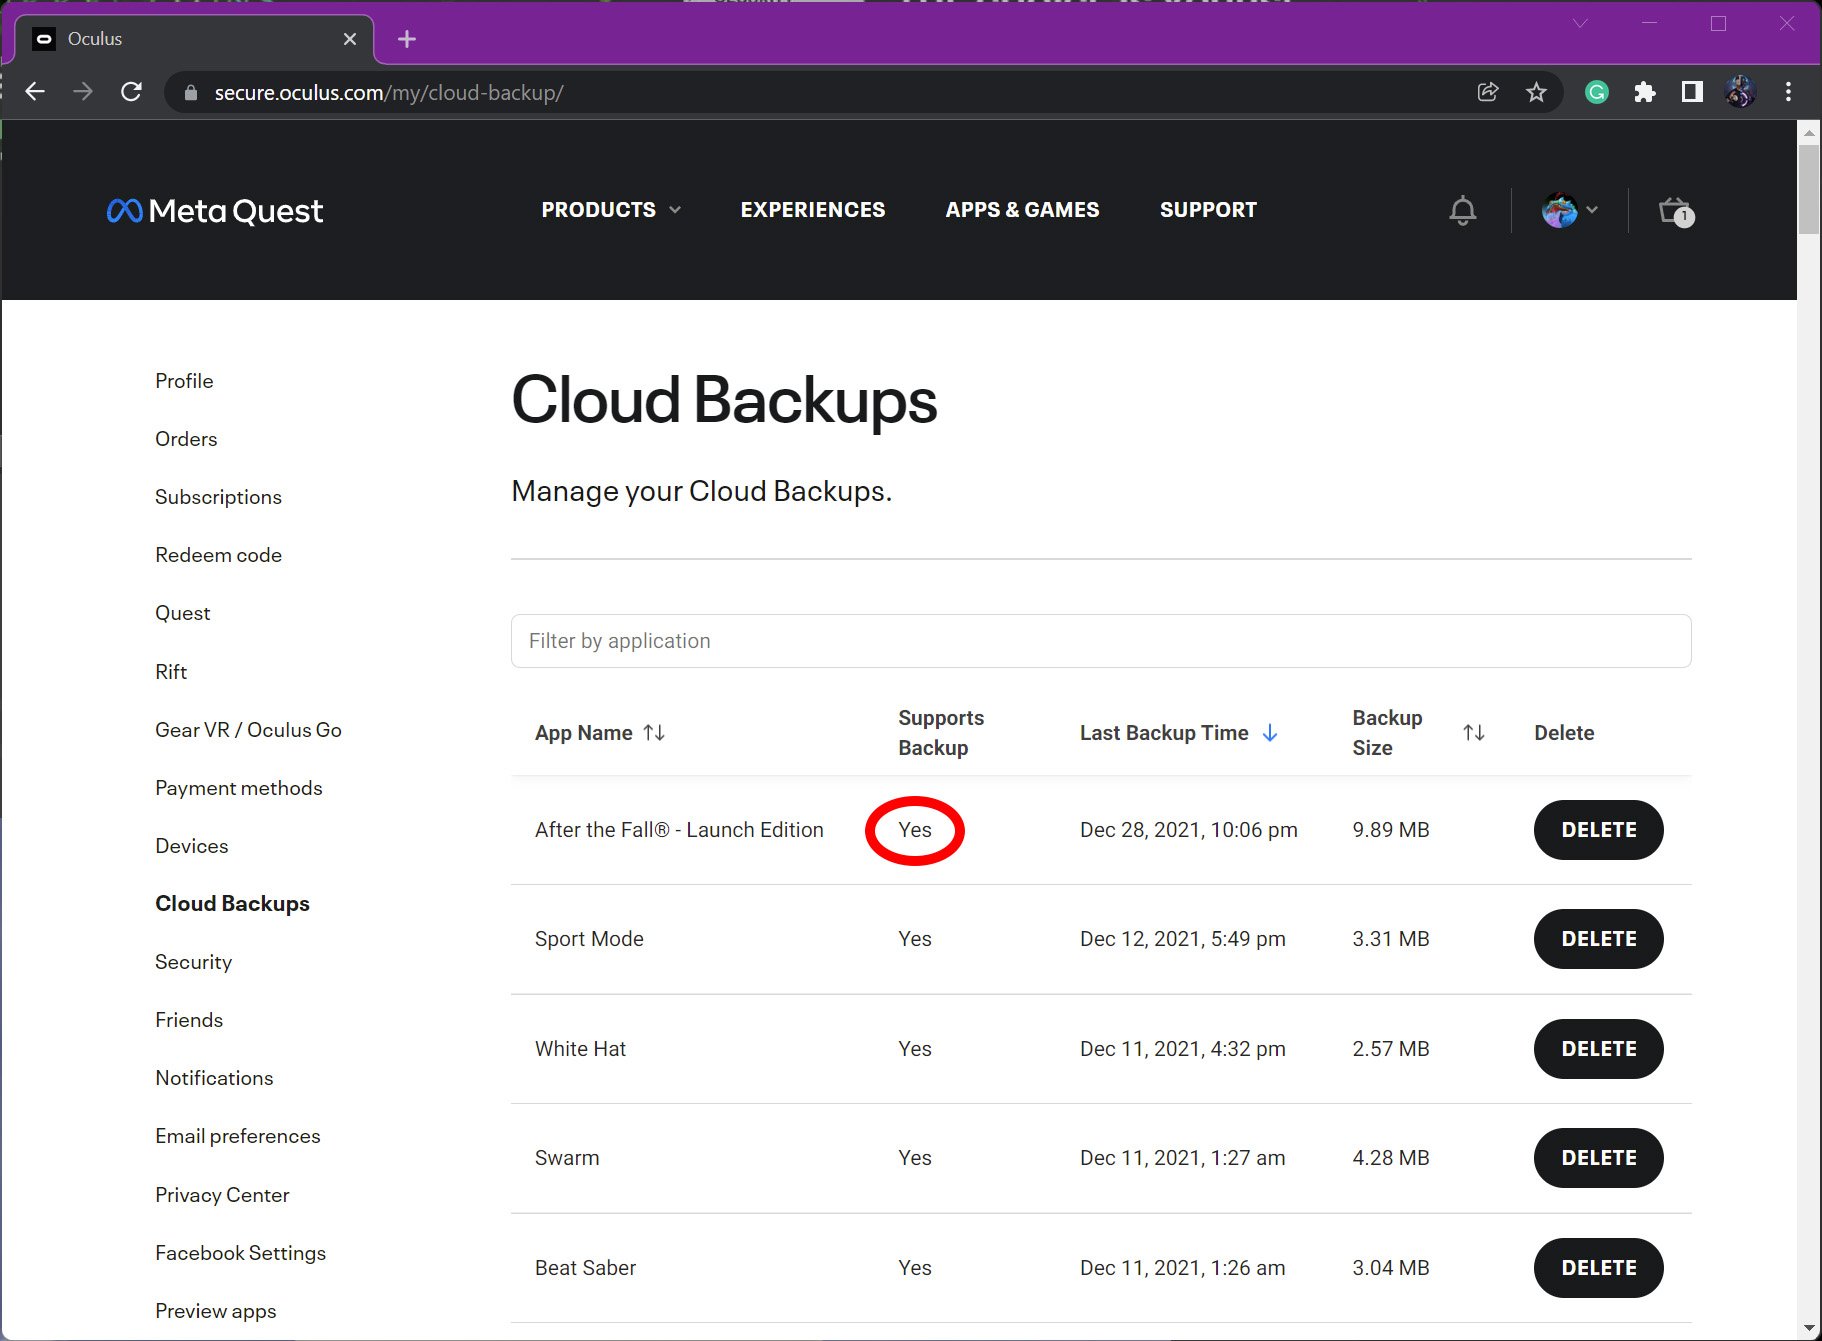
5. A list of backed up games will appear showing the last backed-up time and the size of the backup.
6. You can verify that an app or game supports cloud backup by checking the Supports Backup column.
7. If you want to remove the cloud backup of a game, click the Delete button for that game.
If you're looking to free up space on your Oculus Quest, make sure you only uninstall apps or games that support cloud backup. Otherwise, you'll still end up losing all app data associated with these titles, including save files since save files are tied to the game files on Quest. This means that if you've made lots of progress in a game that doesn't support cloud saves, uninstalling that game will result in your game saves also being deleted.
How do Oculus cloud saves work?
When you make progress in a game or save files in an app on the Oculus Quest or Oculus Quest 2, those save files are located in the same place the game or app resides. That means, when you uninstall a game or app, the entire folder of files gets removed, including any saved game progress or files.
Oculus cloud saves work by backing up this saved data to your Oculus account, thereby allowing you to freely uninstall titles without worrying about losing your progress. But not all apps and games support cloud save just yet. That's why it's important to ensure that your apps or games have their saved files backed up by following the tutorial in the section above.
When you reinstall an app that has a cloud backup, those backed-up files will be automatically downloaded to your Oculus Quest during the installation process. That way you never have to worry about whether your saves are correct or not.

