How to eject a disc from your PS4
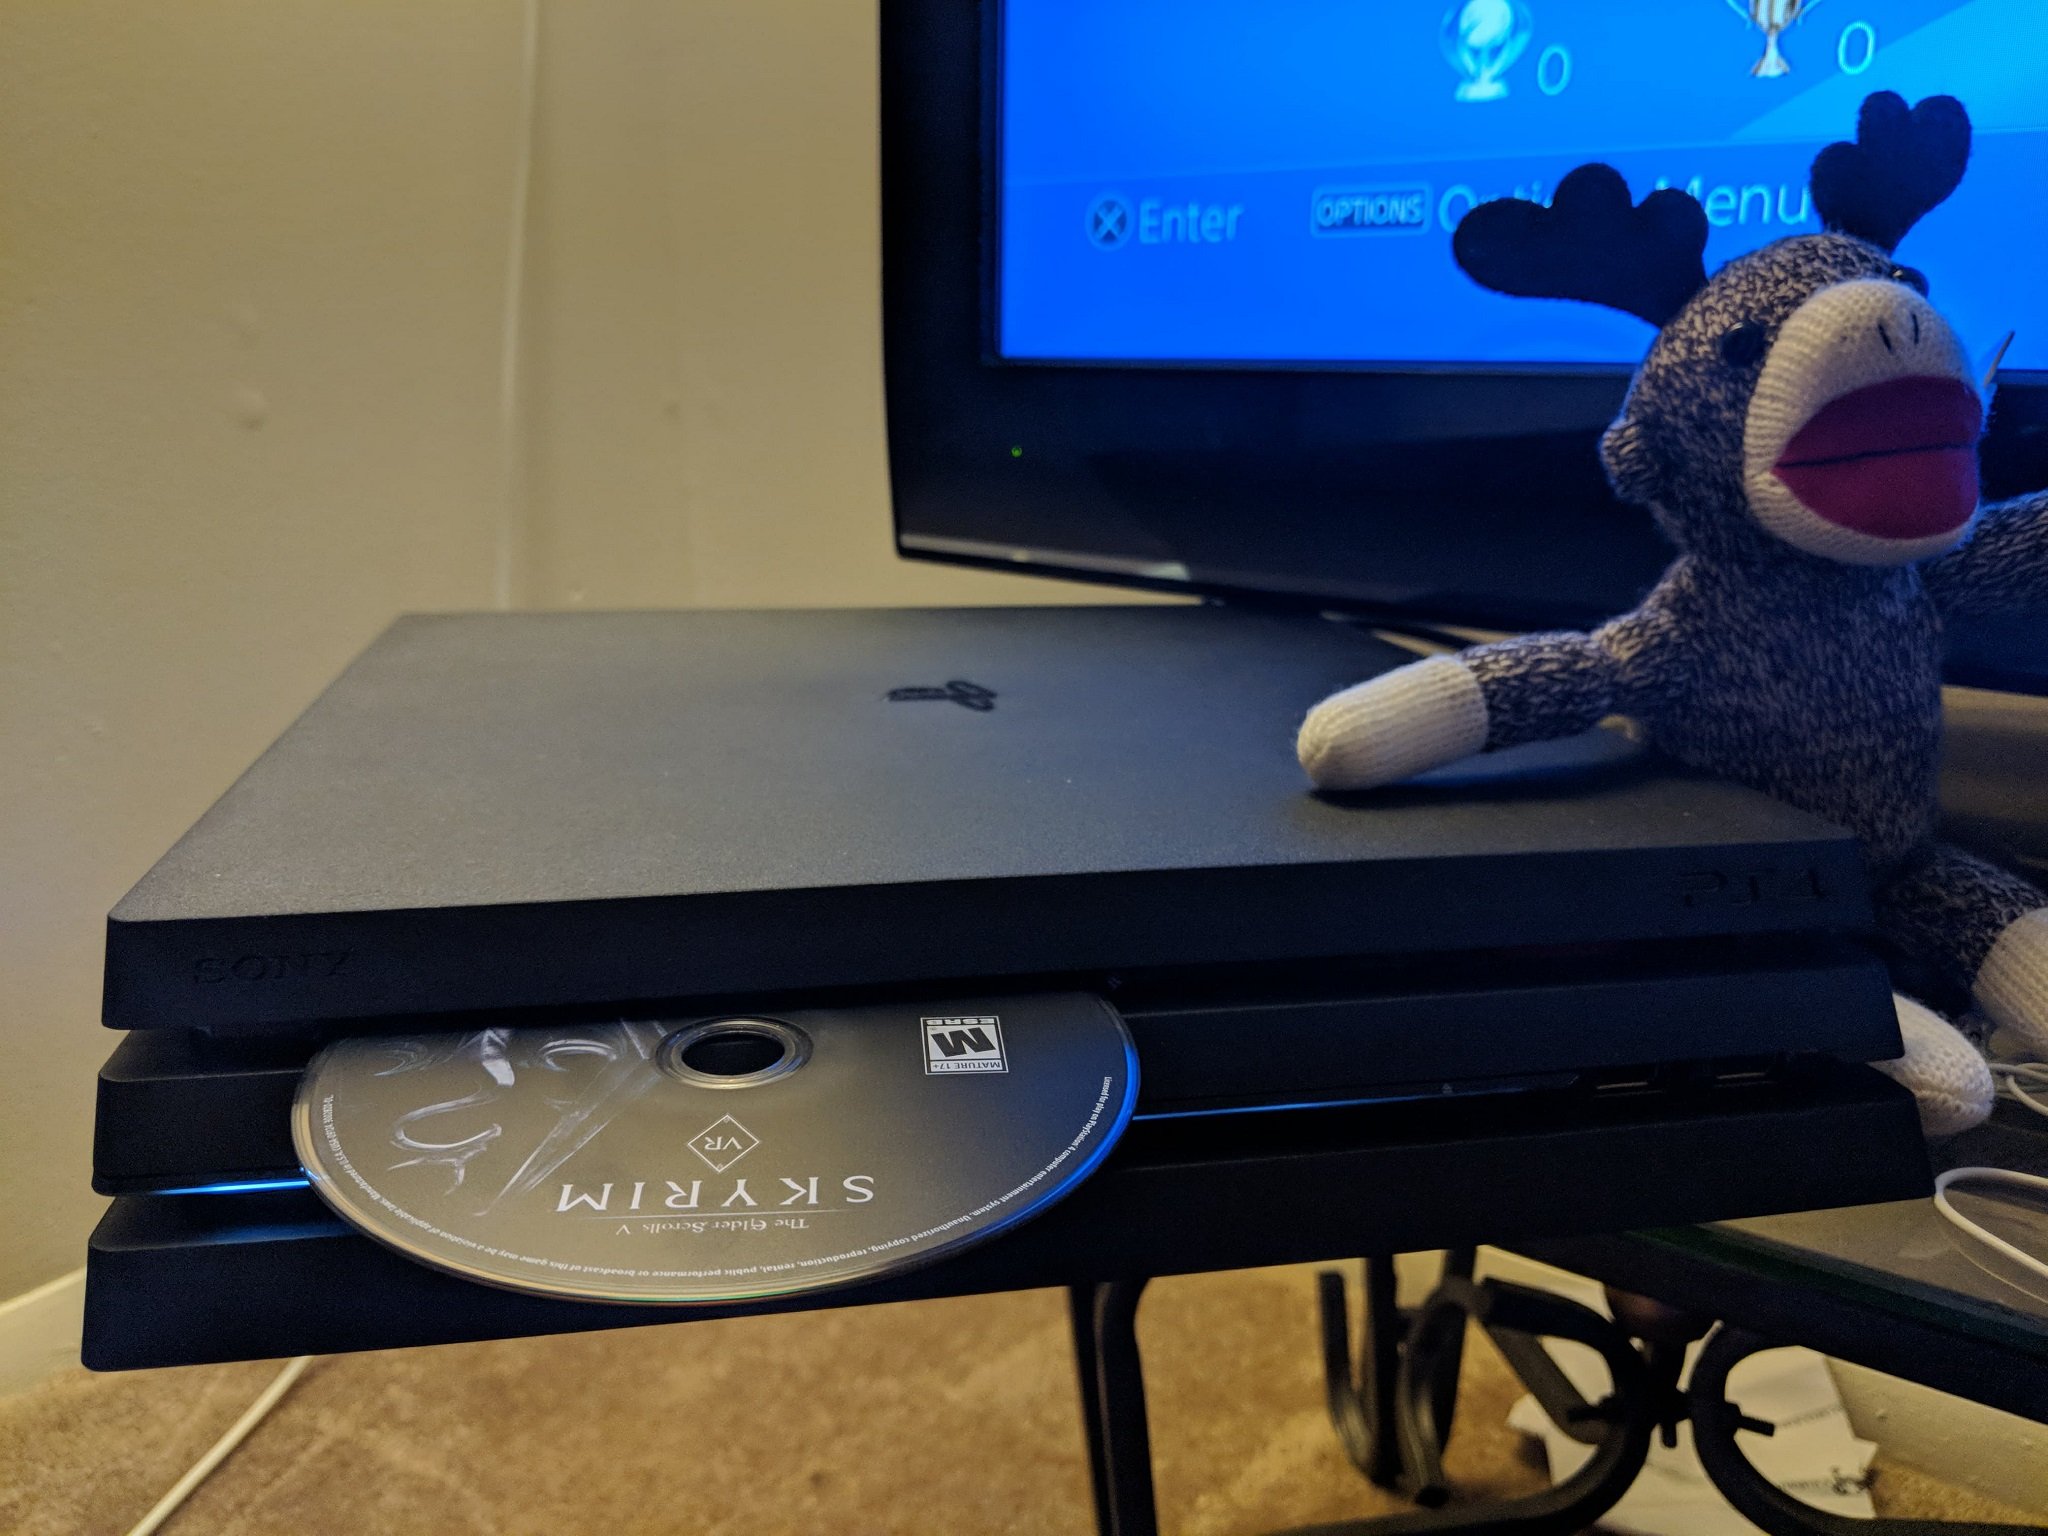
You may be surprised to hear that there are a multitude of ways you can eject a disc from your PlayStation 4. Whether you're simply looking for the incredibly tiny button on the front panel or a need to tighten its manual eject screw if your game is stuck, you have a few options to choose from.
Products used in this guide
- Screwdriver: Stainless Steel Philips Head Screwdriver ($5 at Amazon)
How to tighten the manual eject screw
Note: This requires you to unplug every cable from your PS4.
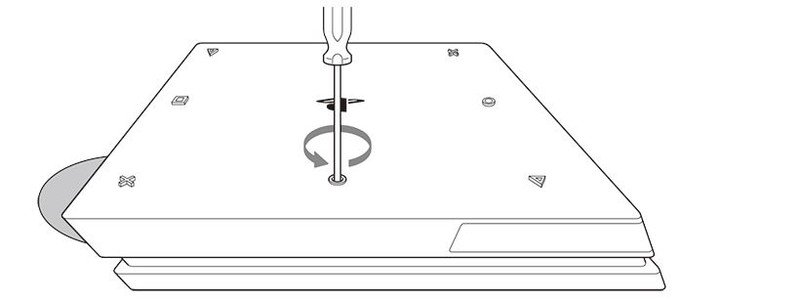
No matter what model console you're playing on, be it the original PS4, the PS4 Slim, or a PS4 Pro, each has a manual eject screw associated with the disc drive should problems arise and your disc gets stuck. Sony thankfully has diagrams showing exactly how to tighten this screw, which conveniently also tends to solve the issue of your PS4 not accepting a disc to begin with.
Original PS4 CUH-1000 Model
If you purchased your PS4 between 2013 and the middle of 2015, you likely have either a CUH-1000 Series model or CUH-1110 Series model.
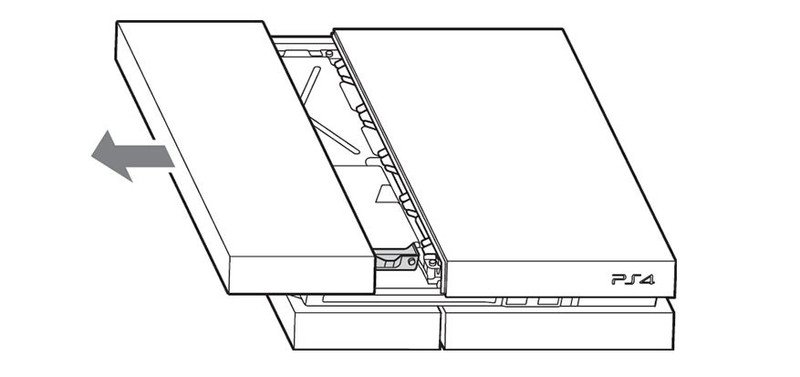
- Gently slide off the left HDD bay cover panel as seen below.
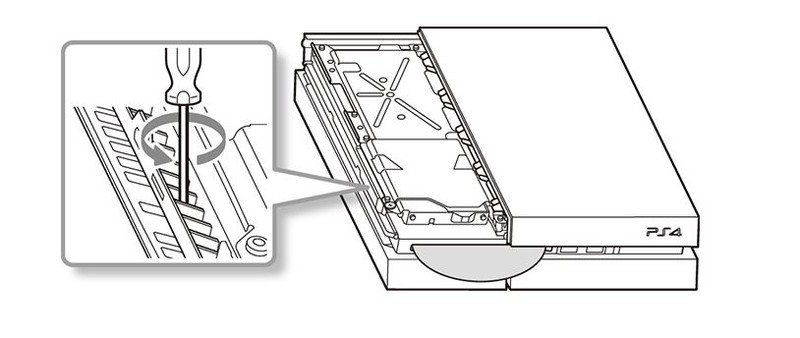
- You will now see two sets of vents. From the front, follow these vents until you come across a slot that is not grouped with any other slots. This is where the screw will be. (Use a flashlight if needed).
- Once located, tighten the screw as needed.
- Place the HDD panel back on and plug in your console.
PS4 CUH-1200 Model
From mid-2015 to around September 2016, anyone buying a PS4 likely picked up the PS4 CUH-1200 Series.
- Like the above steps, start by removing the HDD cover bay. Using your fingers as leverage, apply even pressure near the seam to slide the top panel away. (The panel should move about 7mm and a click will be heard).
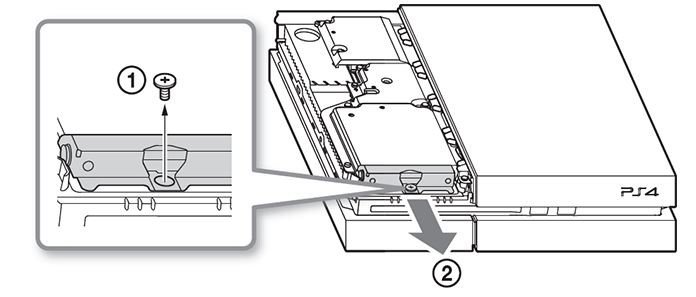
- You'll now need to partially remove the HDD itself. You'll see a screw with the PlayStation symbols. Simply unscrew this counter-clockwise so you can move the HDD out of the way.
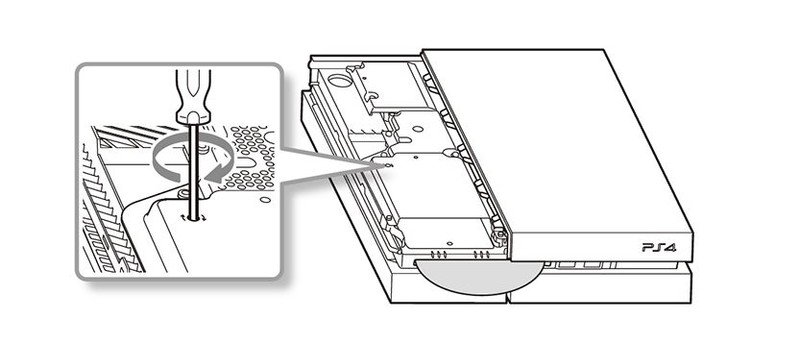
- You should then see the manual eject screw as seen in the diagram below.
- Once located, tighten the screw as needed.
- Place the HDD panel back on and plug in your console.
PS4 Slim and PS4 Pro
If you bought a PS4 from late 2016 until today, you'll probably either have the PS4 Slim or PS4 Pro, which are quite easy to tell apart. This is the easiest out of the batch to tighten.
Get the latest news from Android Central, your trusted companion in the world of Android
- Flip over your console and look for the circular hole directly above the PlayStation logo.
- Insert your screwdriver here and turn.
That's all there is to it!
Physical buttons to eject the disc
The first thing you notice when you open your brand new shiny PlayStation 4 is how tiny the buttons on the front are. Don't even get me started on how they just about blend in with the machine while they're at it. Well, if you've found yourself confused by which button is the power and which is the disc ejector, look no further.
Every PlayStation console has a different set-up for where the power button is compared to the disc ejection button. Here are the examples of where the buttons are for each! Be sure to get your reading glasses on, they're pretty small.
PlayStation 4 Pro
The power button is on the left and the eject disc button is on the right. The buttons are on the same bar on the front of your machine. This bar is located on the bottom of the front center section of your console.
PlayStation 4 Slim
The power button is on the left and the eject disc button is on the right. They're incredibly close together which makes it a hassle to deal with so just keep in mind the power button is long and square, while the eject button is small and circular.
PlayStation 4 Standard Model
The power button is on the top and the eject button is on the bottom of the front panel.
Disc ejection from an in-menu selection
- When the disc is inserted in your PlayStation, hover over the option to play and select the Options button.
- Select Eject from the menu that pops up.
Essa Kidwell is an expert in all things VR and mobile devices who can always be found with an Oculus Go, a Pixel 2, and an iPhone 7+. They've been taking things apart just to put them back together for quite some time. If you've got a troubleshooting issue with any of your tech, they're the one you want to go to! Find them on Twitter @OriginalSluggo or Instagram @CosmeticChronus.
