How to edit photos in Google Photos
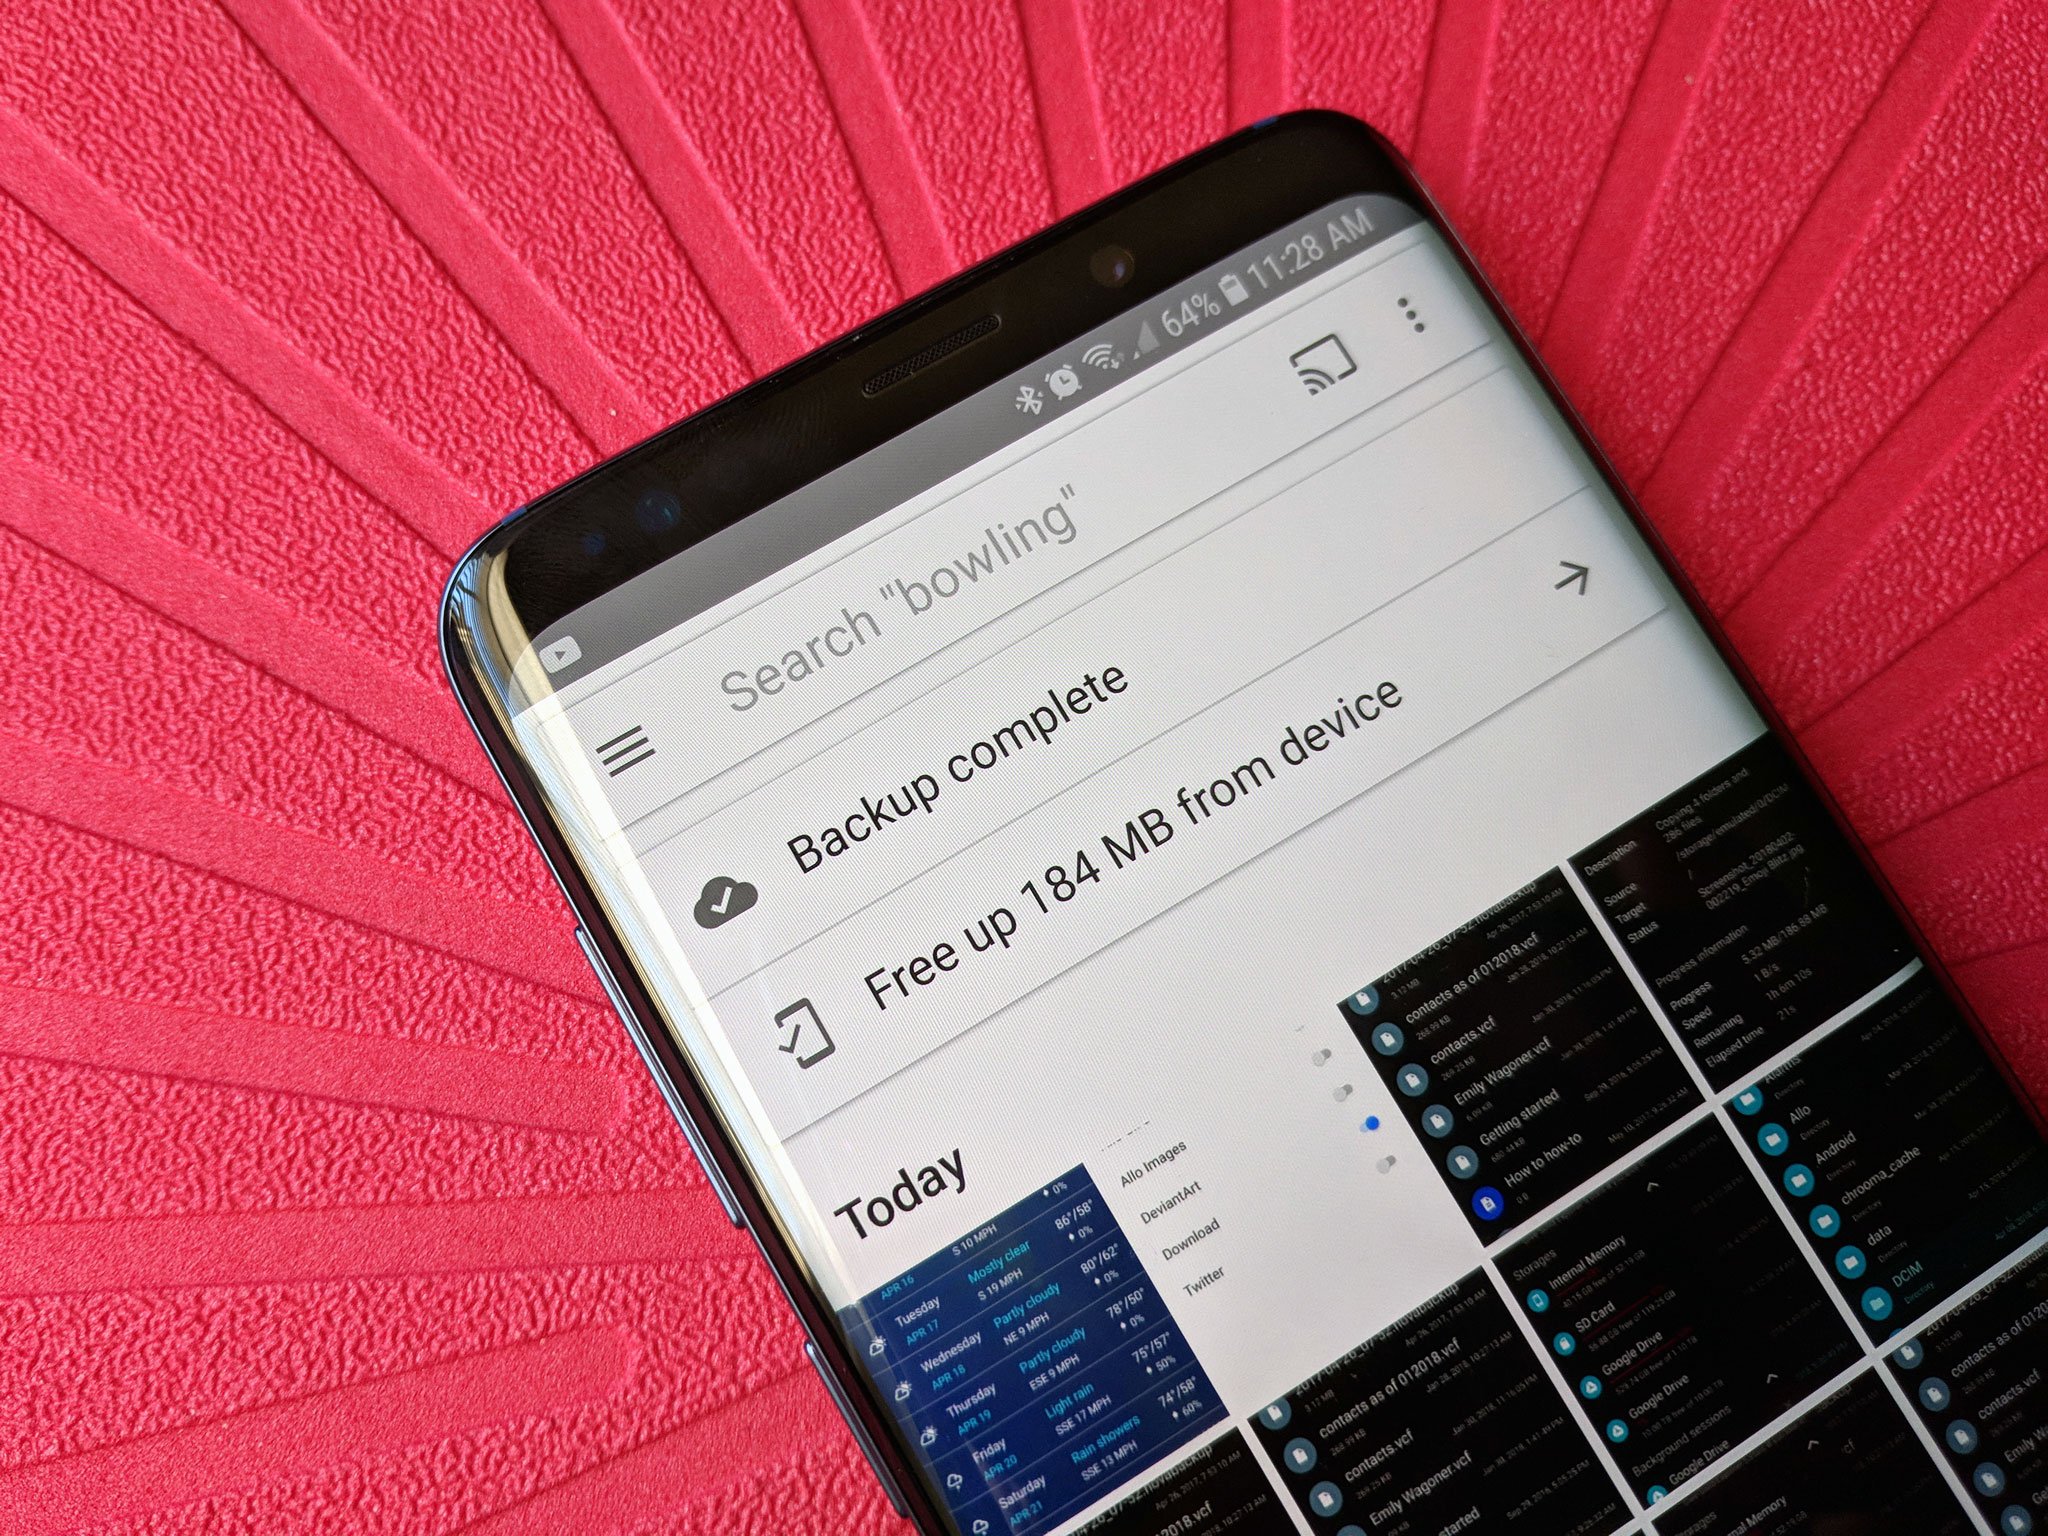
Google Photos offers your one stop shop for all things related to your phone's photos. You have storage for all of your new snapshots, an easy way to share, and plenty more. What you might not have realized is that there is a handy suite of editing tools built directly into the app. When you want to make sure those picnic photos look as awesome as possible before uploading them to Facebook or Instagram, these are the editing tools available to you.
How to use Filters
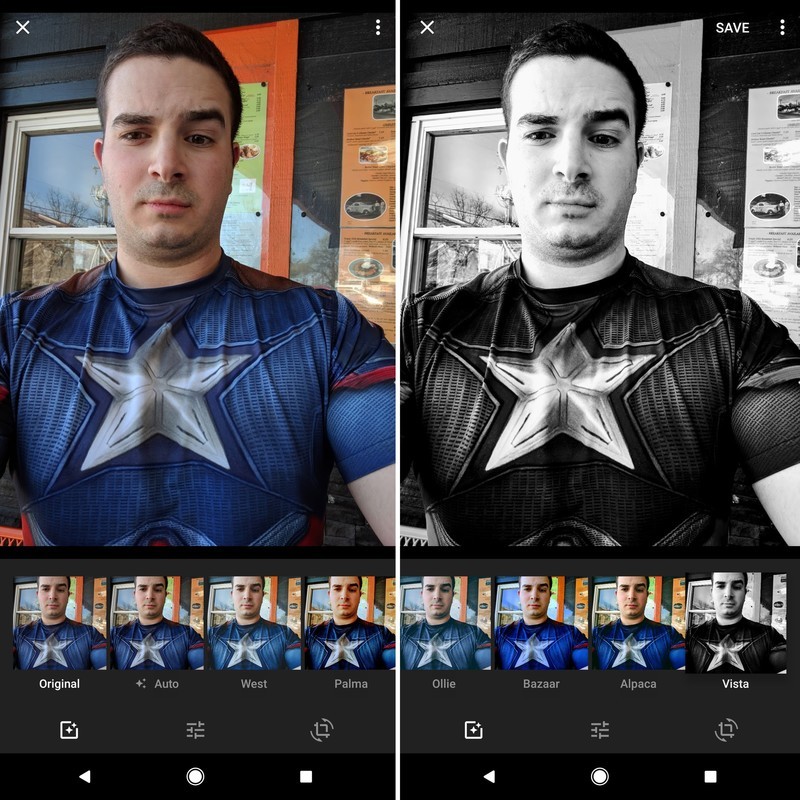
Anyone who has spent time uploading photos to Instagram is probably pretty familiar filters. These specific effects allow you to adjust the entire photo with a single tap, overlaying the photo to look a certain way. In Google Photos you have access to 13 different filters that you can use. There are a variety of different ones here including an auto filter, and several black and white photos. To apply a filter all that you need to do is scroll through the options and choose the filter that you like the most.
- Open Google Photos.
- Tap the photo that you want to edit.
- Tap the slider icon at the bottom of your screen to open the editing tools.
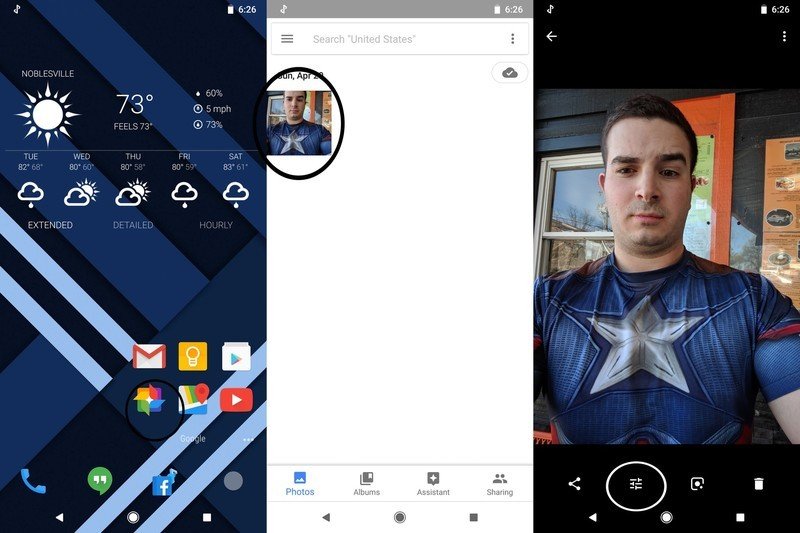
- Swipe across the filters and choose the one you want to use.
- Tap Save, to save the filter on your photo.
How to use 'Auto' to make your photos look amazing with no work
The first 'filter' you can select in Google Photos is the amazing 'Auto' mode that tries to figure out the best combination of exposure, saturation and other settings. It doesn't always work, but pressing on 'Auto' can have a big positive effect on your photos. Try it out!
- Open Google Photos.
- Tap the photo that you want to edit.
- Tap the pencil icon at the bottom of your screen to open the editing tools.
- Tap the Auto button and see the results.
How to adjust light, color and pop
Being able to adjust the white balance of a photo can be key to saving a photo that is too bright, or too dim, in equal measure. With Google Photos you actually get access to not just sliders that will let you adjust the light, but also color, and then "pop".
With Light and color you have extra options past the initial slider bar. You'll be able to adjust exposure, contrast, whites, highlights, shadows, and vignette for light. With color you can adjust saturation, warmth, tints, skin tone, and deep blue. Each option is available for use with a slider bar to ensure that you have the most control over the final product of your photo edits.
- Open Google Photos.
- Tap the photo that you want to edit.
- Tap the slider icon at the bottom of your screen to open the editing tools.

- Tap the icon of slider bars at the bottom middle of your screen.
- Use the slider bars to adjust the Light, Color or Pop of your photo.
- Tap the arrow next to Light or Color to open up the advanced options.
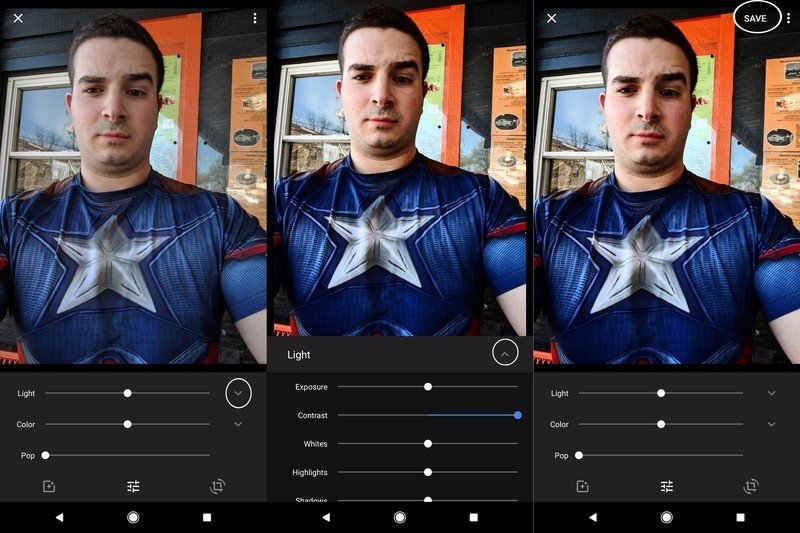
- Use the slider bars to make additional edits.
- Tap Save at the upper right corner of your screen to save your edits.
How to crop and rotate photos
There are times when you take a photo and you need to adjust it a bit before you're ready to upload. You may need to crop the photo to ensure there isn't anything unsuitable for social media lurking in the background, or need to rotate the photo so that it's lined up properly. You also have the option to change the scale of the photo.
Be an expert in 5 minutes
Get the latest news from Android Central, your trusted companion in the world of Android
- Open Google Photos.
- Tap the photo you want to edit.
- Tap the slider icon at the bottom of your screen to open the editing tools.

- Tap the crop icon on the bottom right of the screen.
- To adjust the angle of your photo use the slider bar at the bottom of the screen.
- To rotate your photo tap on the rotate icon at the right of your screen.
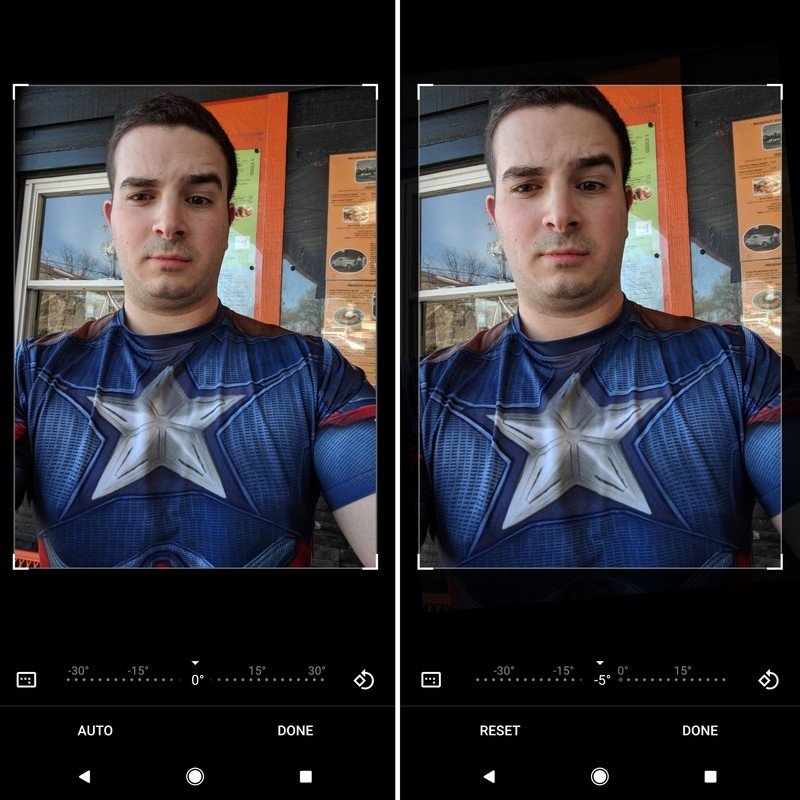
- To change the aspect ratio, tap the icon on the left side of your screen, and then tap the ratio you desire.
- To zoom on your photo, pinch your fingers to zoom in.
- To crop your photo use your finger to drag the corners of the photo to where you want them.
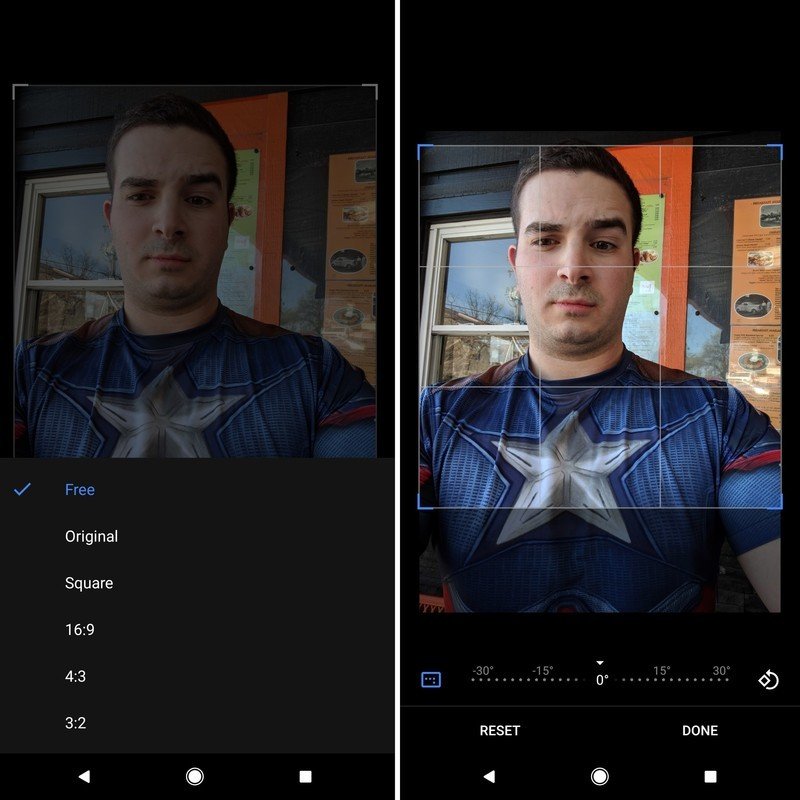
- Tap Done to save your edits.
How to undo edits
There are times when you finish editing a photo and realize that something about it just looks off. Nobody wants to upload a photo that looks goofy thanks to over saturation, for example. That's why it's so easy to undo all of those crazy edits you just applied to your photo with just a tap of a finger.
Note: Google does not make permanent changes to any of your photos, so any edits can be undone for as long as the photo remains on Google Photos.
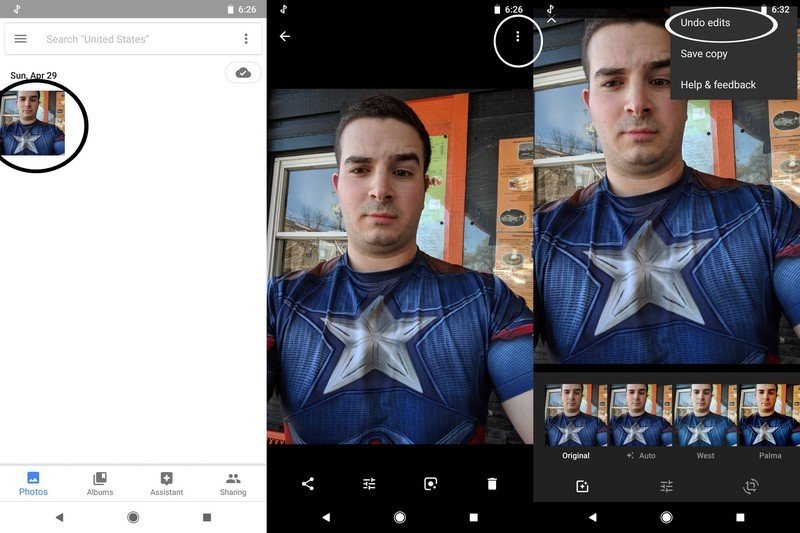
- Open Google Photos.
- Open the edited photo that you want to revert.
- Tap the overflow icon that looks like three vertical dots at the upper right of your screen.
- Tap undo edits to remove all edits and revert your photo to its original form.
Don't forget Assistant
One aspect of Google Photos that is often overlooked is the incredible Assistant, which uses your photos to create GIFs, collages, stylized photos and more. It even groups together photos from a particular day.
Understanding Assistant in Google Photos
Google Photos makes editing easy
Google Photos is an excellent all around app for the photos that you take with your phone. It's also got the editing tools that you need in order to make sure that your photos look as fantastic as possible before you upload them. Whether that means rotating and cropping a photo, adjust levels of light and color, or using filters to make your photos look otherworldly, Google Photos has you absolutely covered.
Have you used the editing tools within Google Photos? Is there an editing tool we failed to mention? Be sure to tell us all about it in the comments below!
Jen is a staff writer who spends her time researching the products you didn't know you needed. She's also a fantasy novelist and has a serious Civ VI addiction. You can follow her on Twitter.

