How to change DNS on PlayStation 4

DNS made the headlines recently when Cloudflare announced it's new 1.1.1.1 service promising speed and security. Google is another high-profile company that offers a free DNS, and in both cases, or with any others you could use, it'll likely be better than the one your ISP provides.
In the case of the PlayStation 4 you can apply a custom DNS directly to the console. It's not particularly obvious how to do it, but once you know where to look, it's pretty easy.
Here's what you need to know.
- Go to the settings menu on your console.
- Select network.
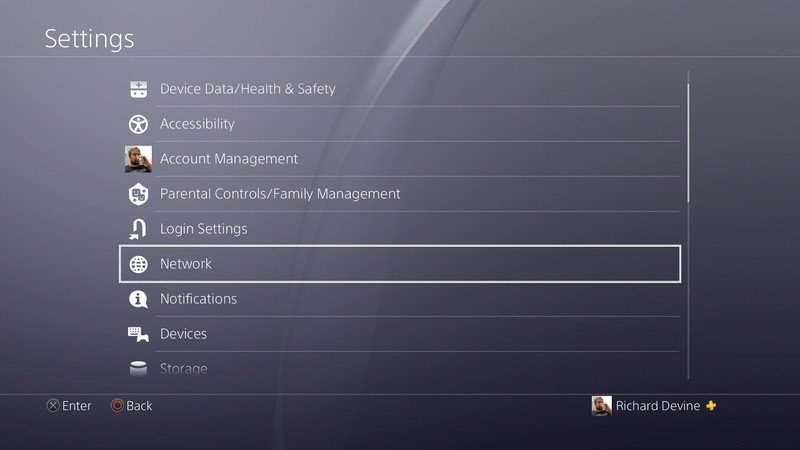
- Next, select the set up internet connection option, regardless of whether you already have one set up on your console.
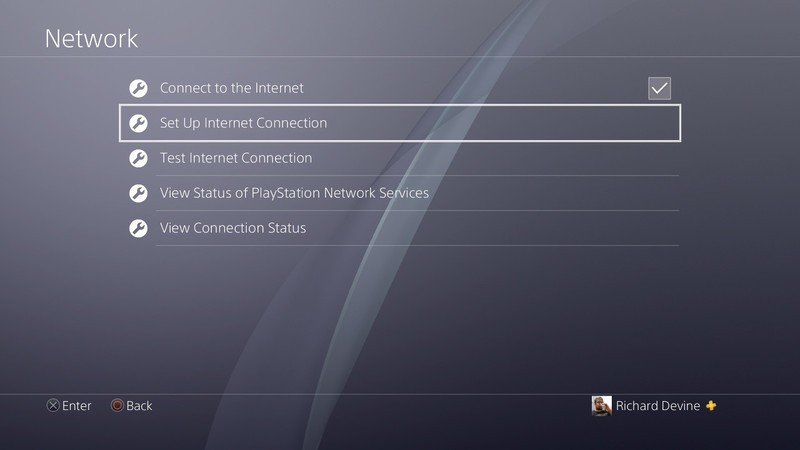
- Choose Wi-Fi or LAN depending on your preference.
- Select the custom set up option.
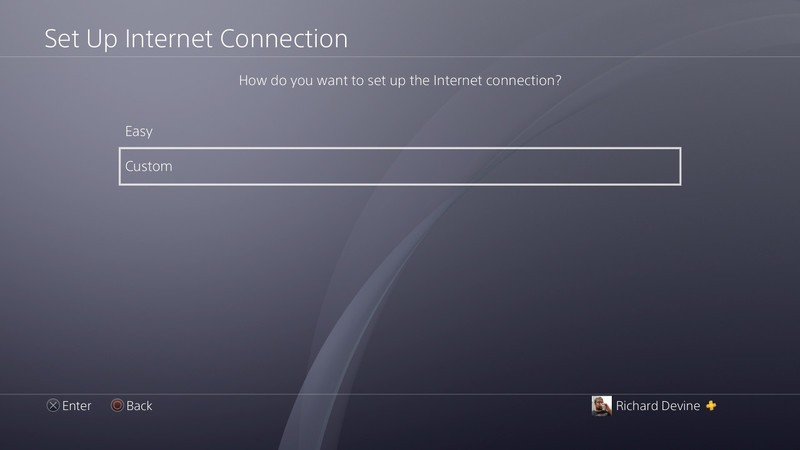
- The next steps will refer to IP address and DHCP settings, if you have no preference choose the default for both.
- When DNS settings appears, choose manual.
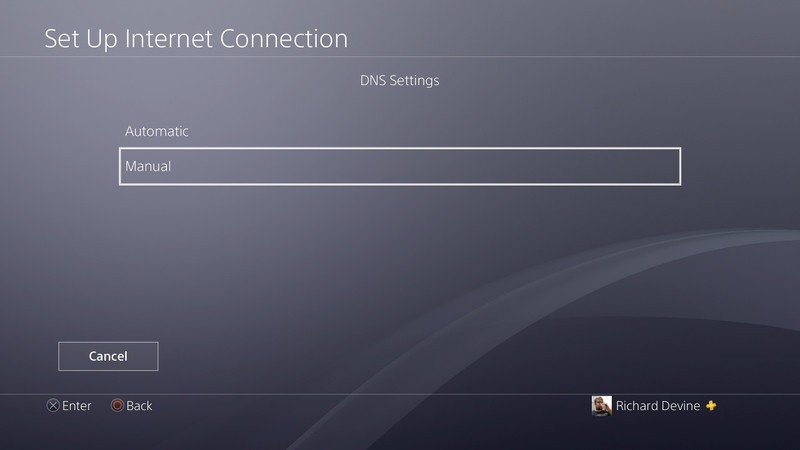
- Enter the values for the primary and secondary DNS.
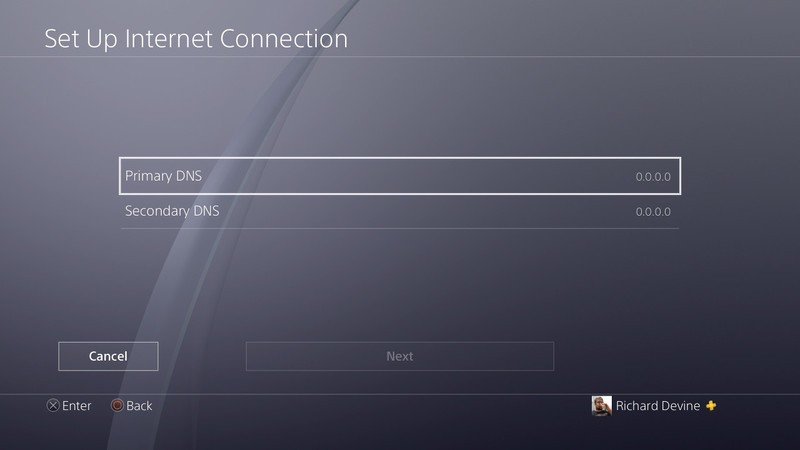
Now, once you complete the setup process, your console will be using the DNS you chose rather than an automatic one. It's important to remember that you need to follow these steps to apply the change to the console, you can't simply amend the DNS settings on your existing internet connection.
Get the latest news from Android Central, your trusted companion in the world of Android

