How to use iMessage on Chromebooks
Thanks to this app, you can finally use iMessage on Chromebooks.
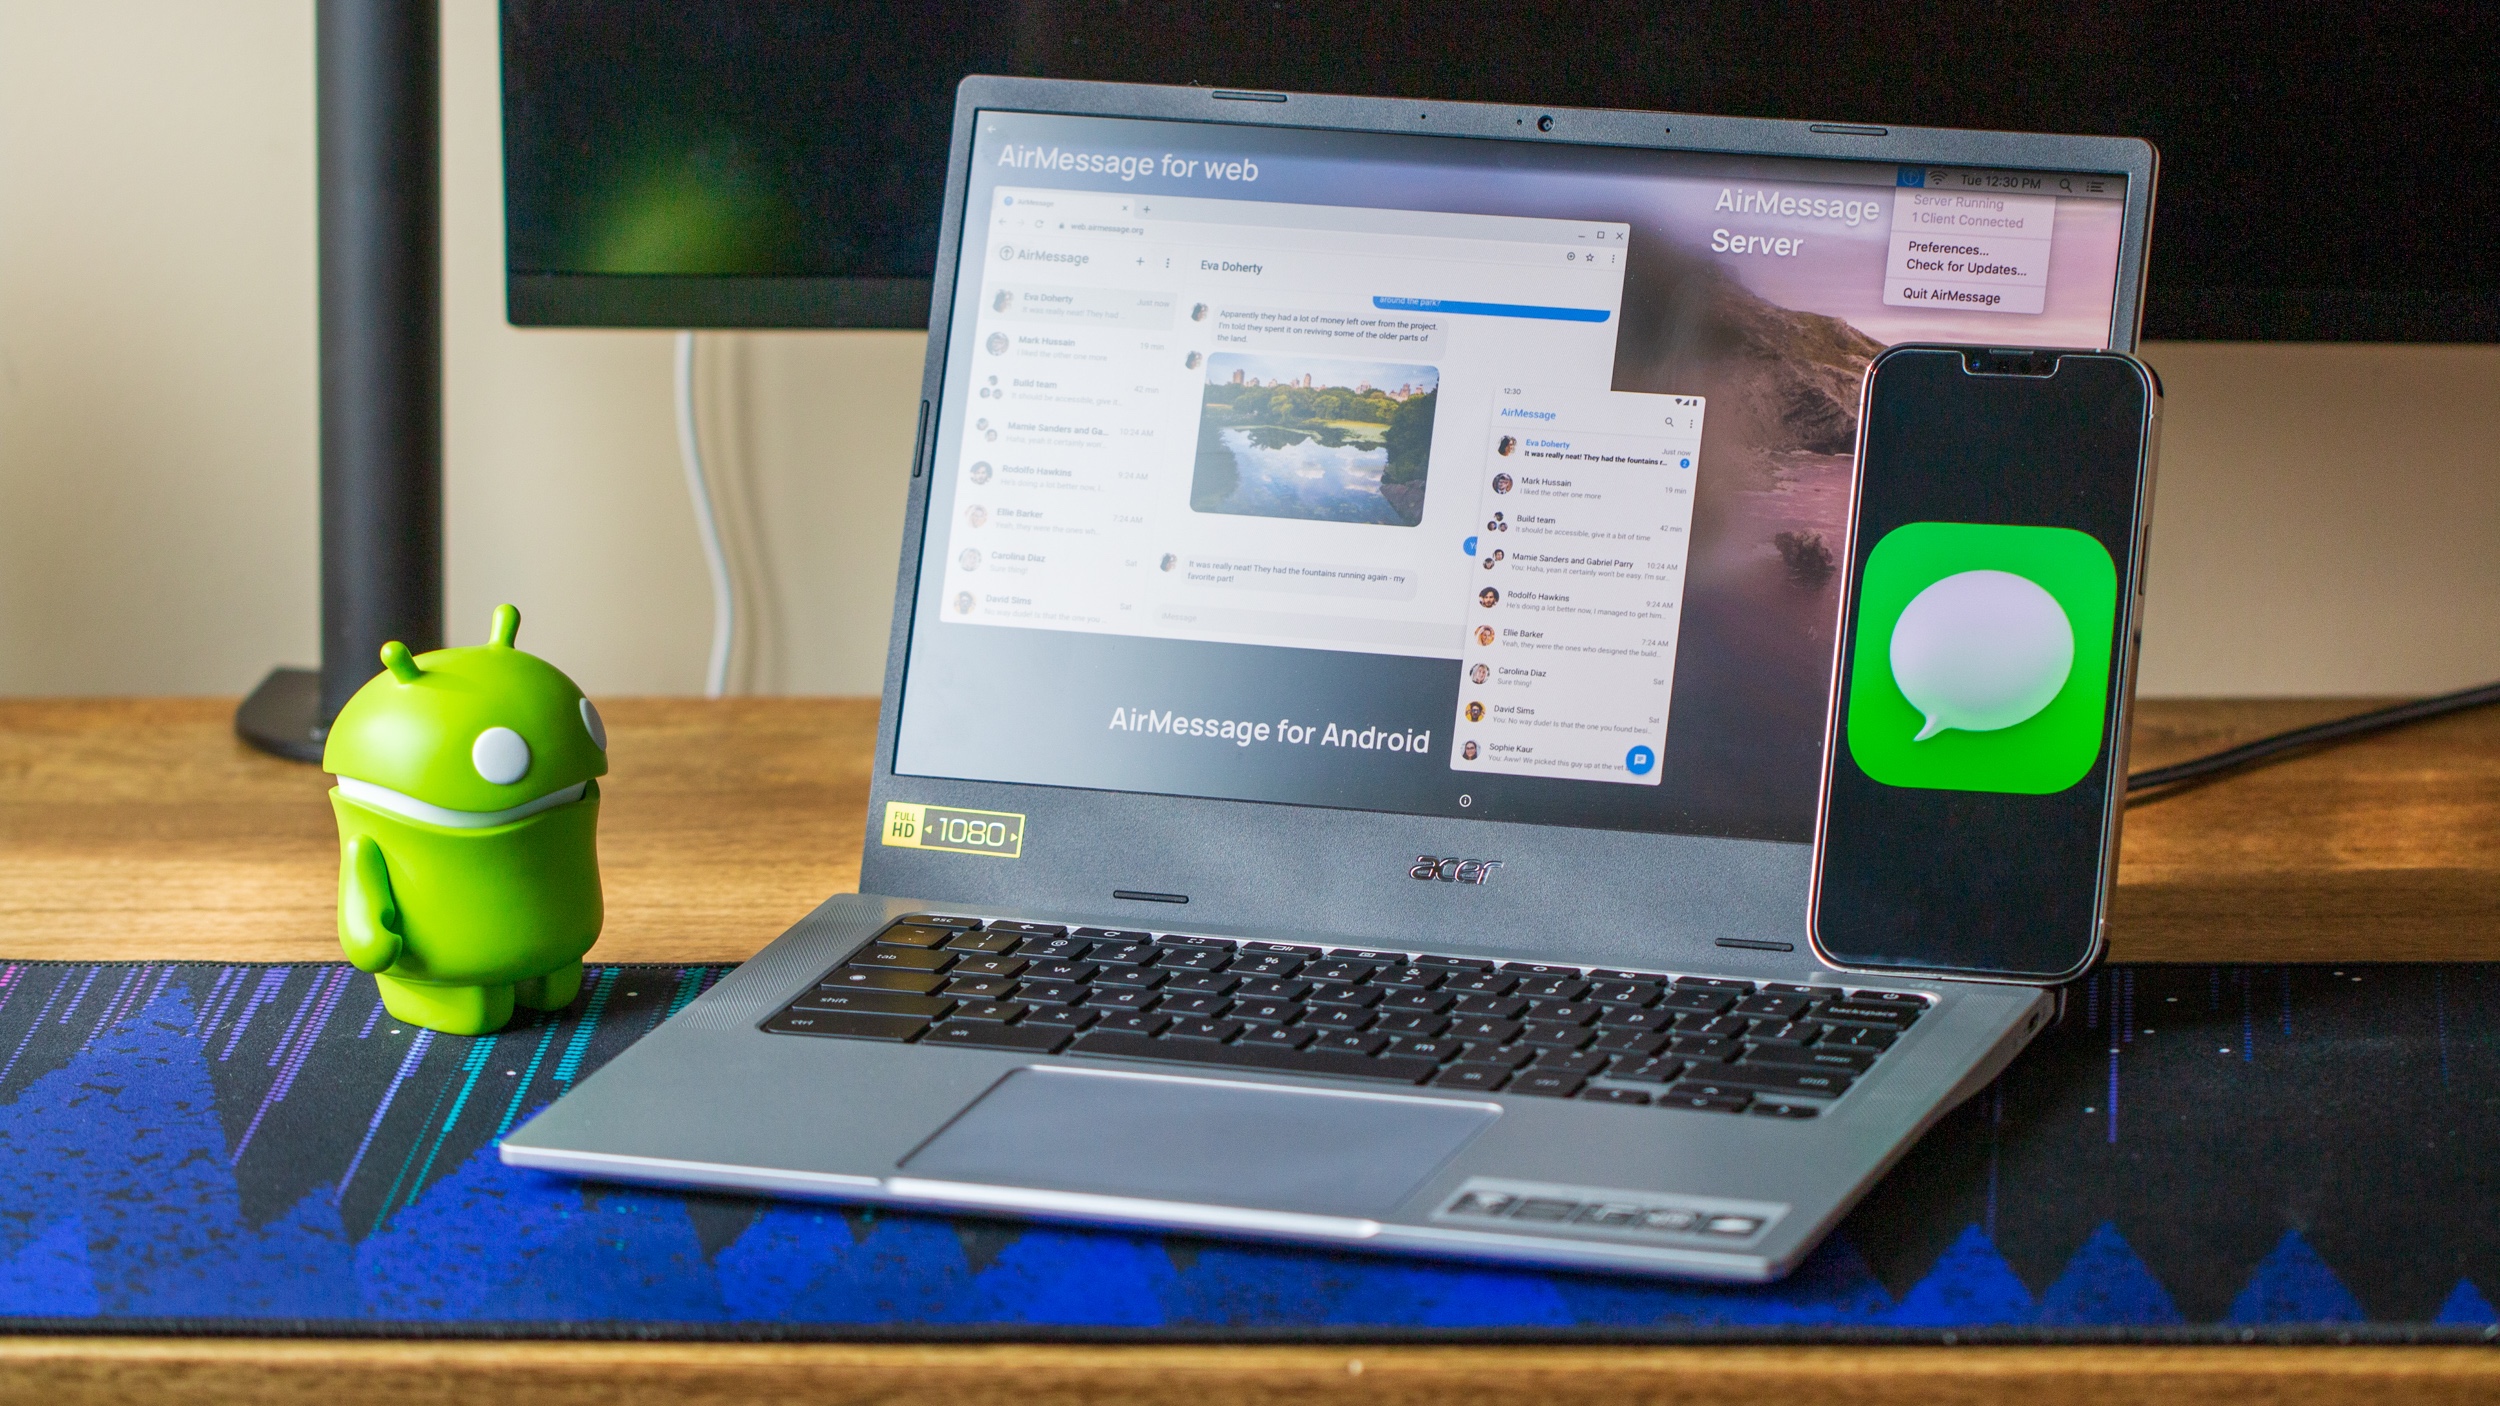
For years, Android users have been dreaming of the day that iMessage support comes to their favorite phones and other devices. Unfortunately, Apple still hasn't gotten the memo yet, even when (not directly) being called out by various Google executives.
In previous years, the workarounds weren't exactly the greatest, and hardly ever worked consistently. Now there's a bit of light for those who want to use iMessage on Chromebooks and other devices, thanks to AirMessage.
What you need to use iMessage on Chromebooks
In order to get everything set up so that you can use iMessage on the best Chromebooks, there are a few things that you'll need:
- A Mac running macOS 10.10 Yosemite or newer
- AirMessage Server
- AirMessage companion app
- An active Apple ID
Unfortunately, the key here is that you do, actually, need a compatible macOS device in order to get everything working. Luckily, this version of macOS is compatible with various Mac models, but you'll get the best support from any Mac released in mid-2012 or later. This includes the 2012 MacBook, MacBook Air, iMac, Mac Mini, or Mac Pro.
You'll also need to have an active Apple ID and be signed into the Messages app. If you already have an iPhone, then this isn't something that you need to worry about. With all of that in mind, you're ready to get started.
How to install AirMessage
Provided that you have a compatible Mac handy, you'll first need to download and install the AirMessage Server application. Just as a note, the app was recently updated to support Macs using Apple Silicon (also known as the M1 series of chips).
1. From your Mac, navigate to the AirMessage landing page.
Be an expert in 5 minutes
Get the latest news from Android Central, your trusted companion in the world of Android
2. Under the Installing the server section, click the download button next to AirMessage Server for macOS.
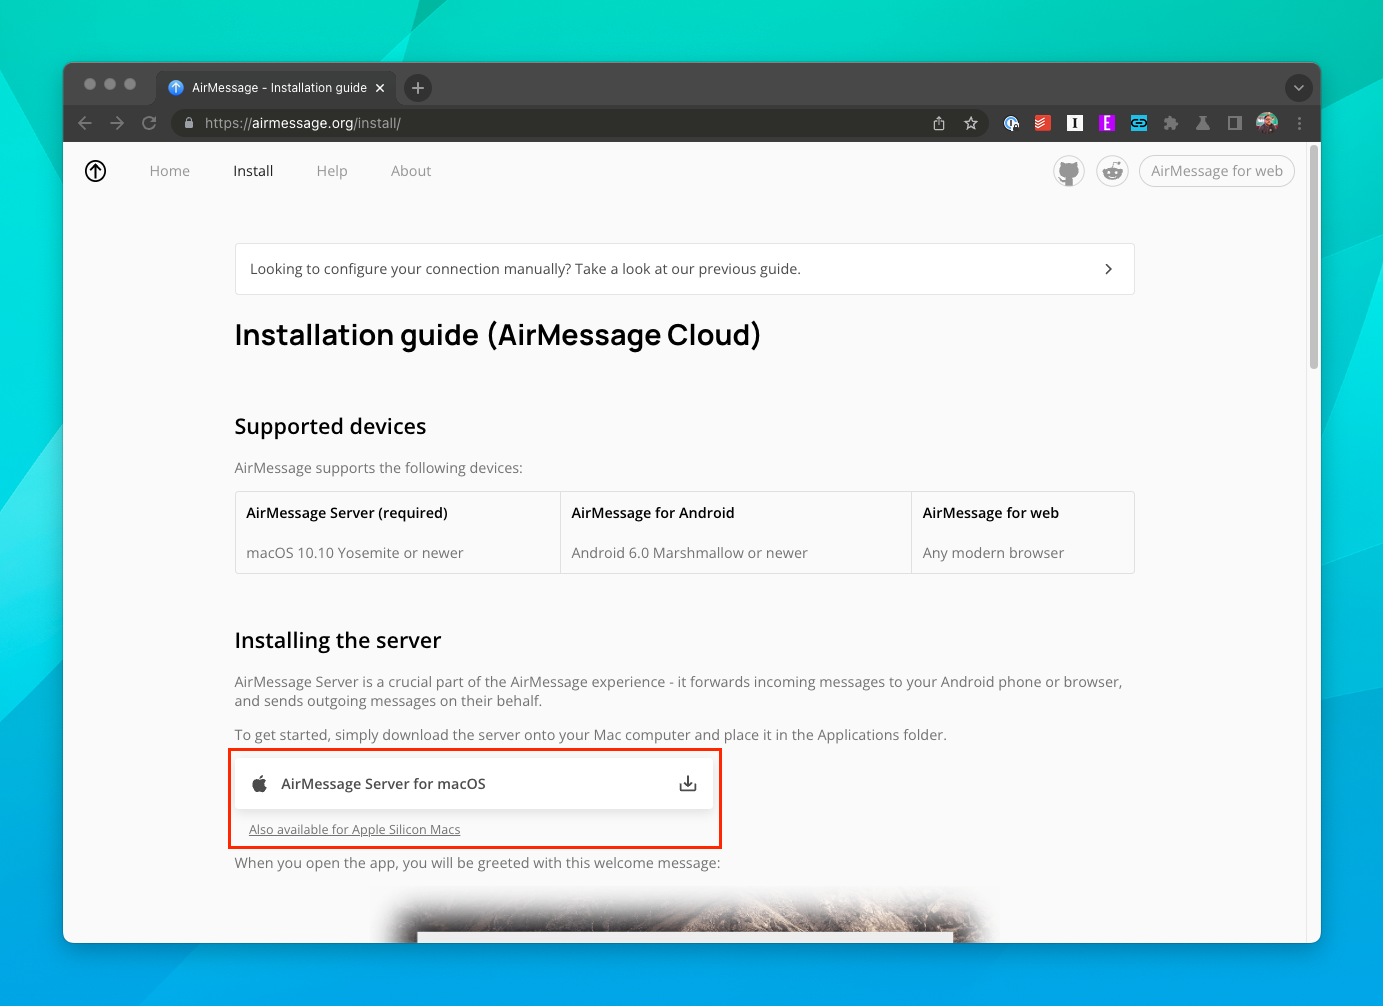
3. Once the download is complete, open the Finder app on your Mac.
4. Navigate to the Downloads folder.
5. Double-click on the AirMessage Server ZIP file to open it.
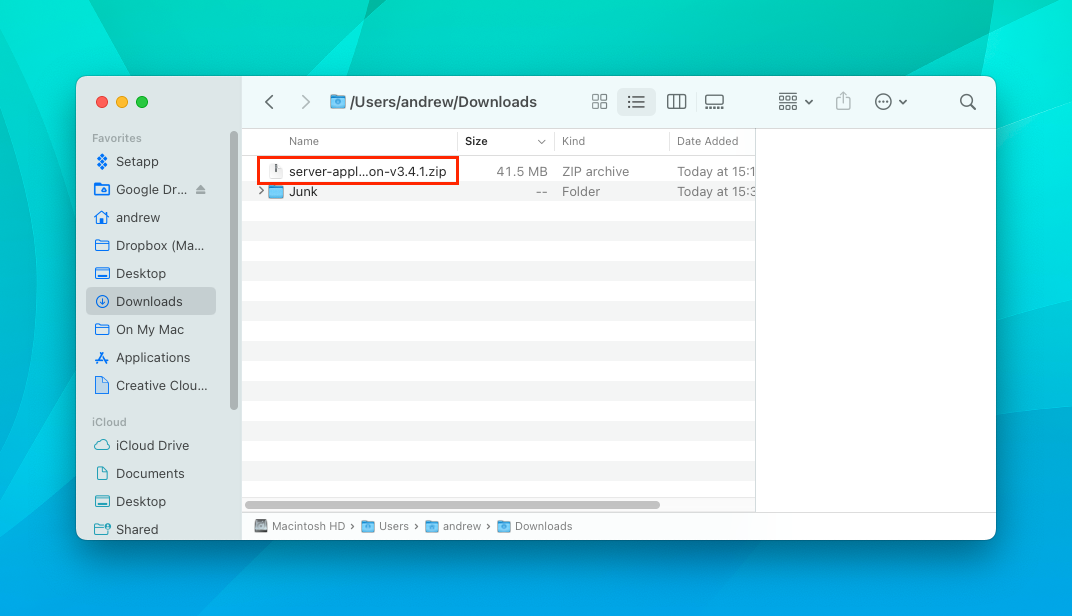
6. Once complete, drag and drop the unzipped AirMessage application to your Applications folder.
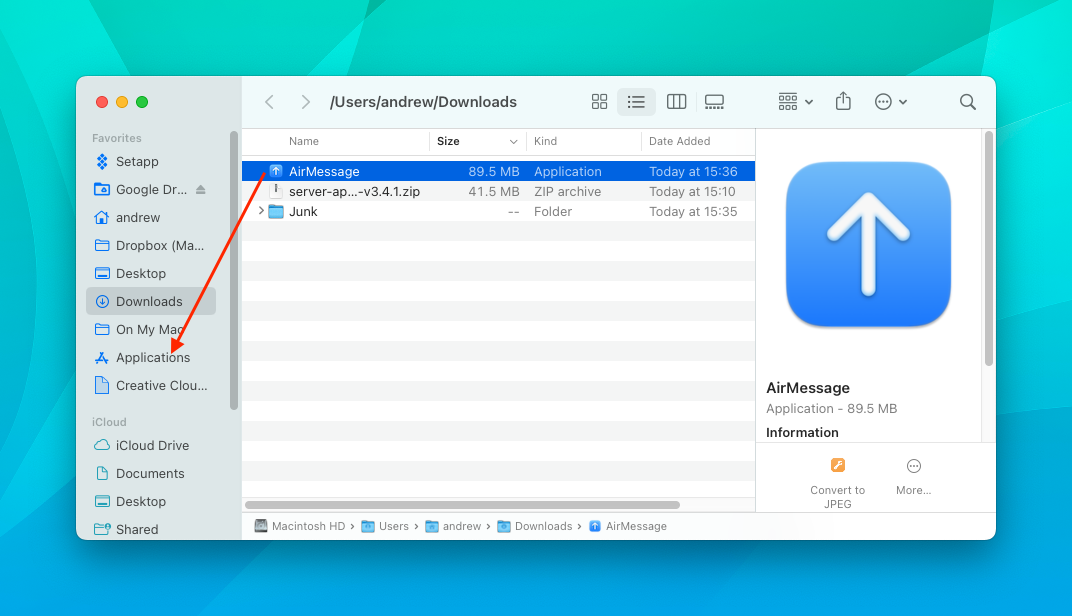
7. Click Applications in the macOS Finder sidebar to open the folder.
8. Locate the AirMessage app and double-click the icon to open it.
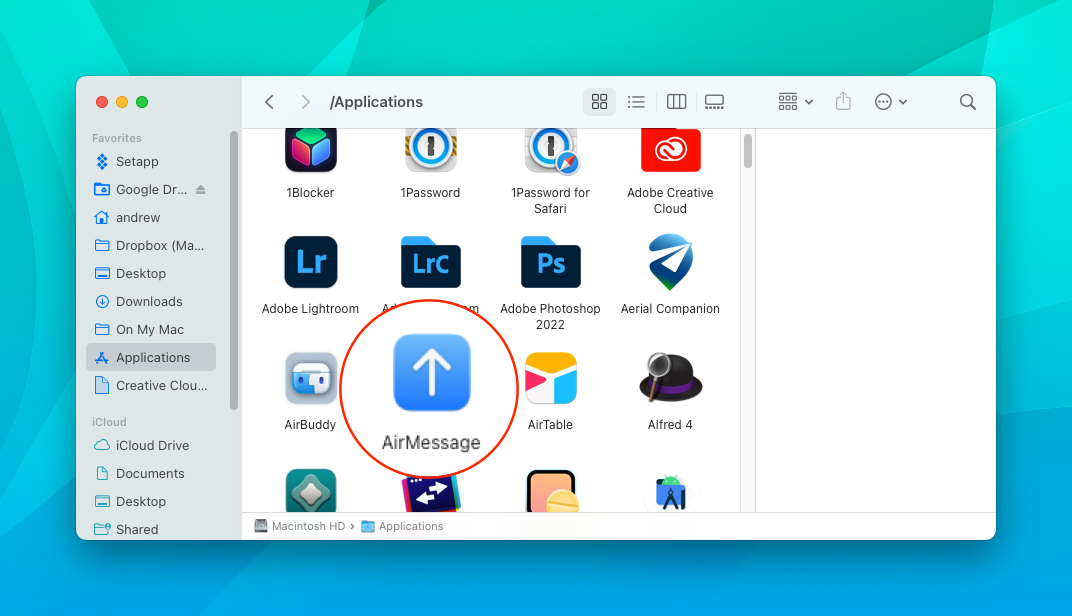
9. When prompted by the security window, click the Open button.
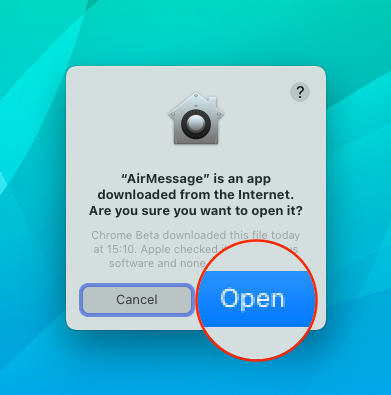
10. Upon first start-up, you'll be prompted with a Welcome to AirMessage Server window. Click the Connect an Account (Recommended) button.

11. Click the Sign in with Google button.
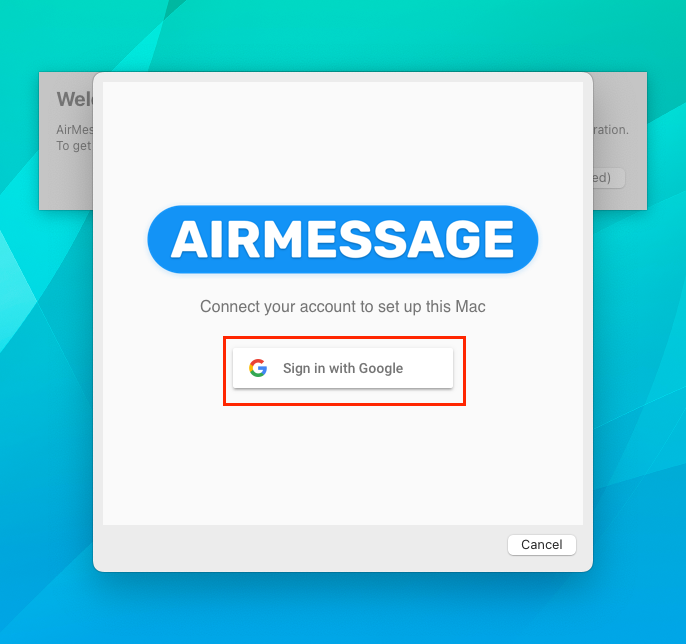
12. Follow the on-screen steps to sign in to your Google account.
13. After your account has been registered, you'll see a "Computer registered successfully" window. Just click the OK button to continue.
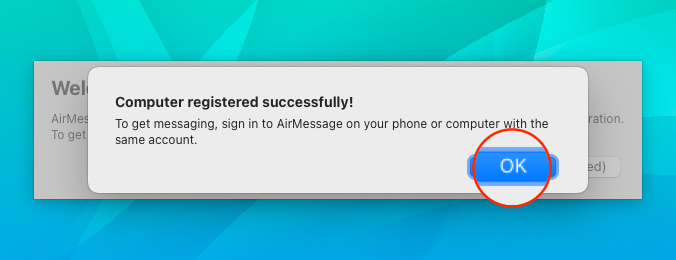
Provide Security & Privacy access
With the AirMessage Server installed, there are just a few more steps that you need to take in order to provide full access to your iMessages with AirMessage. This involves enabling privacy access to AirMessage.
1. Open the System Preferences app on your Mac.
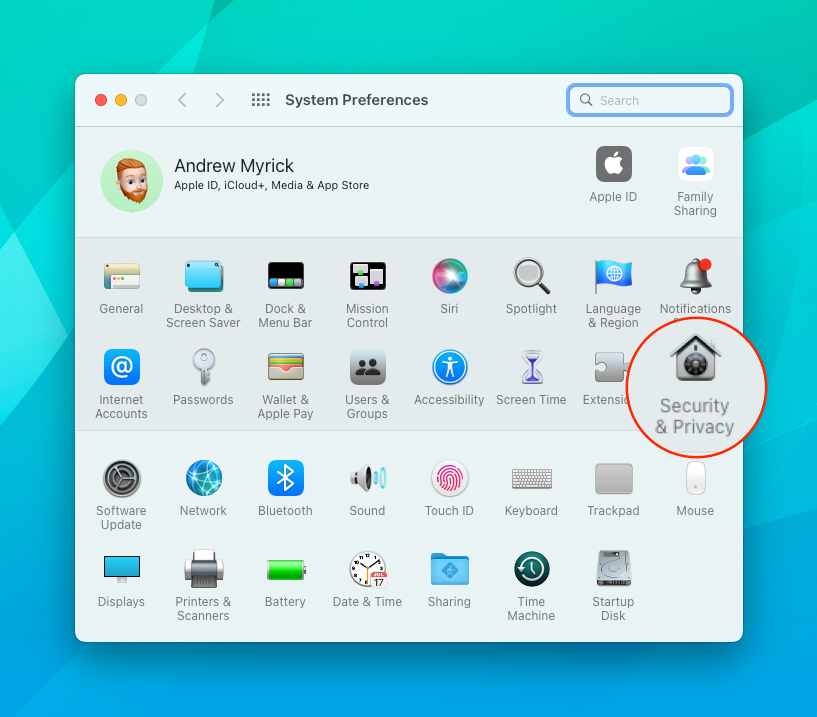
2. Click the Security & Privacy icon.
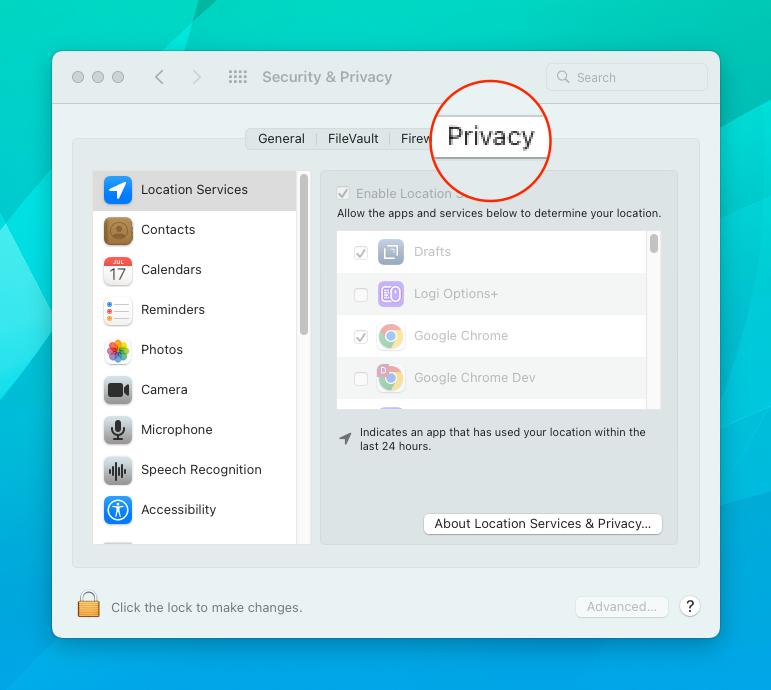
3. Make sure that the Privacy tab is selected at the top of the panel.
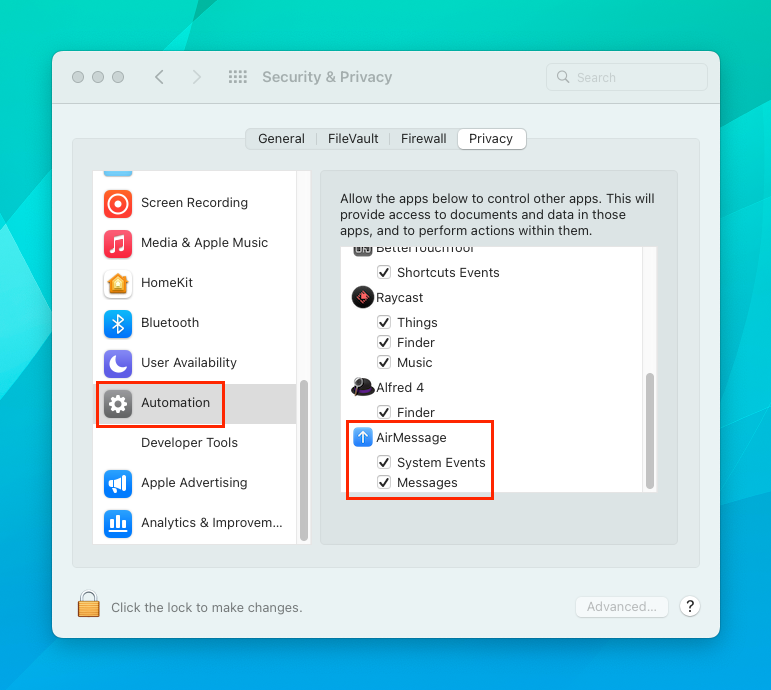
4. In the sidebar, scroll down and select Automation.
5. Scroll down until you see AirMessage and make sure that System Events and Messages are checked.
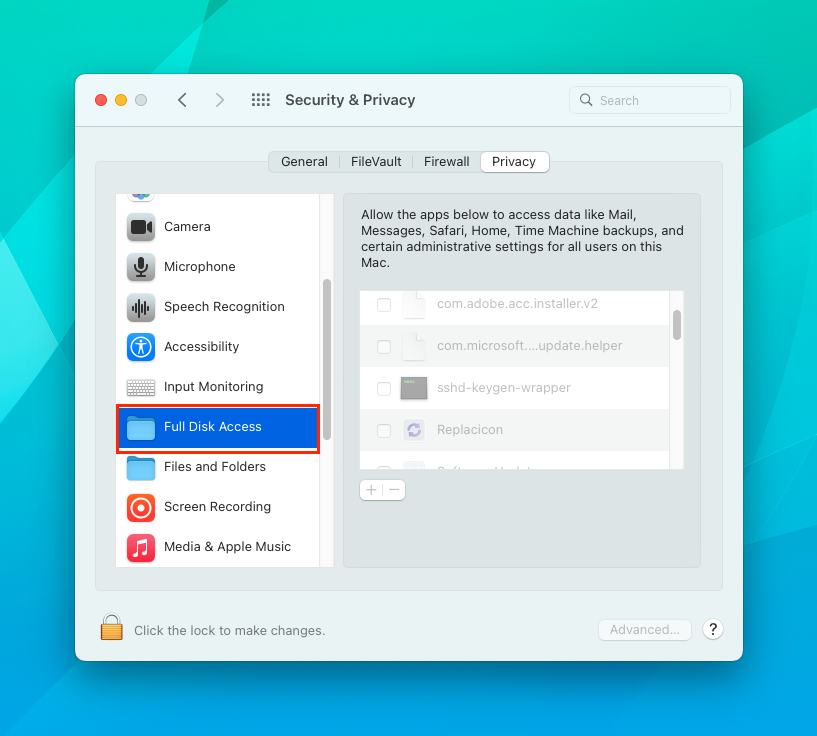
6. In the sidebar, scroll and select the Full Disk Access option.
7. Click the lock icon in the bottom right corner.
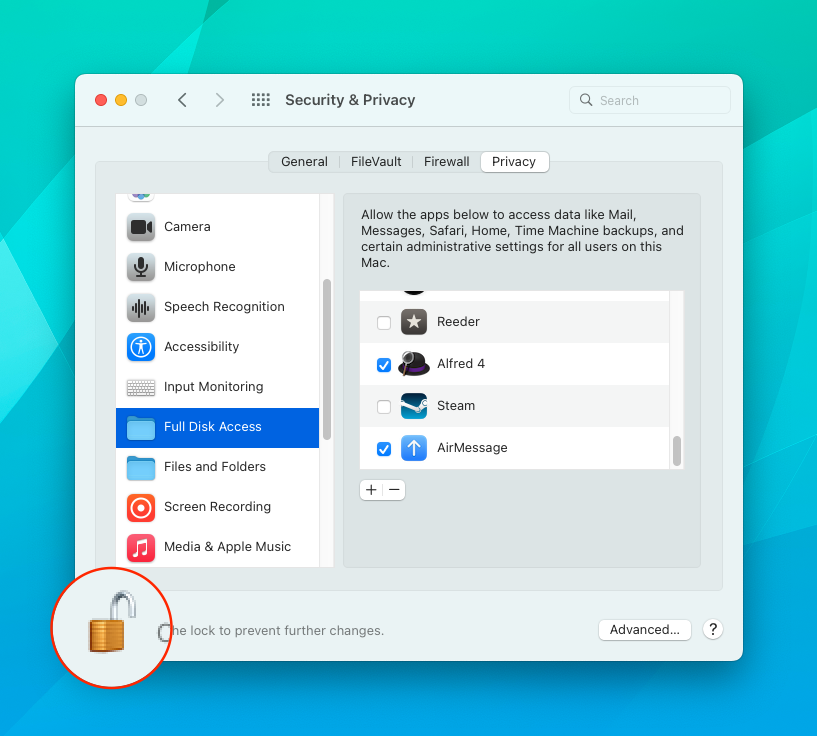
8. Enter the administrative password for your Mac.
9. Scroll down on the right side until you see AirMessage.
10. Click the checkbox next to AirMessage to provide access.
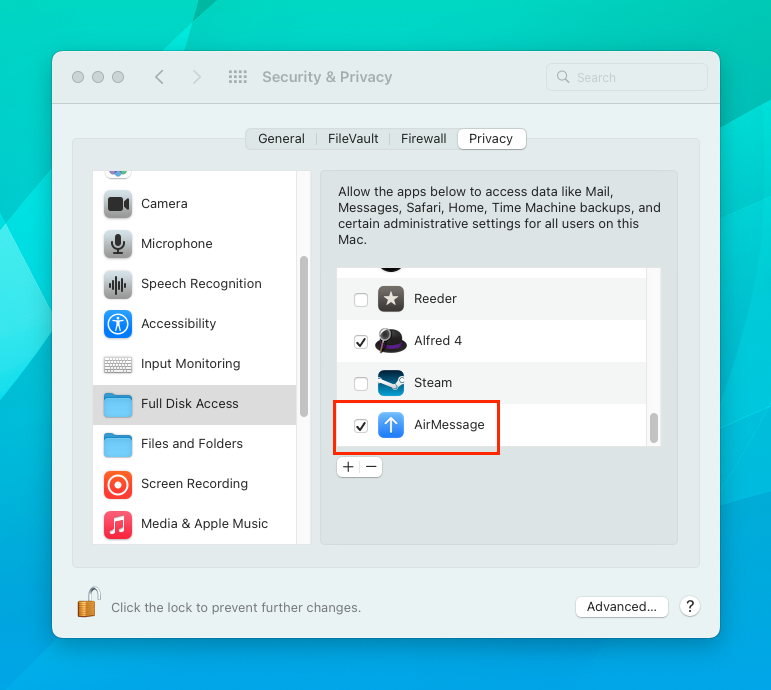
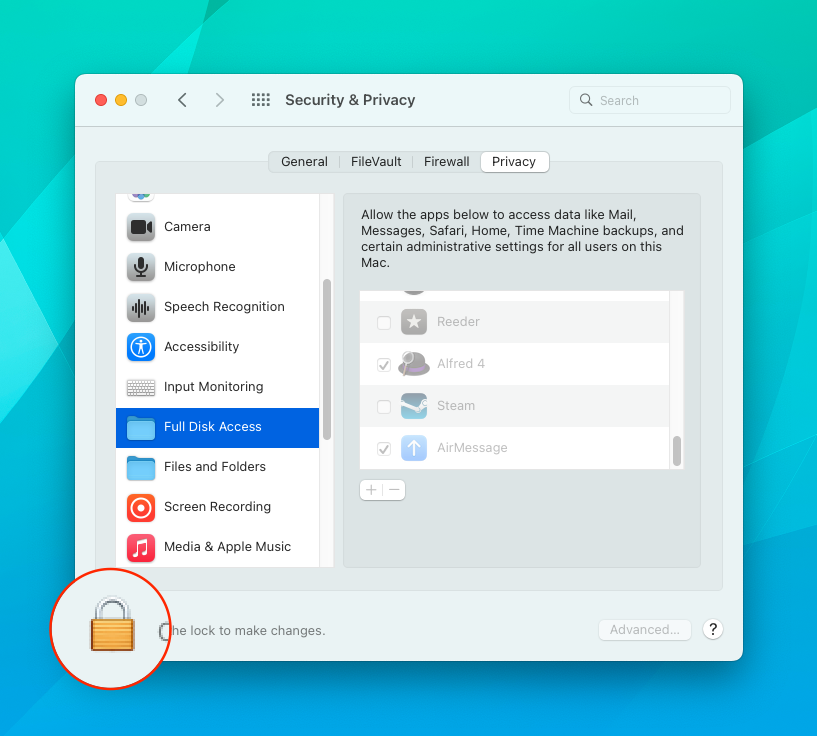
11. Once enabled, click the lock icon in the bottom right corner again.
Don't let your Mac go to sleep
Now that AirMessage Server has access to the necessary security and privacy features it needs to communicate with iMessage. There's just one more series of steps to take.
- Open the System Preferences app on your Mac.
- If you are using a Mac desktop computer, such as a Mac Mini, click Energy Saver.
- Drag the slider for Turn display off after: to around an hour or whatever you prefer.
- Drag the slider for Computer sleep to Never.
- Check the box for Wake for network access.
- Exit the System Preferences app.
You might have noticed that we didn't touch on the steps required if you are using an Apple laptop as a desktop computer. This is because macOS automatically freezes any software running, even if the lid is shut. In the event that you are using any compatible MacBook model to set up AirMessage, you'll need to download an app like Amphetamine from the Mac App Store, or follow the steps below.
1. Open the System Preferences app on your Mac.
2. Click the Battery icon.
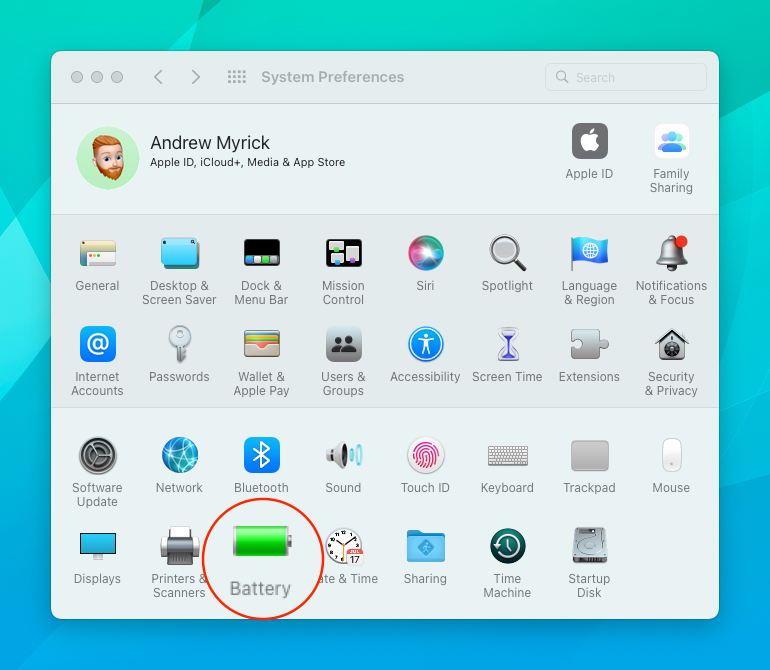
3. In the sidebar, select Power Adapter.
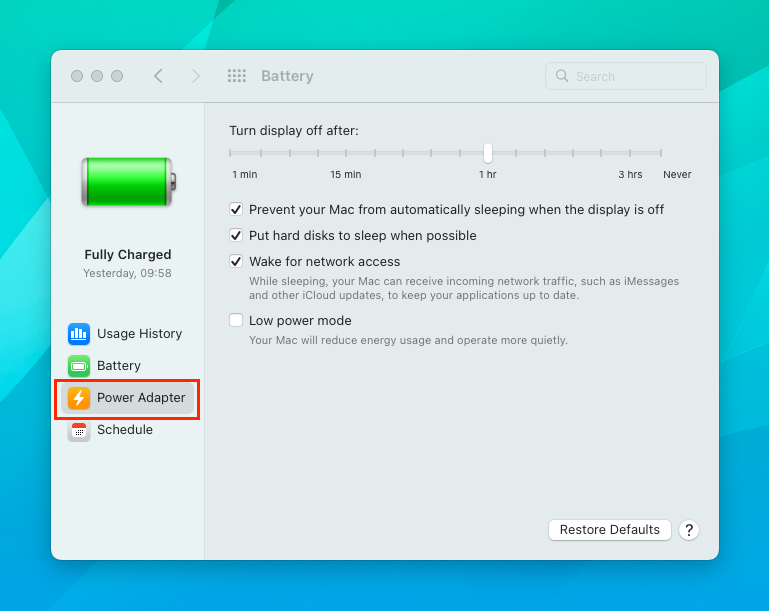
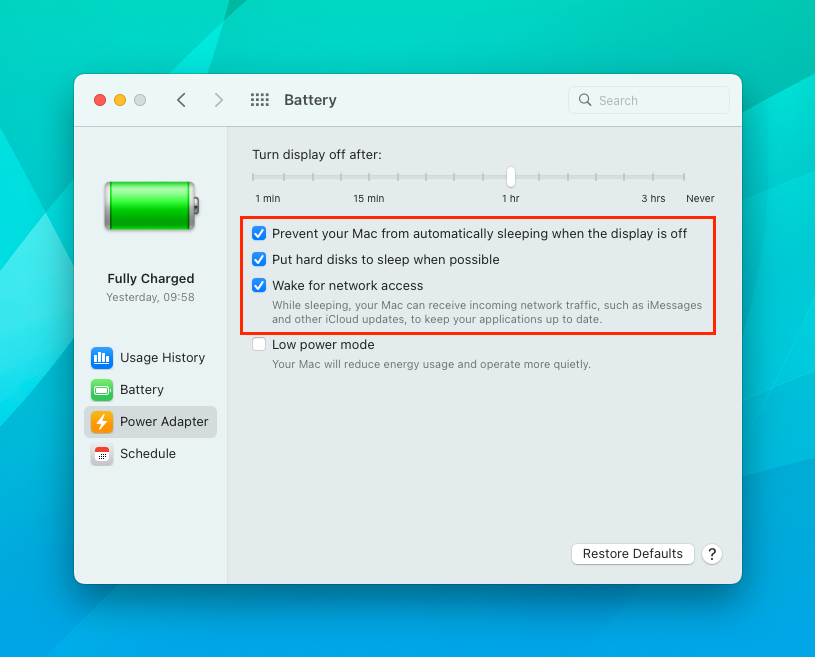
4. Click the checkbox next to Prevent your Mac from automatically sleeping when the display is off.
5. Click the checkbox next to Put hard disks to sleep when possible.
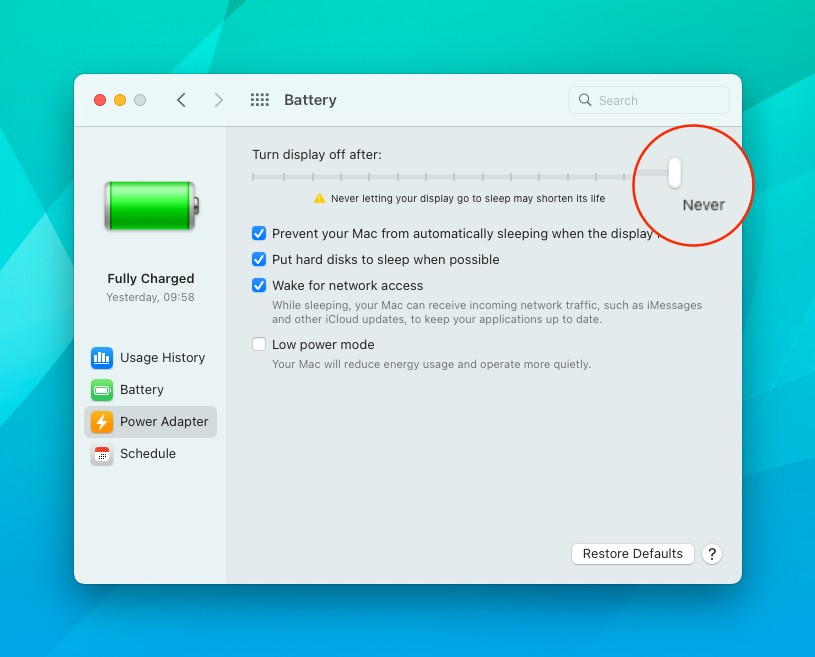
6. Drag the slider for Turn display off after: to Never.
Use Terminal to keep your Mac awake
If you want to go the extra mile to ensure that your MacBook never goes to sleep, there is a command that you can enter. This is using the Caffeinate command, which has been around on macOS for a few years at this point.
1. Open the Terminal app on your MacBook.
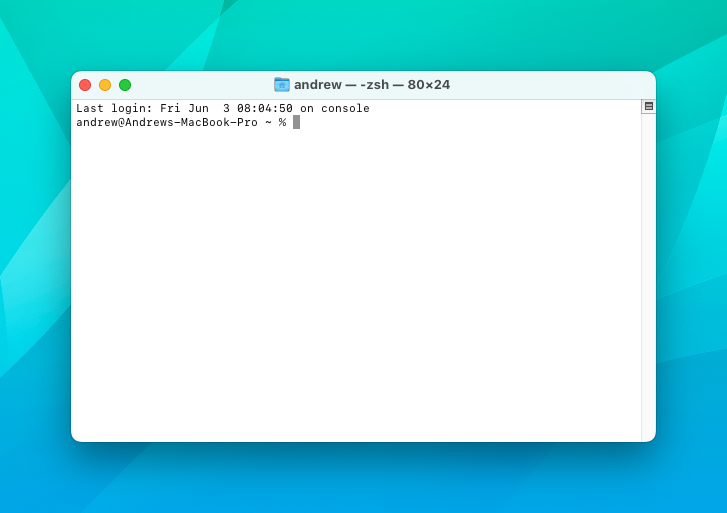
2. Enter caffeinate -is.
3. Press Enter.
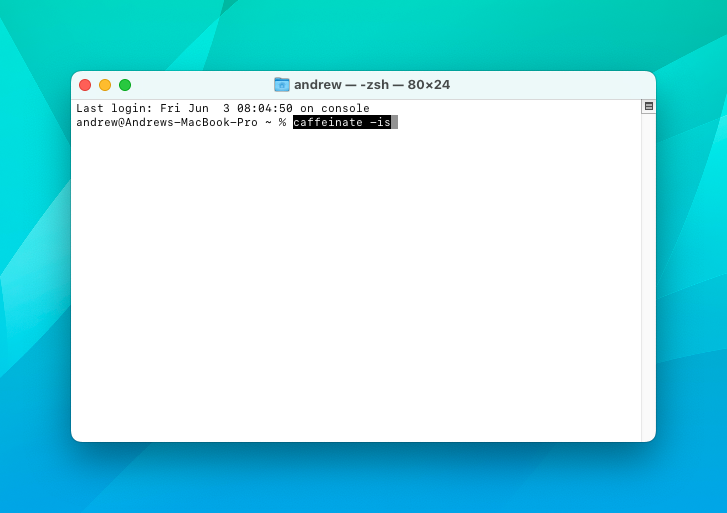
With this enabled, your Mac will no longer automatically sleep, including the hard drive, allowing AirMessage to continue working. As this involves Terminal commands, here's what each command signifies:
- Caffeinate is the command that prevents the MacBook from entering sleep mode, but both the display and hard drive can still turn off.
- -i prevents the MacBook from entering idle sleep after not being used for a certain amount of time.
- -s is most commonly used with laptops, and prevents the system from entering a "forced" sleep mode. This portion of the command only applies when not using battery power.
The easier method is, by far, to download an app like Amphetamine. This handles all of the different settings that you would need to tweak in order to keep your MacBook running. Plus, you don't have to worry about entering the wrong command and potentially needing to reset your MacBook.
How to use iMessage on Chromebooks
So your Mac is all set up with AirMessage configured and signed in. Now's the time for the easiest part of this entire process. Actually being able to use iMessage on Chromebooks.
1. From your Chromebook, navigate to web.airmessage.org.
2. In the address bar, click the Install app button.
3. Click Install, when prompted.
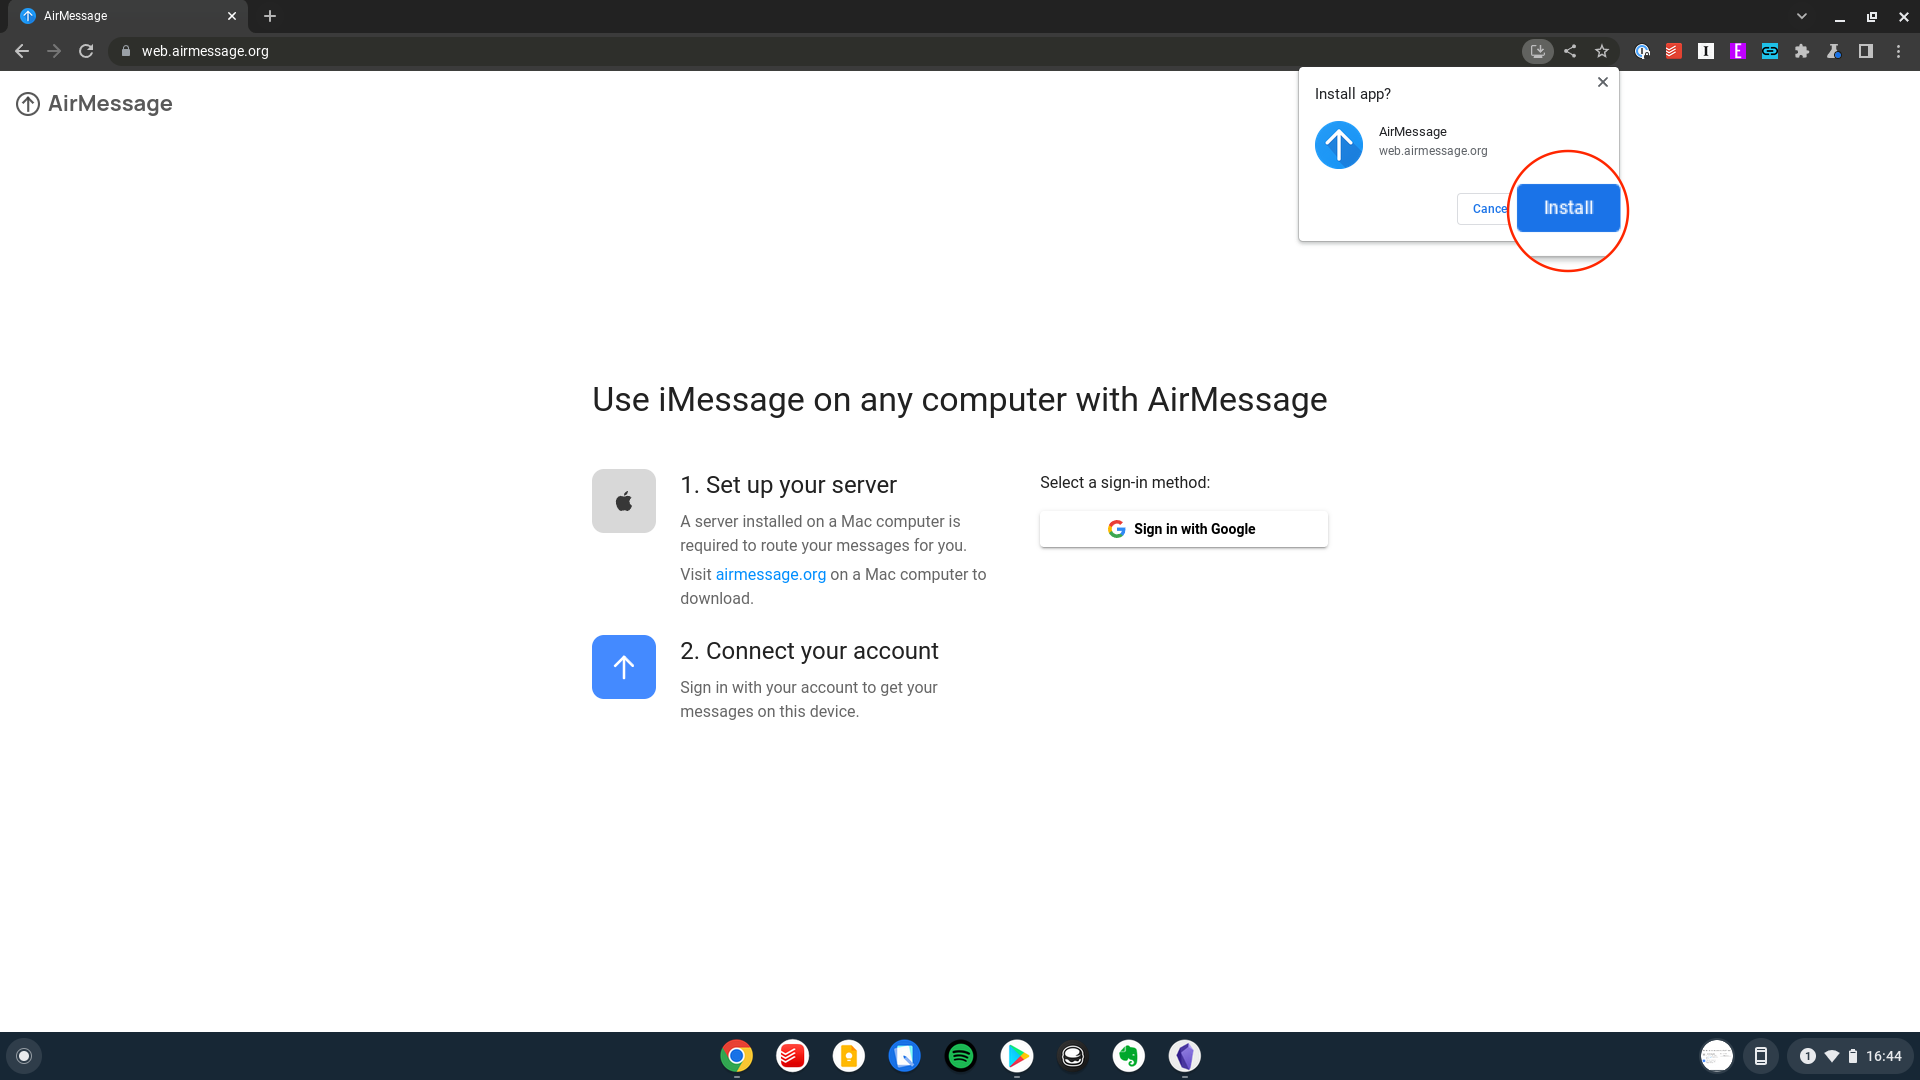
4. Click the Sign in with Google button on the right side of the PWA.
5. Log in with the same Google account that you used when setting up AirMessage Server.
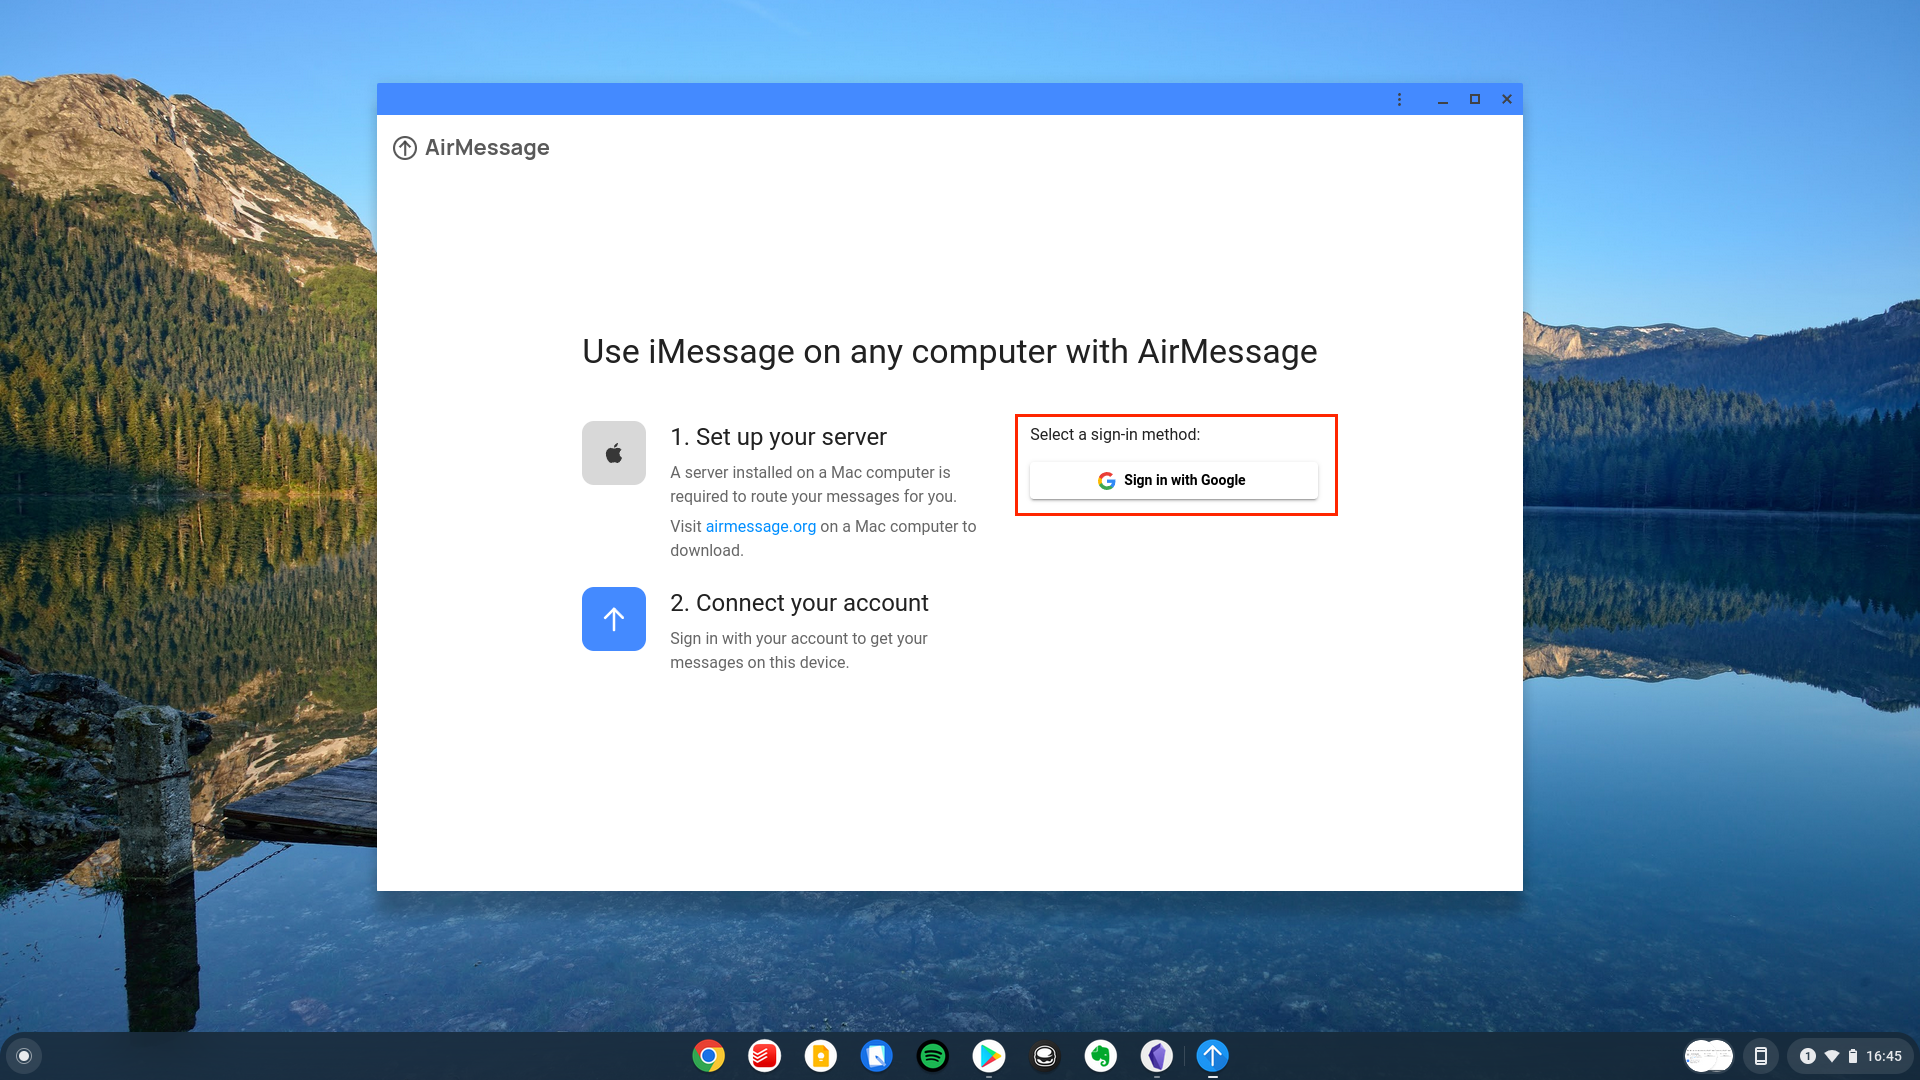
Now, you can view and respond to any iMessages that arrive. You're also able to start new message conversations, and they can be viewed from your Chromebook, iPhone, Mac, or any other device that is using AirMessage.
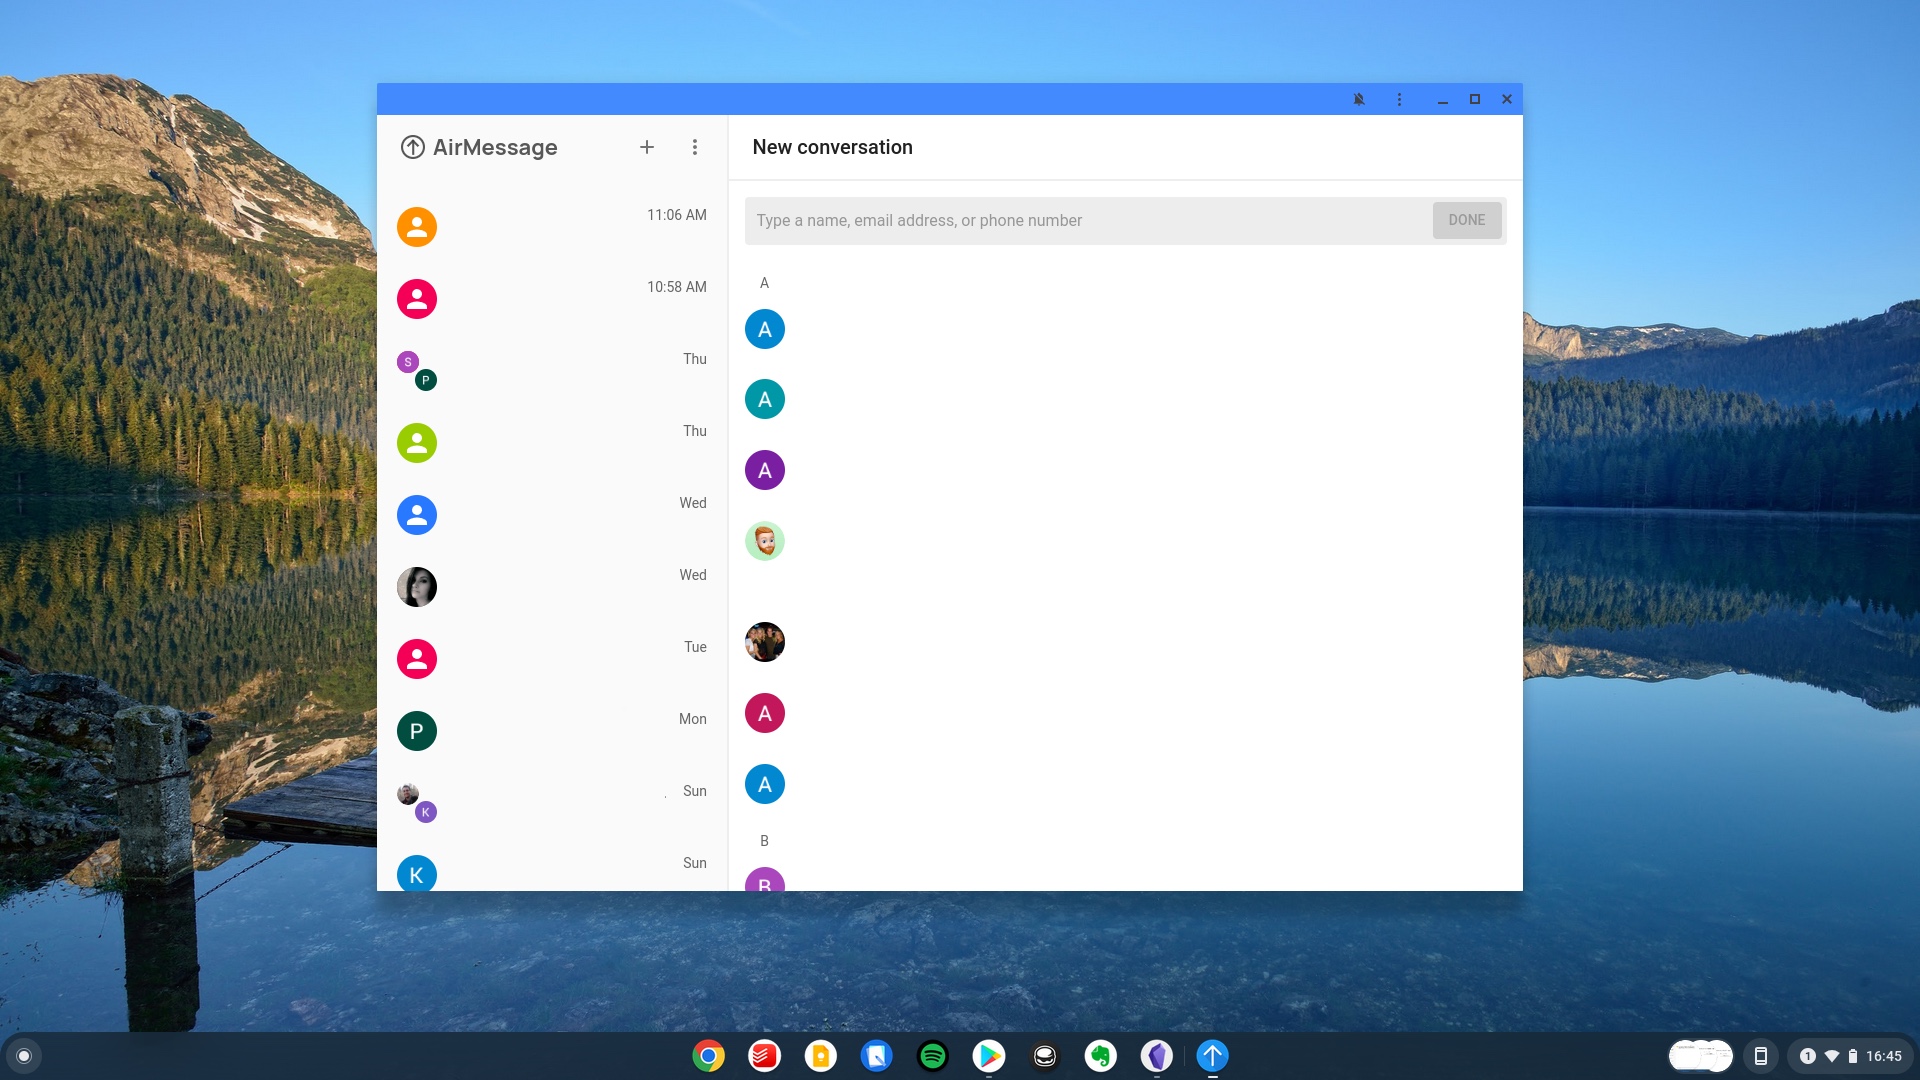
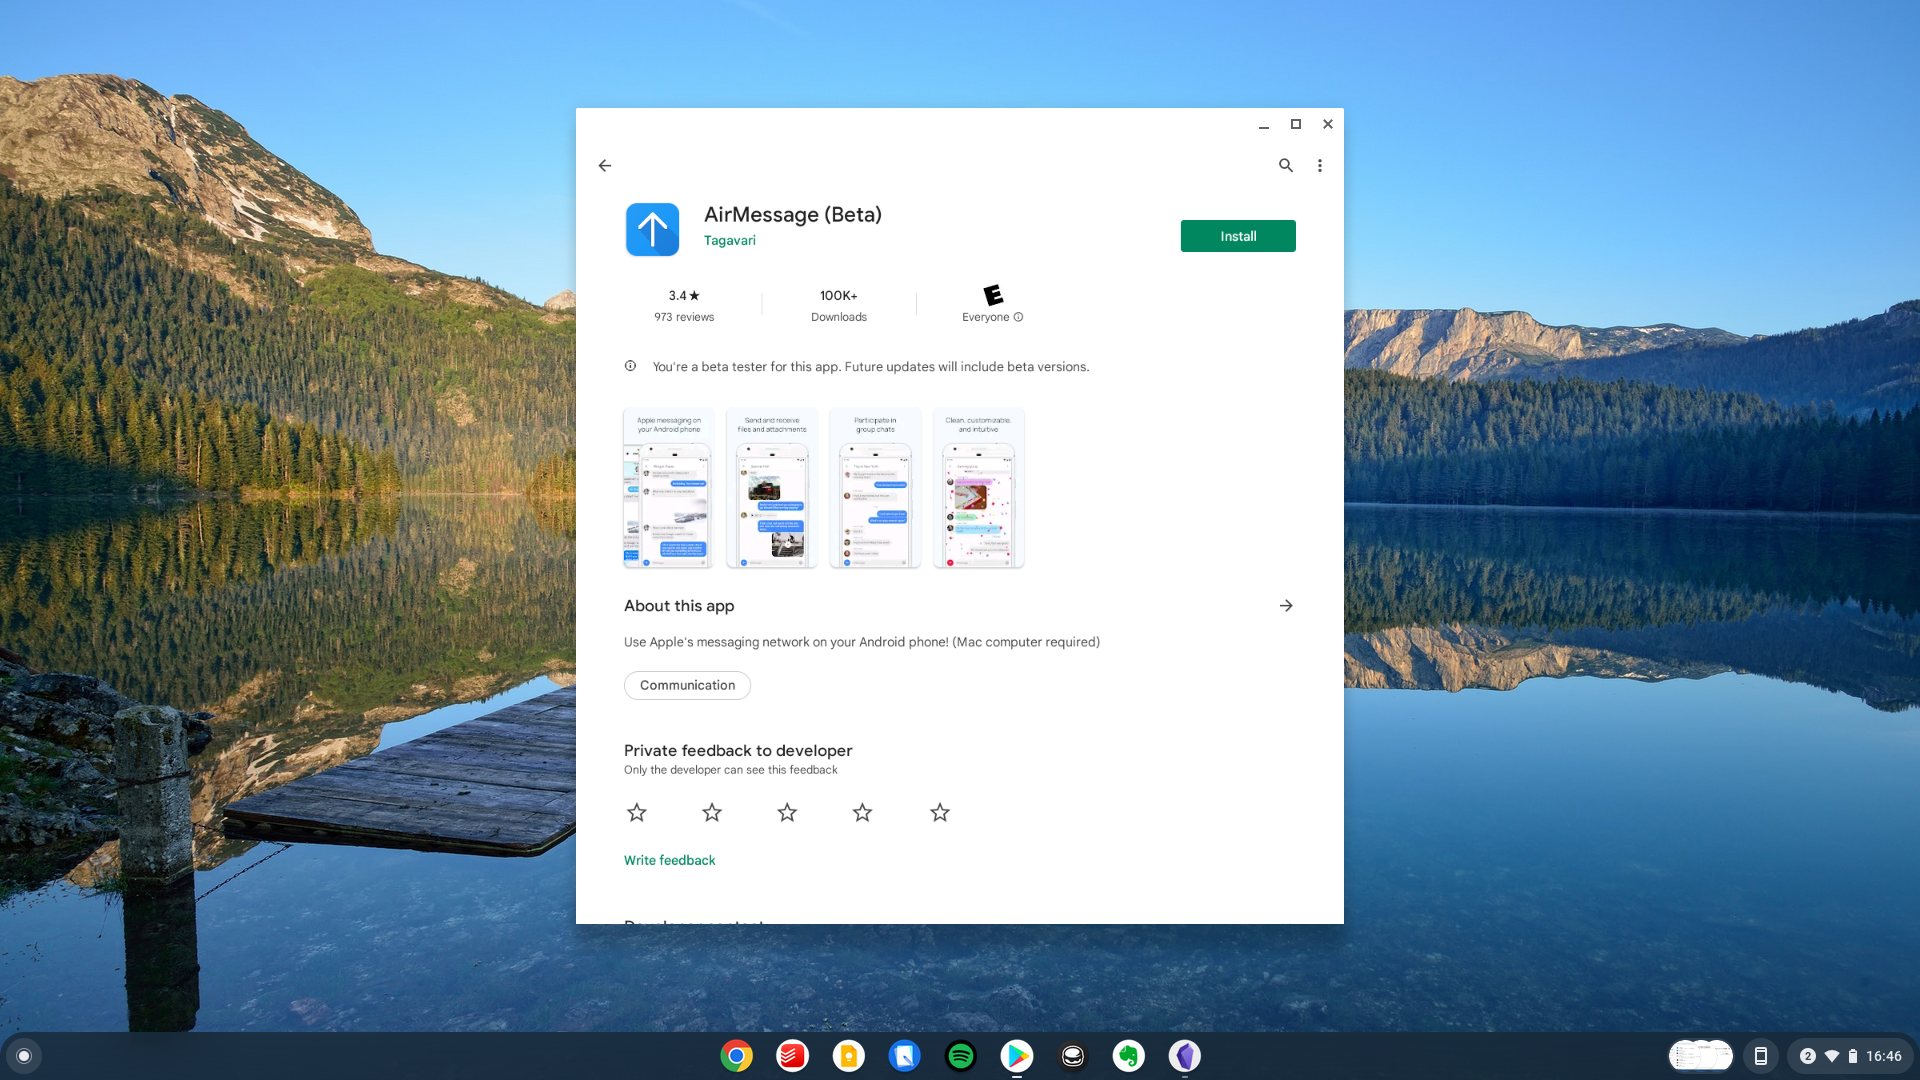
It's also important to point out that there is an AirMessage app available for download from the Google Play Store. Essentially, it's just a web wrapper for the AirMessage client, but if you have a Chromebook that is capable of downloading and installing Android apps from the Play Store, this is another option.
Otherwise, you can just follow the steps above to use the AirMessage web client. From there, there should be a button in the address bar that prompts you to install the Progressive Web App. This works just as the normal app would, but should receive updates much faster than the Play Store version.
It's not perfect, but it works
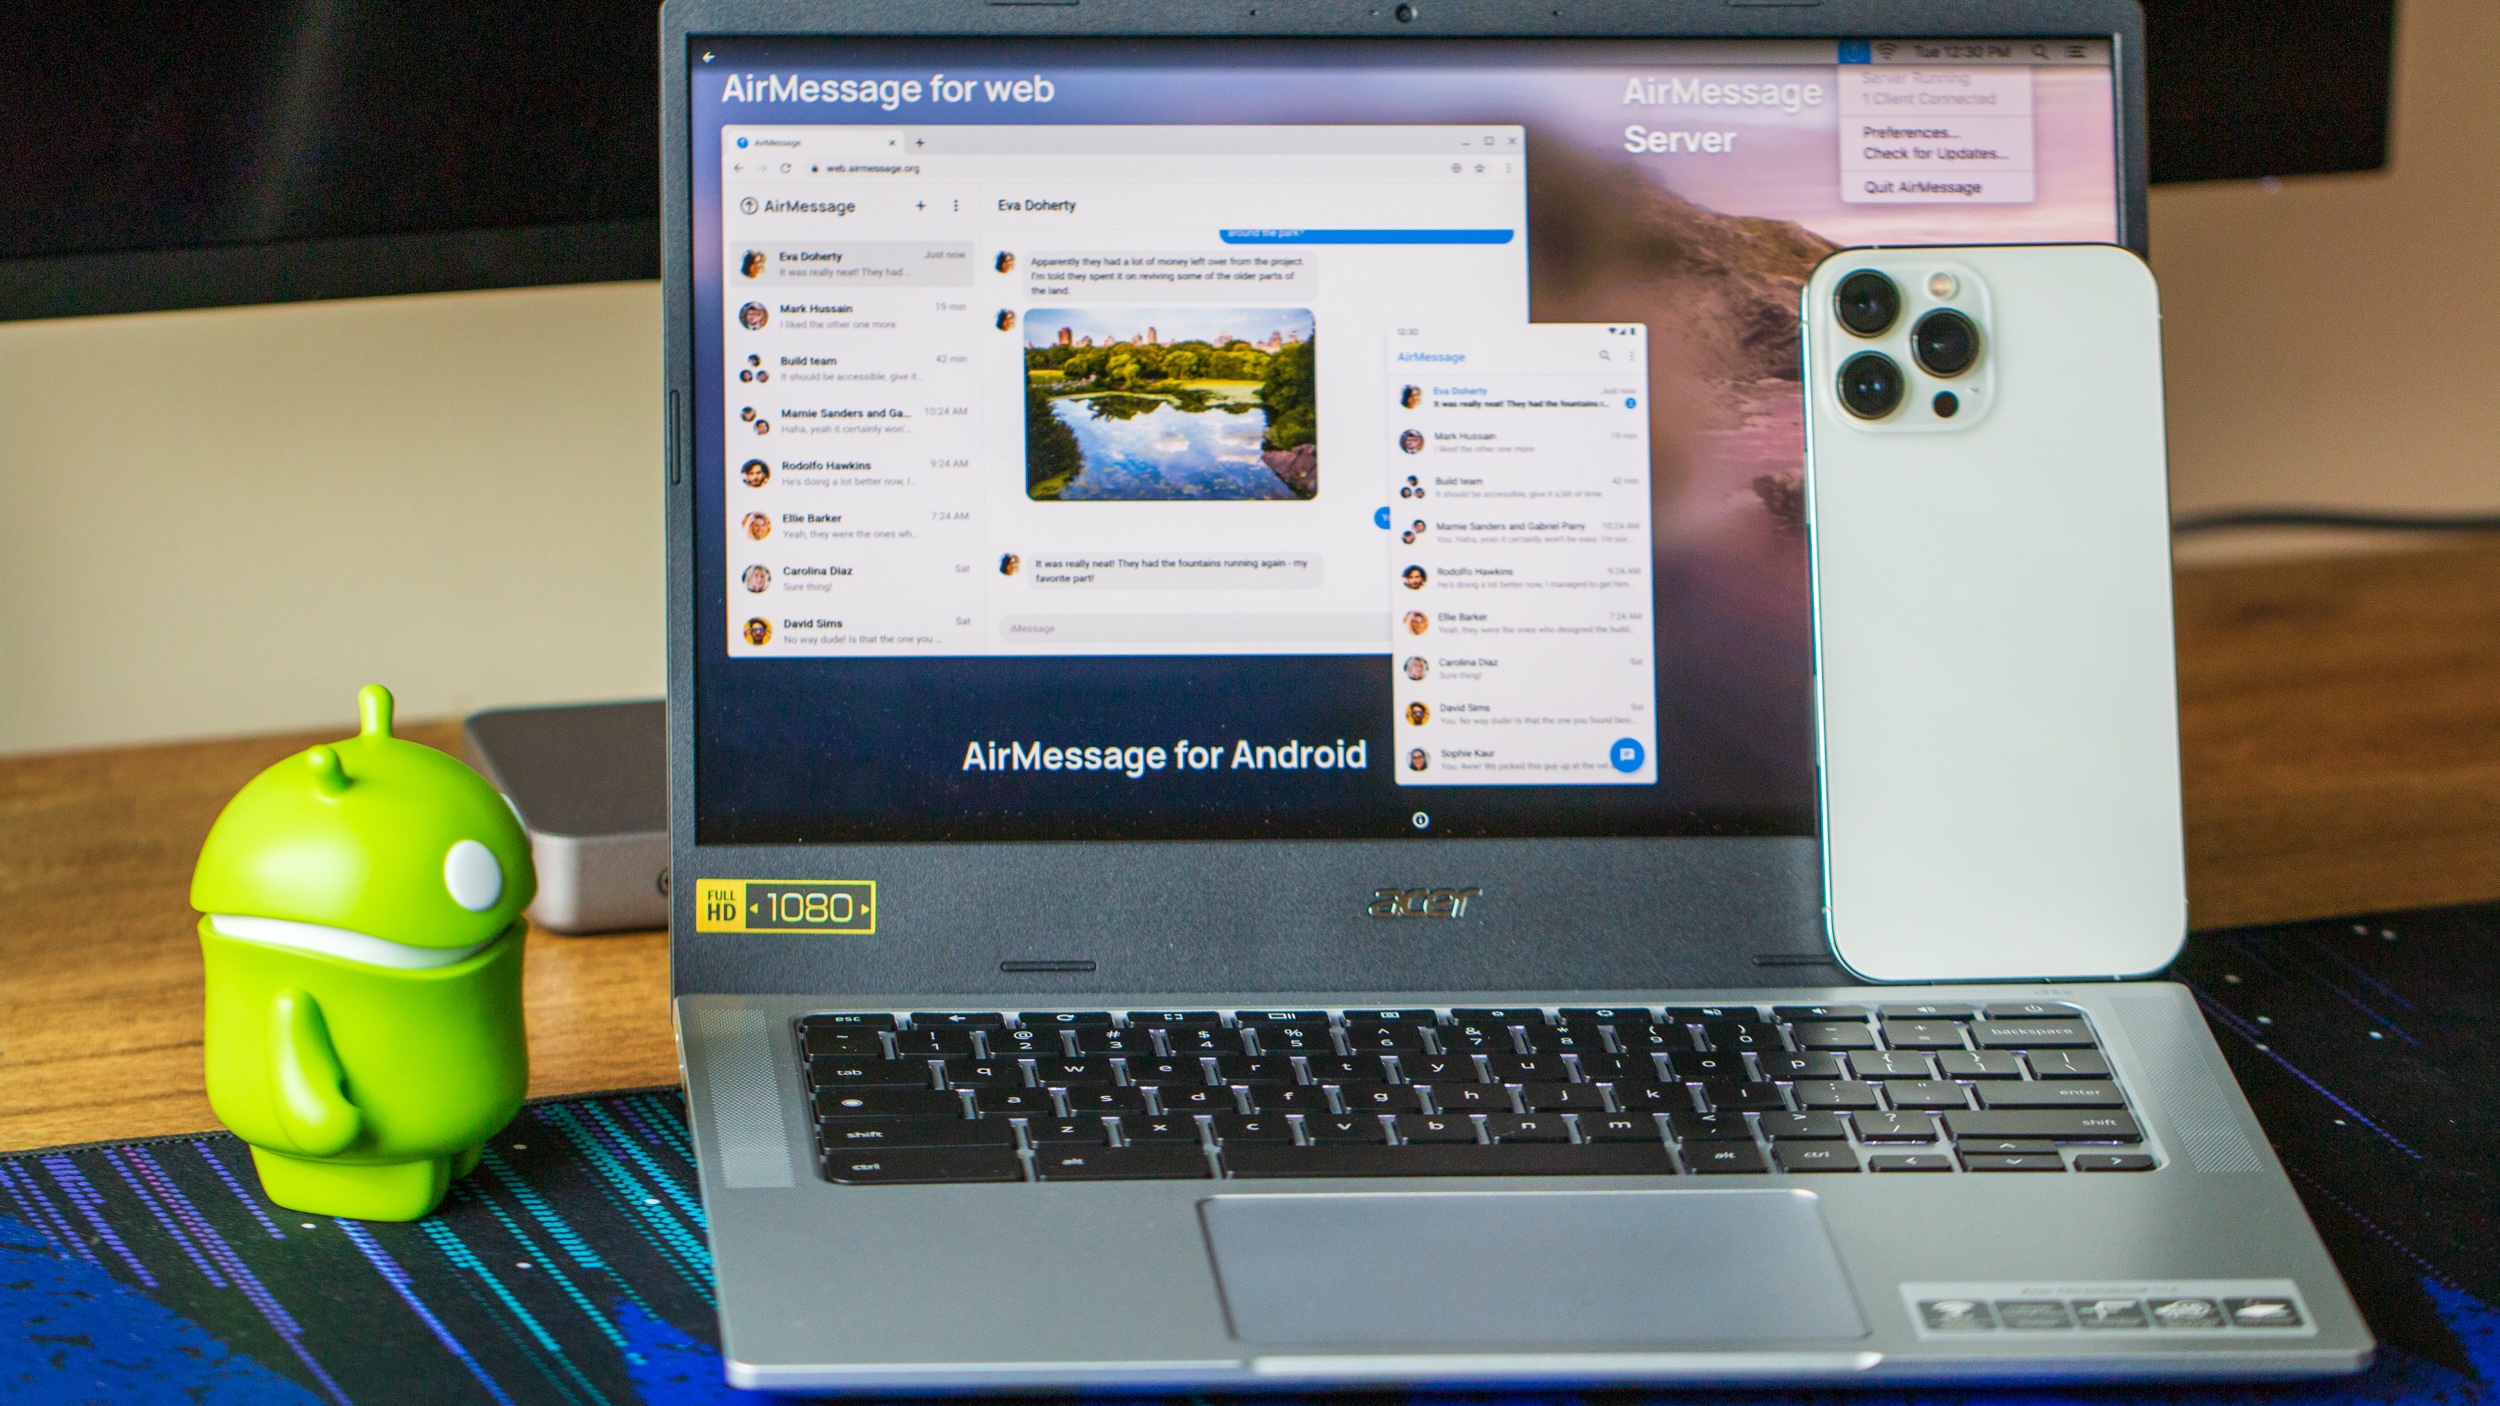
Needless to say, trying to use iMessage on Chromebooks is much more complicated than it may seem. You need a bunch of different things that you might not even have, especially if you own just an iPhone and a Chromebook.
There is another app out there that provides a workaround for this, but you need to create a Virtual Machine with macOS, which is an even bigger headache that might not even work. Nevertheless, it is possible to use iMessage on Chromebooks, but you'll need to make sure that the AirMessage Server is constantly running and connected to a network.

Andrew Myrick is a Senior Editor at Android Central. He enjoys everything to do with technology, including tablets, smartphones, and everything in between. Perhaps his favorite past-time is collecting different headphones, even if they all end up in the same drawer.
