How to turn an old PC or Mac into a Chromebook with ChromeOS Flex
What was once old is new again.
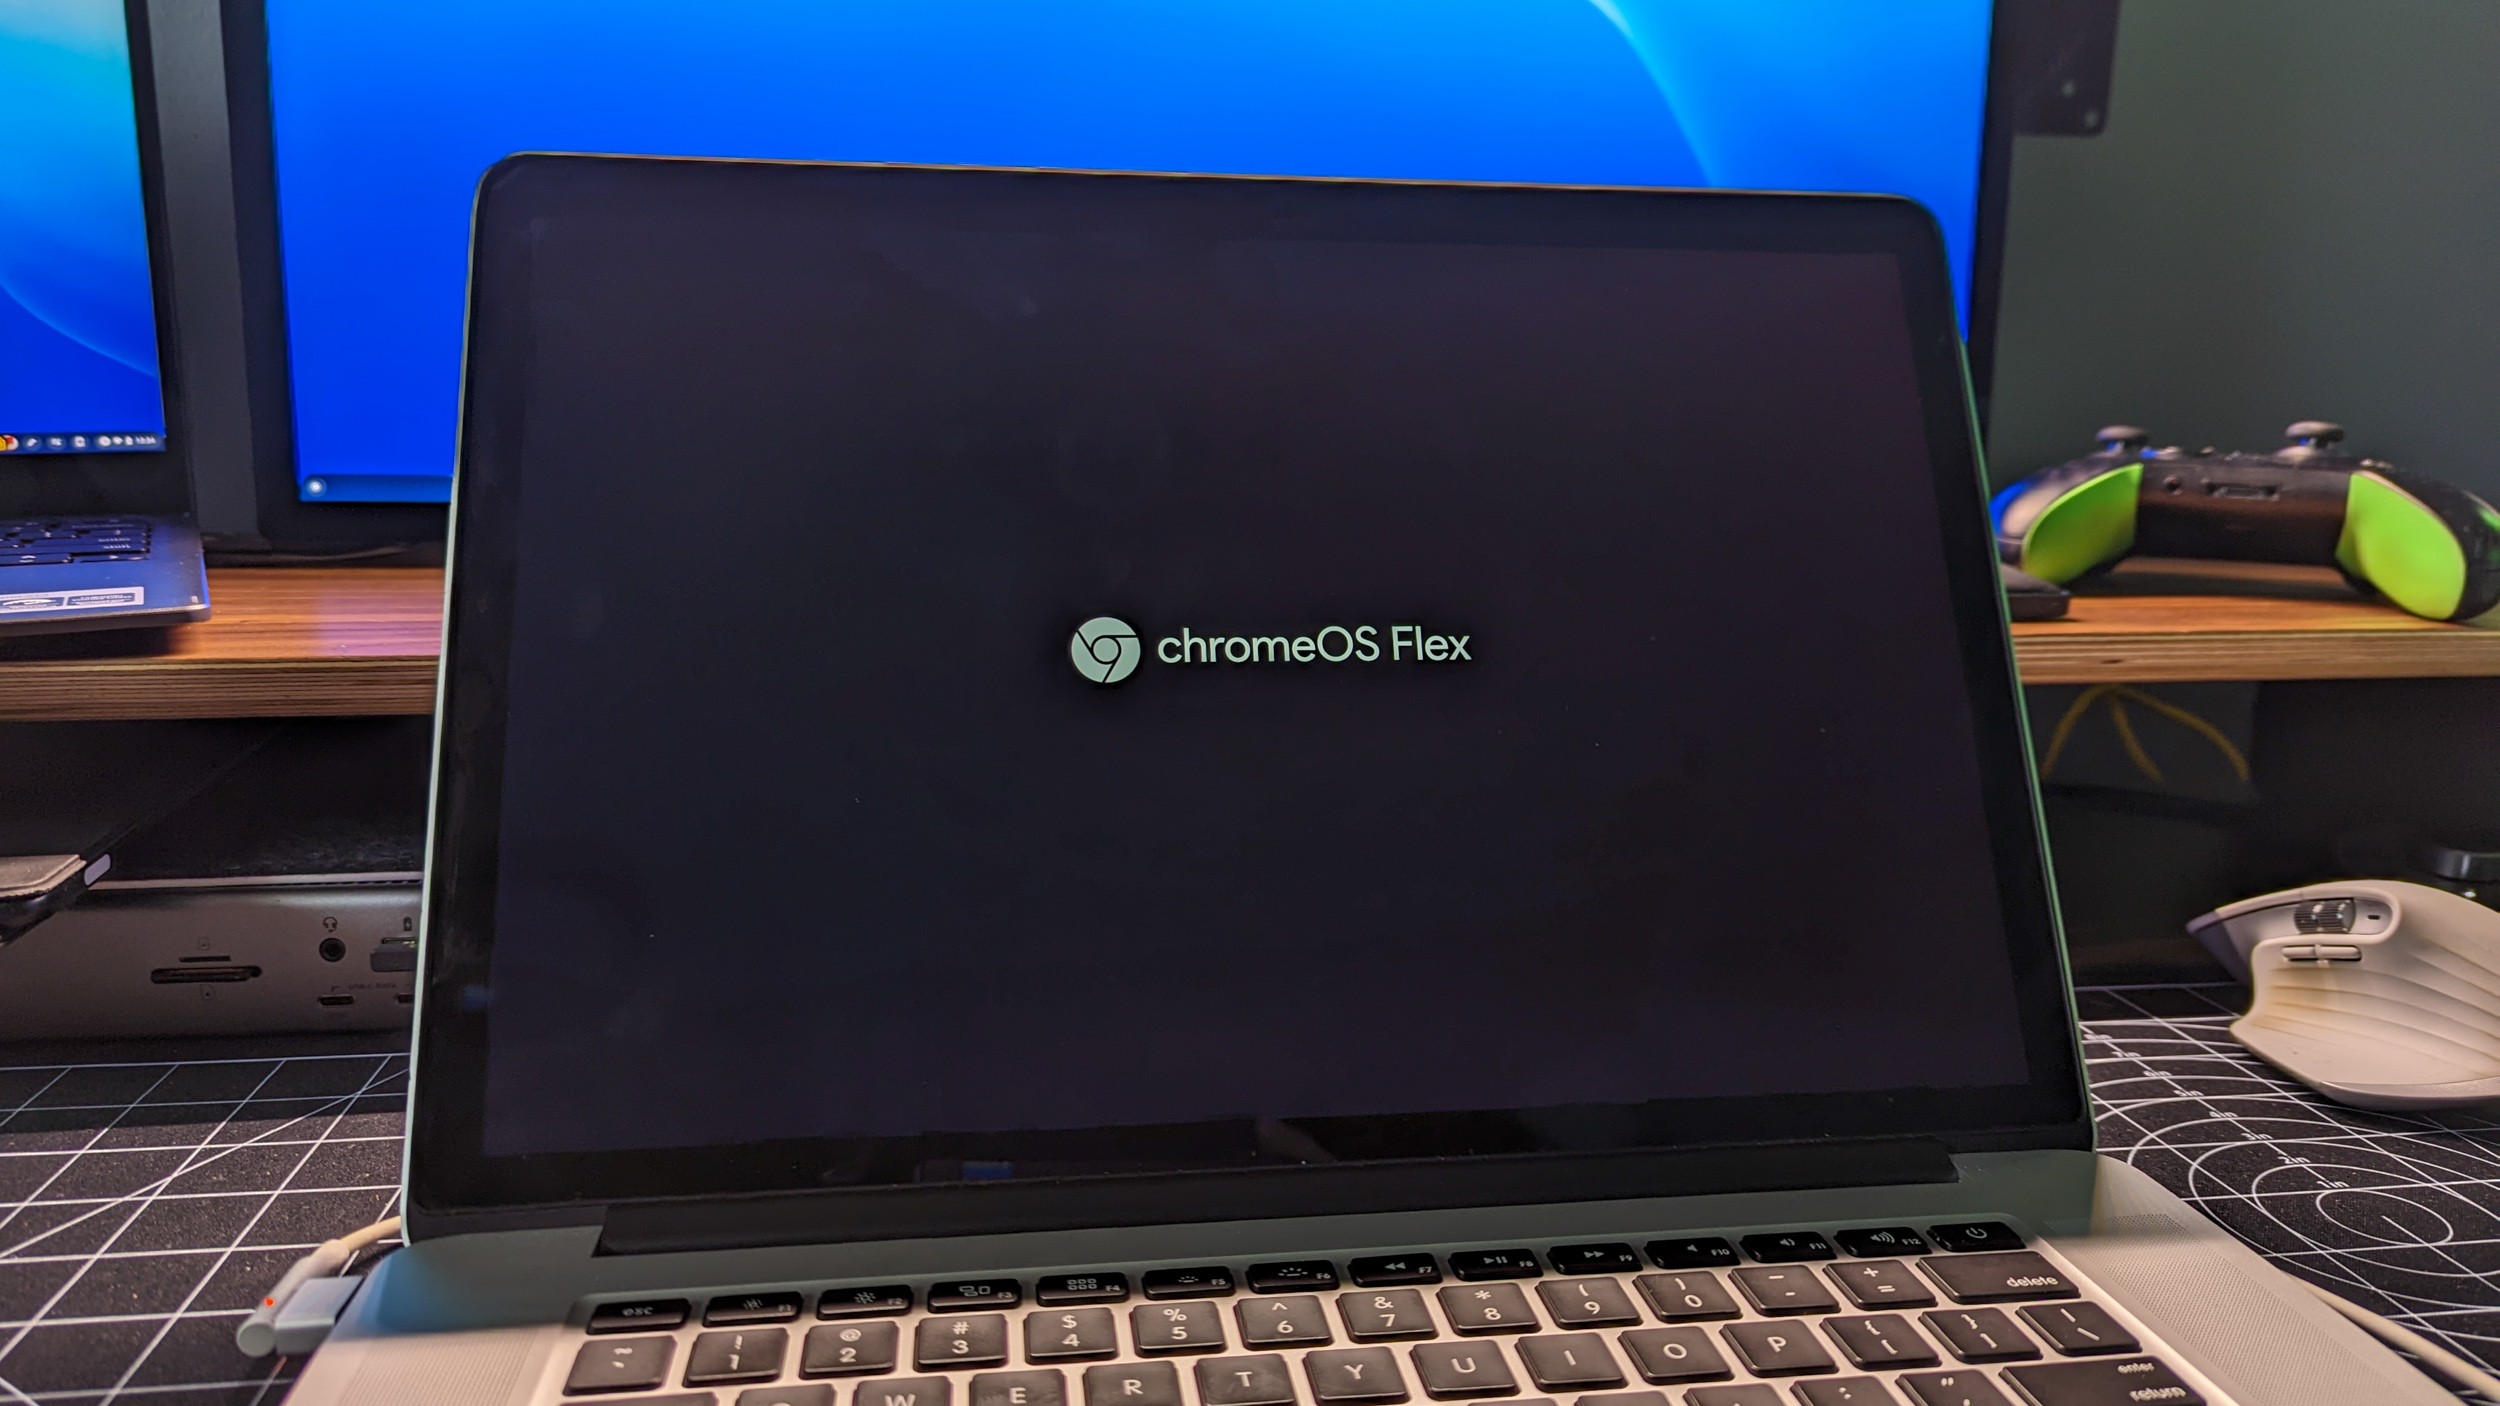
In a world driven by smartphones, we put a lot of thought and focus into what we can do with those devices once they’ve been replaced by something new and shiny. But for many, the same can’t be said for old laptops or computers that you have just thrown in the closet to collect dust until you’re ready to get rid of it.
There are various recycling programs, and you could go down the path of selling it if you really wanted to. But there’s something to be said about having a “spare” computer in the event that your main rig experiences problems. Chances are, however, the software experience is so awful that it could take what feels like an eternity just to try and boot the thing.
That’s where ChromeOS Flex comes in, allowing you to repurpose an old computer, turning it into something that feels like you just picked up one of the best Chromebooks.
What is ChromeOS Flex?
ChromeOS Flex was first introduced in February 2022 as a “cloud-first version of ChromeOS for PCs and Macs.” However, it was derived from software created by Neverware’s CloudReady, which allowed users to install ChromeOS on virtual machines. Following Google’s acquisition of Neverware in 2020, the CloudReady project went a bit dormant, with just a few minor updates being released.
Another big benefit of CloudReady, and now ChromeOS Flex, is for enterprise users, as it makes deploying ChromeOS Flex a much easier process than before. However, Google is also making it possible for everyone to repurpose their old laptop that has just been collecting dust into something that’s actually usable on a daily basis.
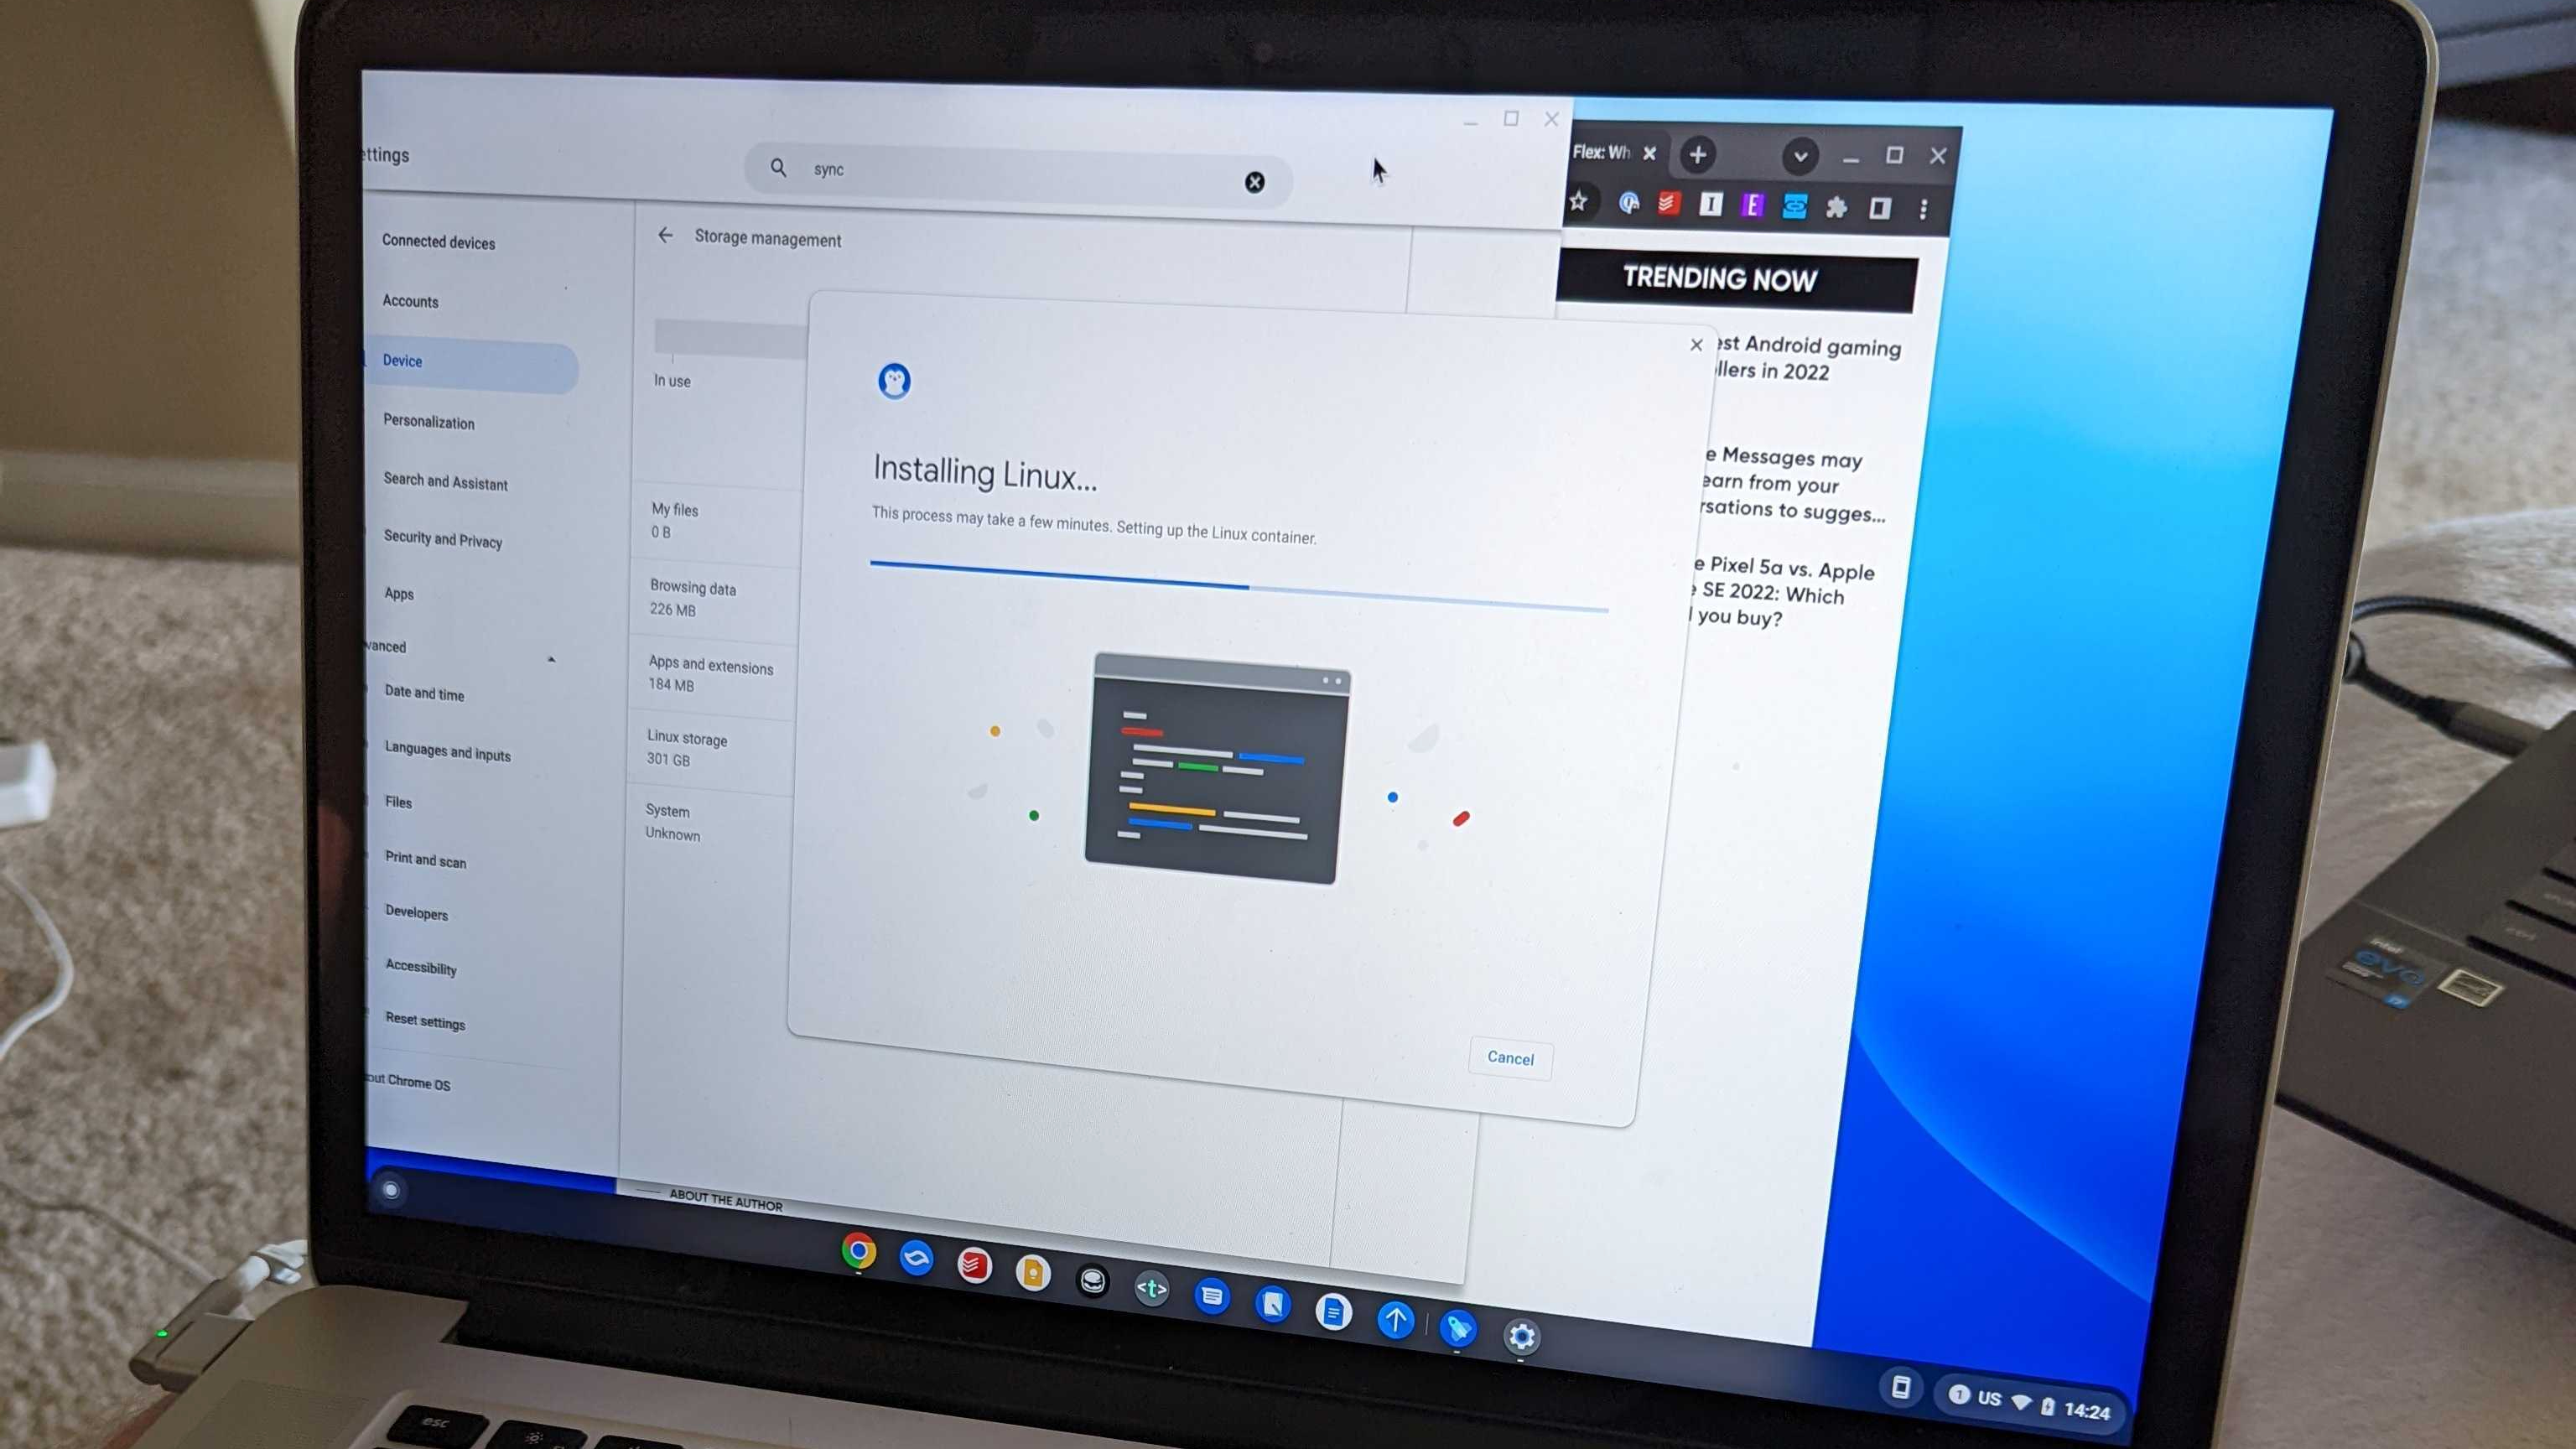
On its face, you might think or assume that ChromeOS and ChromeOS Flex are the same, and we wouldn’t blame you. The interface itself is identical, and as our own Jerry Hildebrand points out in his ChromeOS Flex explainer, even the code base is the same. There’s even support for Google Assistant, ChromeOS Flags, and if you really want to tinker around, ChromeOS Flex includes Linux support.
There is one feature of ChromeOS that is missing from its Flex counterpart, and that’s Android app support. According to the official ChromeOS Flex FAQ: “While Google supports Android apps on many Chromebooks, they‘re not supported on ChromeOS Flex devices.” Of course, many of the best Android apps have PWA (Progressive Web Apps) versions available, which can be installed, so you’ll likely be just fine.
Be an expert in 5 minutes
Get the latest news from Android Central, your trusted companion in the world of Android
Requirements and getting started
When you’re looking around at the various support documents for ChromeOS Flex, Google tries to make a note that this is not compatible with any laptop. There are system requirements that Google has laid out, providing a baseline for what your old device needs to have. Since then, the list of compatible devices has exploded to more than 400, where you can see if your computer makes the cut. Plus, there’s a list of what will, and might not, work once you have installed ChromeOS Flex.
Device Requirements
- Architecture: Intel or AMD x86-64-bit compatible device
- RAM: 4GB
- Internal Storage: 16GB
- Bootable from USB drive
- BIOS: Full administrator access. You’ll need to boot from the ChromeOS Flex USB installer and make some adjustments in the BIOS if you run into issues.
- Processor and graphics: Components made before 2010 might result in a poor experience. (Note: Intel GMA 500, 600, 3600, and 3650 graphics hardware do not meet ChromeOS Flex performance standards.)
What works with certified models
- Audio input, at least one method
- Audio output, at least one method
- Internal display, if present
- Video output
- Installation
- Network — Wi-Fi, Ethernet, or both, if present
- Touchpad, if present
- Keyboard
- Sleep and resume
- System UI and graphics
- USB
- Webcam, if present
What might not work
- Automatic screen rotation
- Bluetooth
- Keyboard shortcuts and function keys, such as brightness and volume
- Touchscreens
- SD card slots
Create a ChromeOS Flex USB Installer
Installing ChromeOS Flex onto one of your older devices isn’t as simple as clicking a couple of buttons. Instead, you’ll need to create a physical USB installer that doubles as a boot device. Google recommends that this drive have at least 8GB of storage, which makes a USB thumb drive the perfect candidate. As a warning, whatever you use will have its existing contents erased during the creation process.
1. Open Chrome on your "installer device."
2. Navigate to the Chrome Web Store.
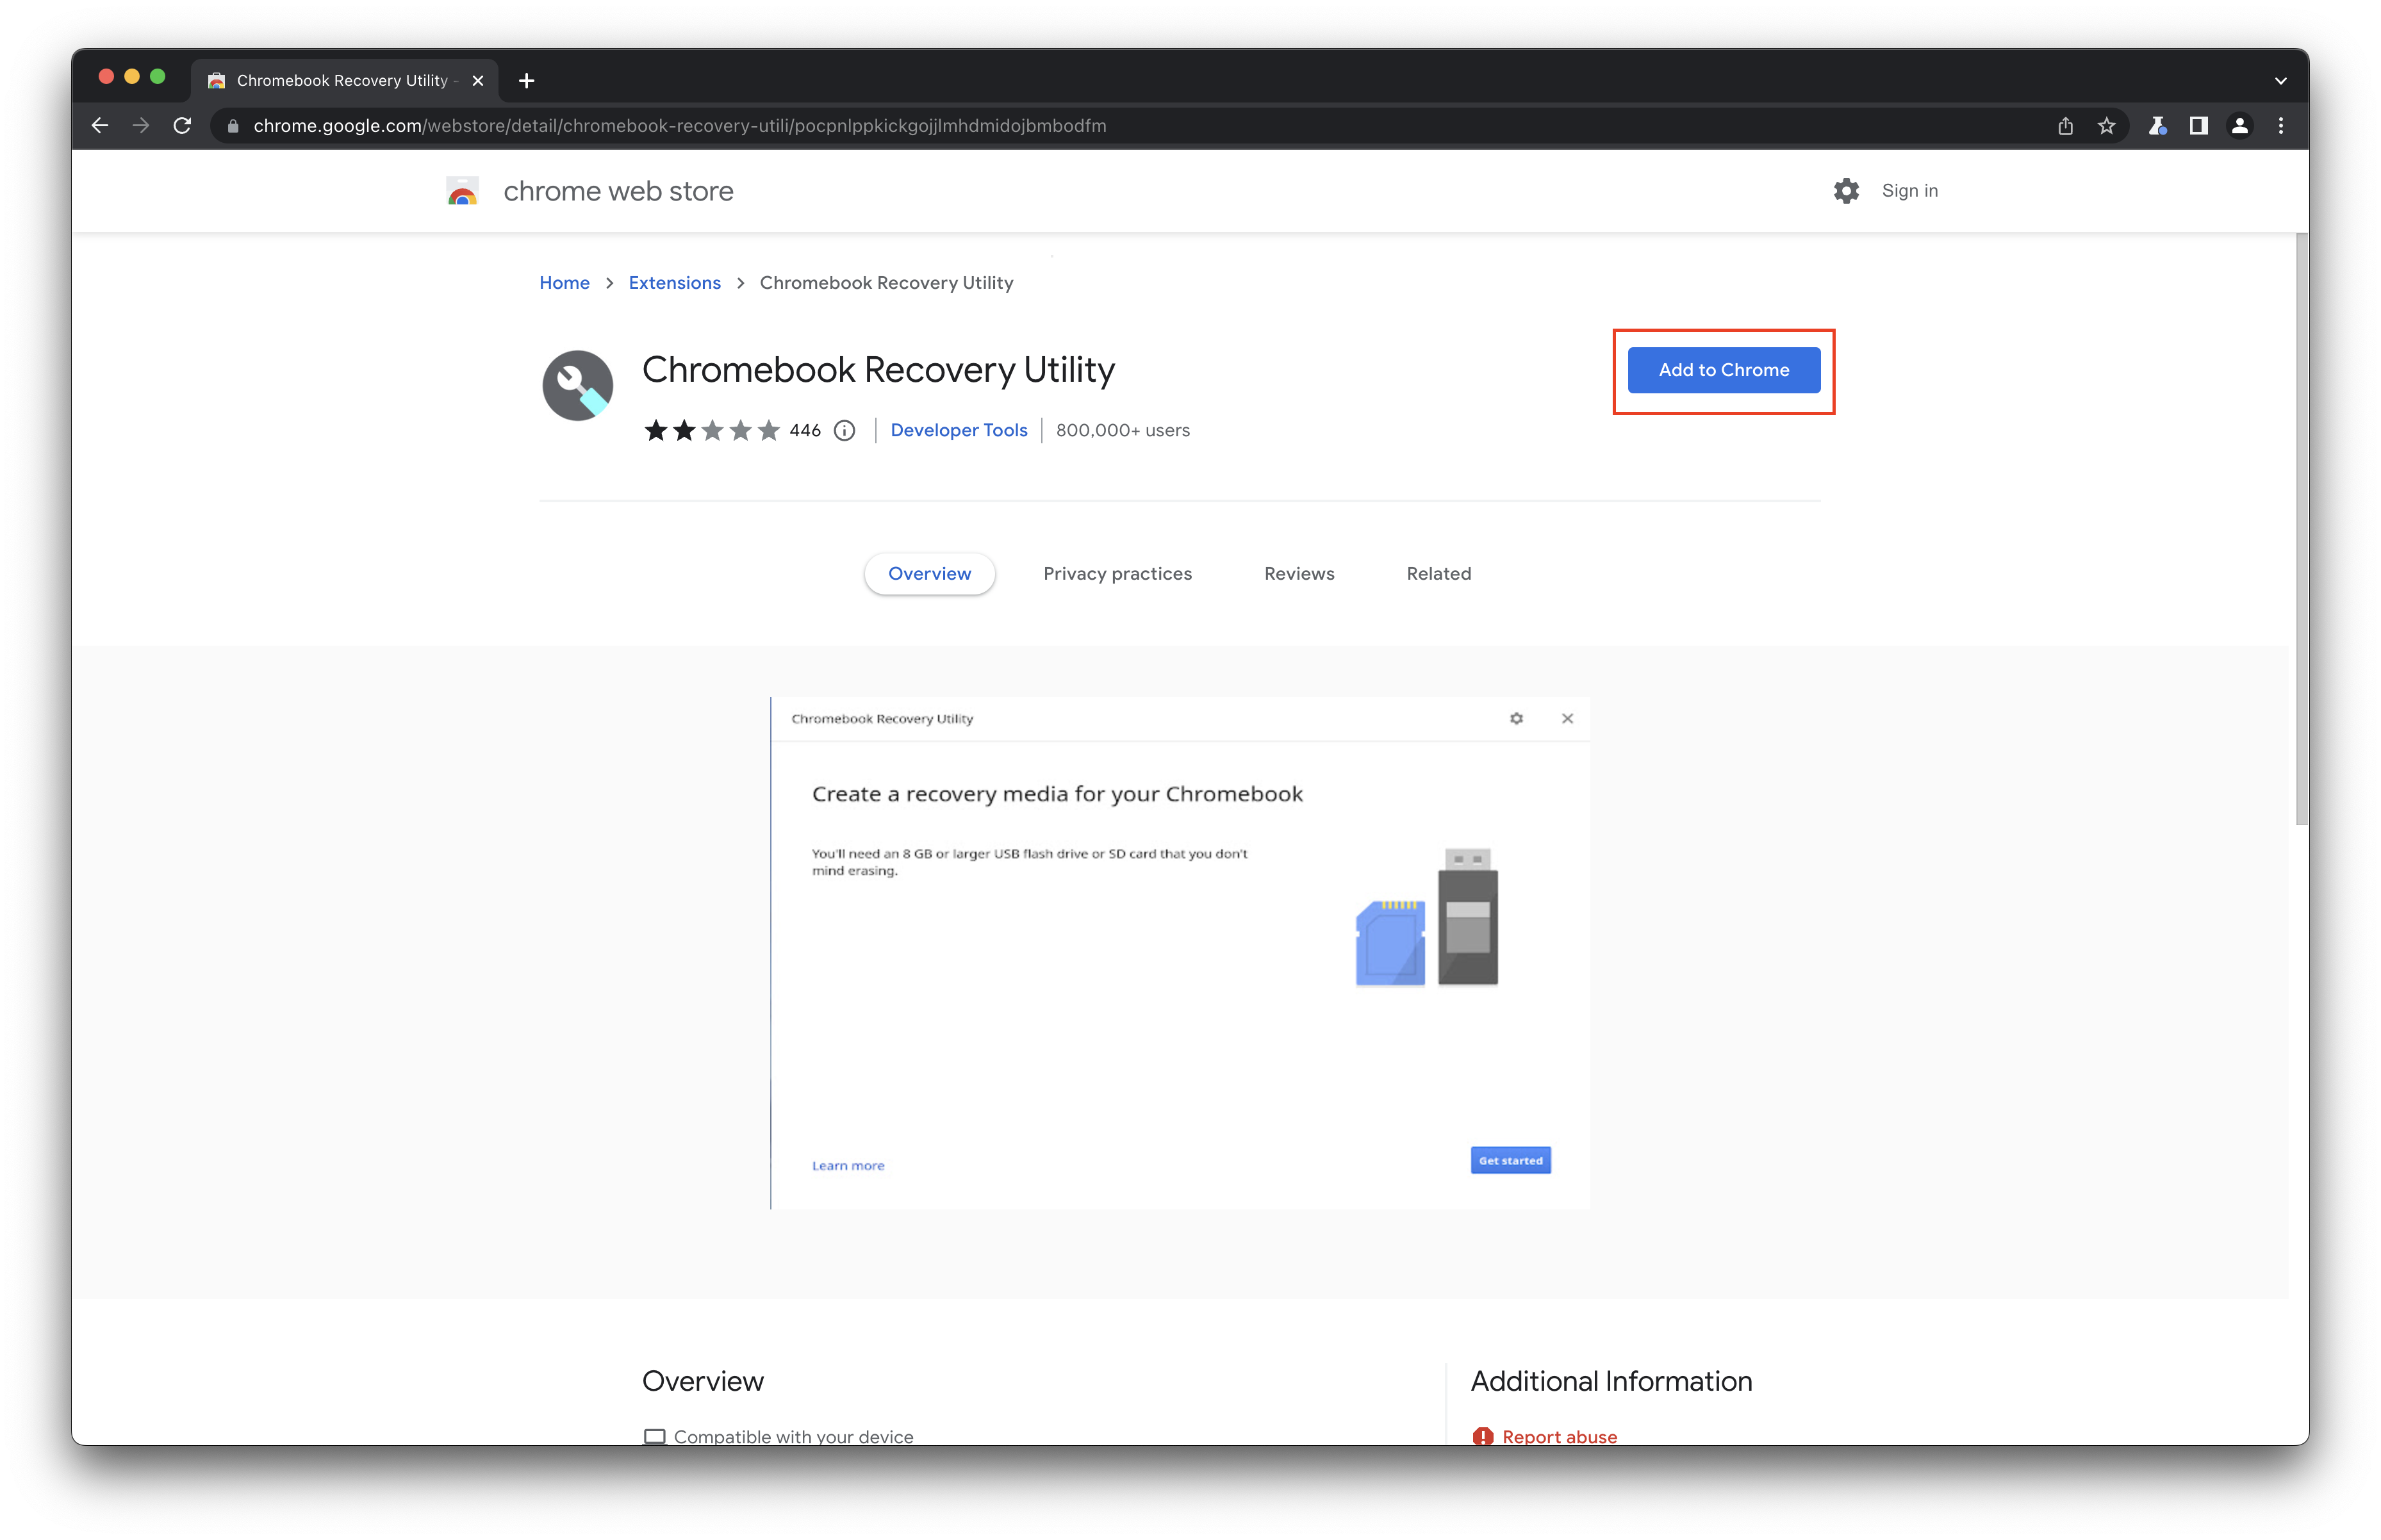
3. Search for Chromebook Recovery Utility.
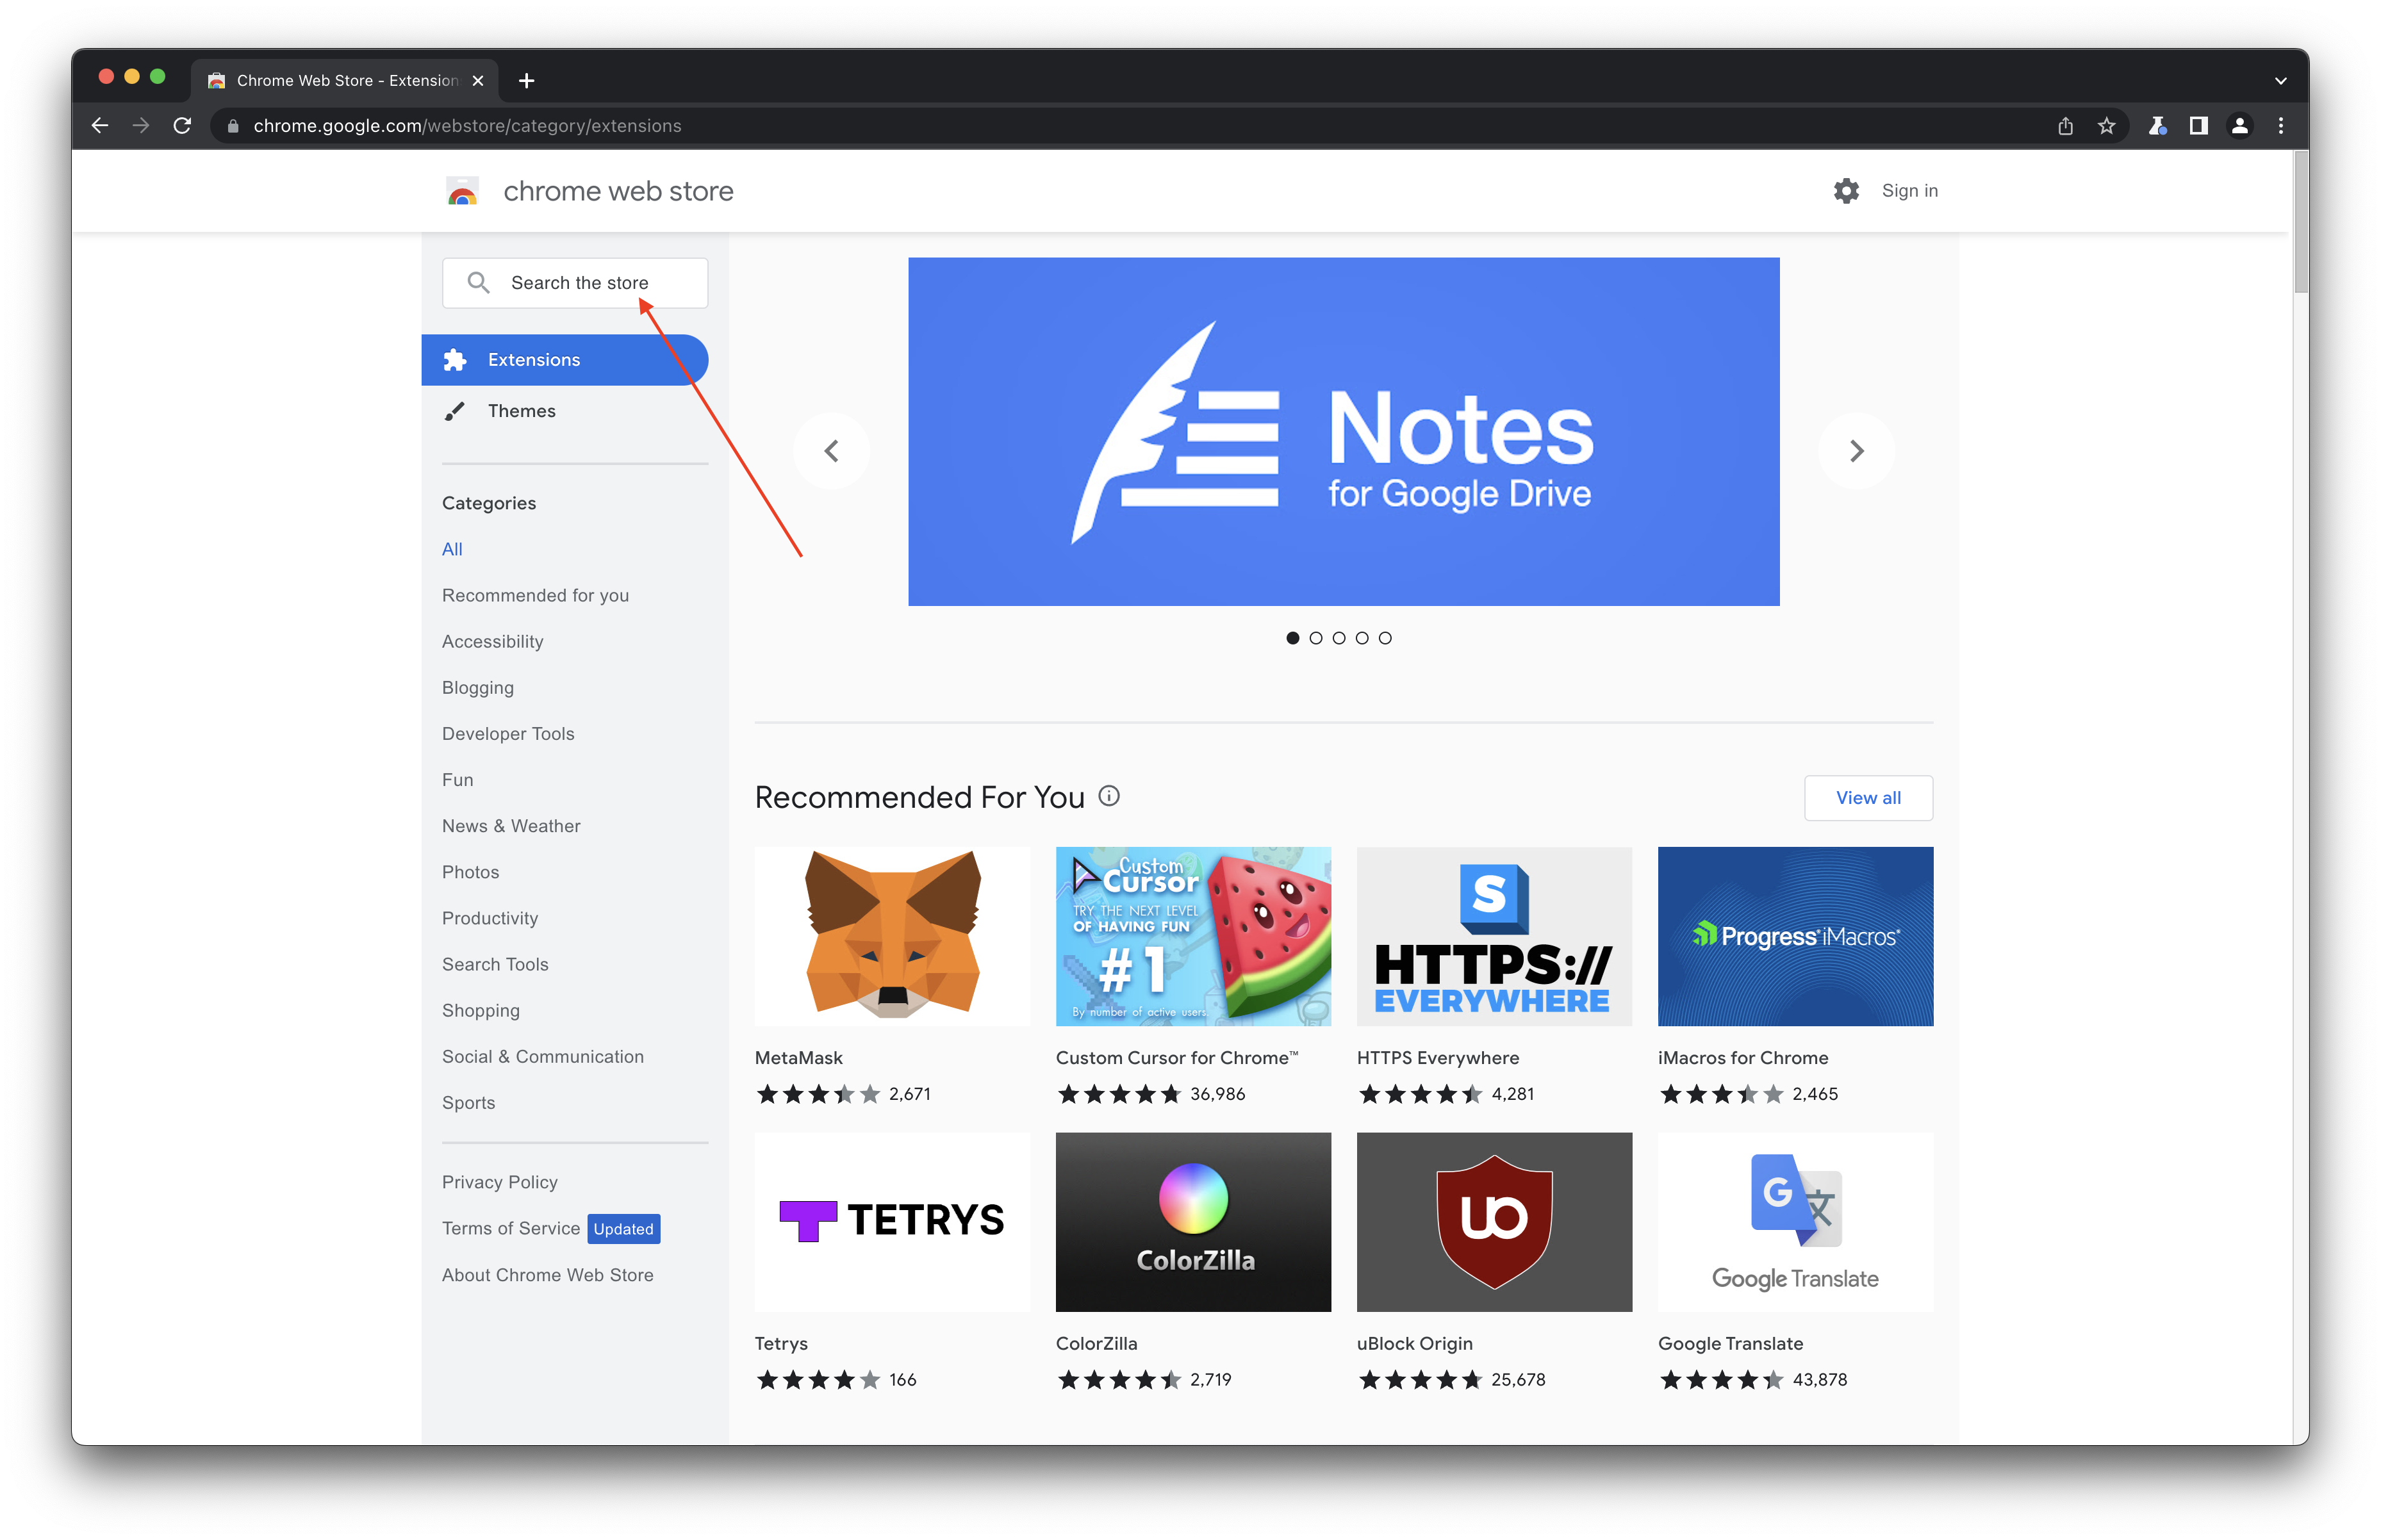
4. Click the Add to Chrome button.
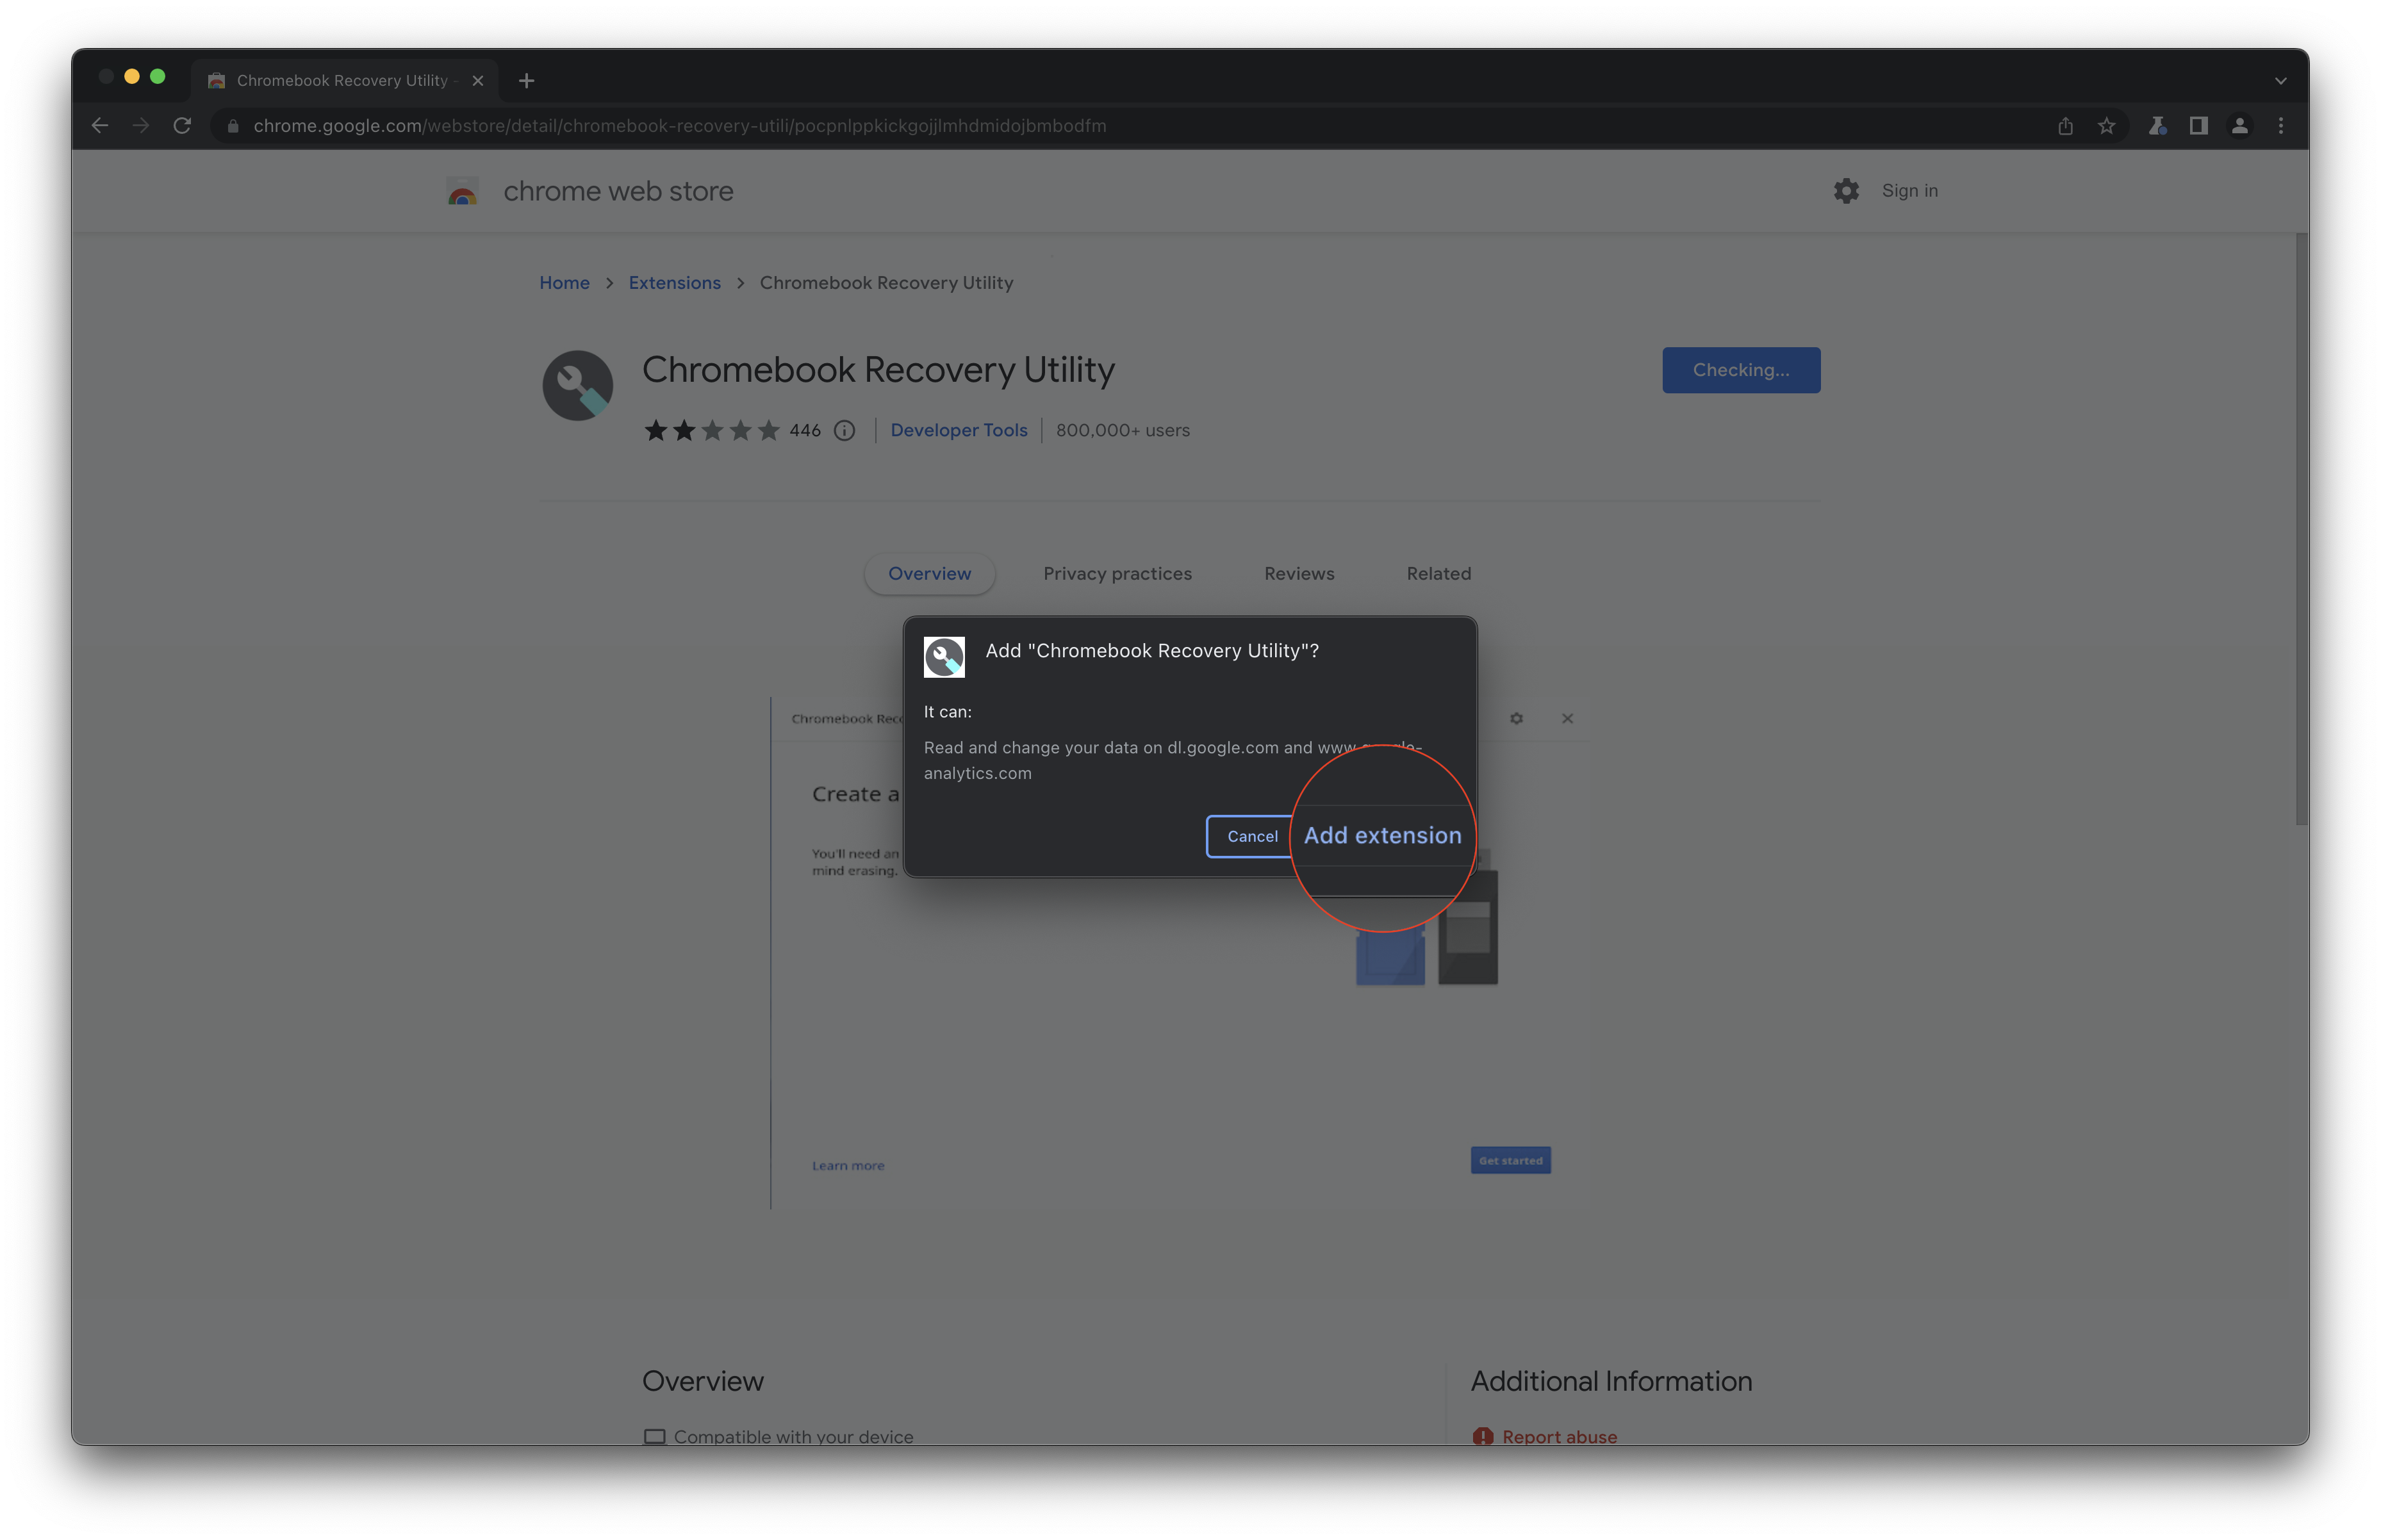
5. When prompted, click the Add extension button.
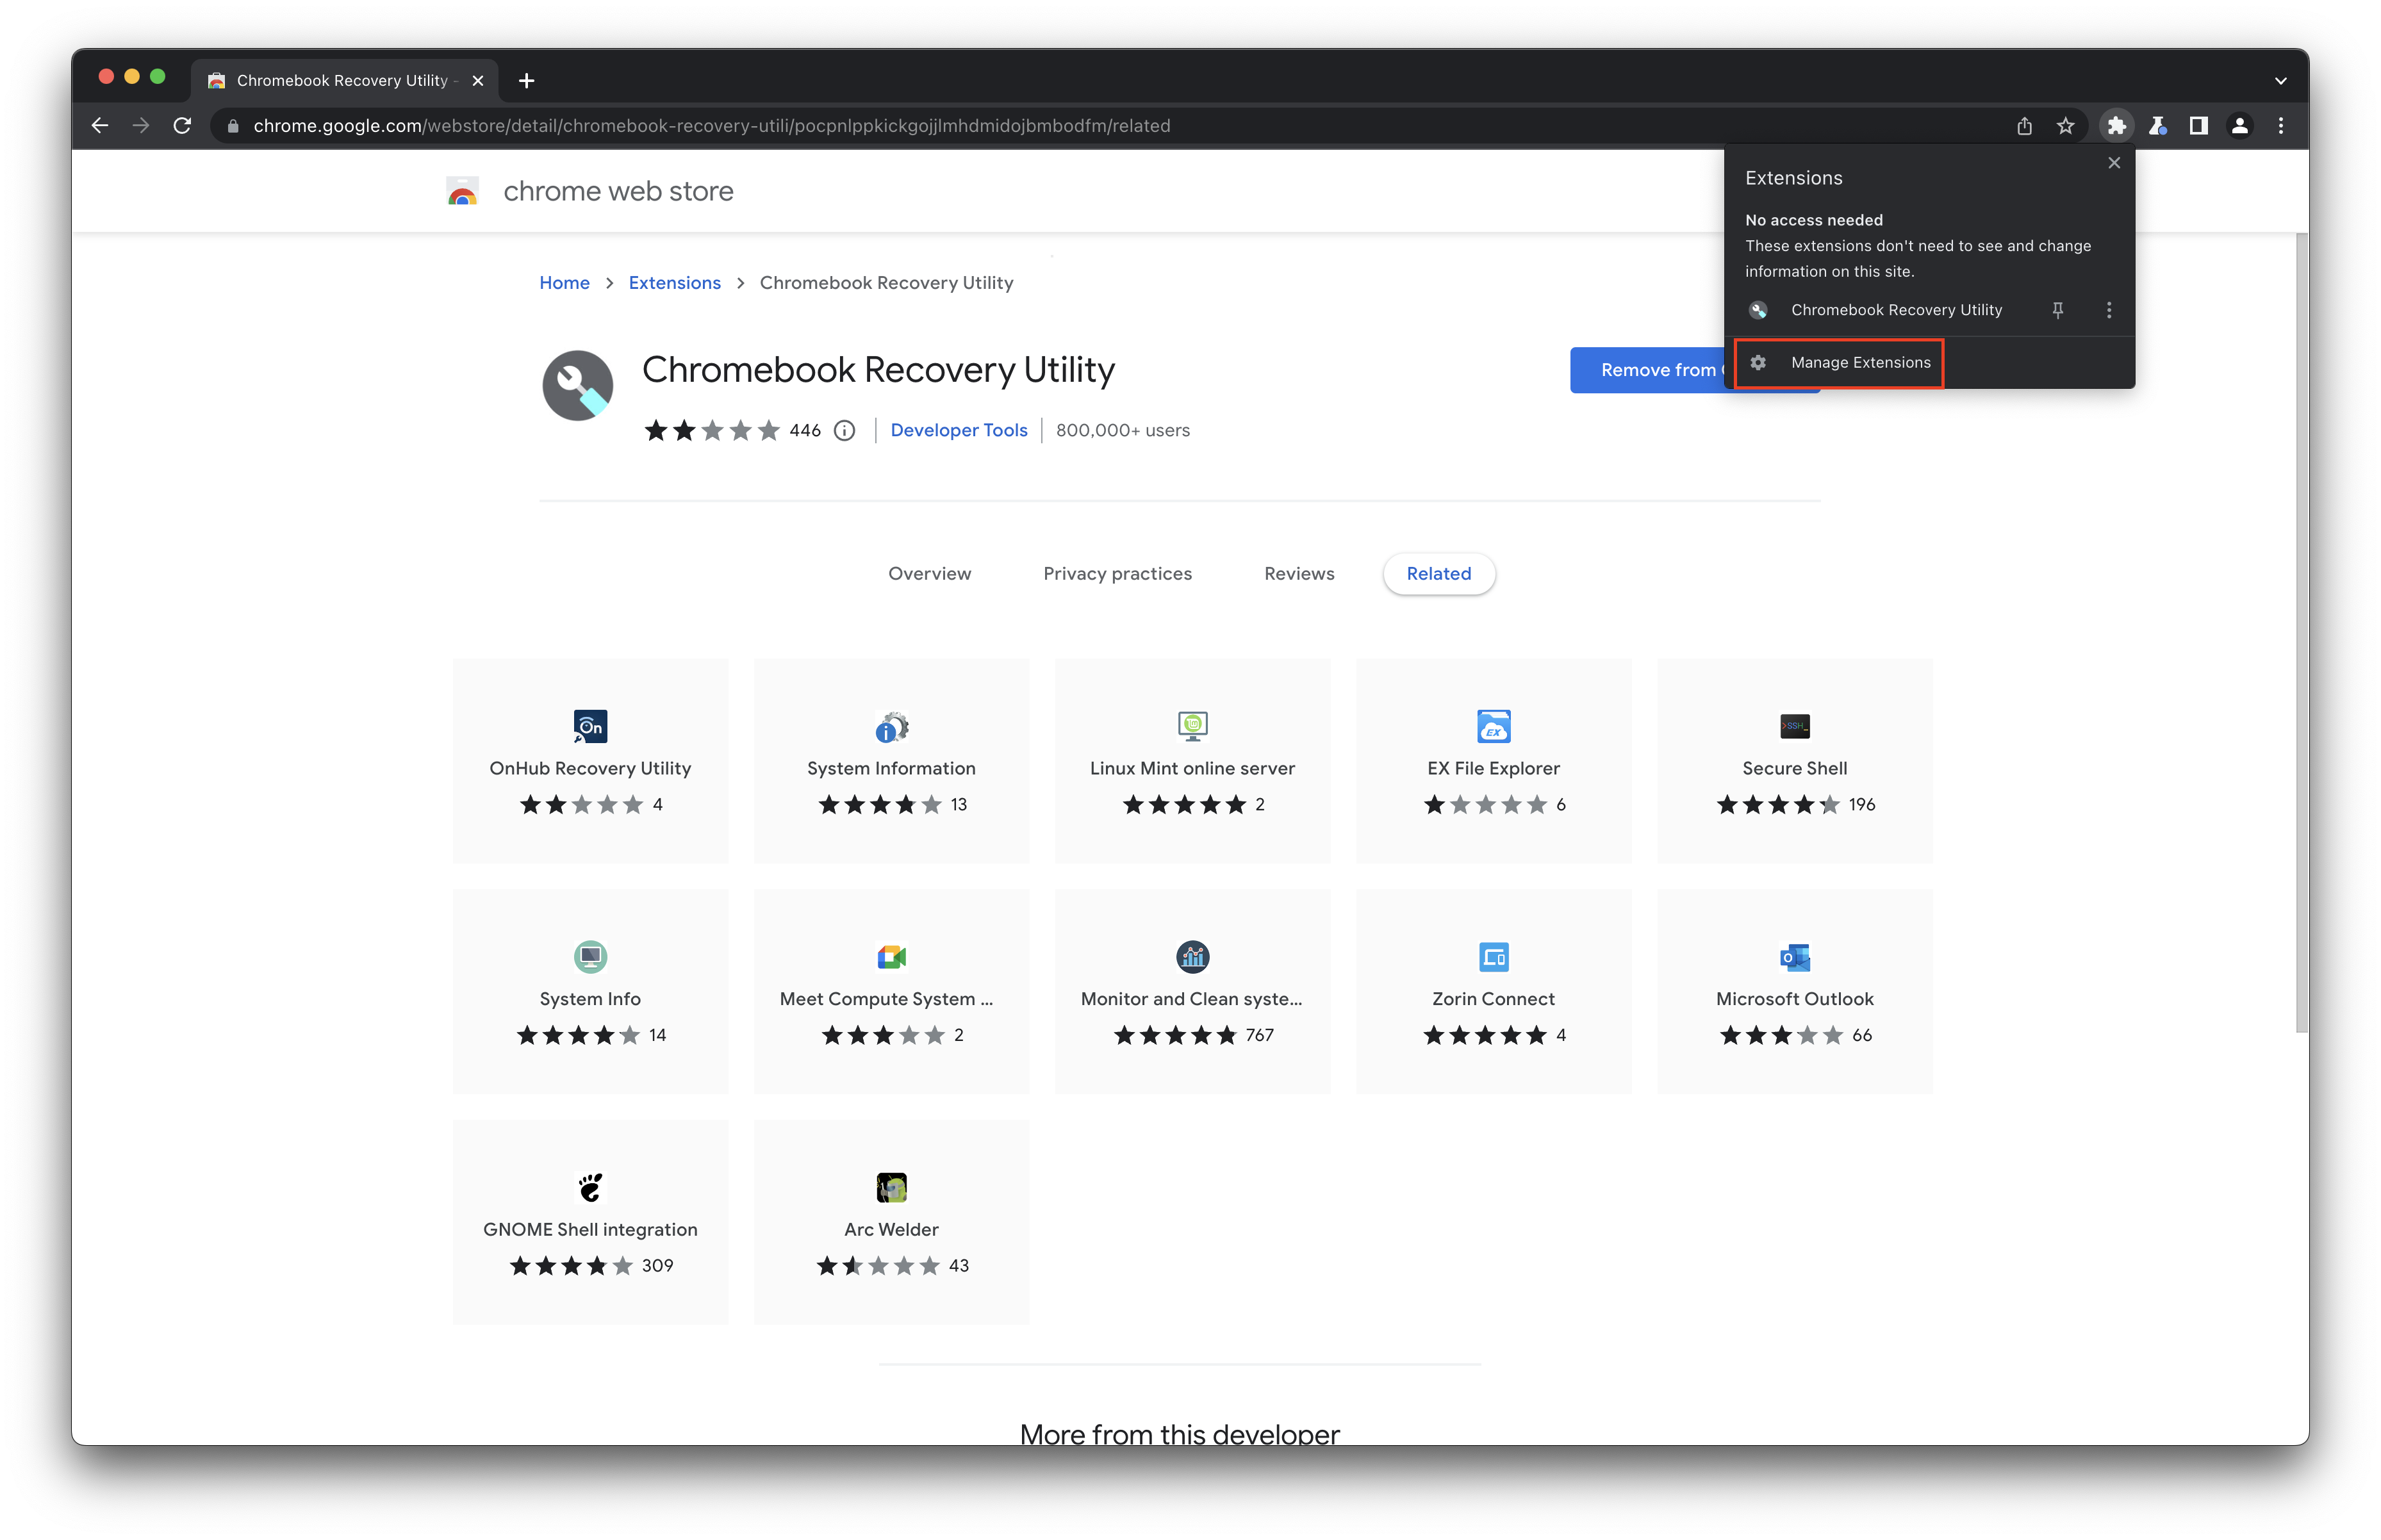
6. Once installed, click the Extensions button in the Chrome toolbar.
7. Select Manage extensions.
8. In the Chromebook Recovery Utility box, click the toggle in the bottom right corner.
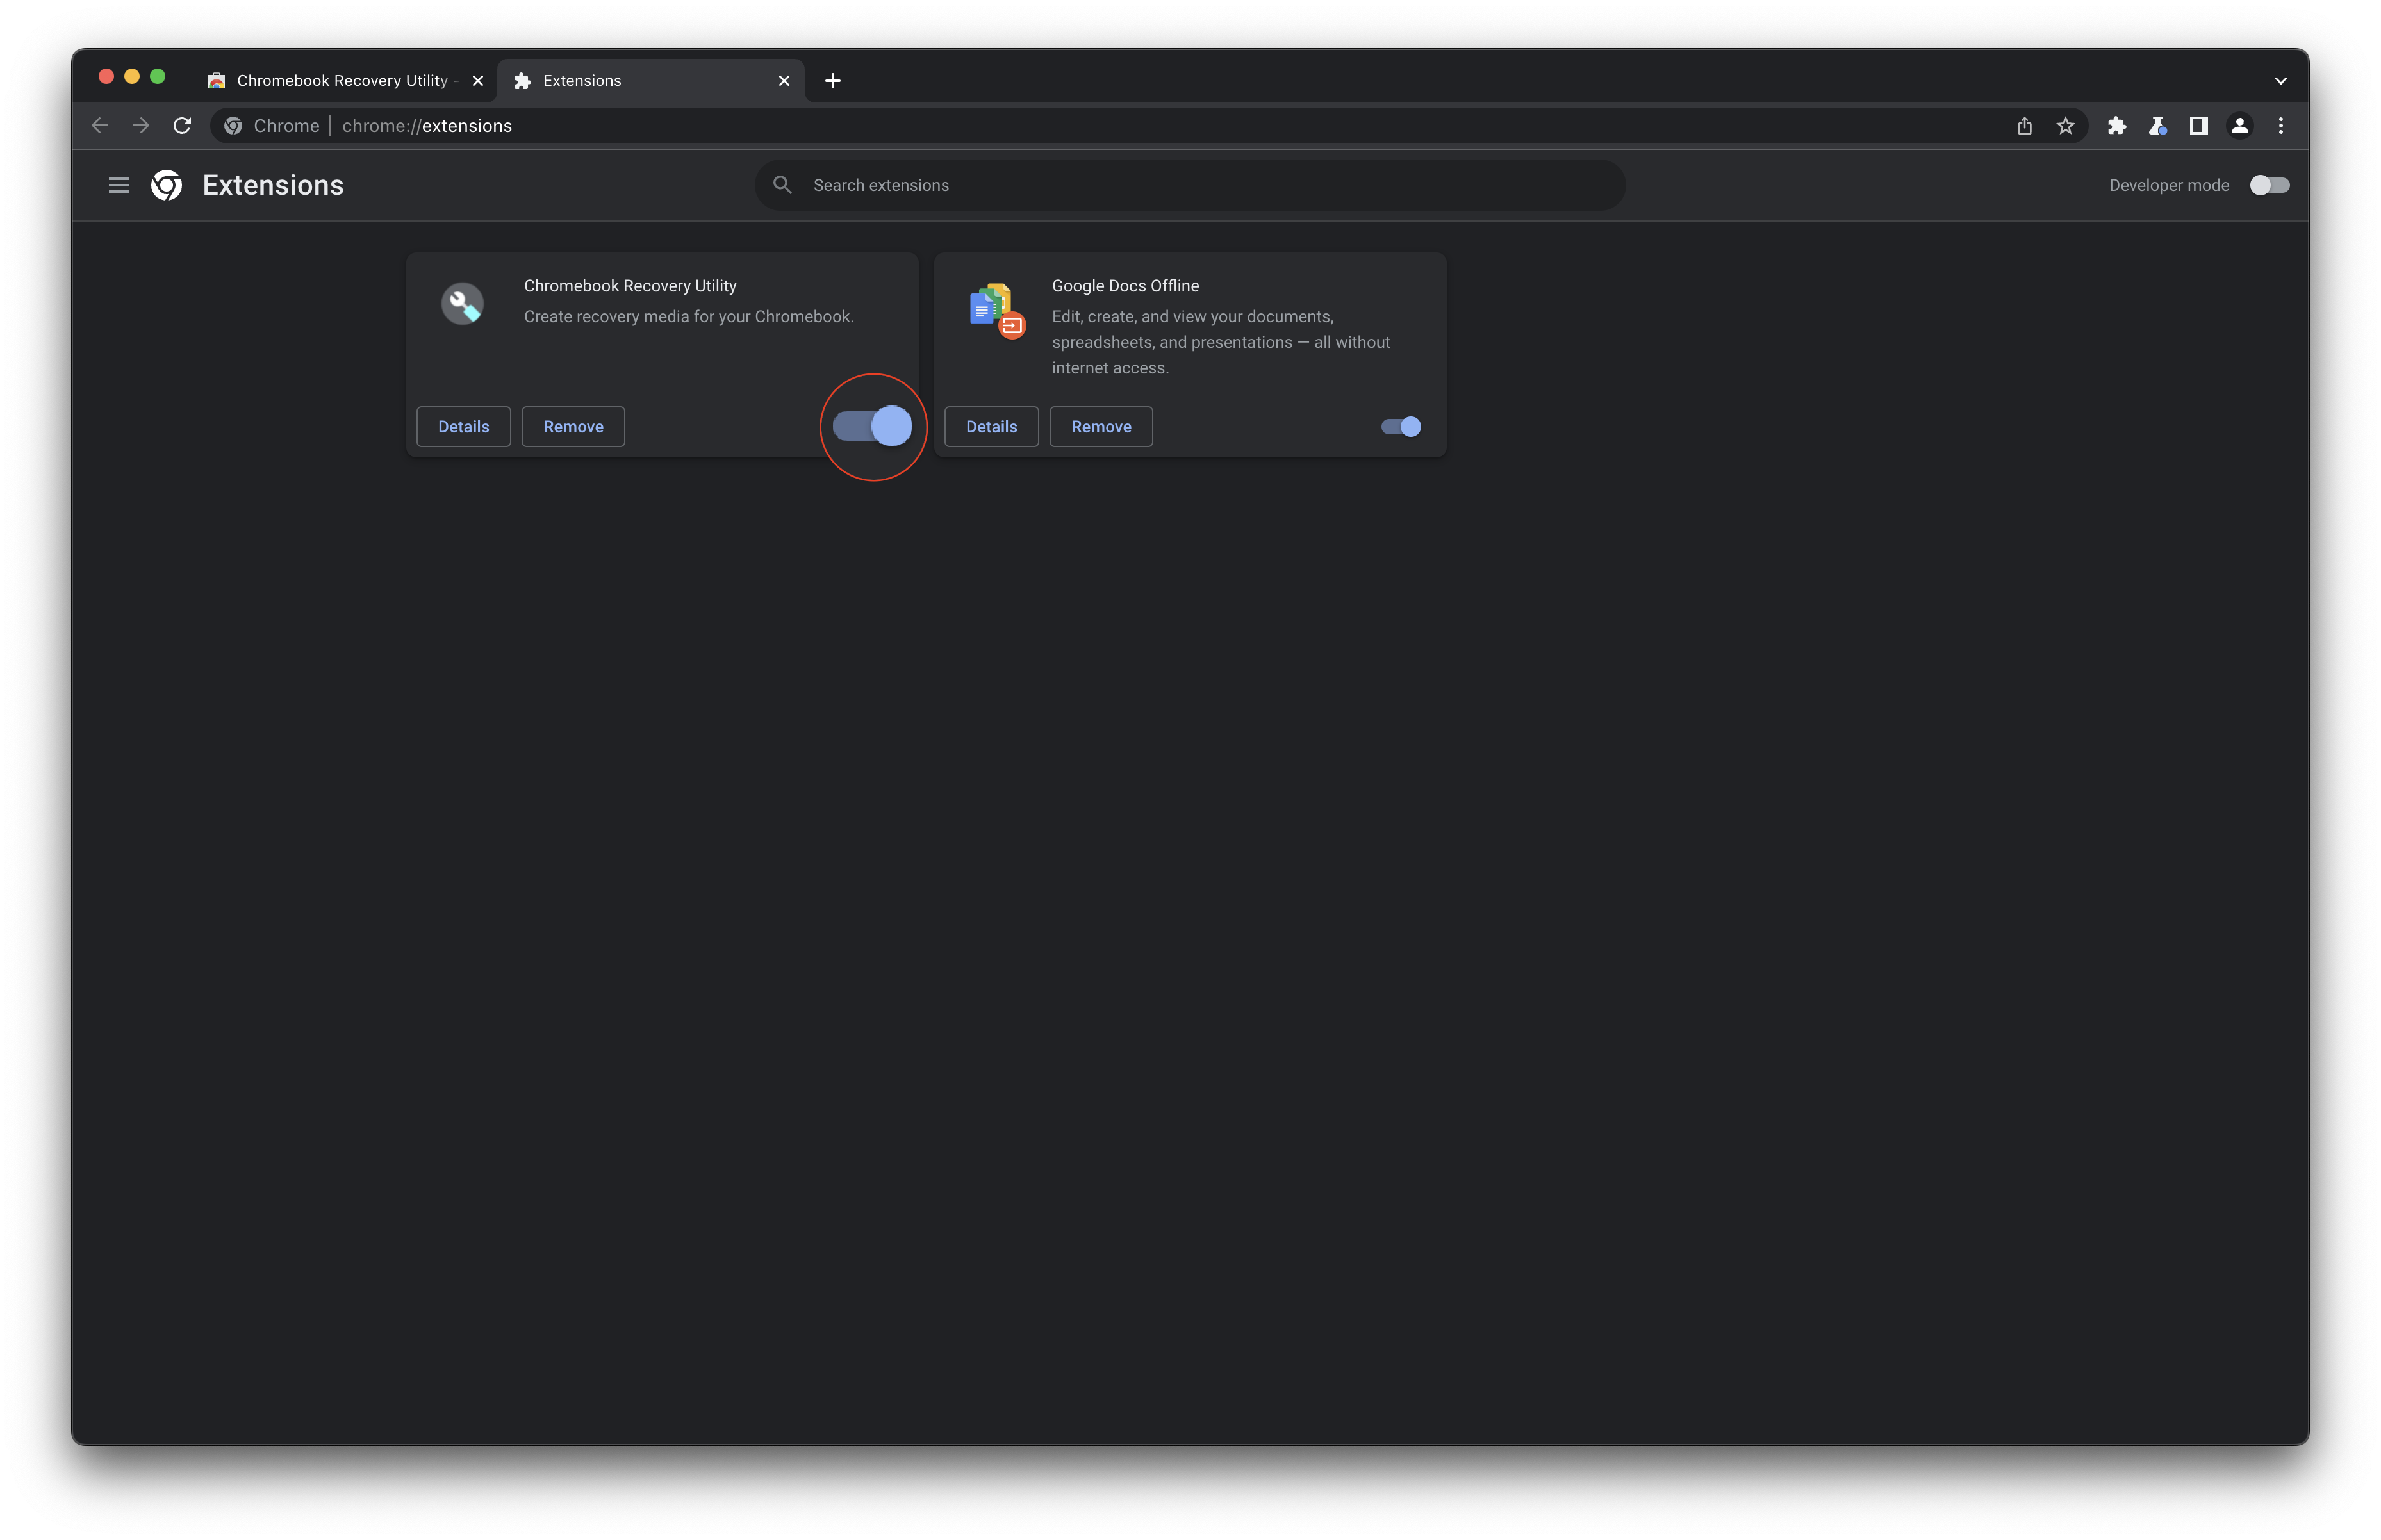
Now that the Recovery Utility has been installed and enabled, it’s time to create the USB installer that will be used.
1. From Chrome, open the Chrome Recovery Utility extension.
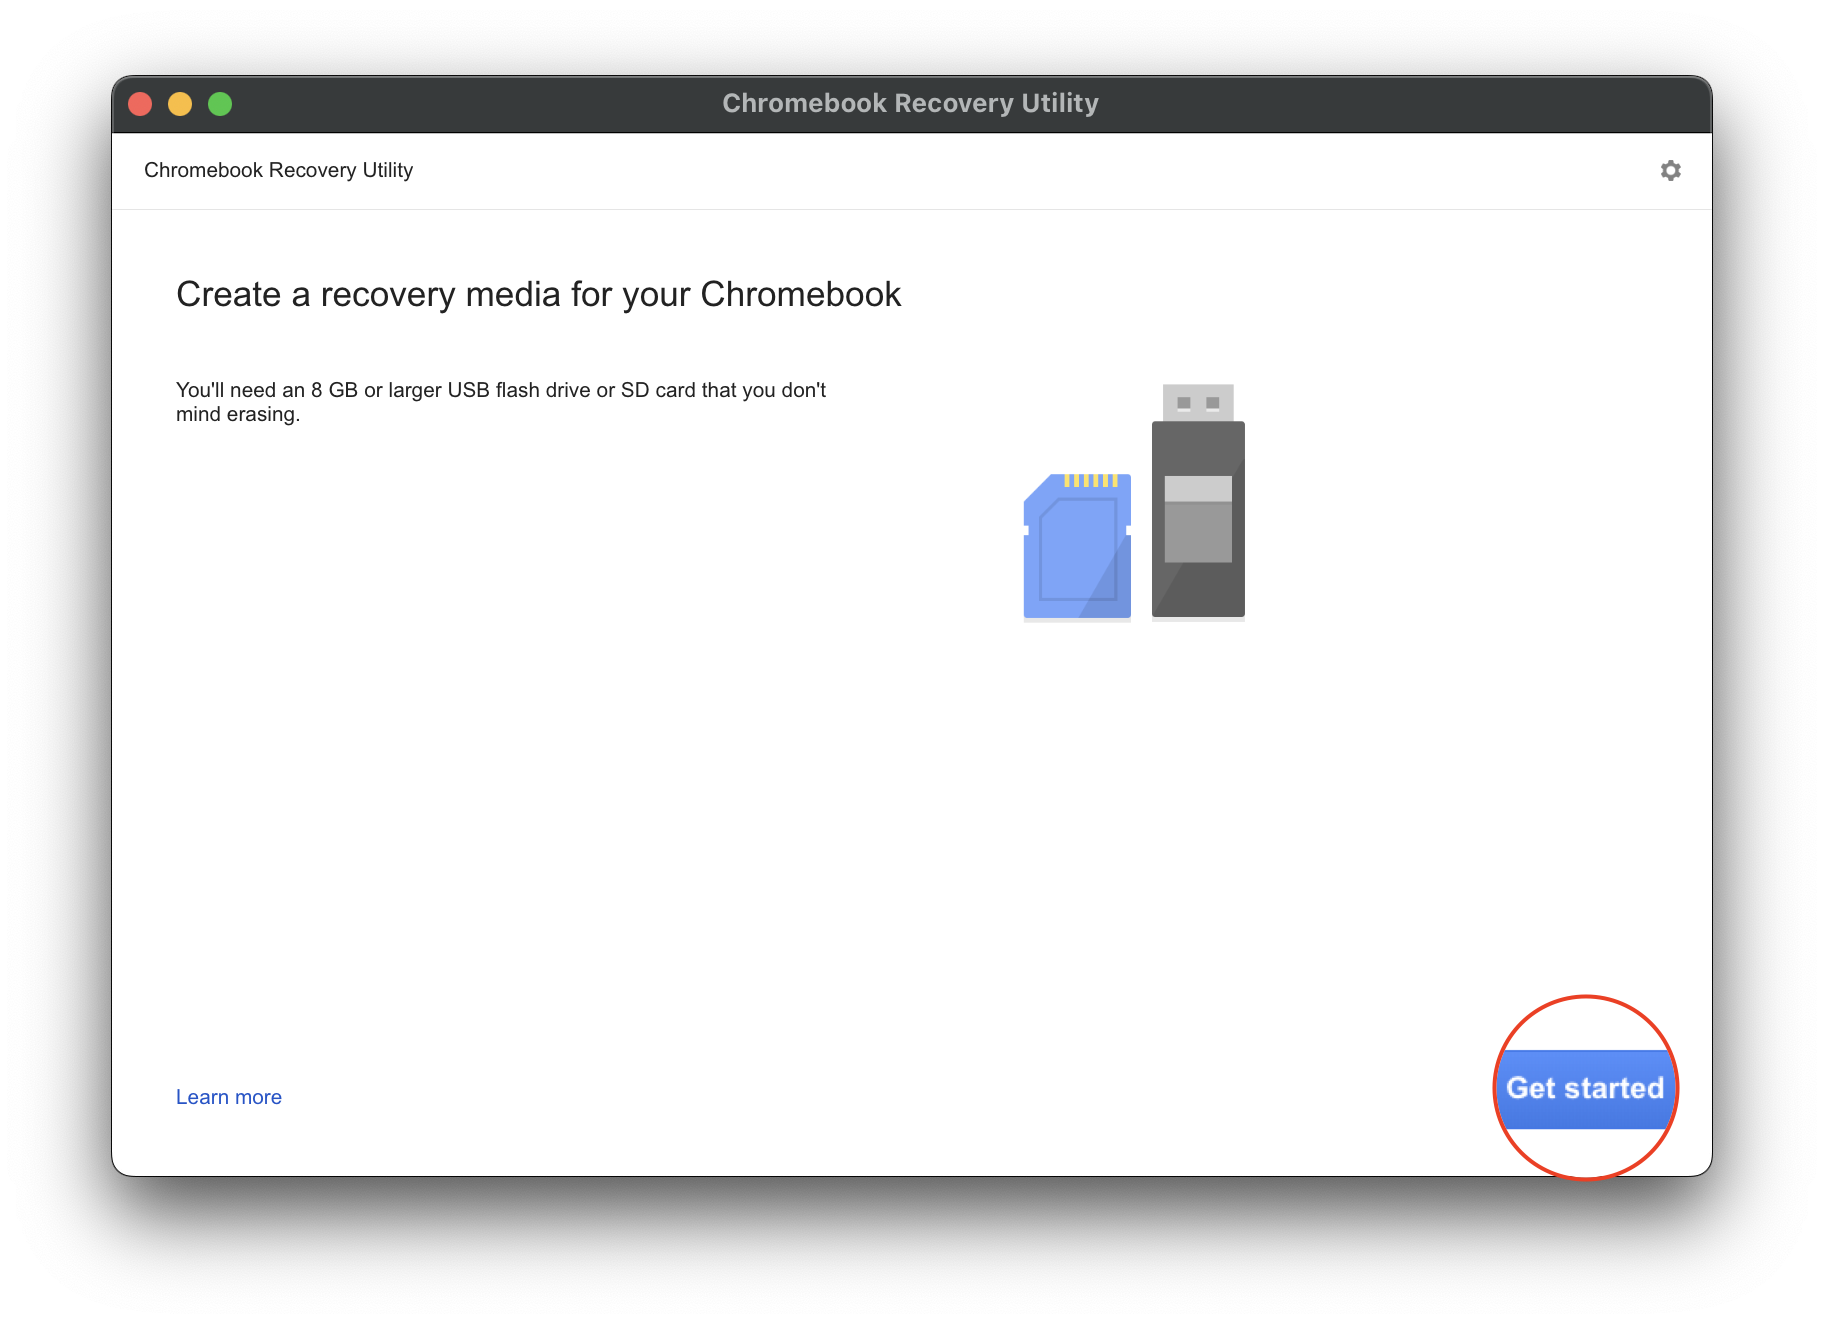
2. Click the Get Started button.
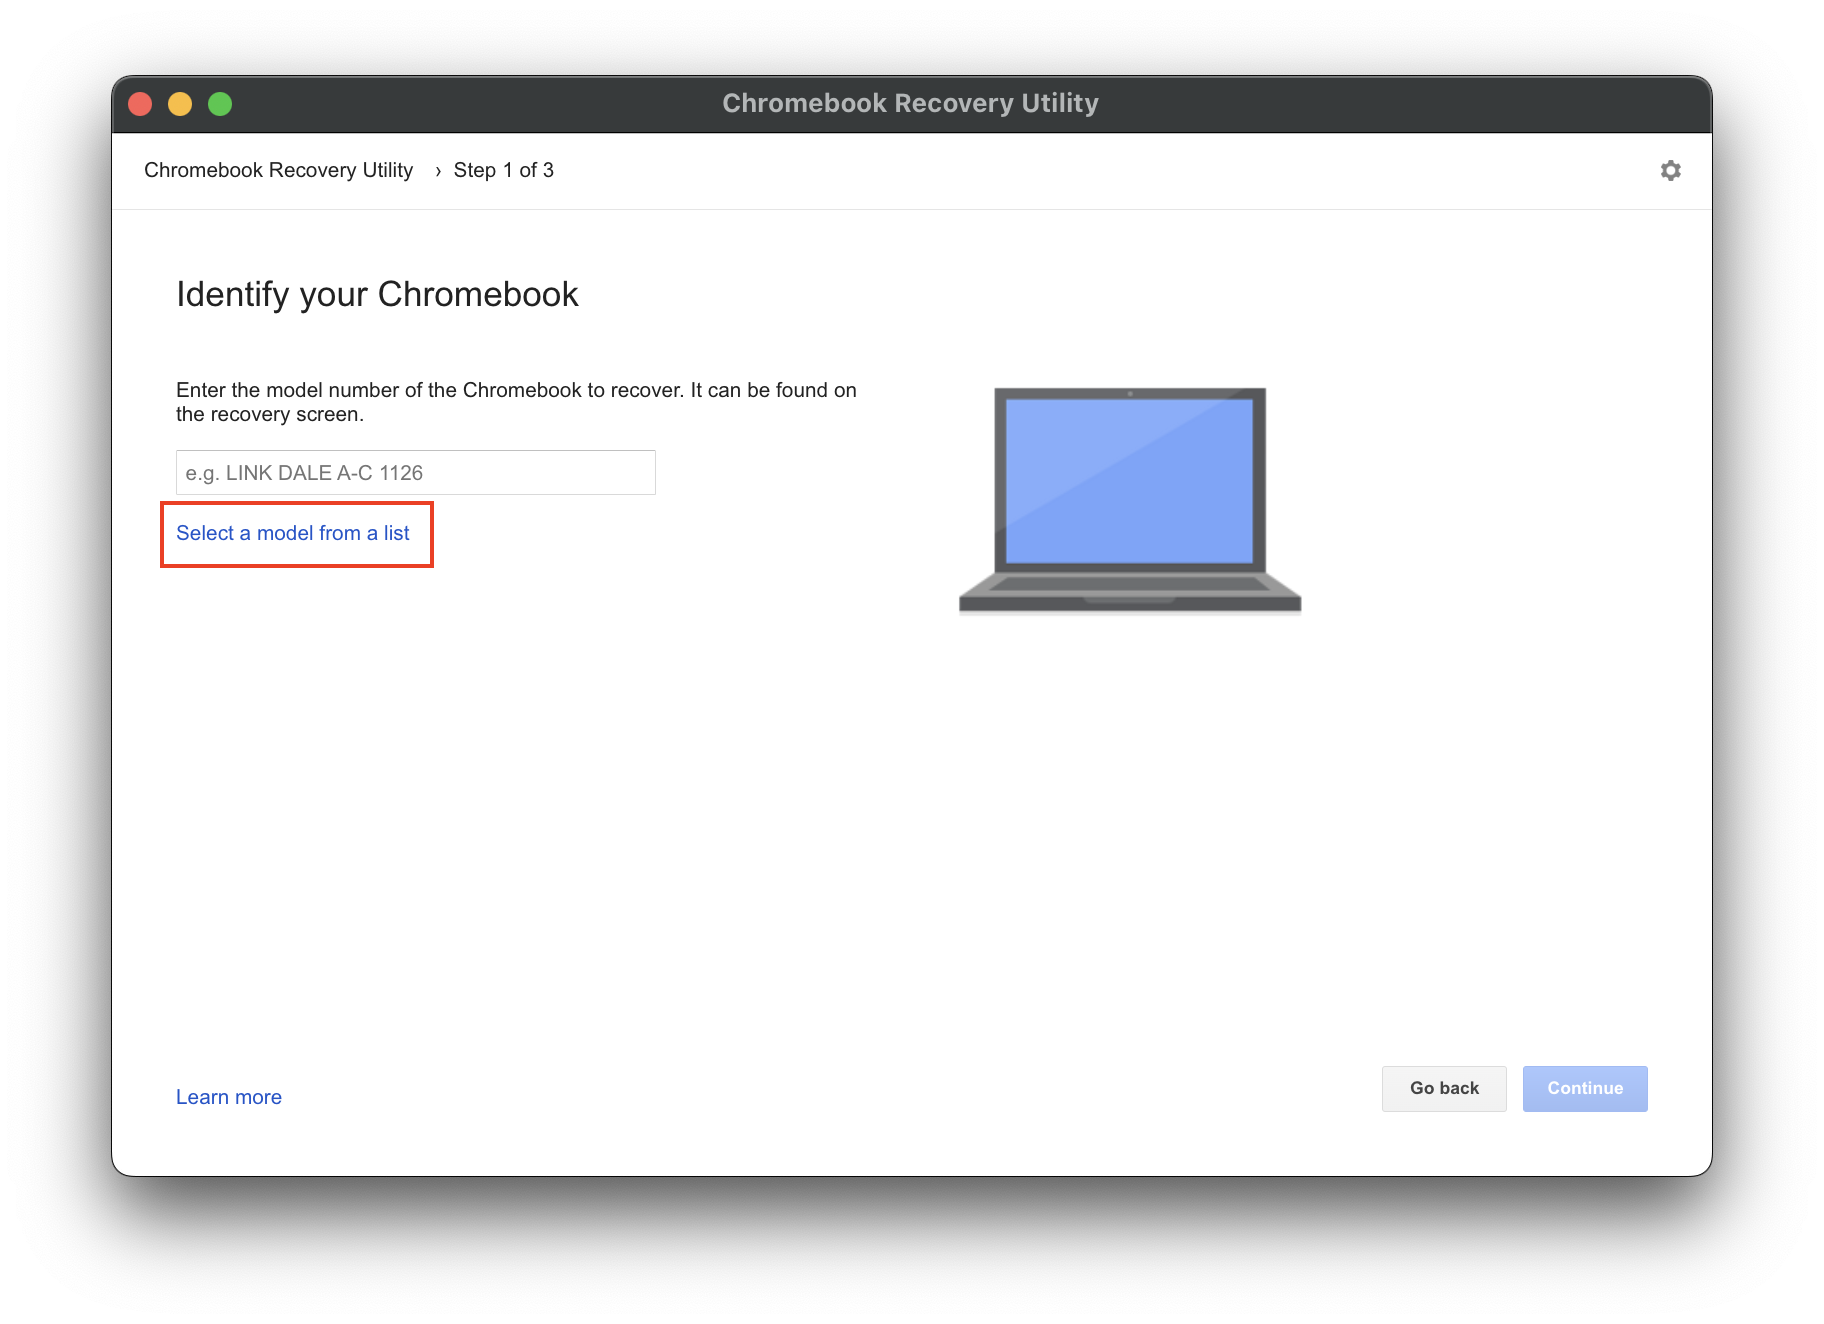
3. On the Identify your Chromebook page, click Select a model from a list.
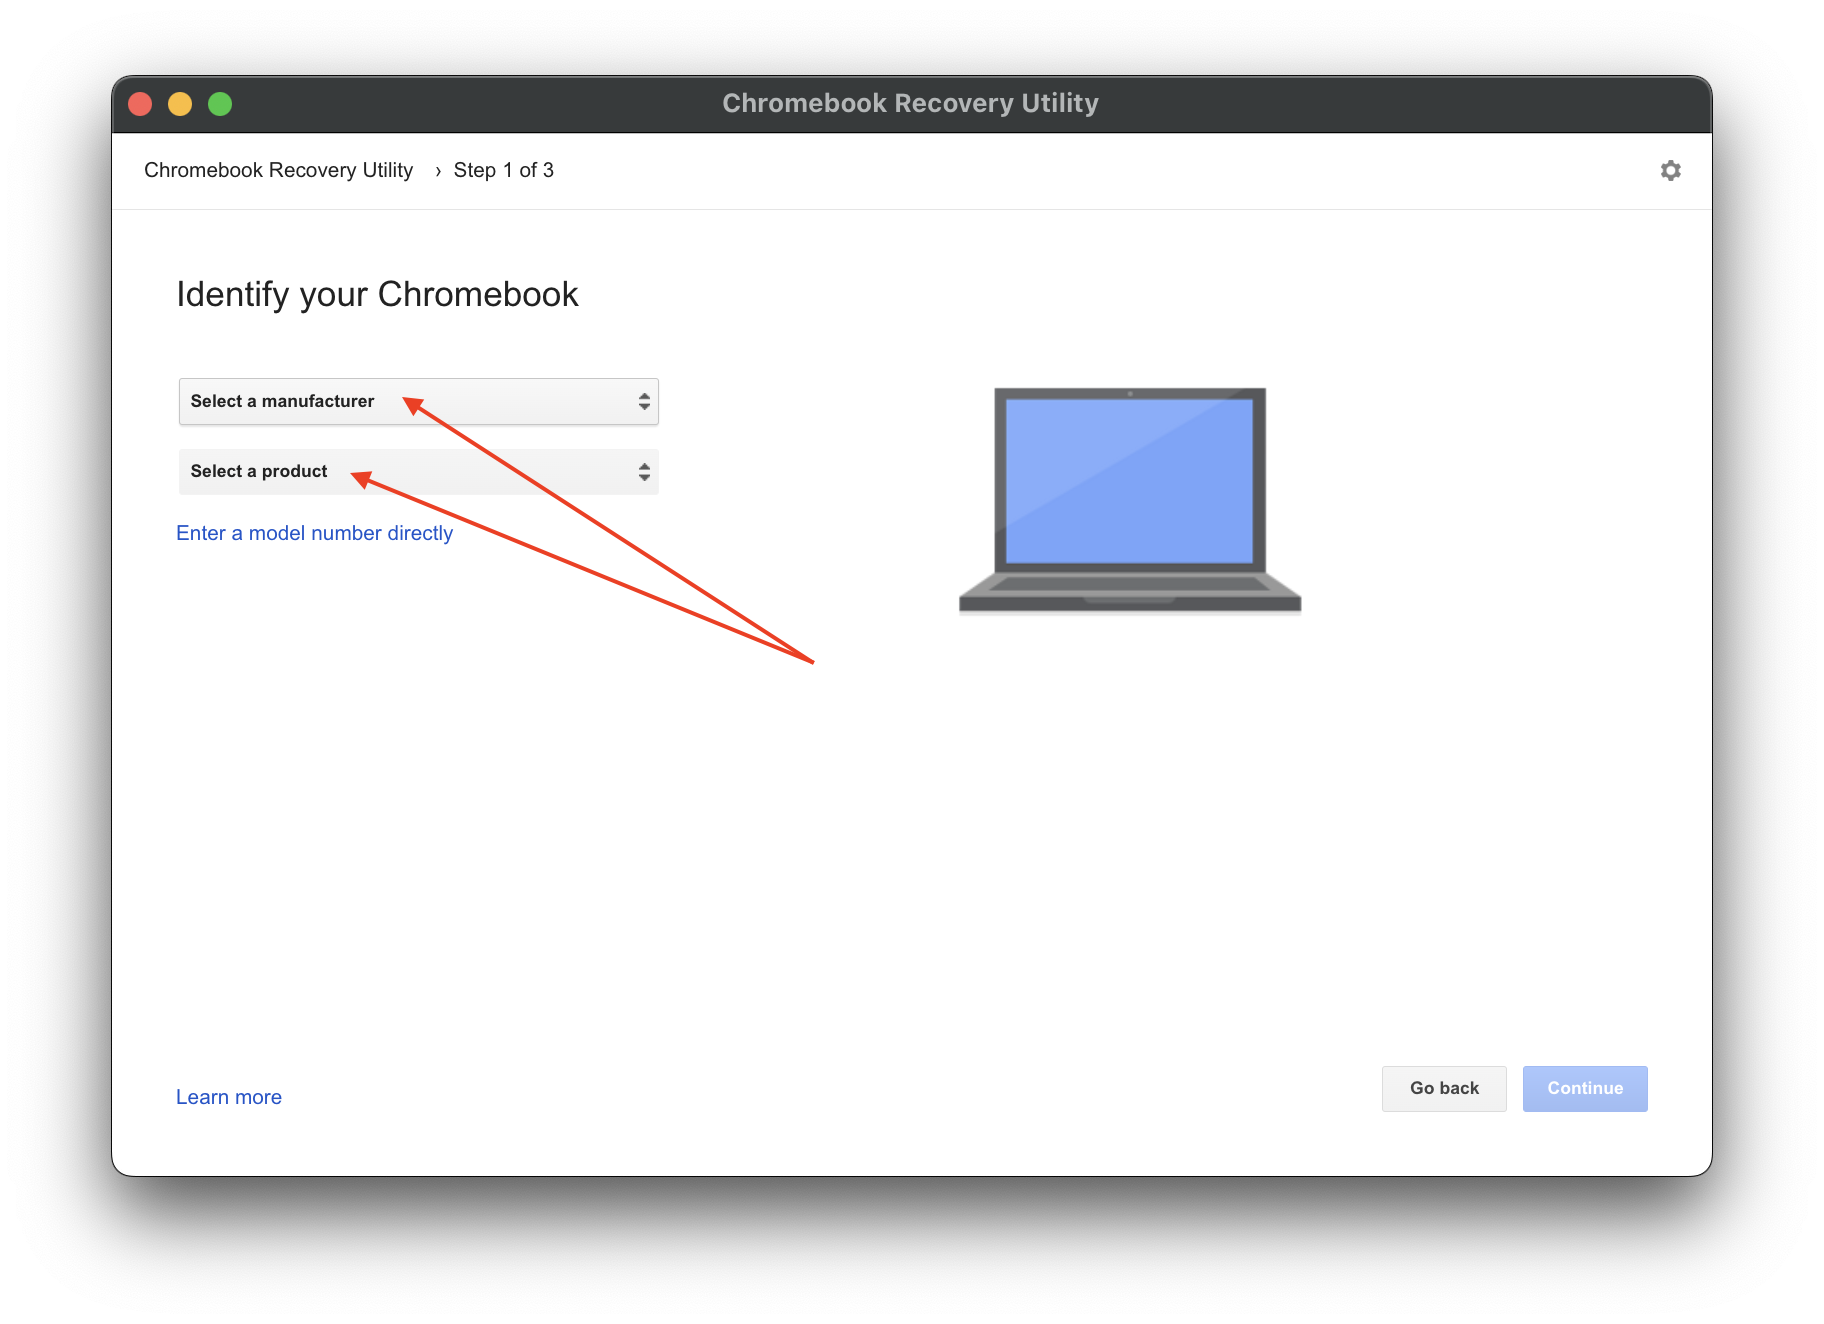
4. Under Select a manufacturer, click Google ChromeOS Flex.
5. Under Select a product, click ChromeOS Flex.
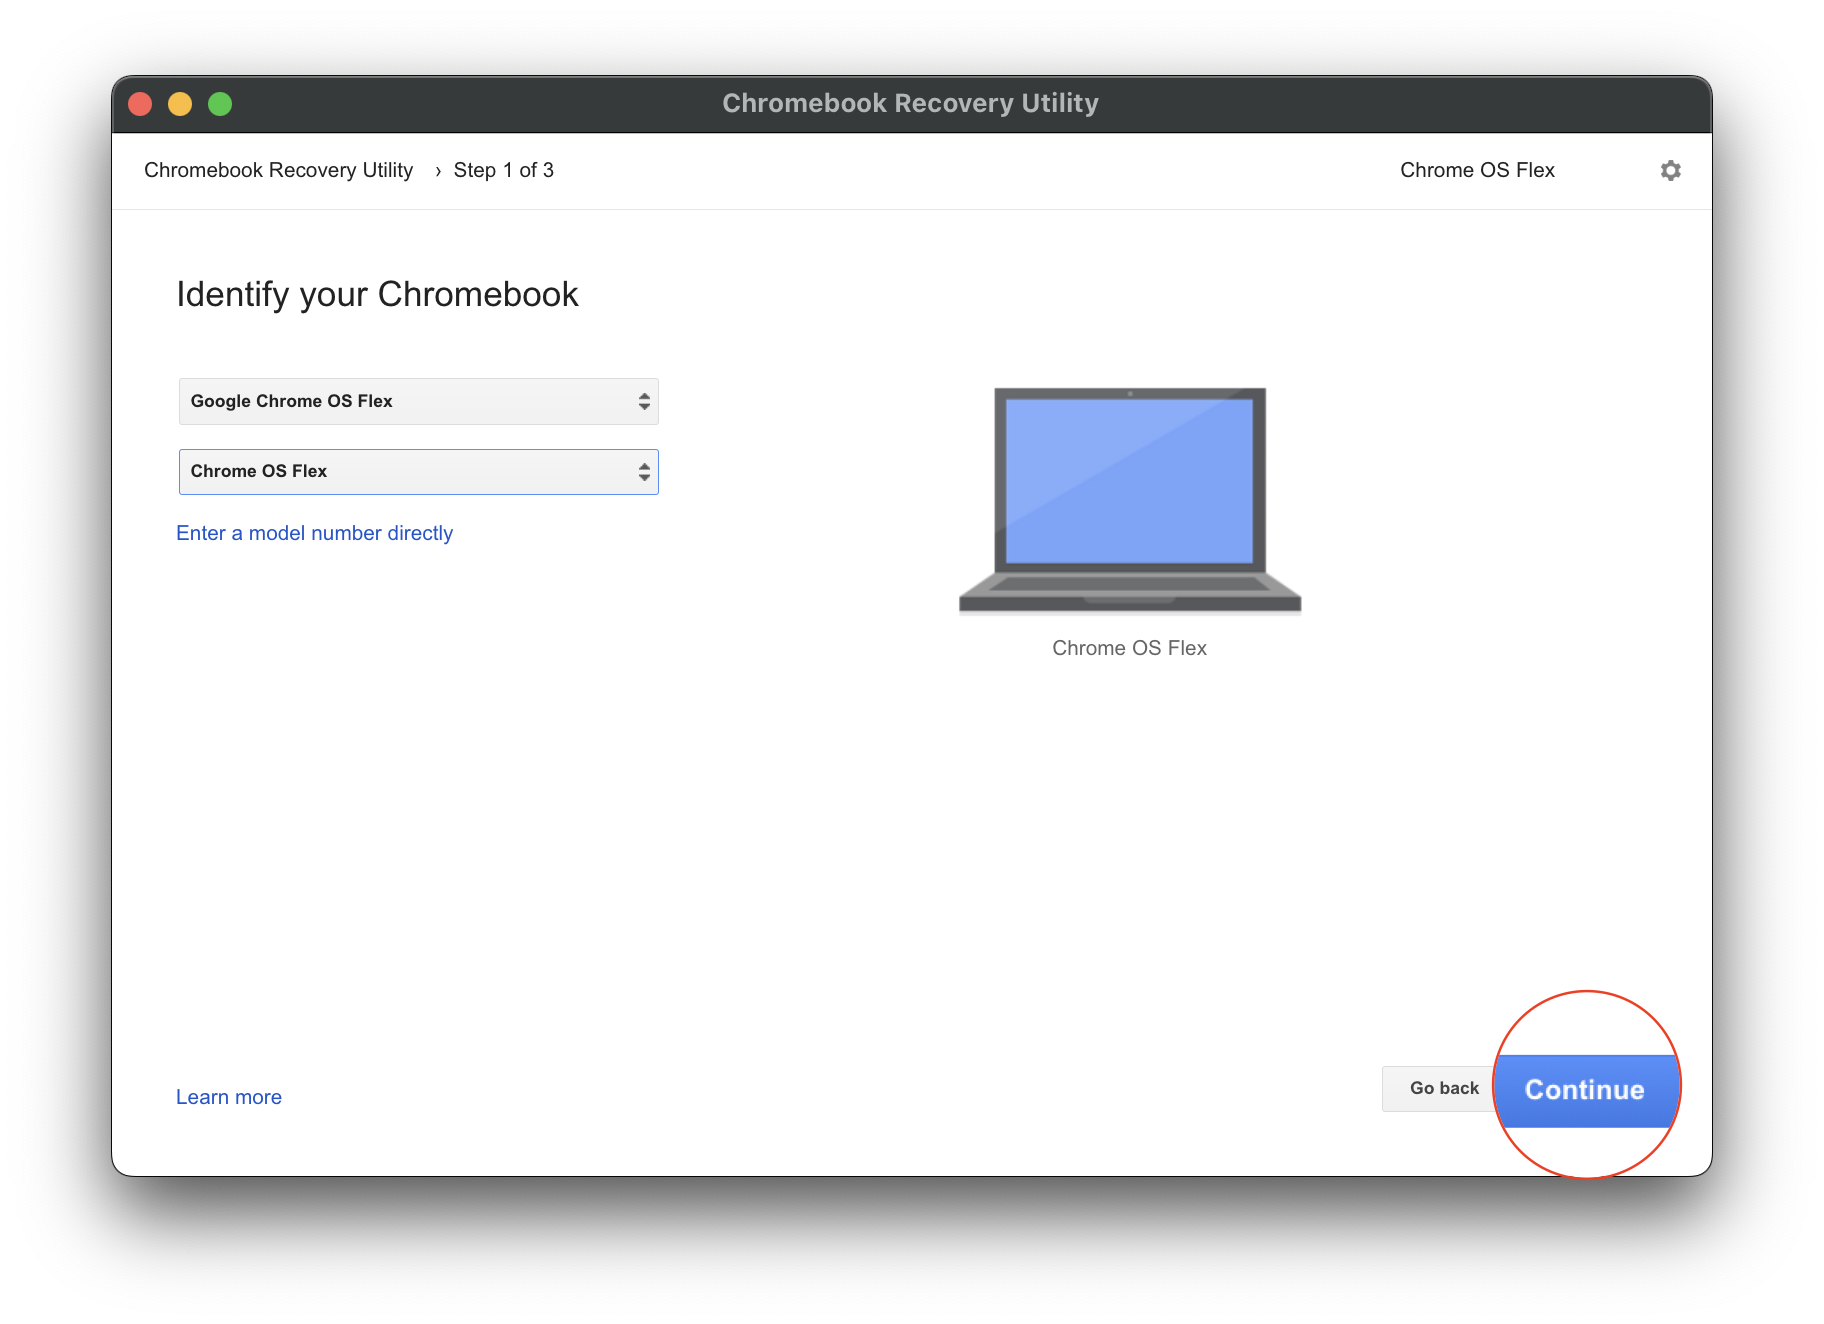
6. In the bottom right corner, click Continue.
7. When prompted, insert your USB drive.
8. Select the name of the USB drive from the drop-down menu.
9. Click the Continue button.
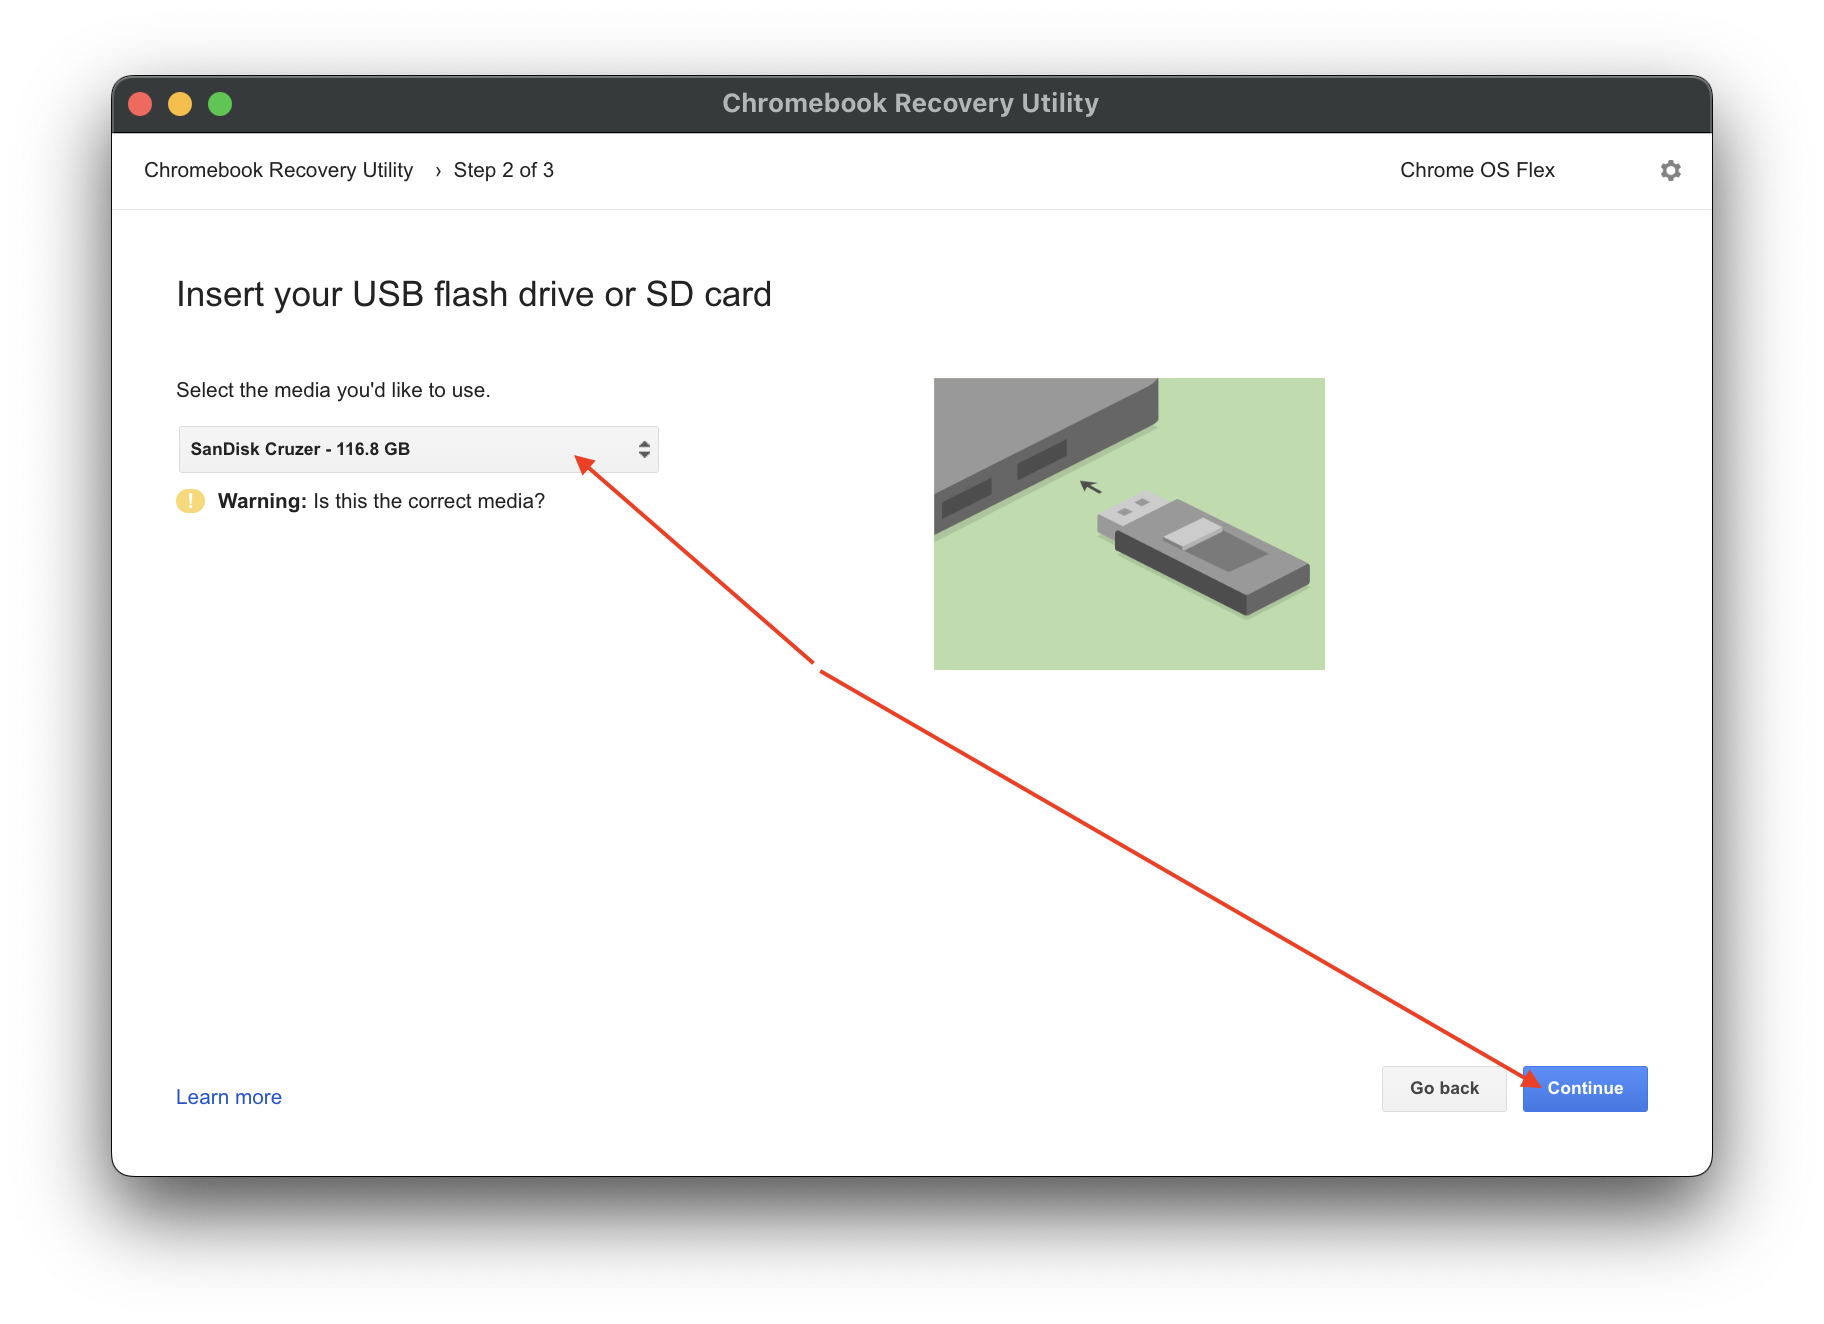
10. Click Create now.
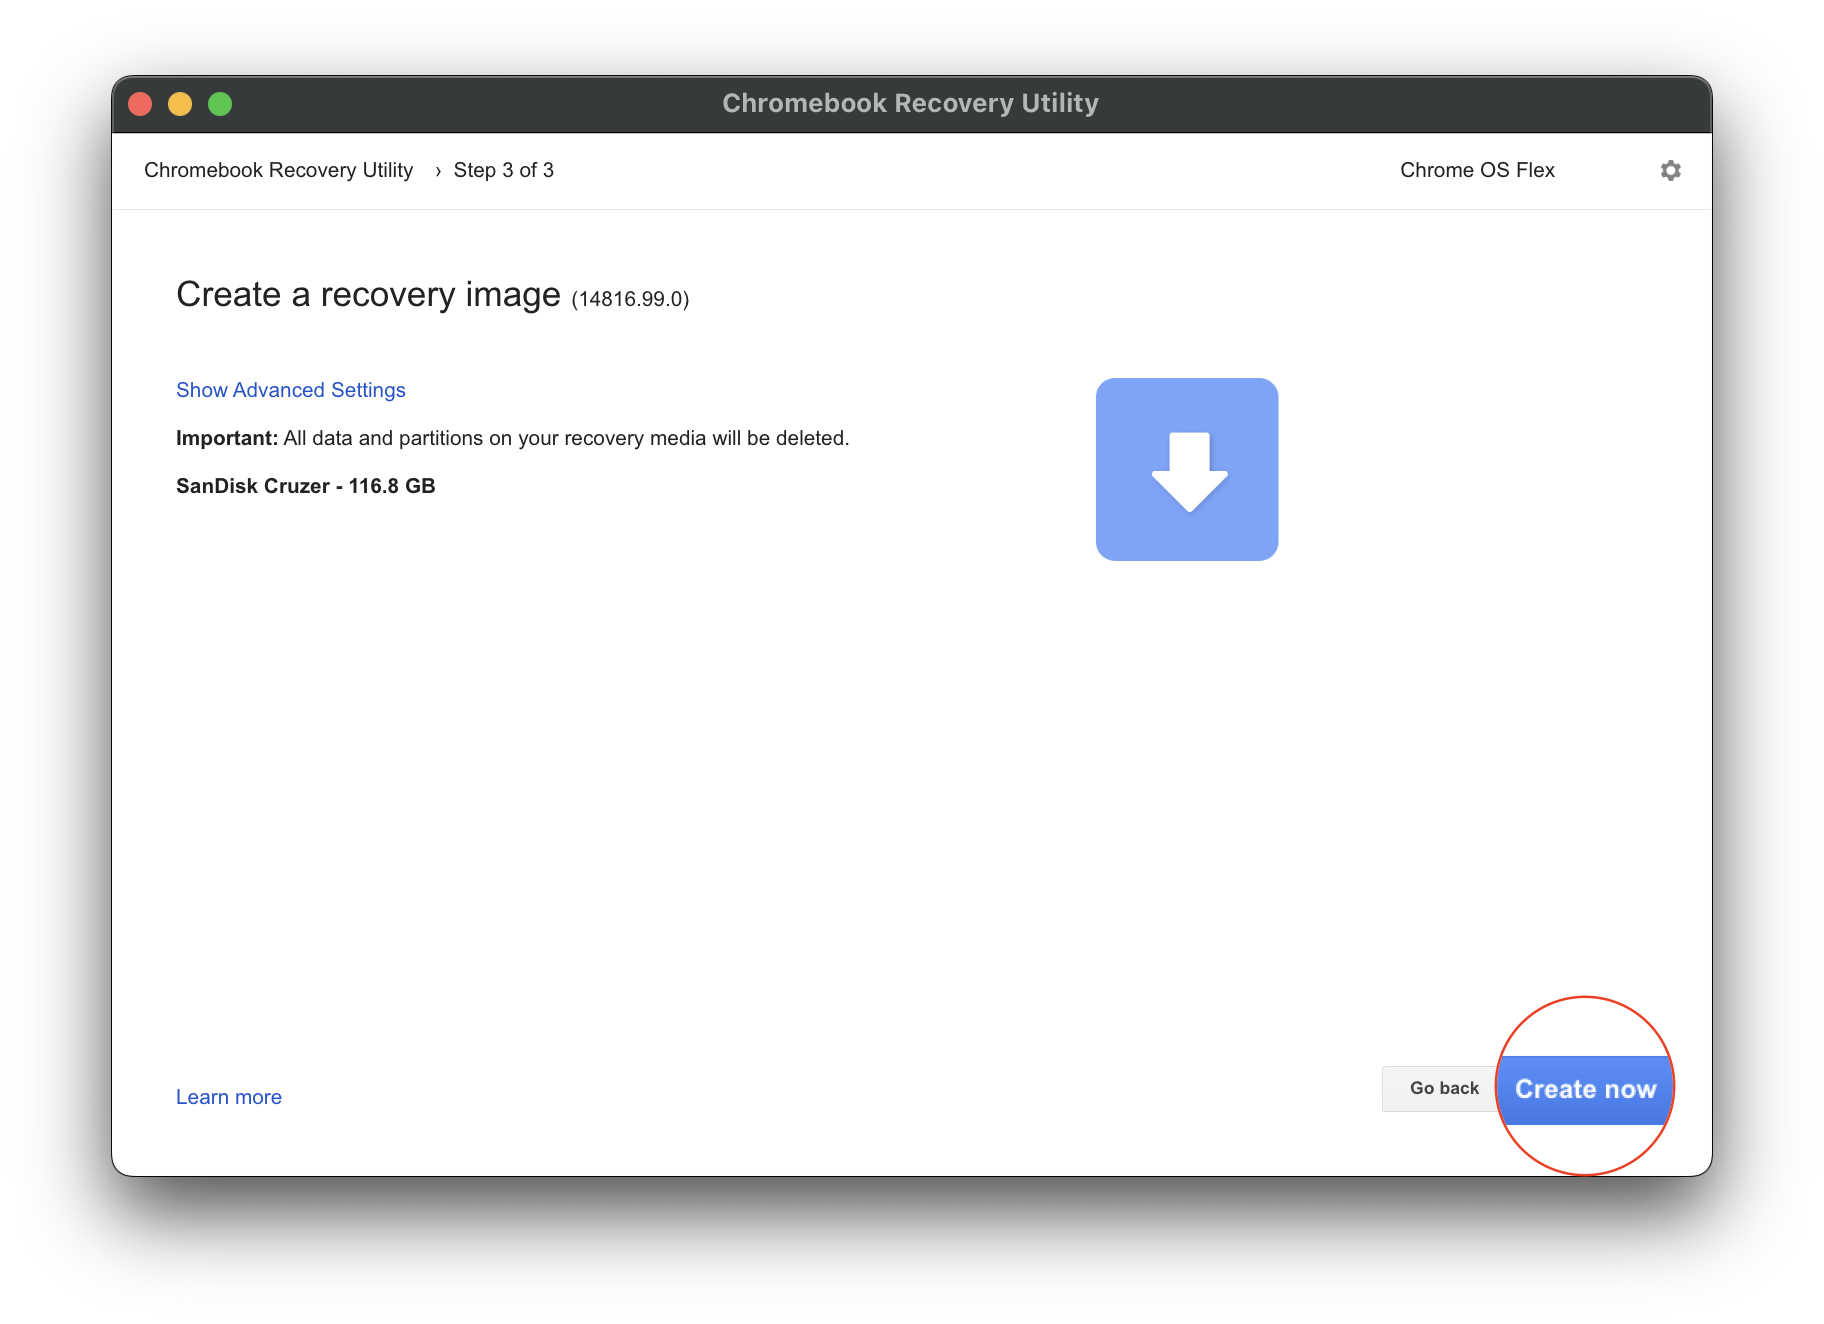
The process may take a few moments, but you’ll be prompted once the USB installer has been created. When the USB installer has been created, remove it from the device, and then proceed with the steps below.
Boot into ChromeOS Flex
So, you’ve verified that your device is compatible with ChromeOS Flex. The USB installer has been created, and you’re finally ready to breathe some life into your old laptop or computer. Here’s what you’ll need to do:
1. Turn off the device that you want to install ChromeOS Flex onto.
2. Insert the newly-created USB installer drive.
3. Press the power button on your device.
4. Immediately begin pressing the boot key of your device.
5. When prompted, select the USB installer as your boot device.
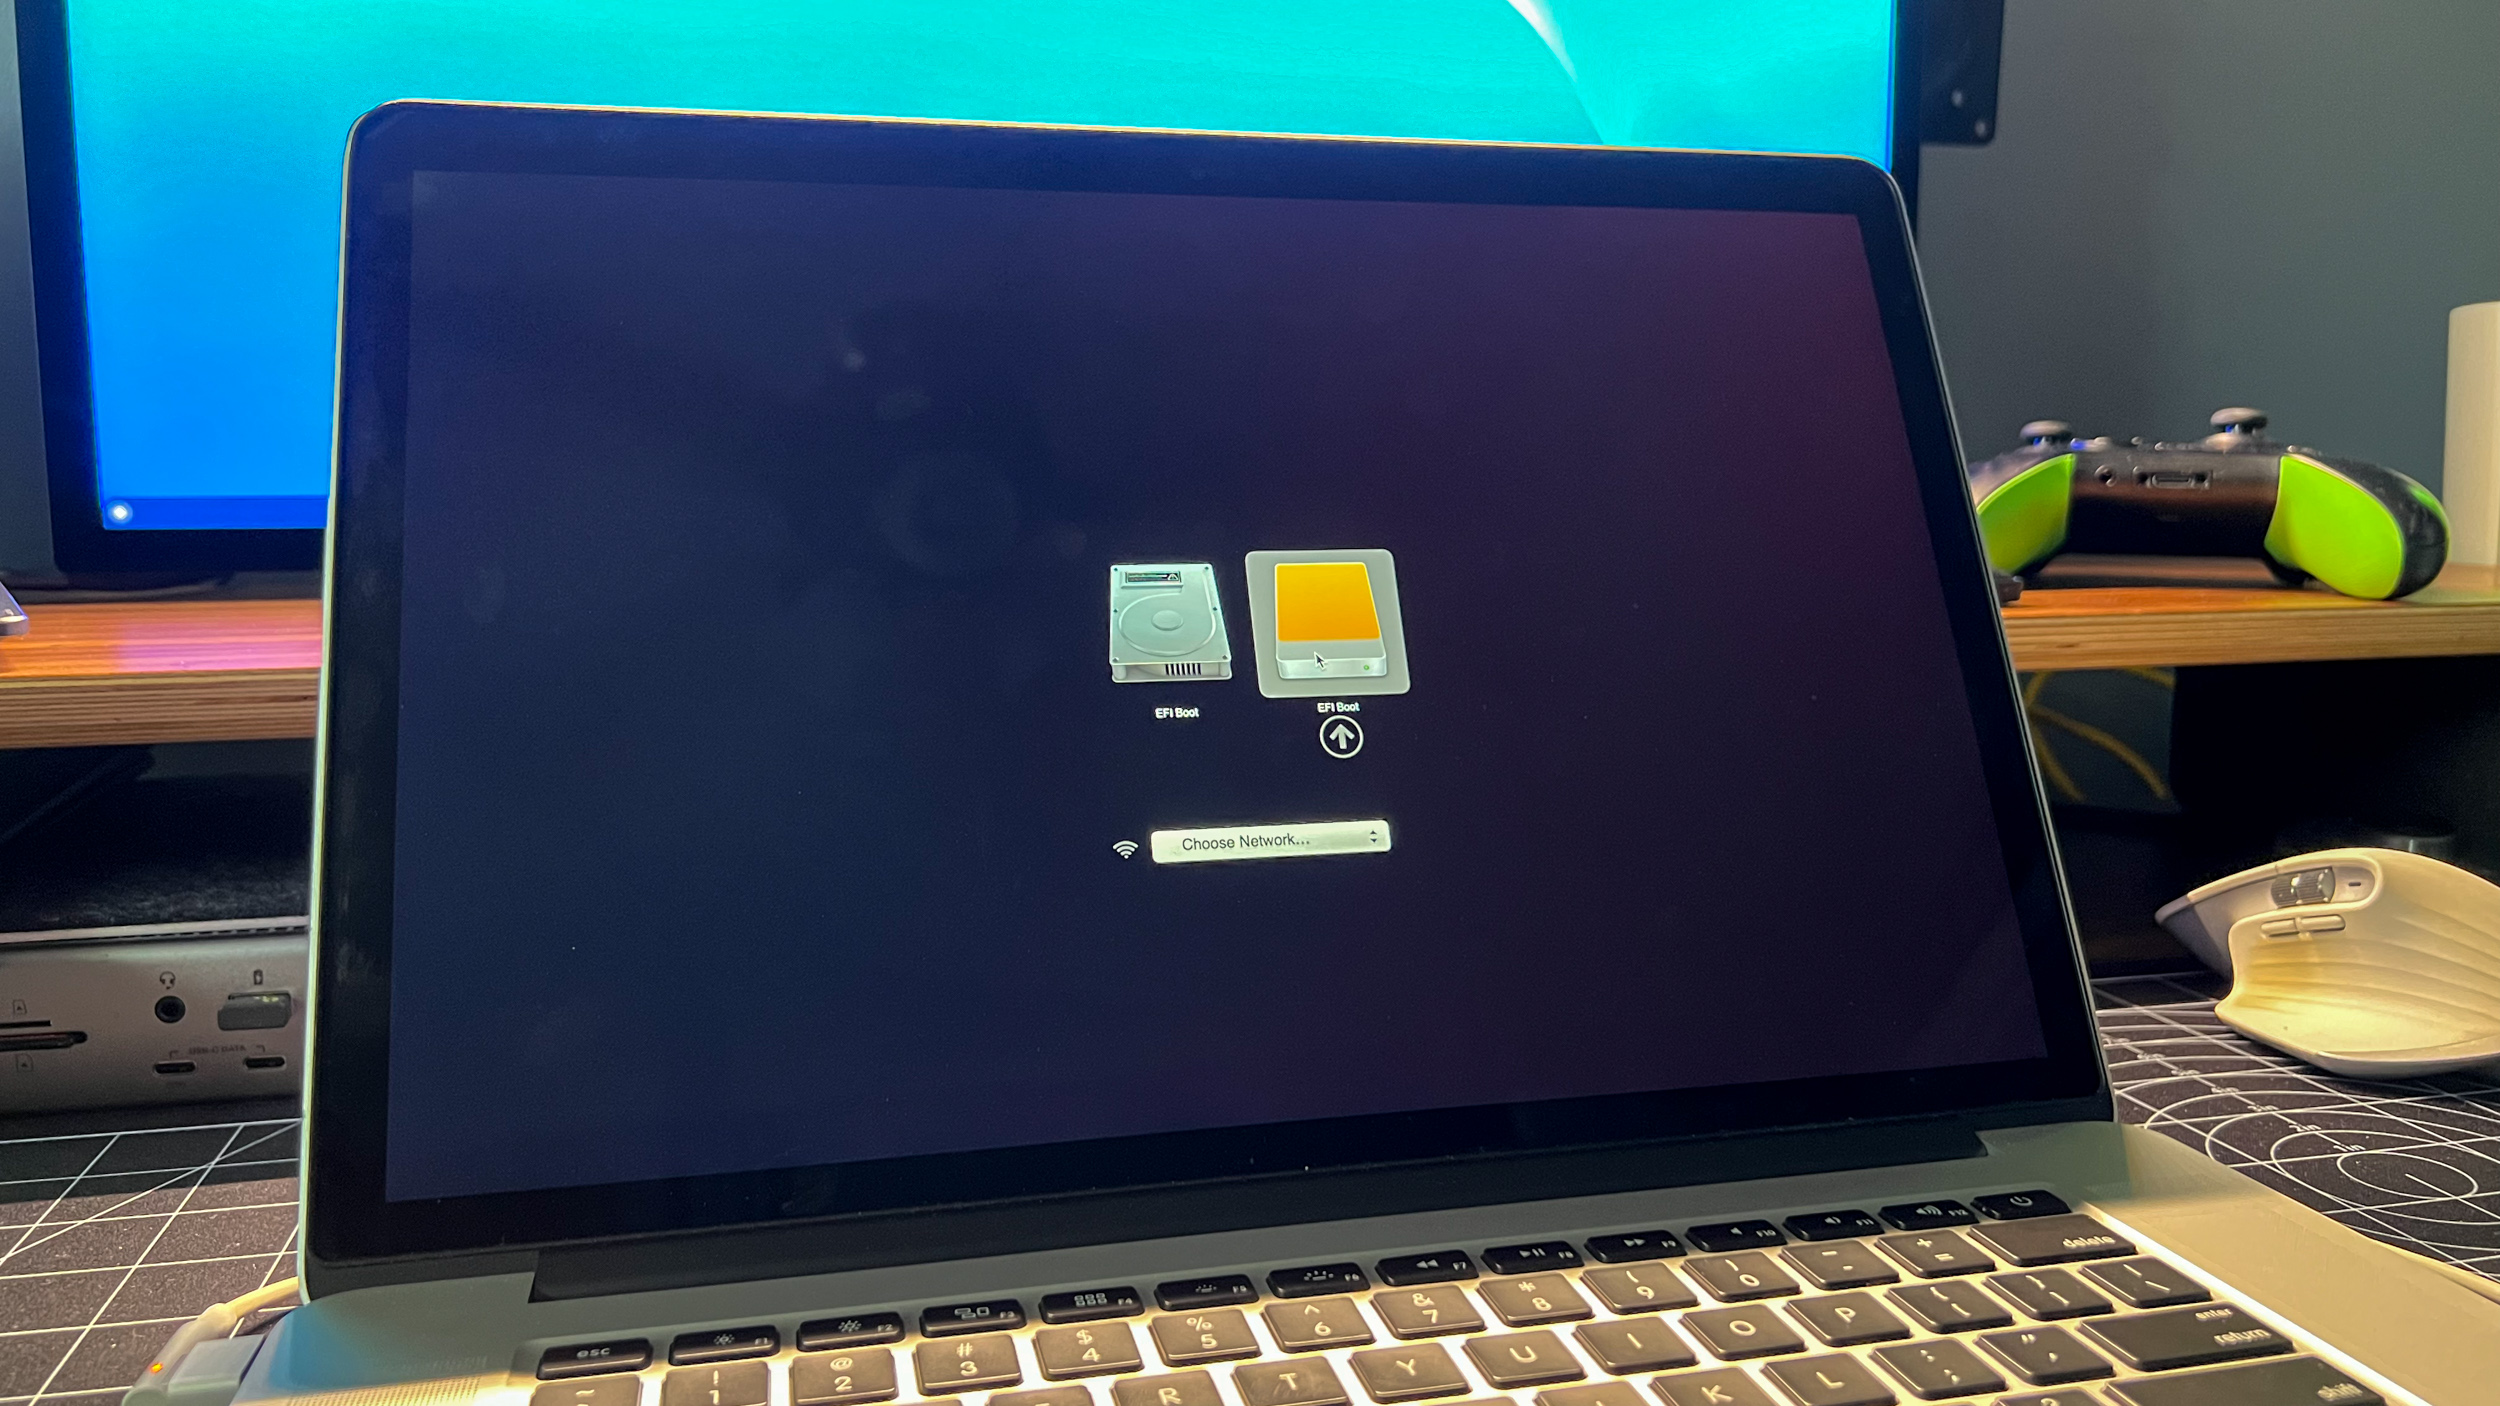
In the event that you don’t know what the boot key is for your specific device, you can refer to the user manual for that device. You can also refer to chart below, which should work for most devices, but may not work for all of them.
| Manufacturer | Boot key |
|---|---|
| Acer | F2 |
| Apple | Hold Option (next to the ⌘ key) |
| ASUS | Del |
| Dell | F12 |
| Gateway | F1 |
| HP | F9 |
| Intel | F2 |
| Lenovo | F12 |
| Toshiba | F2 or F12 |
| Other | Try pressing Esc, any of F1-F12 keys, or Enter |
How to install ChromeOS Flex
Actually going through the steps to install ChromeOS Flex is arguably the easiest part of the entire endeavor. With the USB installer loaded as your boot device, you can finally fire up ChromeOS Flex.
When you go through the steps below for the first time, Google also makes it possible for you to “test drive” ChromeOS Flex before installing it. This is just to give you a “lay of the land,” allowing you to see if it will work for you, while seeing if there are any issues before proceeding with the installation.
1. From the Welcome to ChromeOS Flex screen, click the Get started button.
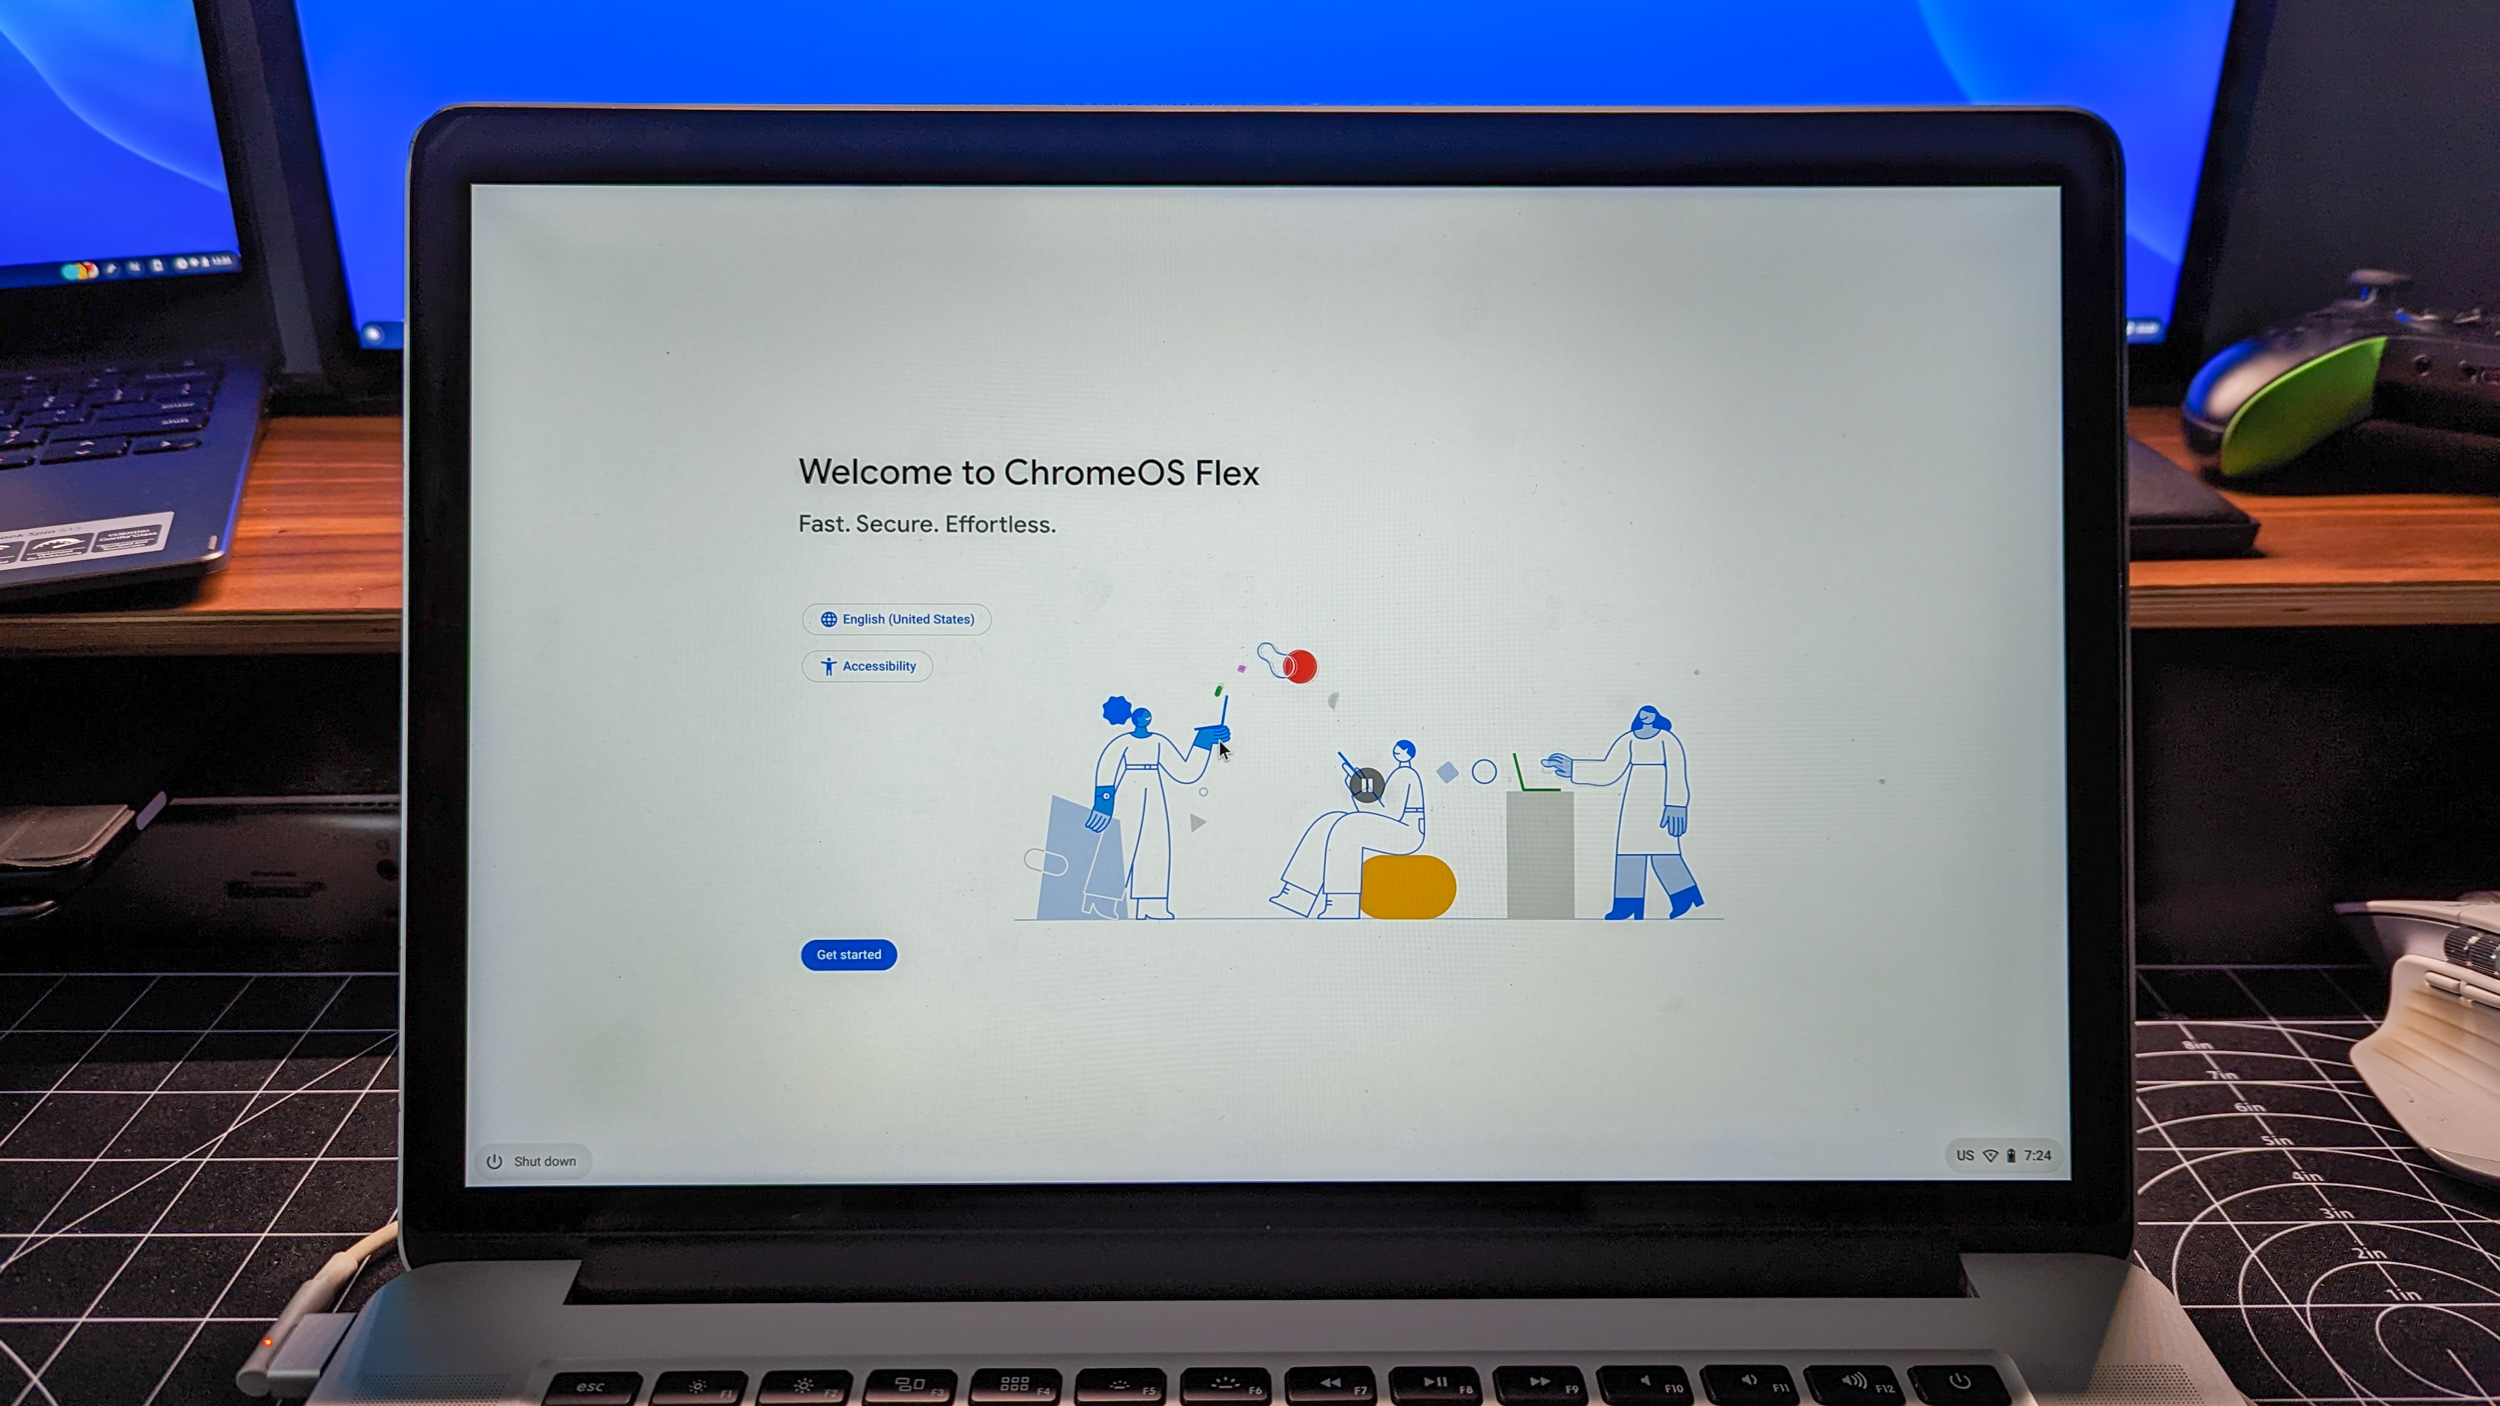
2. From the Start using ChromeOS Flex screen, click Install ChromeOS Flex.
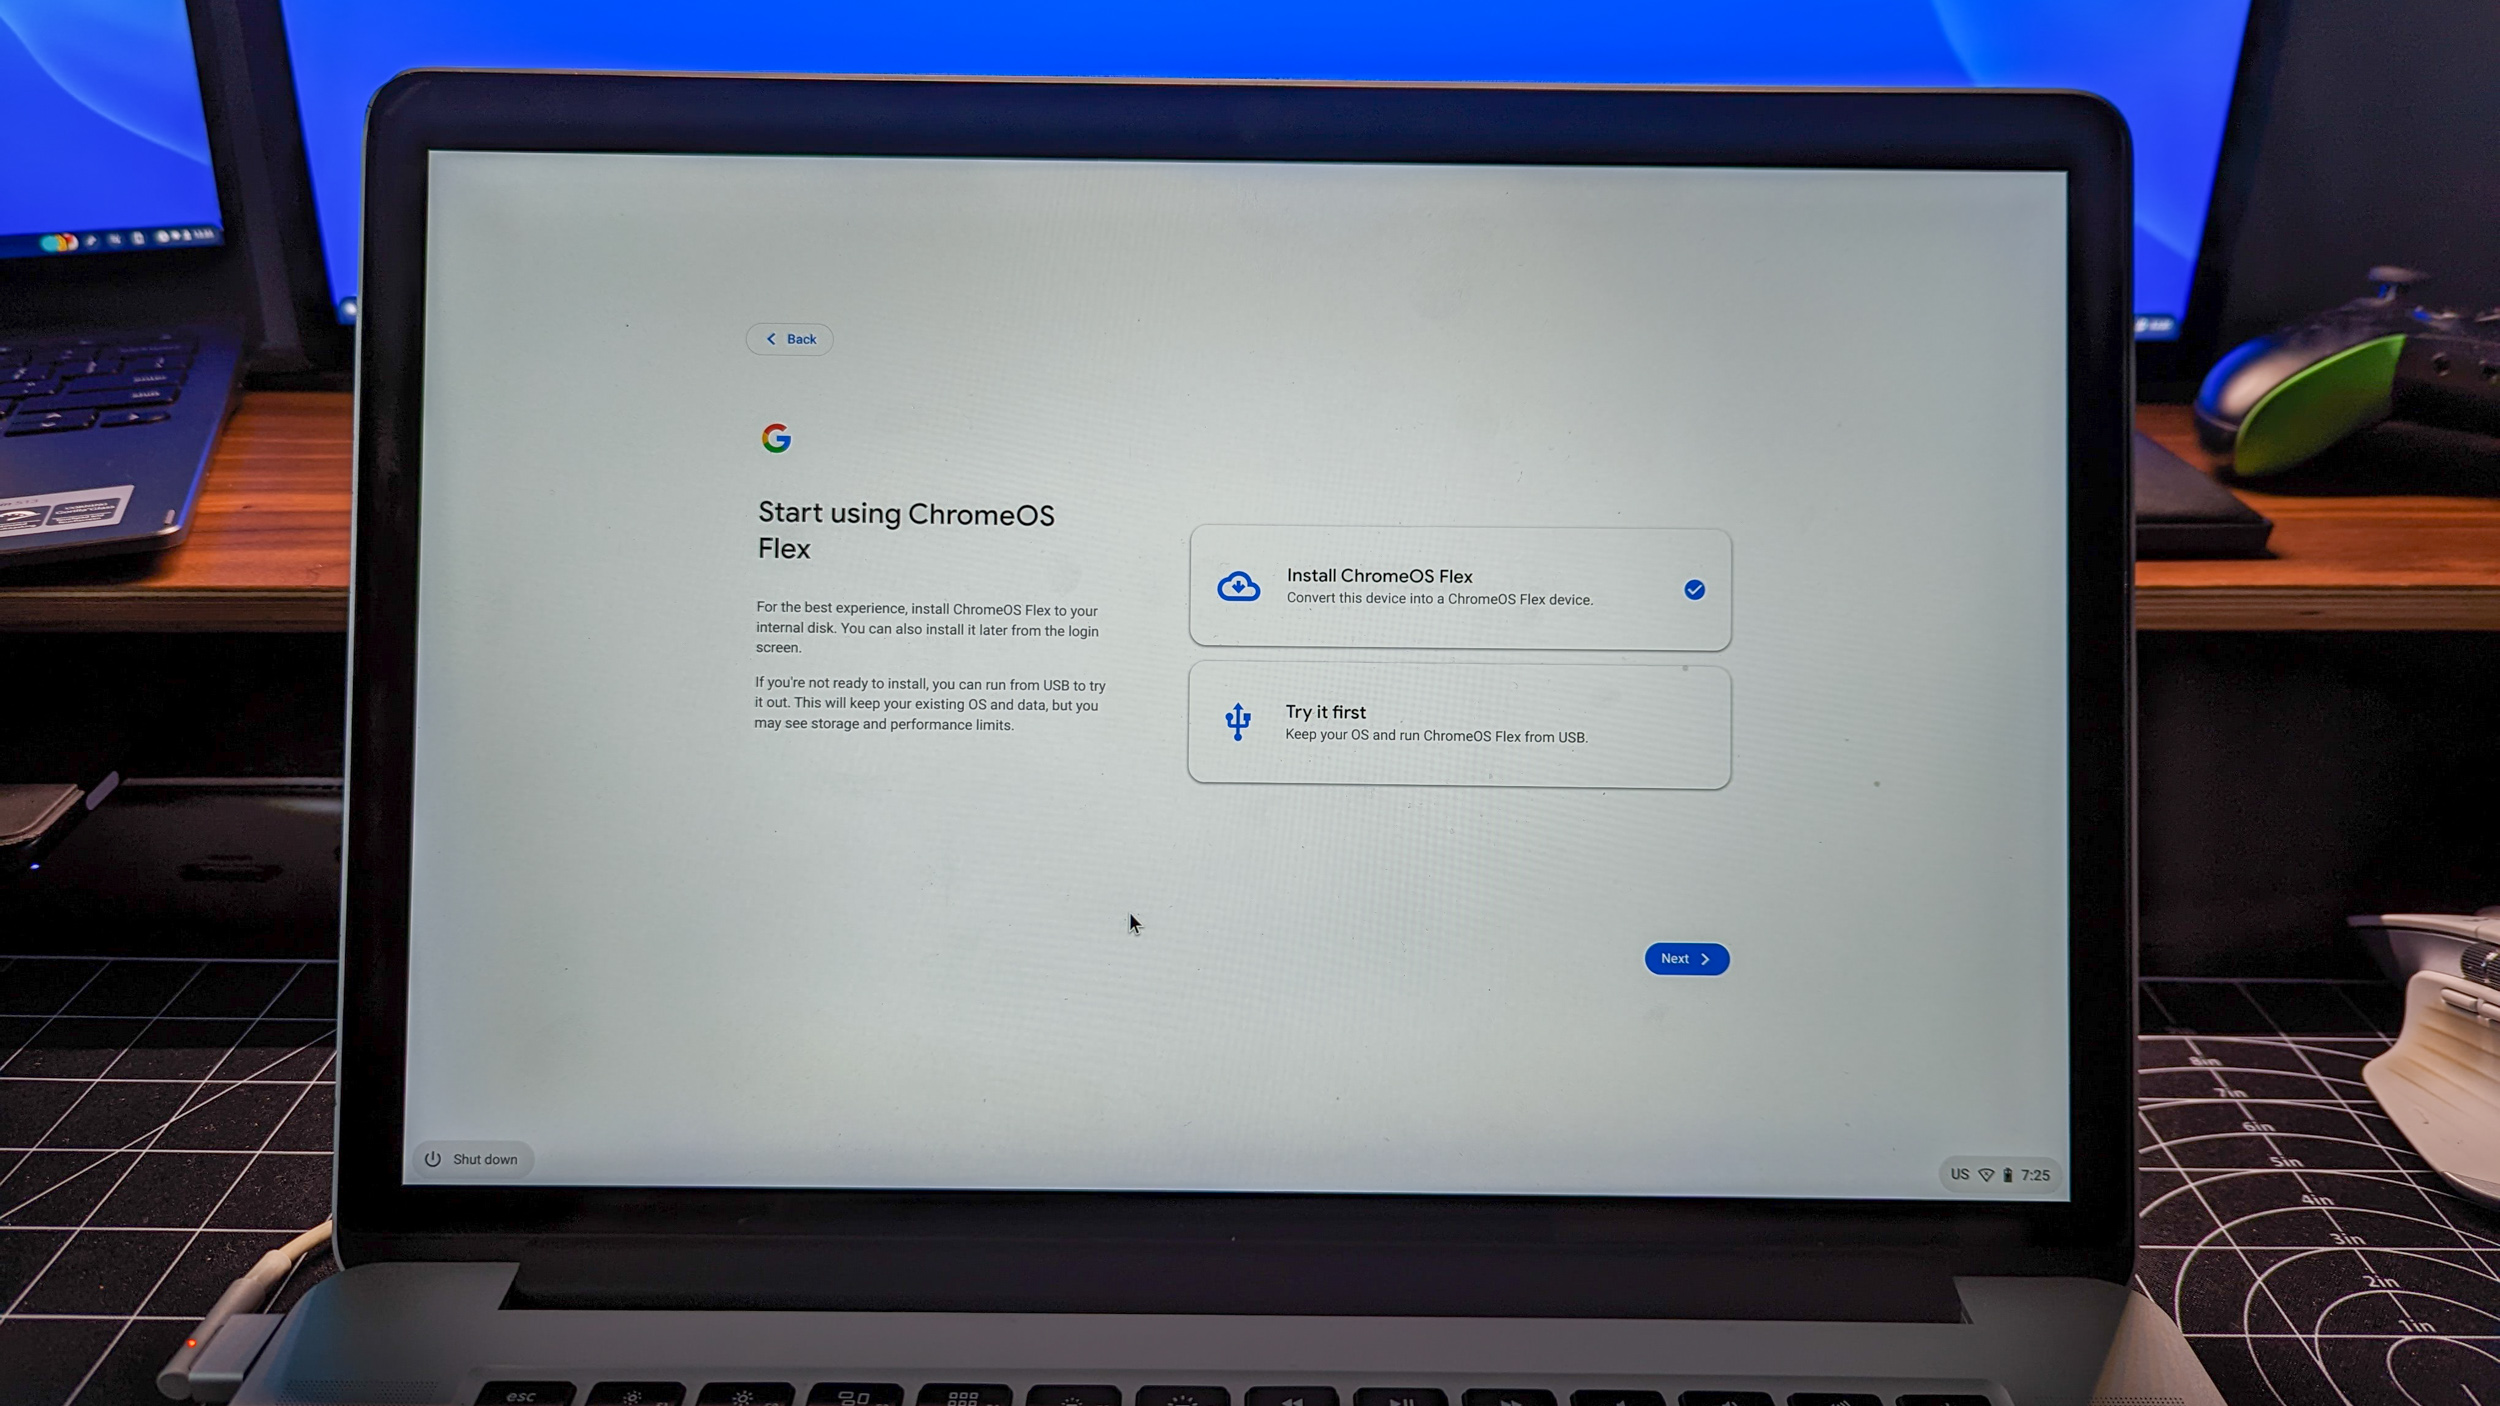
3. Read through and confirm the on-screen warning regarding erasing data.
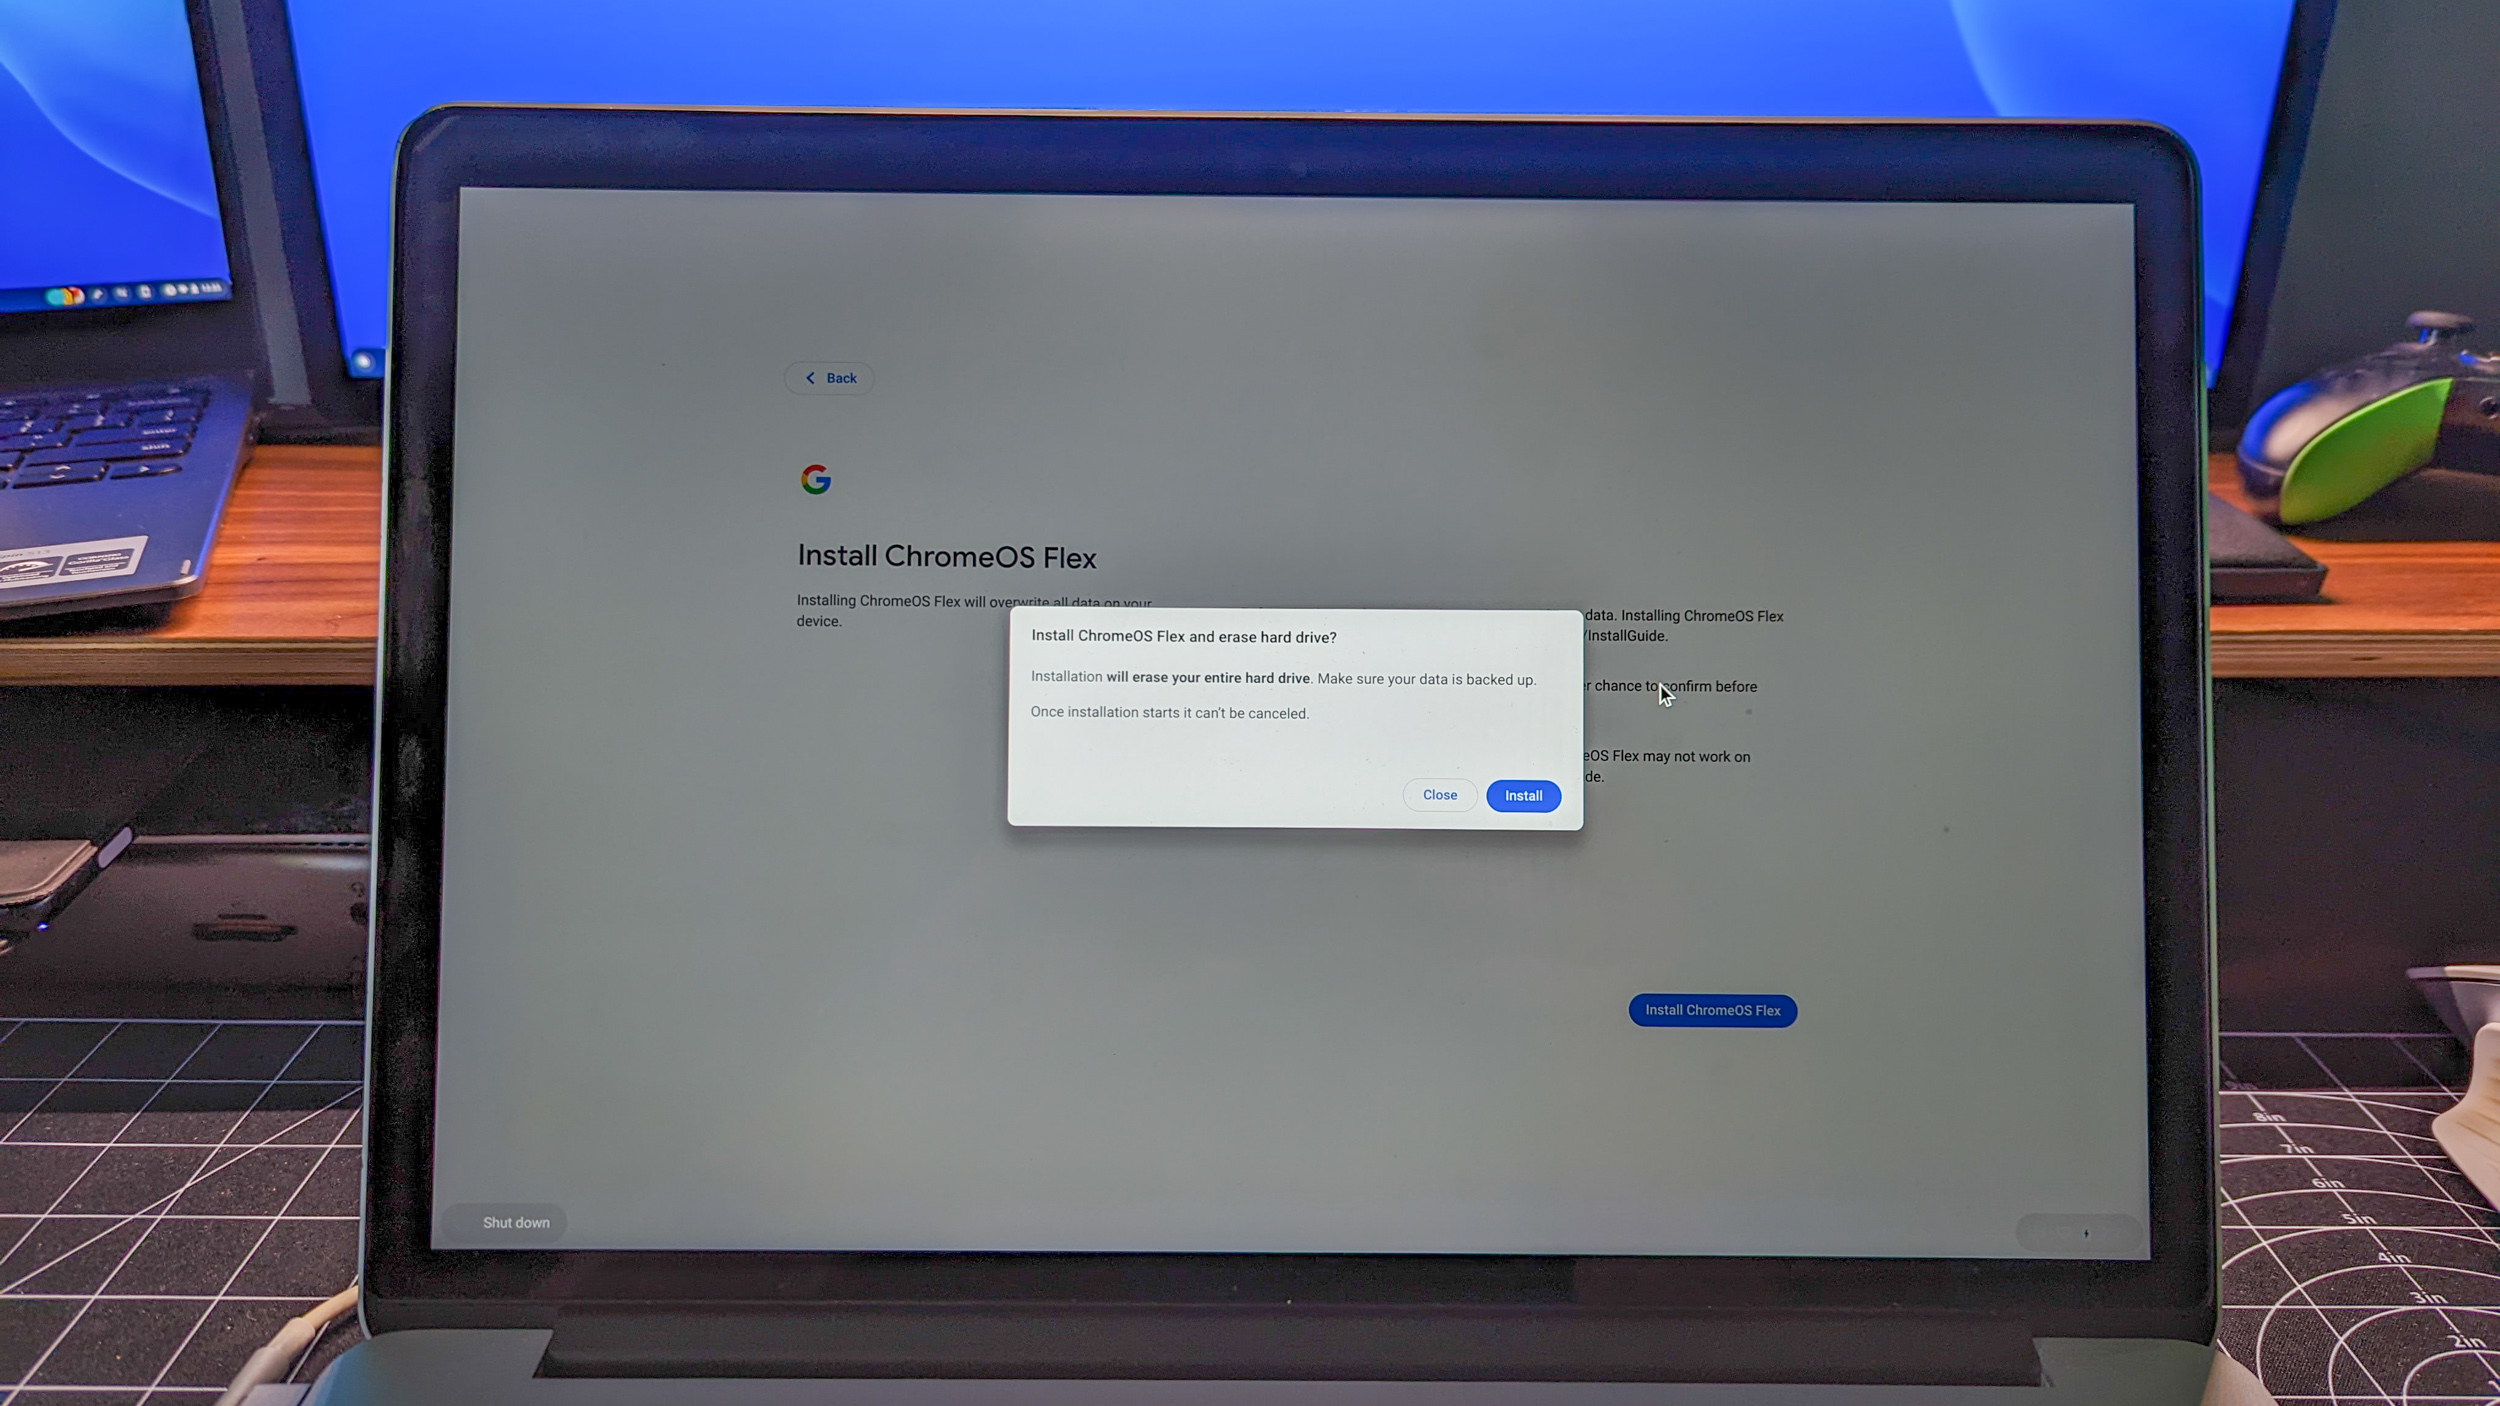
4. Click the Install ChromeOS Flex button.
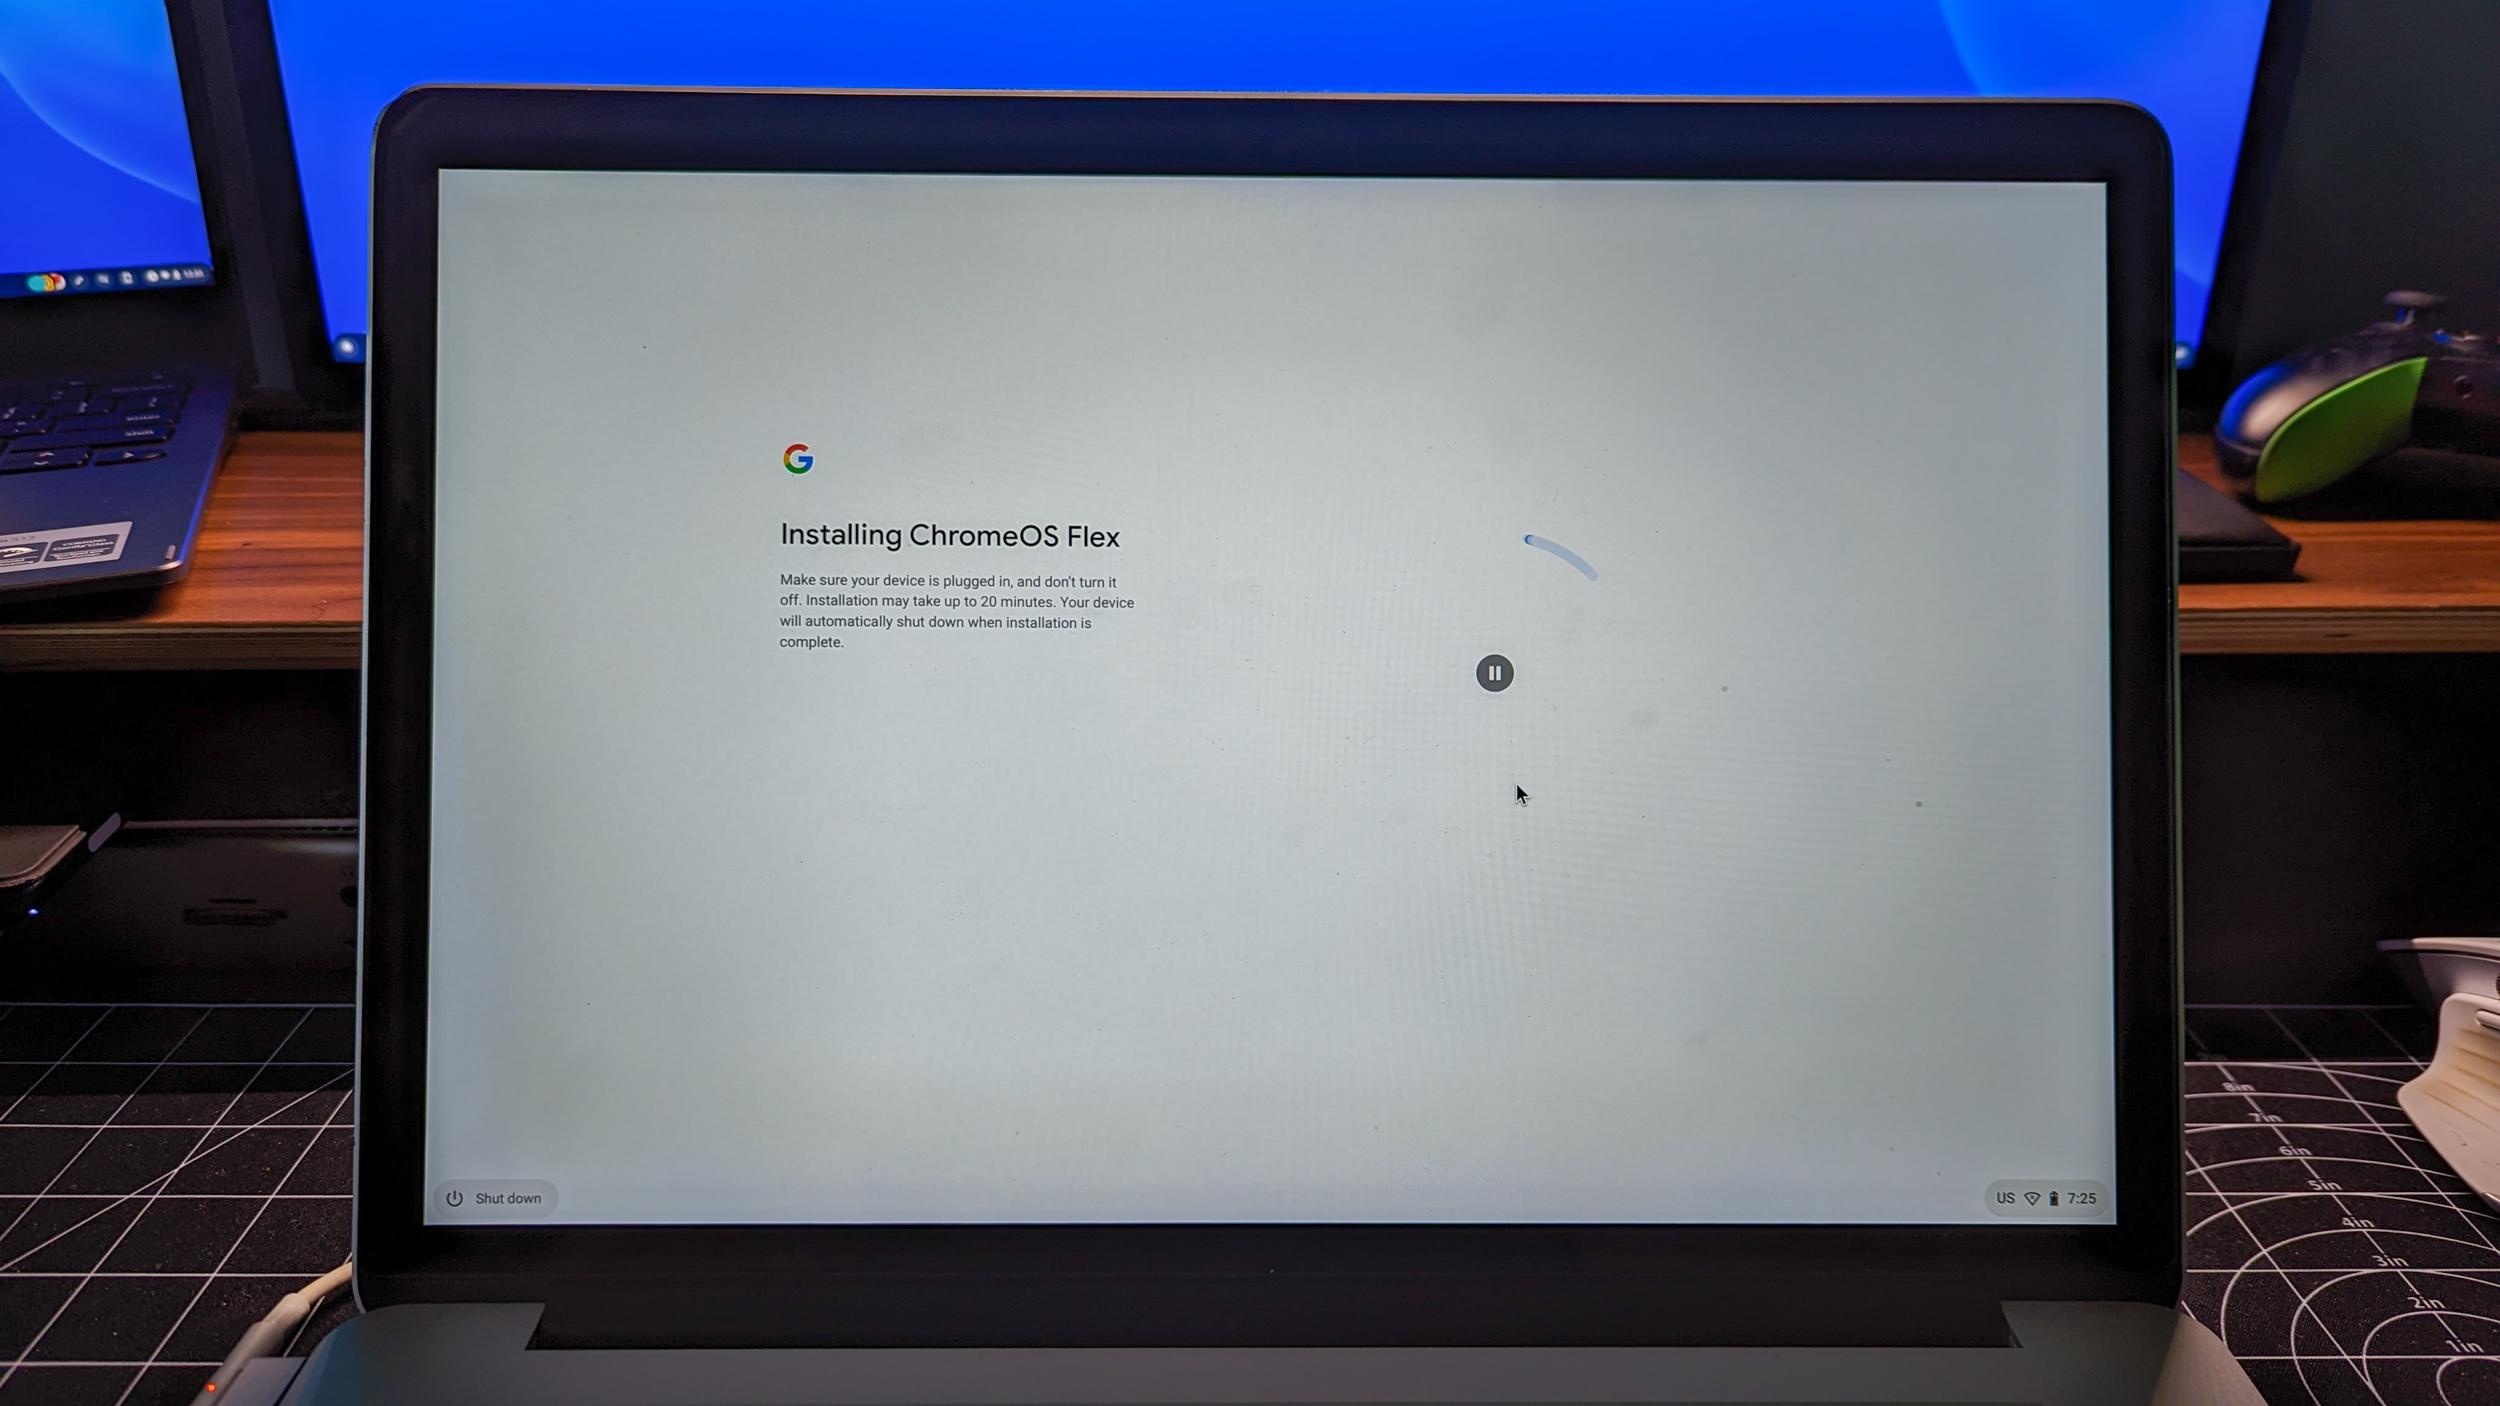
5. After the installation is finished, a message will appear on the screen. Your device will then automatically turn itself off.
6. Once the device is turned off, remove the USB installer from the computer.
Set up your new ChromeOS Flex device

With ChromeOS Flex installed on your device, the only thing left to do is to turn it back on and get signed in. The setup process is no different from setting up a new Chromebook or Chromebox for the first time.
From there, it’s the same setup experience that you’ll find with traditional Chromebooks. After a few moments, all of your apps and preferences will appear, and aside from the hardware itself, you wouldn’t be able to even tell the difference.
Breathe new life into an aging computer
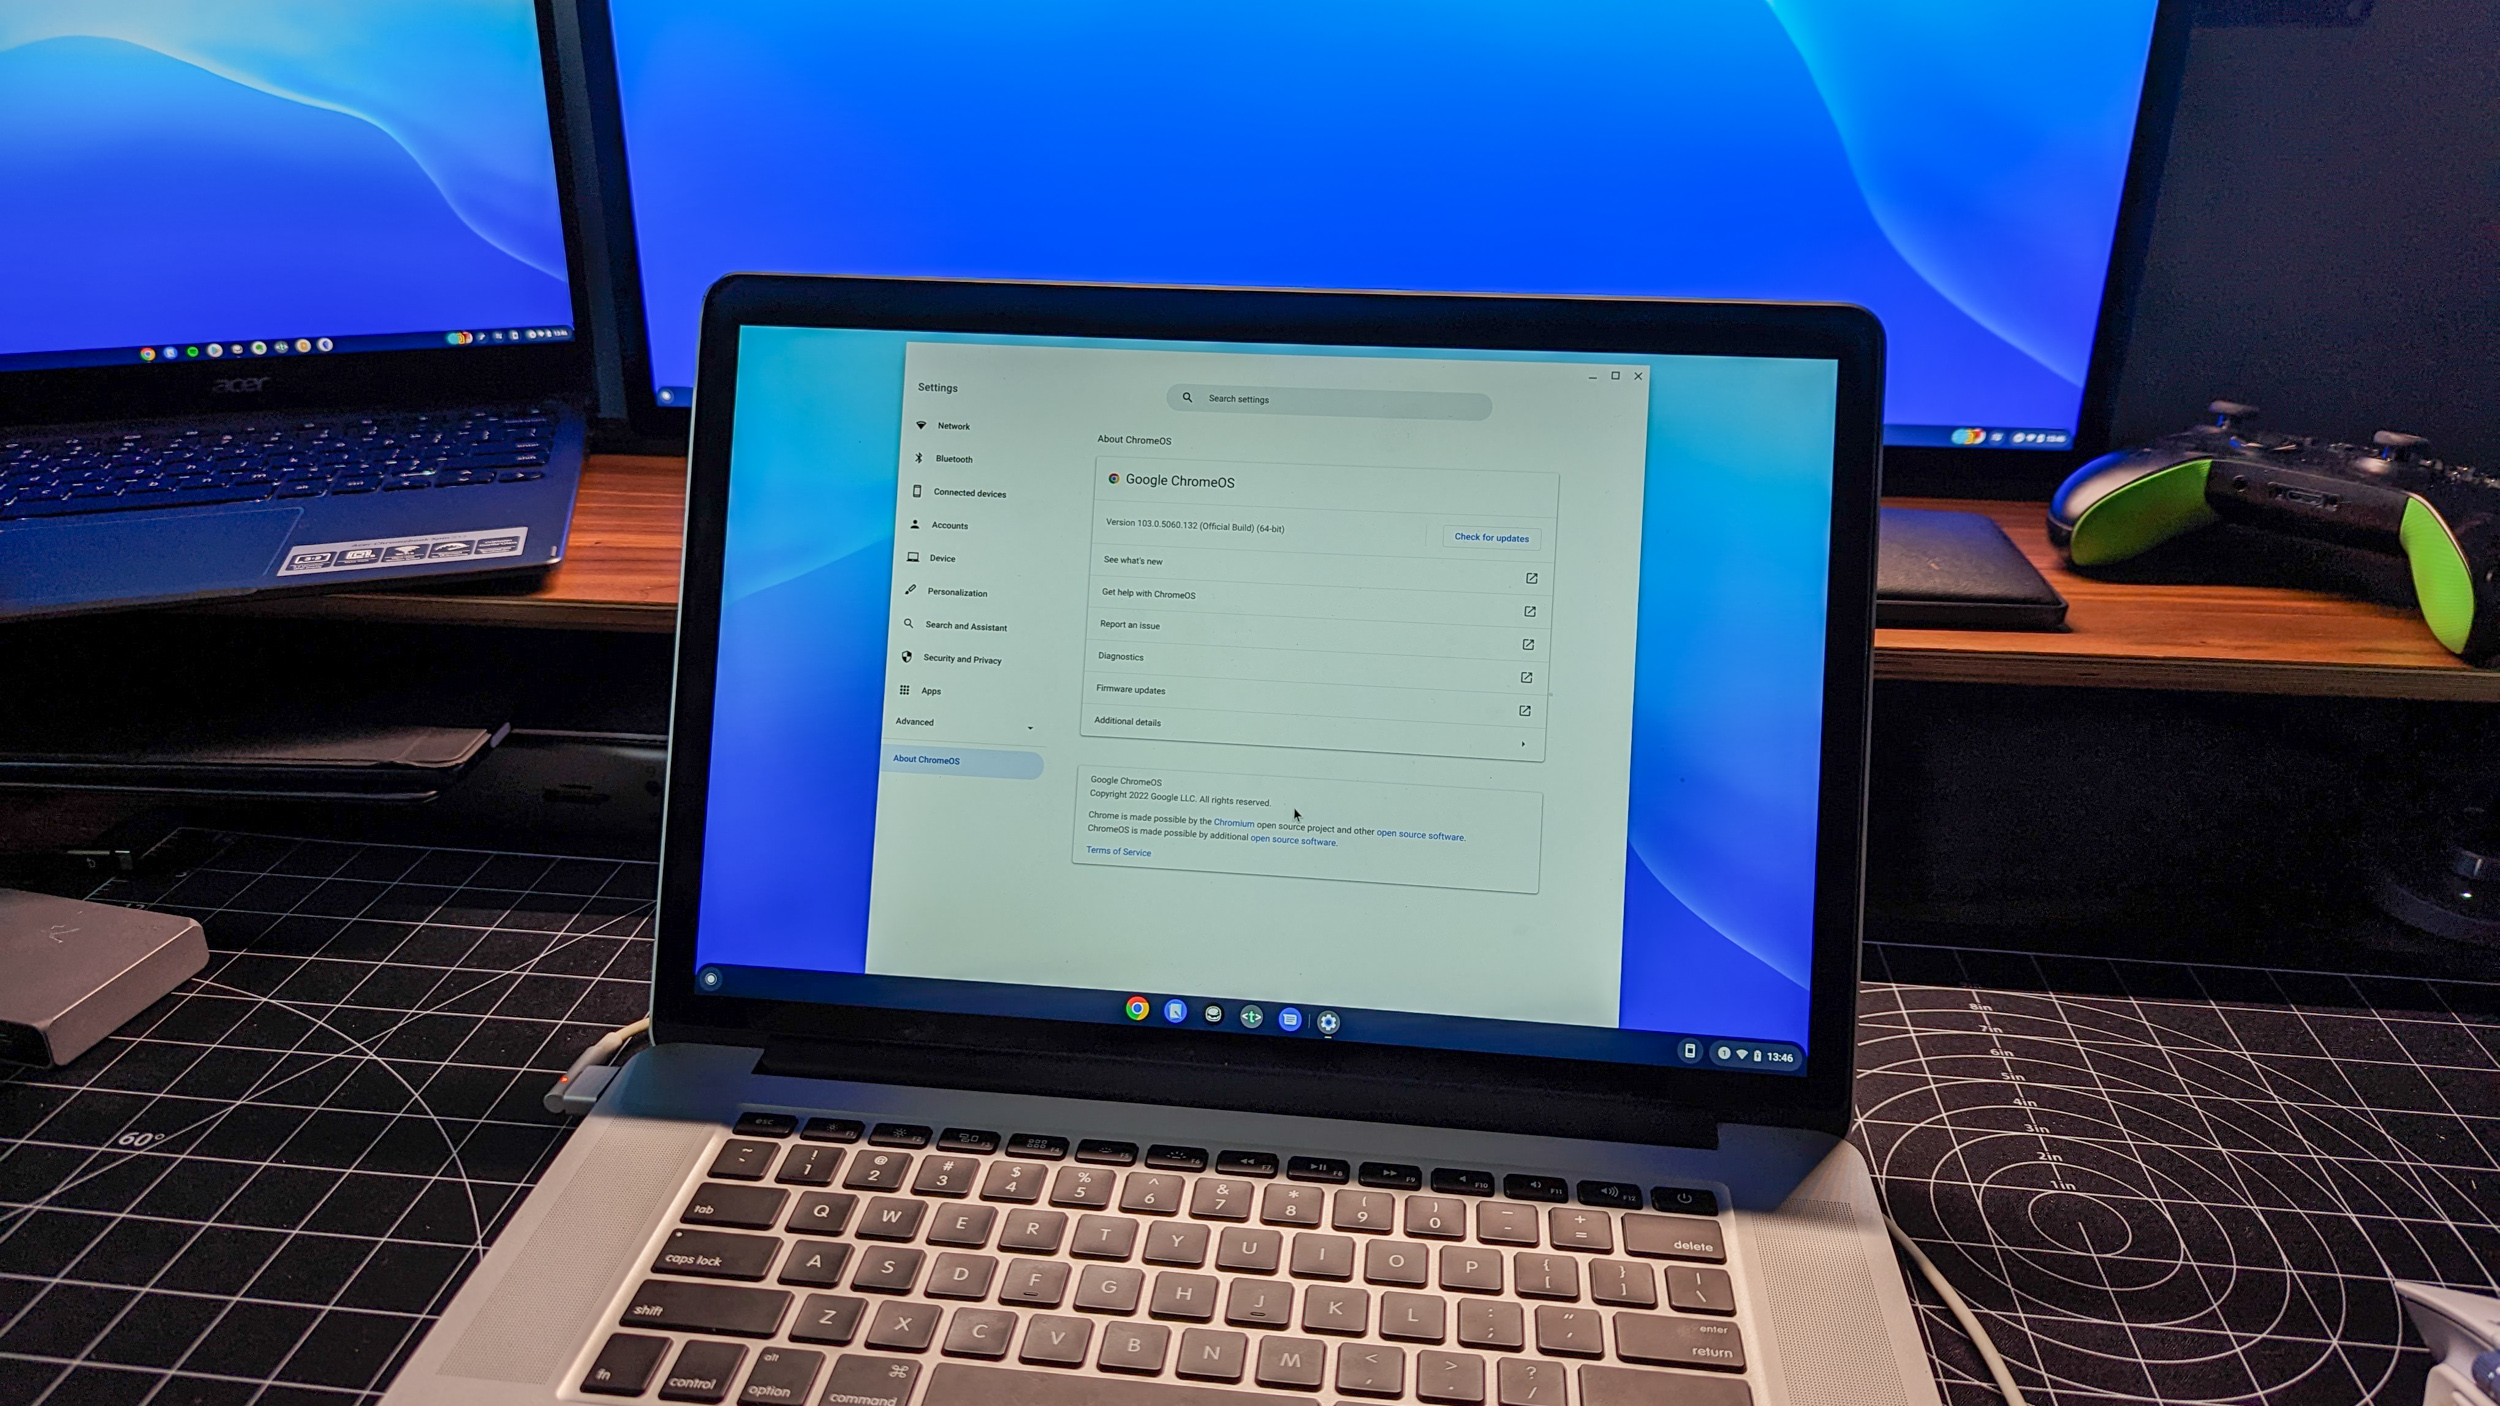
Going through all of the steps we've laid out for installing ChromeOS Flex may seem pretty daunting. But the truth is that the hardest part is making sure that you properly create the USB installer that is then used to put Flex onto your old computer.
Seeing Google release ChromeOS Flex to the public, as opposed to leaving it as an enterprise solution is rather interesting. The company didn't try and create some type of recycling program, but instead, gave everyone the tools they need to make your old computer feel brand new.
No, you won't be able to use Android apps on a device running ChromeOS Flex, but everything else about the experience is practically identical. Arguably the best part of it all is that Flex is so lightweight that you won't even notice the same slowdowns that were apparent when Windows or macOS was running.

Andrew Myrick is a Senior Editor at Android Central. He enjoys everything to do with technology, including tablets, smartphones, and everything in between. Perhaps his favorite past-time is collecting different headphones, even if they all end up in the same drawer.
