The basics of using a Nest Thermostat with Android, iOS and the web
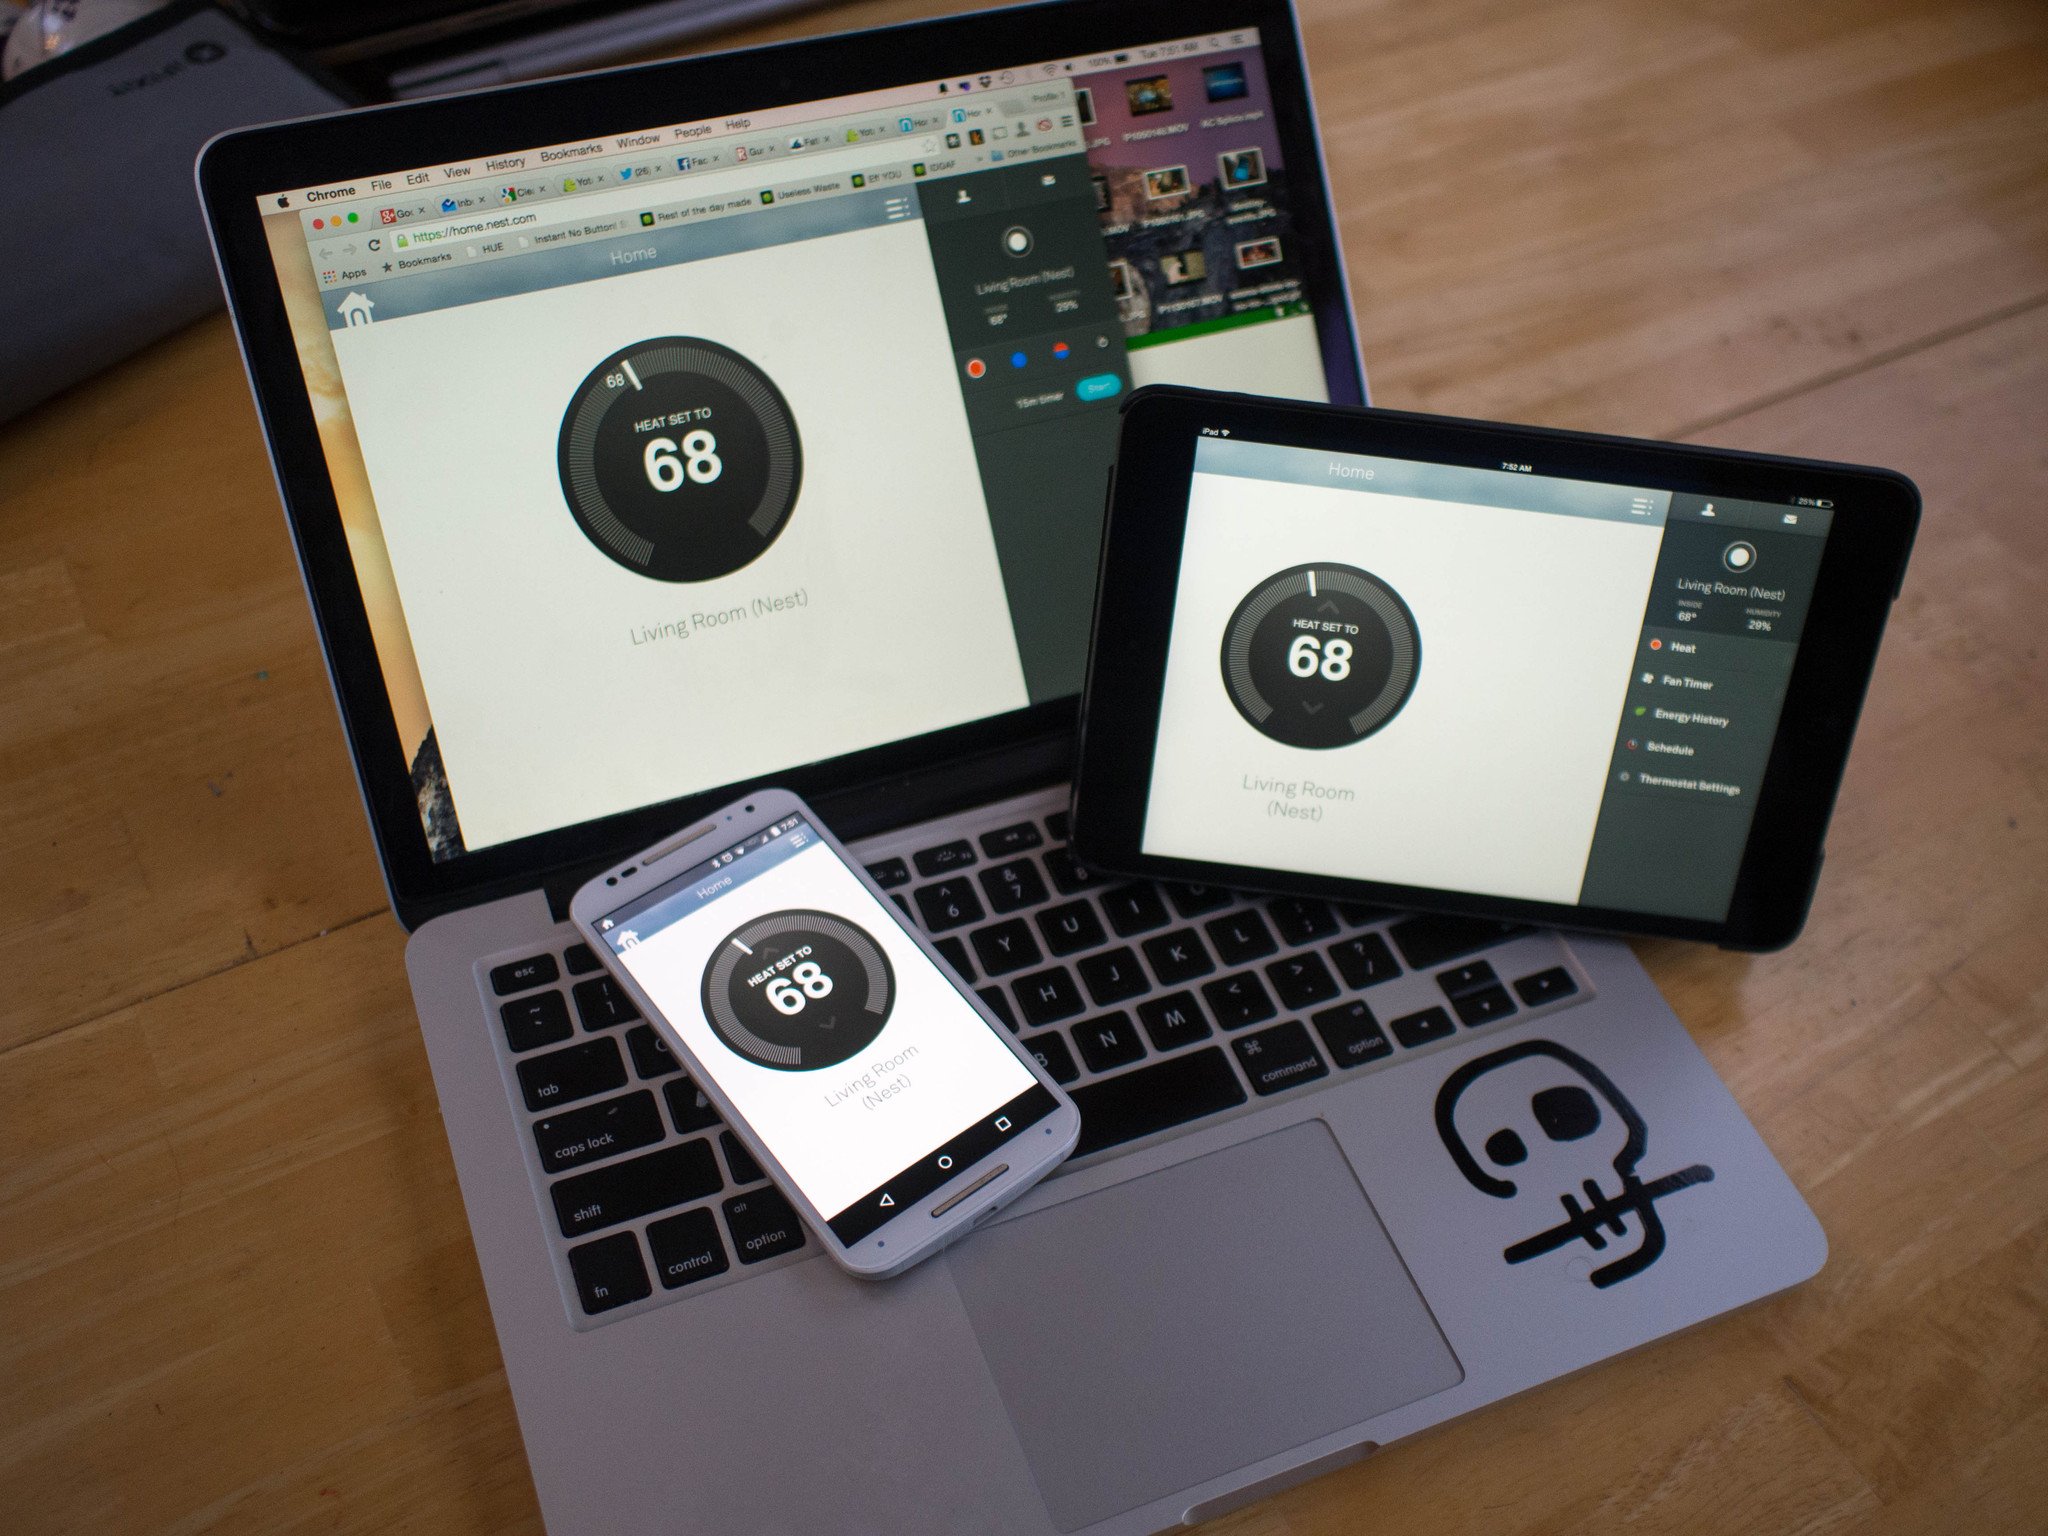
The mobile component of this connected thermostat is really what makes it futuristic
OK, so it's just a thermostat.
And while you will always have the option to walk right up to the pretty little dial on the wall and give it a spin when you want to change something, there's quite a bit of functionality baked into the Nest online services that ensures you basically never have to. As with all connected thermostats, the ability to reach only your hand out from under the covers to grab a device capable of increasing the temperature in your house is one of the great miracles of the 21st century. The Nest Thermostat offers you a lot more than just temperature control, however, and regardless of what device you're using to access those features you can enjoy the entire feature set.
And that's where we head today.
Read more from our Nest series:
- Part 1: What is a Nest Thermostat, and why would you want one?
- Part 2: What you need to know about installing a Nest Thermostat
Across their web and mobile apps, which is currently only Android and iOS, there is a single Nest interface. The tablet UI is essentially a wider version of the phone UI, allowing for the right side slide out menu to fill in without sliding the temperature dial out of view, but all of the buttons are in the same basic places. The web browser is the tablet UI with mouse input, and anyone with higher than 1080p resolution monitors (excluding Apple's Retina display) will notice that this experience is less than ideal if your browser typically takes up most of your screen. The bottom line is, for better or worse, that it's the same experience everywhere.
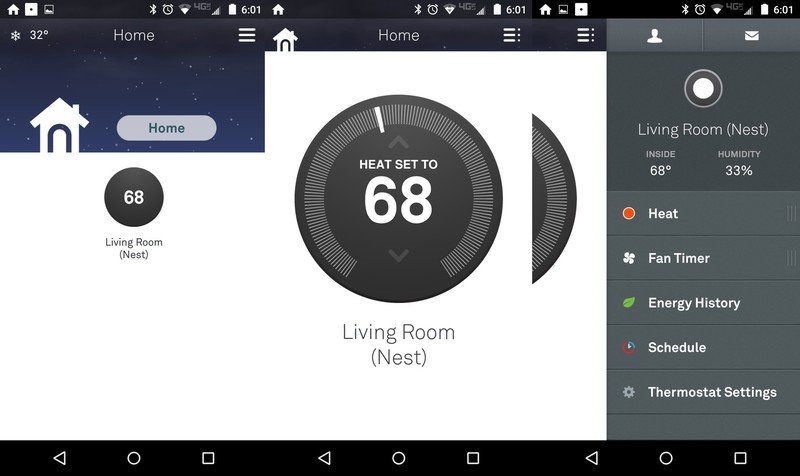
Opening the Nest app starts off with a quick glance at your setup, as well as the current weather conditions in your area. The colorful top section is animated with whatever your current weather is, with the outside temperature in the top left. The big icon labeled Home lets you manually set your thermostat between home and away states, which controls how often your HVAC hardware fires up to maintain your desired temperature. There are lots of ways to do this automatically, including the auto away detection built into Nest, but we'll get into that in another post.
The white section of the app is for your Nest devices, which if you only have a single Nest Thermostat means you just have the one black circle with the current temperature setting in the middle. If your home uses multiple thermostats and you have multiple Nest units handling the different zones, or if you have Nest Protect smoke detectors, you'll see all of those devices here and can select them individually. From here, you'll have access to adjusting your temperature as well as all of the tools and settings that apply to that device.
Be an expert in 5 minutes
Get the latest news from Android Central, your trusted companion in the world of Android
If all you need is a quick temperature change, the up and down arrows on the dial will get you where you want to go. For everything else, you want to hit the menu button on the right. This will give you a look at the current temperature and humidity inside, as well as controls for your fan and your HVAC hardware. If you want to switch from AC to heating, or if you want to set a range that will allow both pieces of equipment to function when necessary, the top slider gives you those options. If you just want to cycle the air in your house, you can turn on your fans for 15 minutes and do so. Nest has the option to do this automatically, and as part of the learning thermostat software will eventually do so based on your behavior.
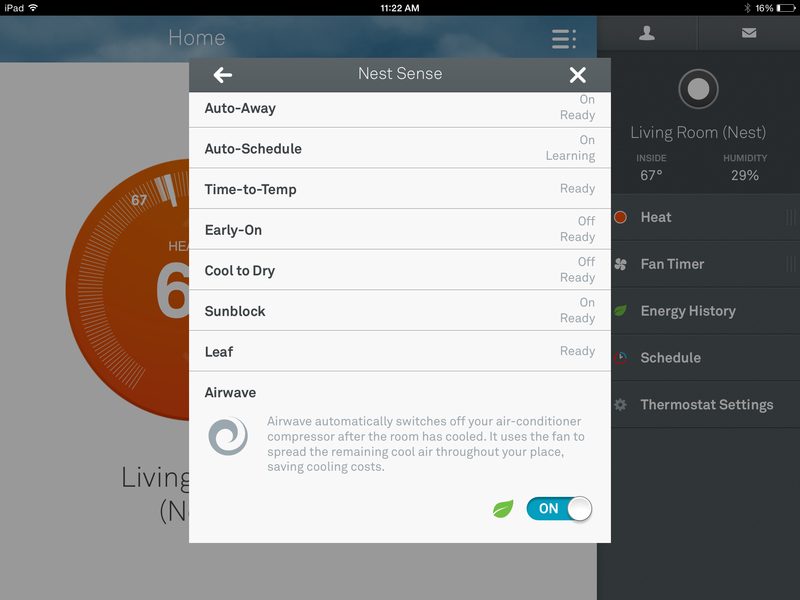
If you want to see what Nest is currently being programmed to learn from you, the Nest Sense section in settings is where you want to head. Nest Sense is where you can tell the device to create a schedule based on your behavior, to adjust automatically when the sun is shining directly on the thermostat, or to use the fans instead of the AC to help control humidity. Most importantly, if you're interested in the energy savings promises made by Nest, the Leaf and Airwave sections will likely be areas you want active. When active, the Nest Leaf shows up all over the UI to let you know when power is being saved. This information is based on your current usage as well as some environmental logic.
Airwave, on the other hand, uses some clever logic to turn off the AC unit earlier than usual and instead uses the fans to maintain a speific temperature. Knowing that this logic is in place is cool, but seeing the results on a daily basis and comparing that data to your energy bill is going to be where you see the actual benefits.
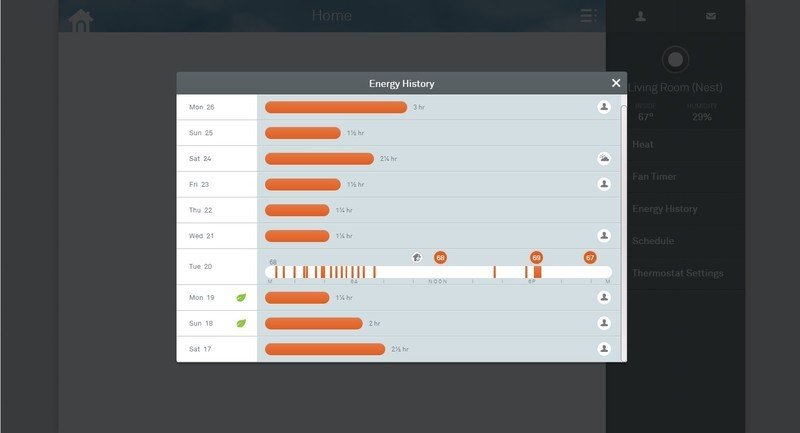
The Energy History section on Nest breaks down the last 10 days of use for you, with Leaf icons to show when your hardware was particularly efficient. You can tap on each day to get a more detailed breakdown, and what you get is a timeline with marks on it that show when your HVAC hardware was active. If settings are adjusted during that day, those changes are time stamped on this timeline, so you can see what effects those changes had. This hourly breakdown lets you know how effective your current setup is, whether that is a schedule you have built for yourself or one that Nest has built on your behavior.
Unfortunately, even through the web browser you can't see further back than ten days and there's currently no way to request an archive from Nest. Given the potential for things like efficiency monitoring for HVAC hardware over time or a yearly comparison of behavioral changes, this is something Nest probably doesn't handle as well as they should.
Nest is designed to be simple, glanceable, and capable of offering you the complete set of features from whatever device you are currently using. There are plenty of other ways to use Nest, including services like Google Now or third party hubs like the Wink, but through this core UI you can do everything we've covered here and quite a bit more. It's one of those experiences that is, for the most part, as simple or as complex as you tell it to be.

