How to use Mastodon
Getting started with this interesting alternative to Twitter.
- What is Mastodon
- Find an instance
- How to join Mastodon
- Mastodon Basics
- Fill out your profile
- Build a community
- Your first post
- Mastodon character limits
- Picture captions
- Edit or delete
- Boosts, Favorites, and Bookmarks
- Poll the audience
- Mastodon and Twitter
- Tune your notifications
- Mastodon apps
- Mastodon isn't perfect
When you think about social media apps, the first ones that come to mind are likely Facebook and Twitter. Given the ongoing saga with the constant changes being made to Twitter, there are other social media platforms to consider.
One of the biggest beneficiaries of Elon Musk's acquisition of Twitter was Mastodon, as the platform saw more than one million new users join. According to The Guardian, Mastodon had about 500,000 active users before Twitter was acquired, and reached a peak of more than "2.5 million in early December."
If you're tired of Twitter's shenanigans and are just looking to see whether the "grass is greener," Mastodon is a good place to start. It definitely doesn't have the same number of users as Twitter, but that might be for the better.
What is Mastodon
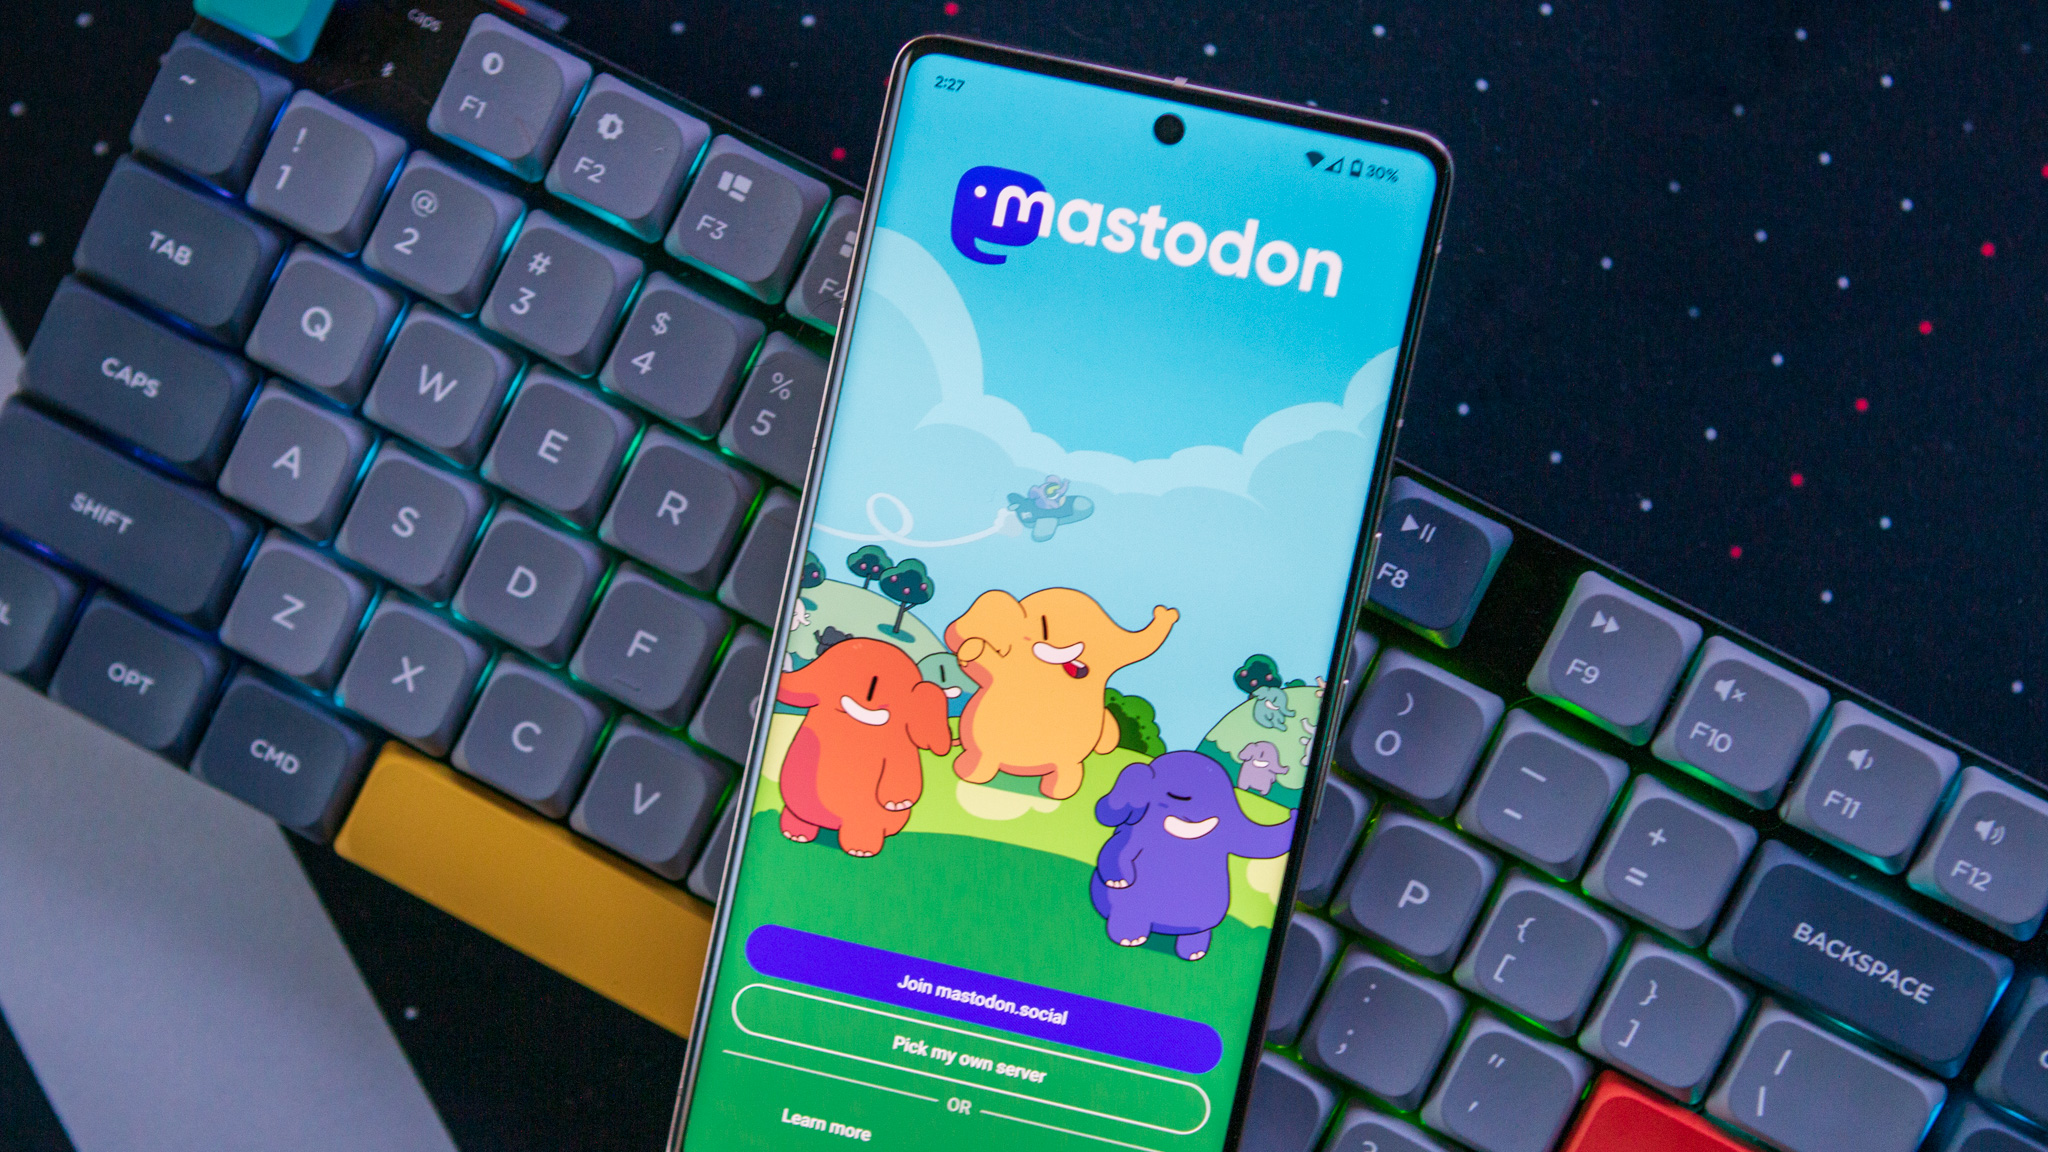
In simple terms, Mastodon is a social network comparable to Twitter and Facebook. Established in February 2017, the platform has gained more users since Elon Musk acquired Twitter.
Mastodon's main objective, as stated on its homepage, is to offer a decentralized alternative to Twitter. Unlike Twitter, which acts as a single "hub" where all users can interact, Mastodon operates through instances or servers that users must join or apply to access the platform.
Finding the "right" Mastodon instance (server)
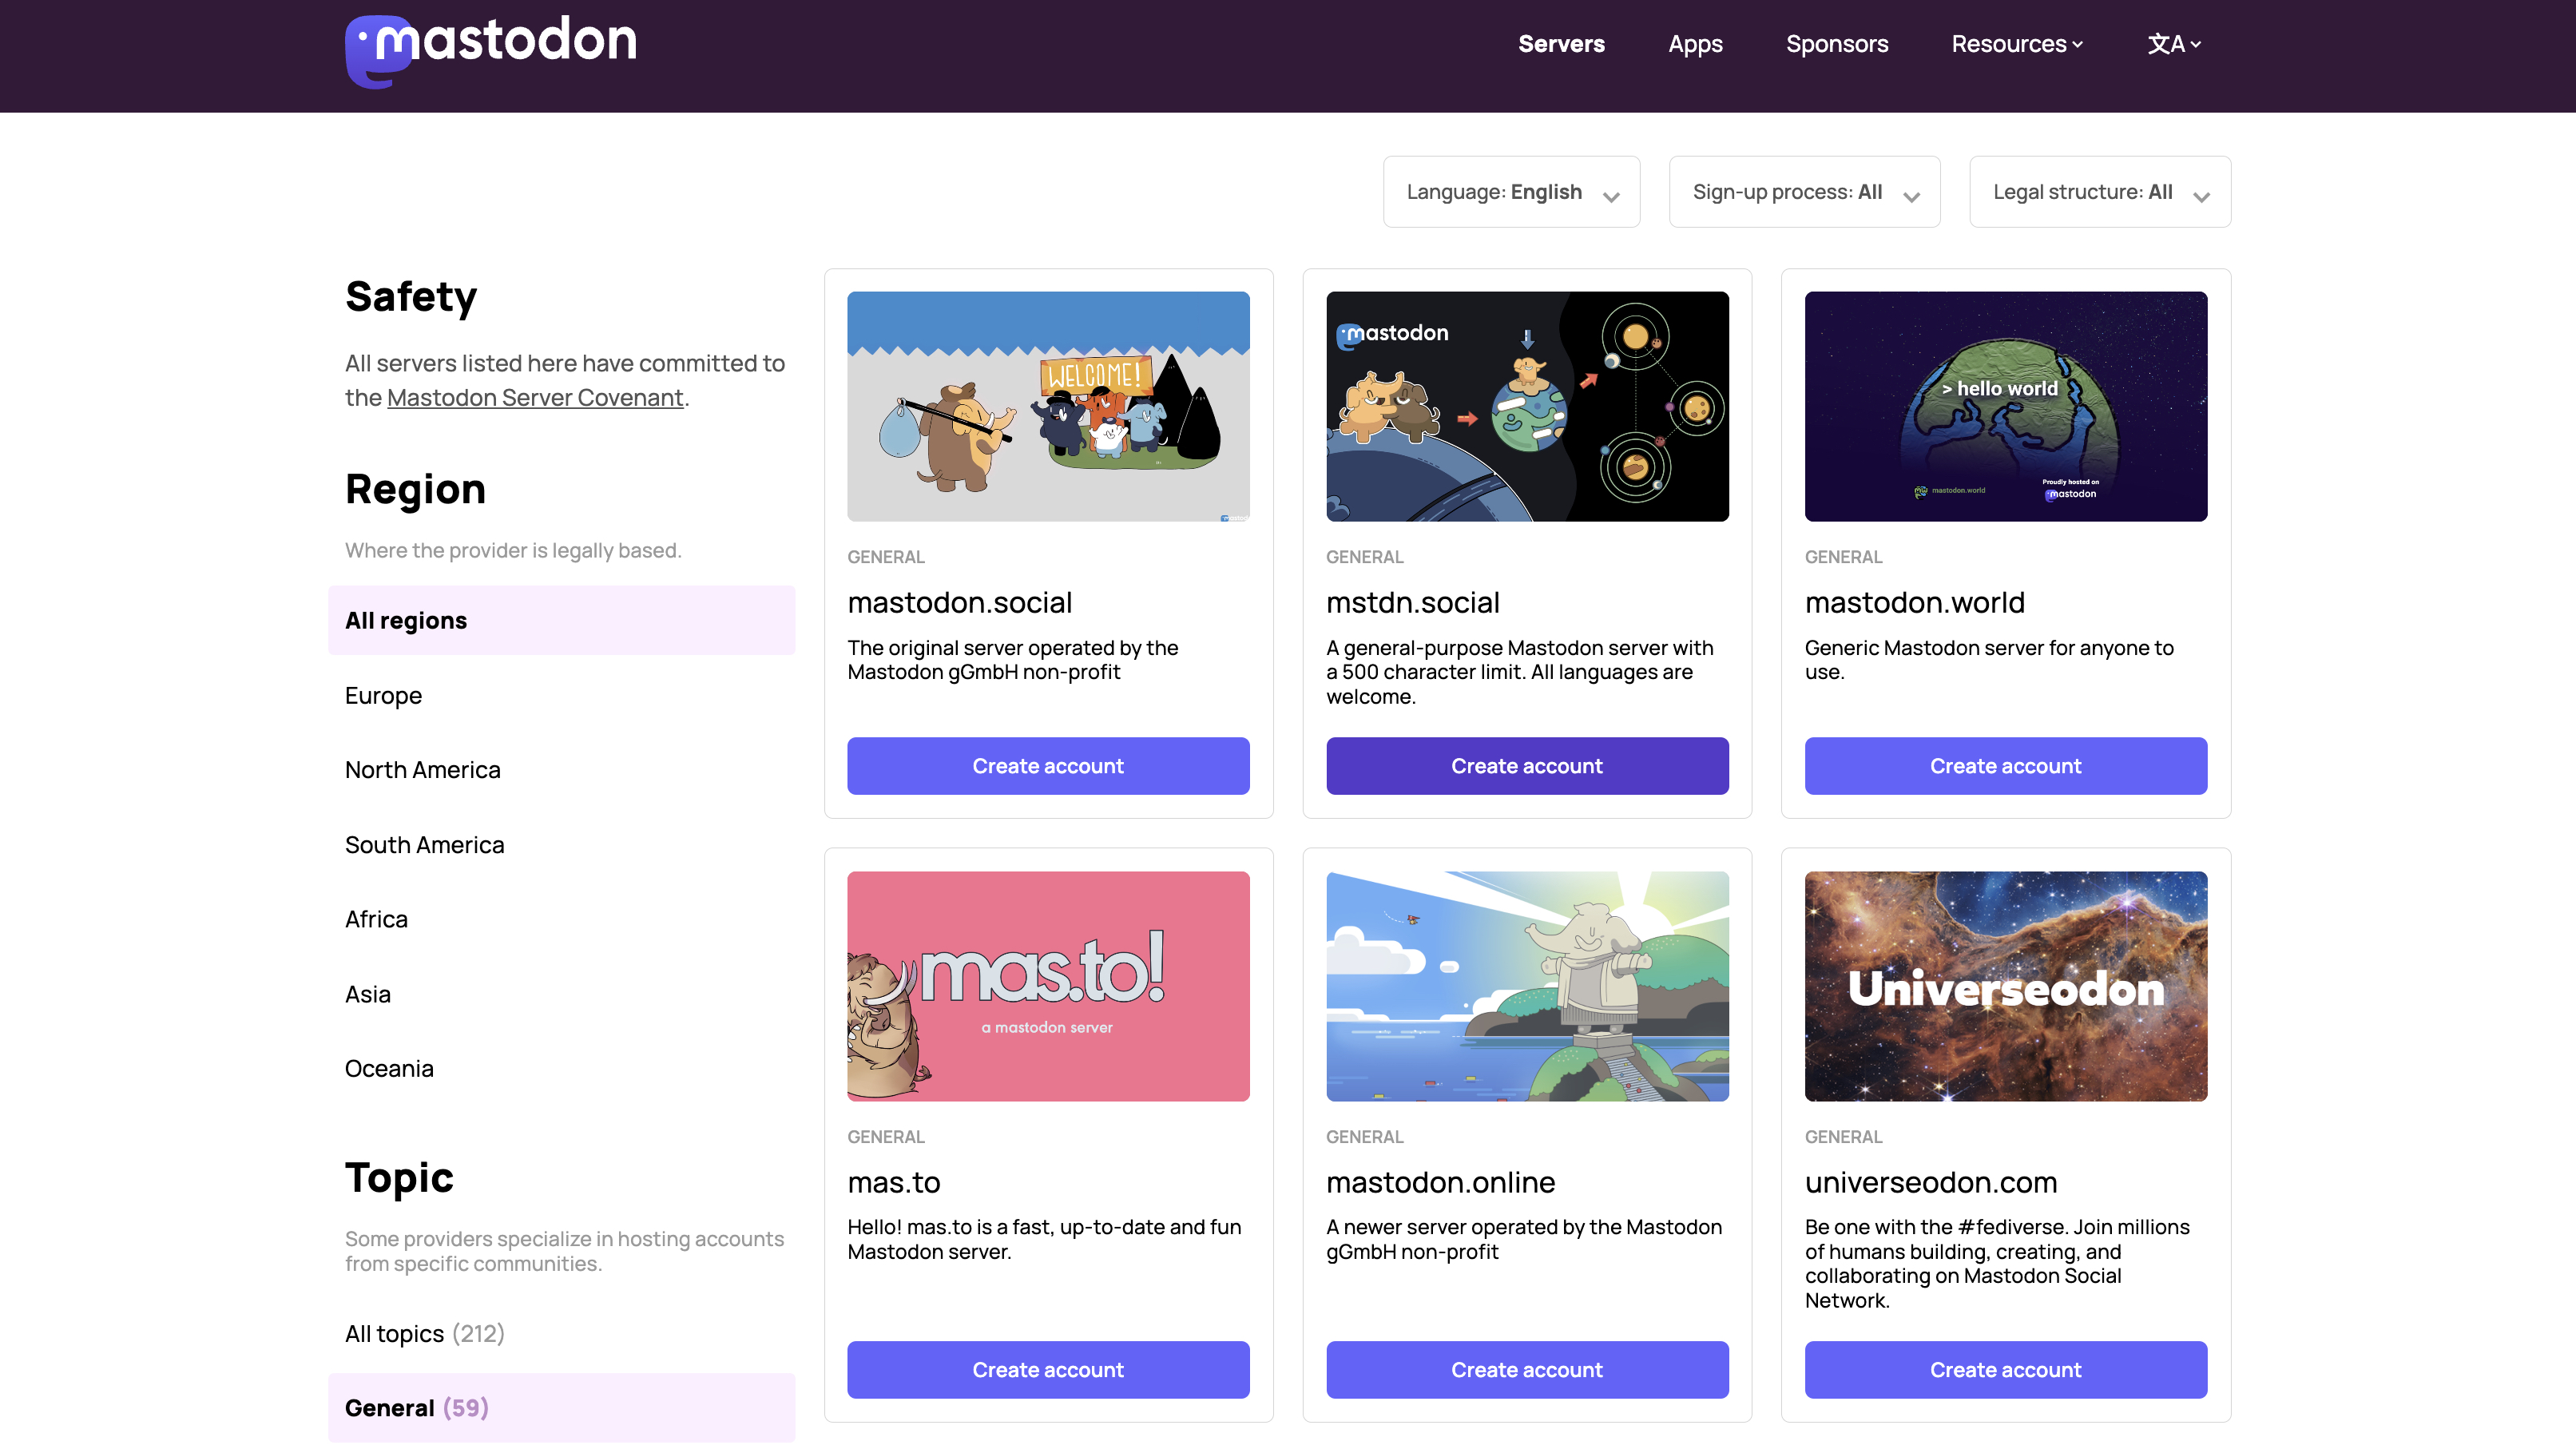
Unlike Twitter, which takes a "melting pot" approach, Mastodon operates as the backbone for different servers or "instances" to operate. This is partially why Mastodon users don't have just a basic username, as it's usually formatted as "@username@server/instance."
If you want to just get up and running quickly, you can join the mastodon.social instance, which is the "original server operated by the Mastodon gGmbH non-profit." However, there are many other servers to choose from, including some that might better fit the community you want to join.
Be an expert in 5 minutes
Get the latest news from Android Central, your trusted companion in the world of Android
It might be worth doing a bit of research into locating the right server for you, ahead of signing up for Mastodon. Thankfully, there are also a few different websites that offer a way to browse different servers or instances. One such tool is simply named Mastodon instances but walks you through a series of questions in order to try and find your new online home.
How to join Mastodon
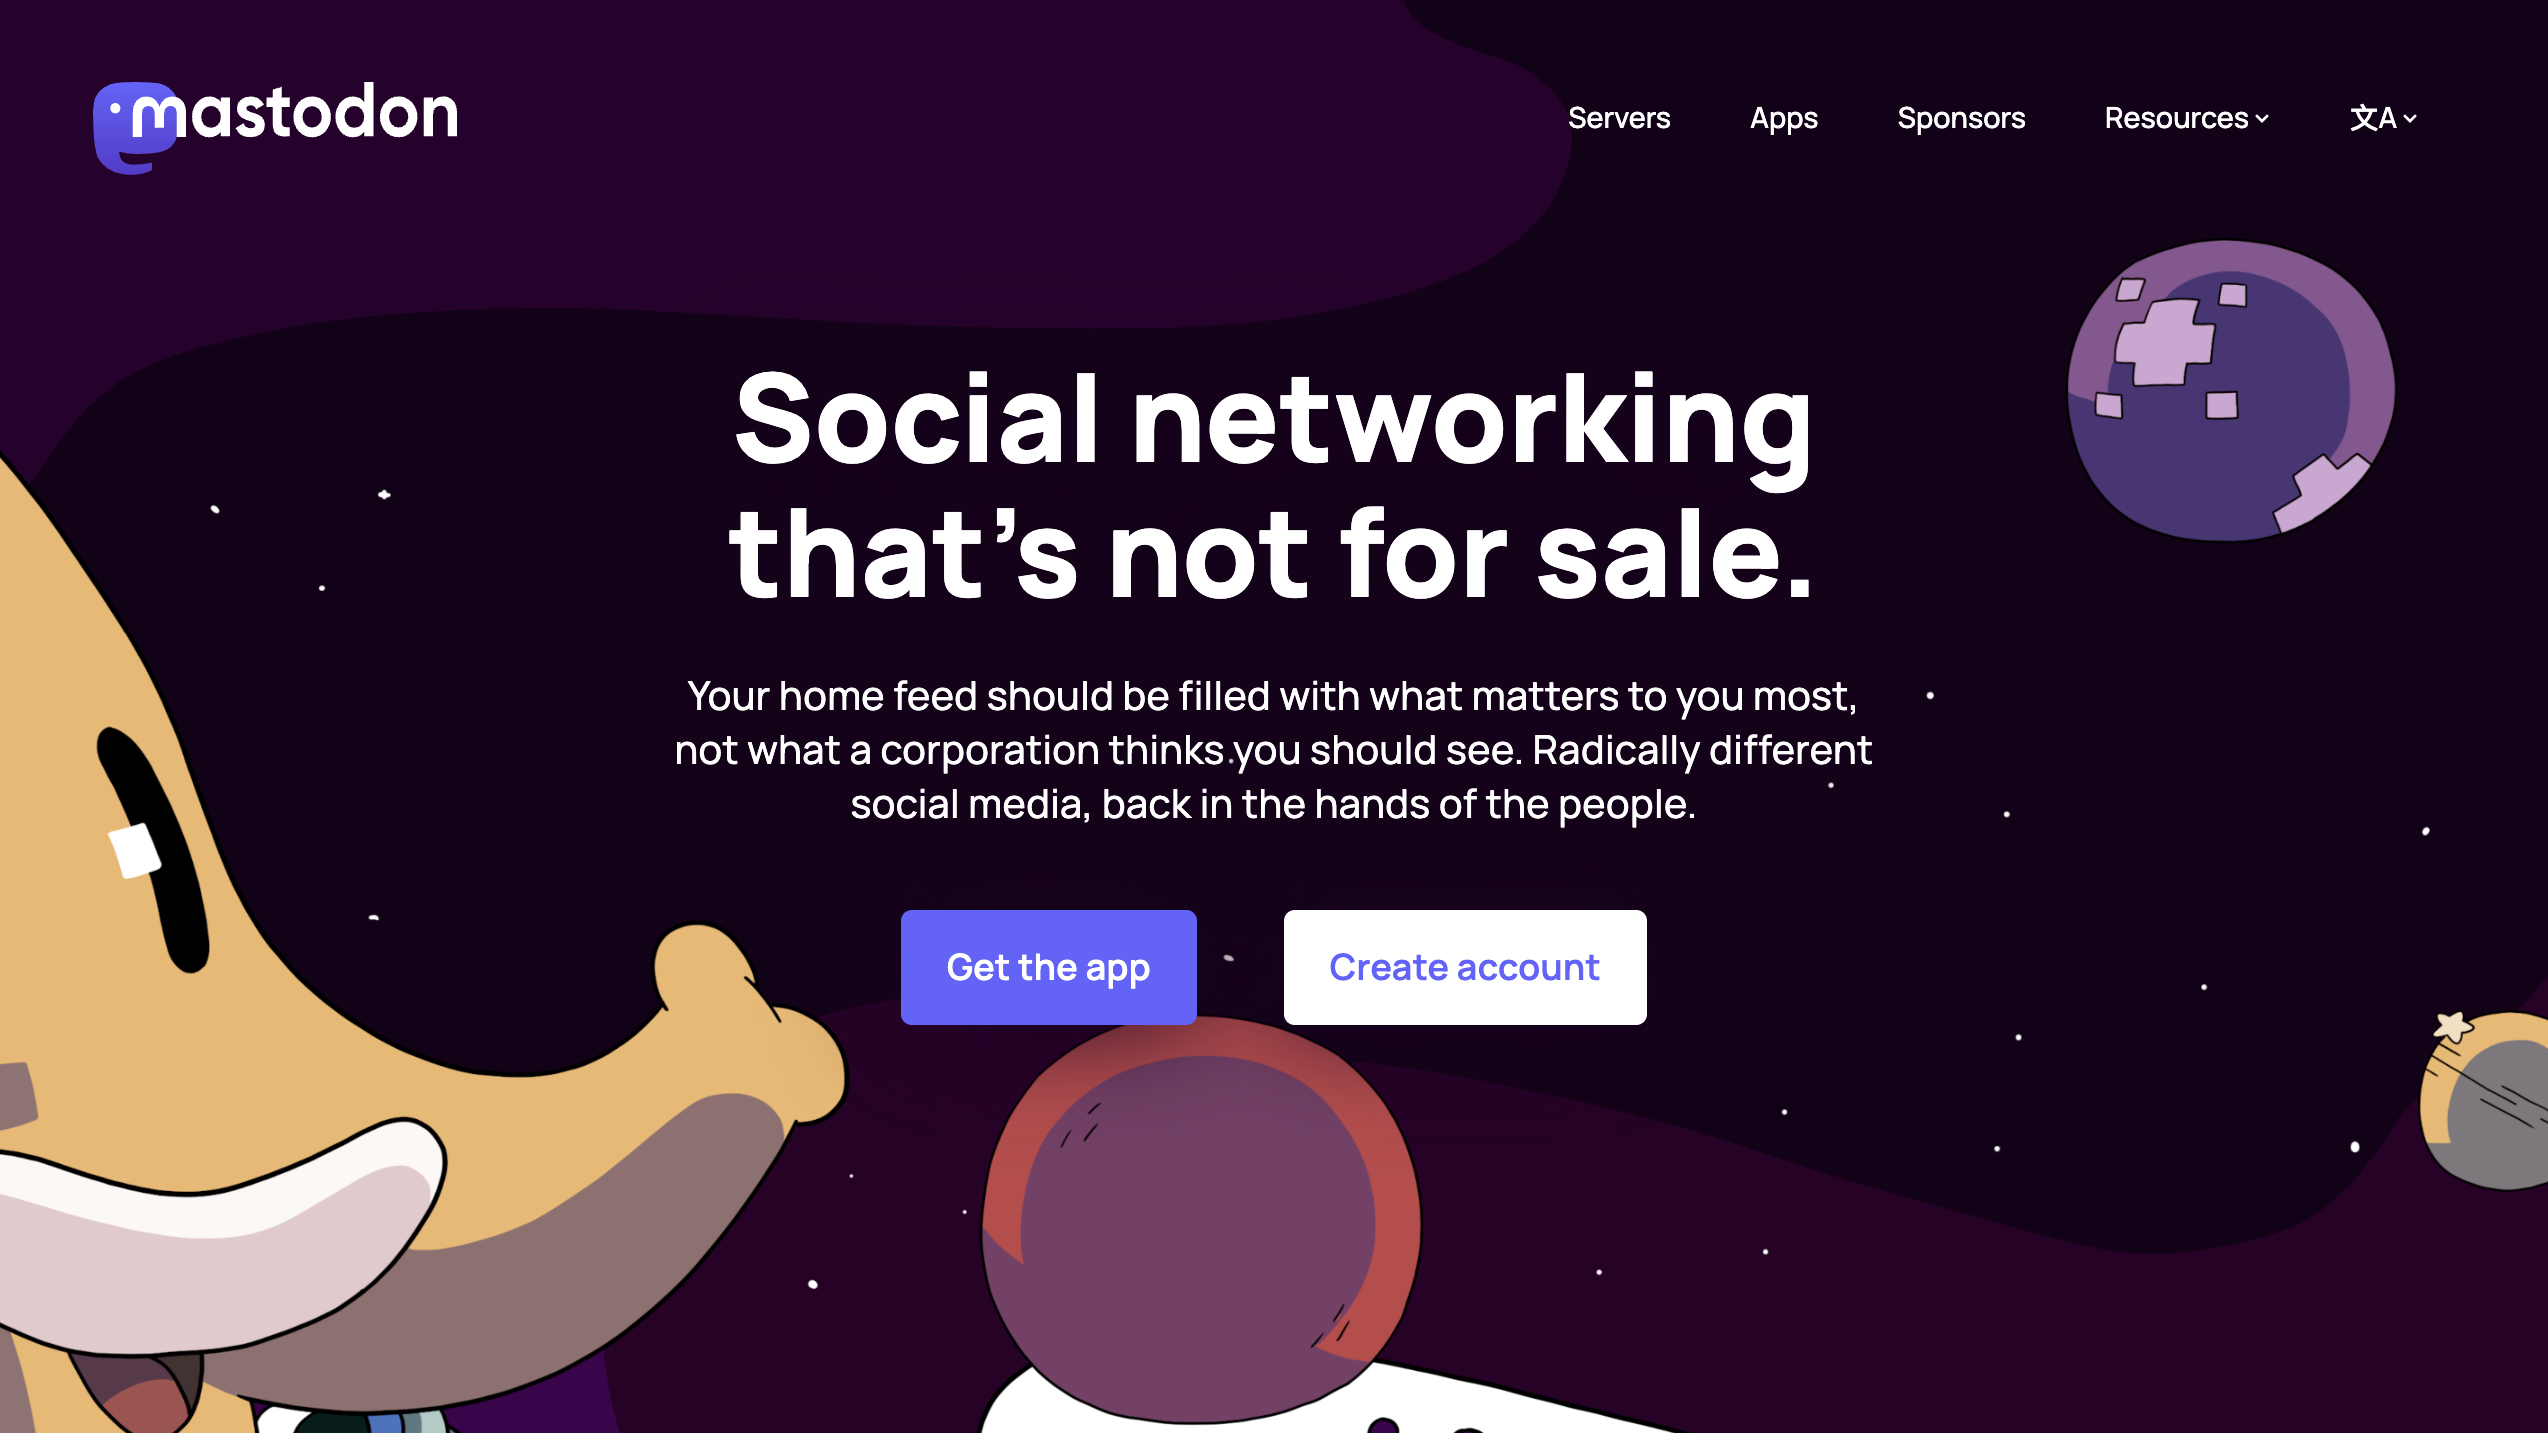
1. Open your browser of choice from your computer and navigate to JoinMastodon.org. Alternatively, you can download the official Mastodon app on iOS or Android. Once installed, follow the on-screen steps to sign up for Mastodon.
2. Click the Create account button.
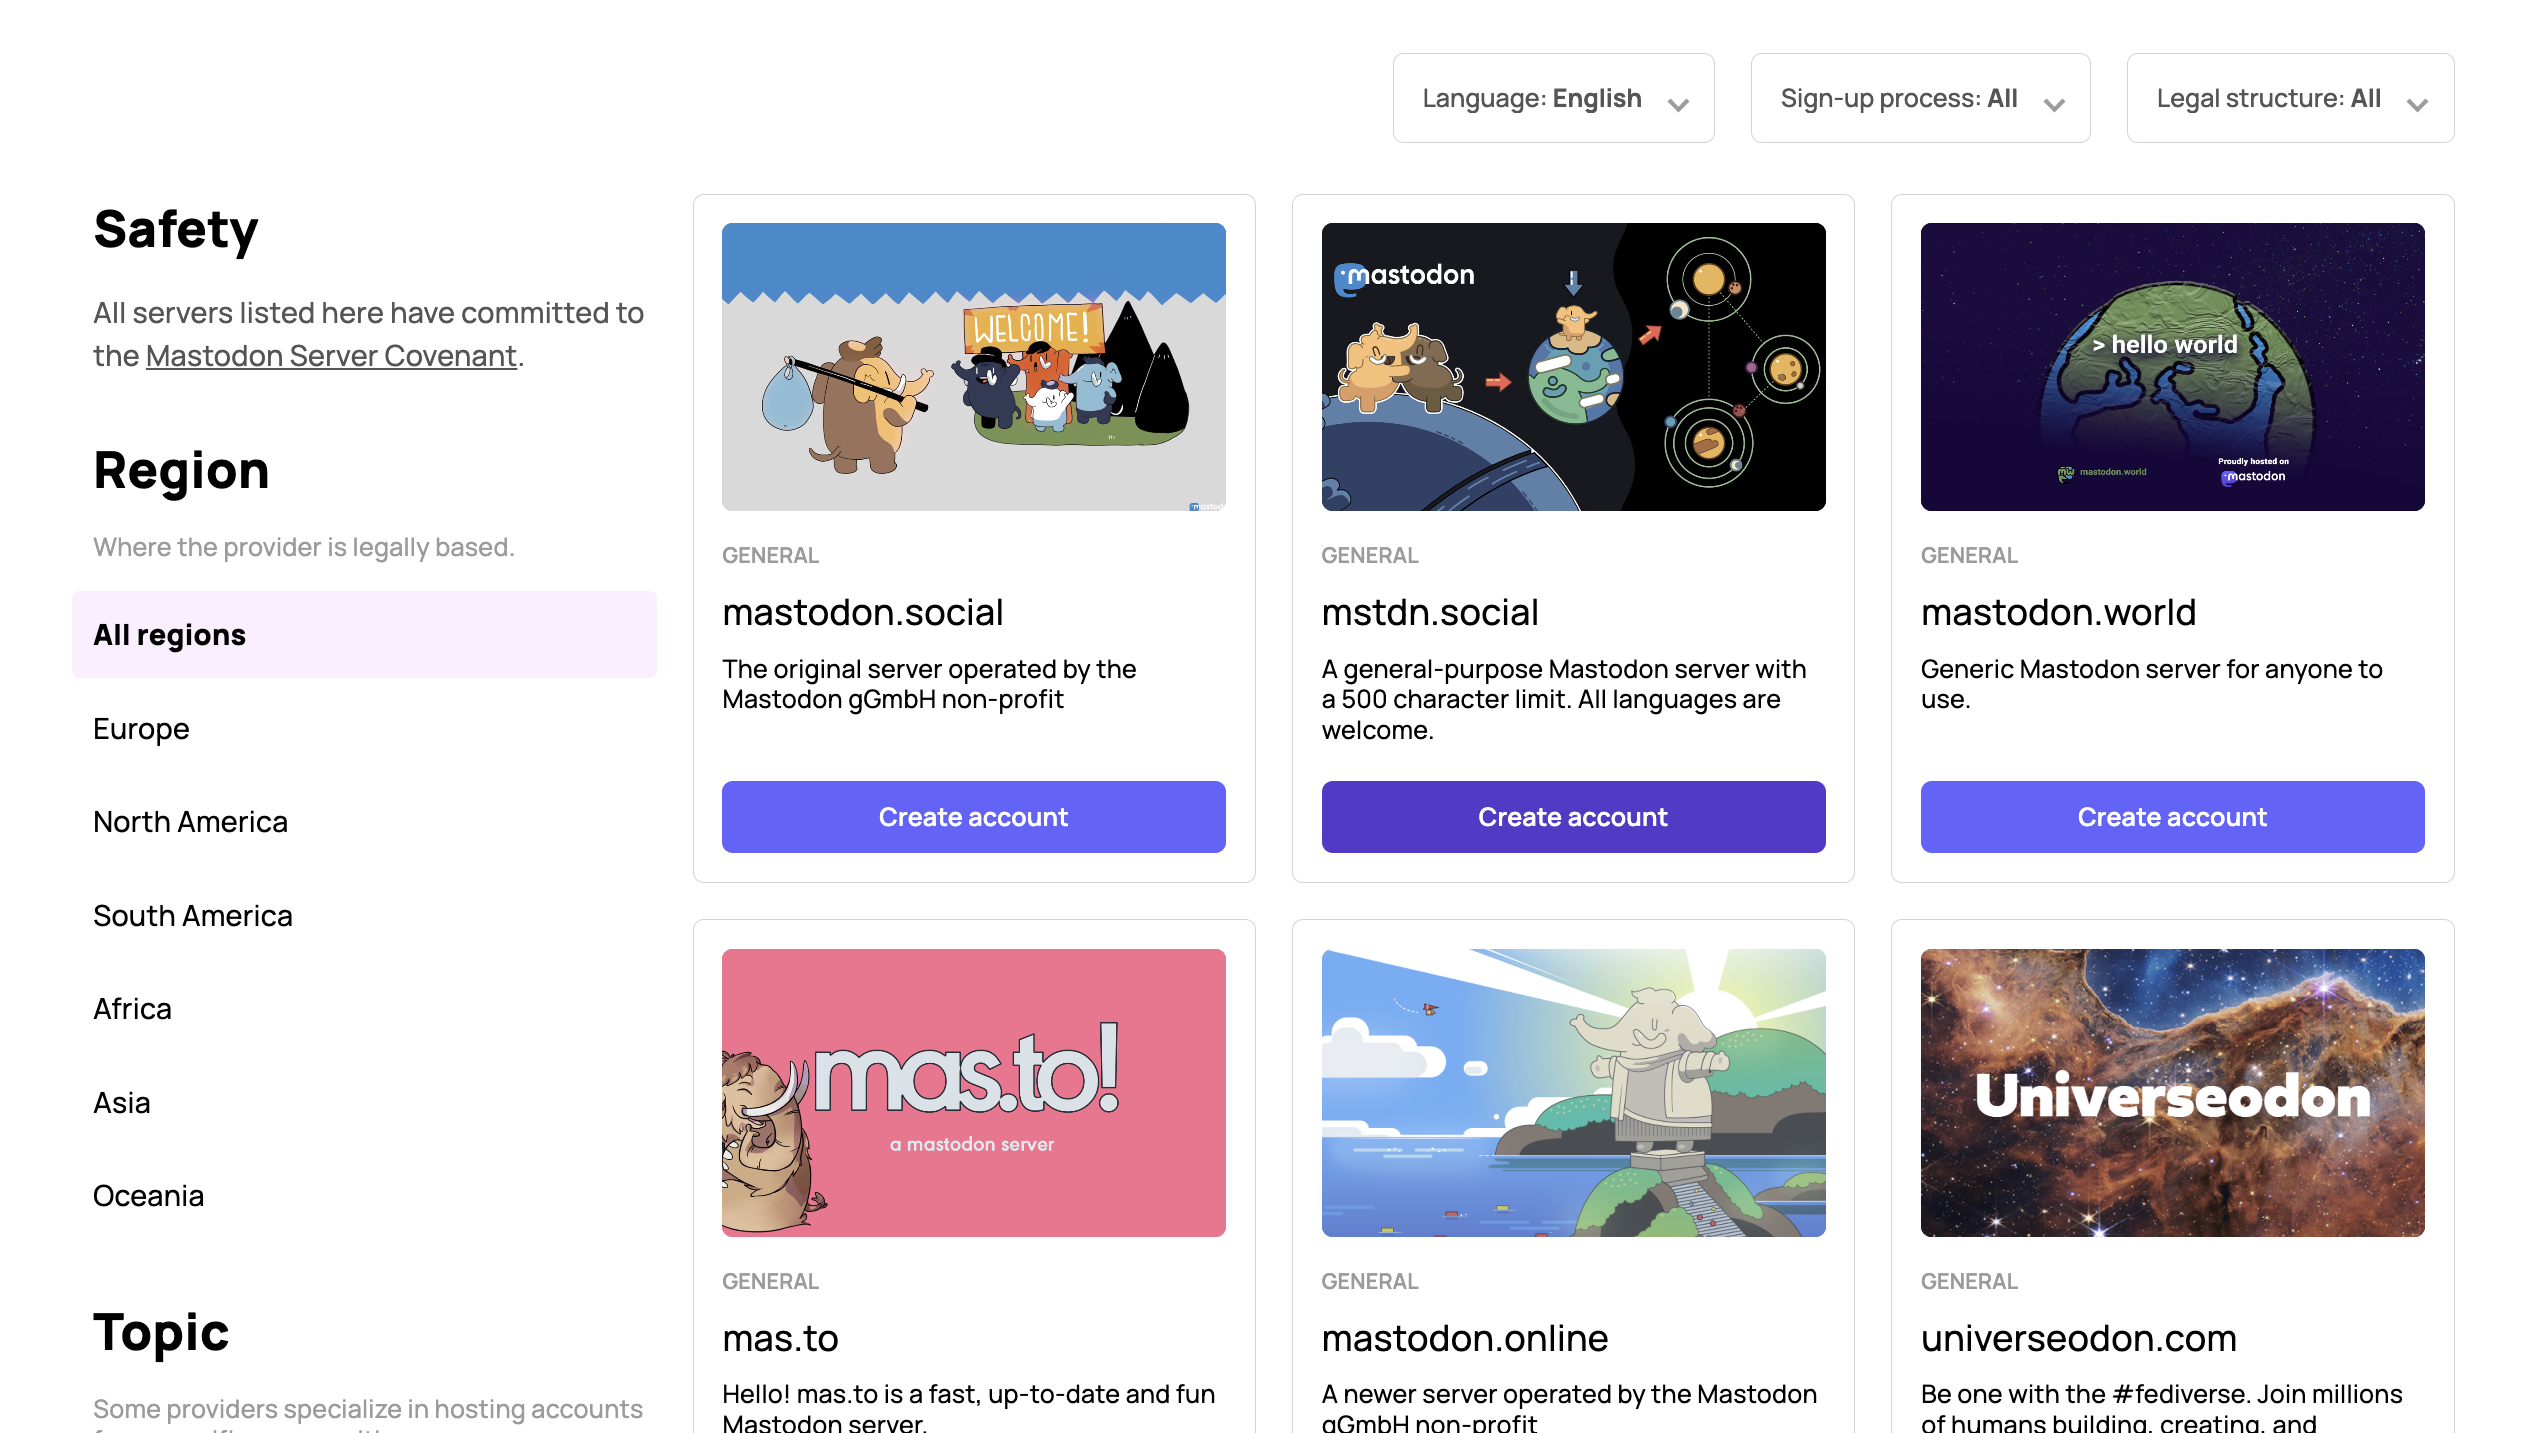
3. Scroll down and locate a server you want to be a part of.
4. Click the Create account button beneath the server description.
5. When the new tab for the server has been loaded, click the Create account button in the right sidebar.
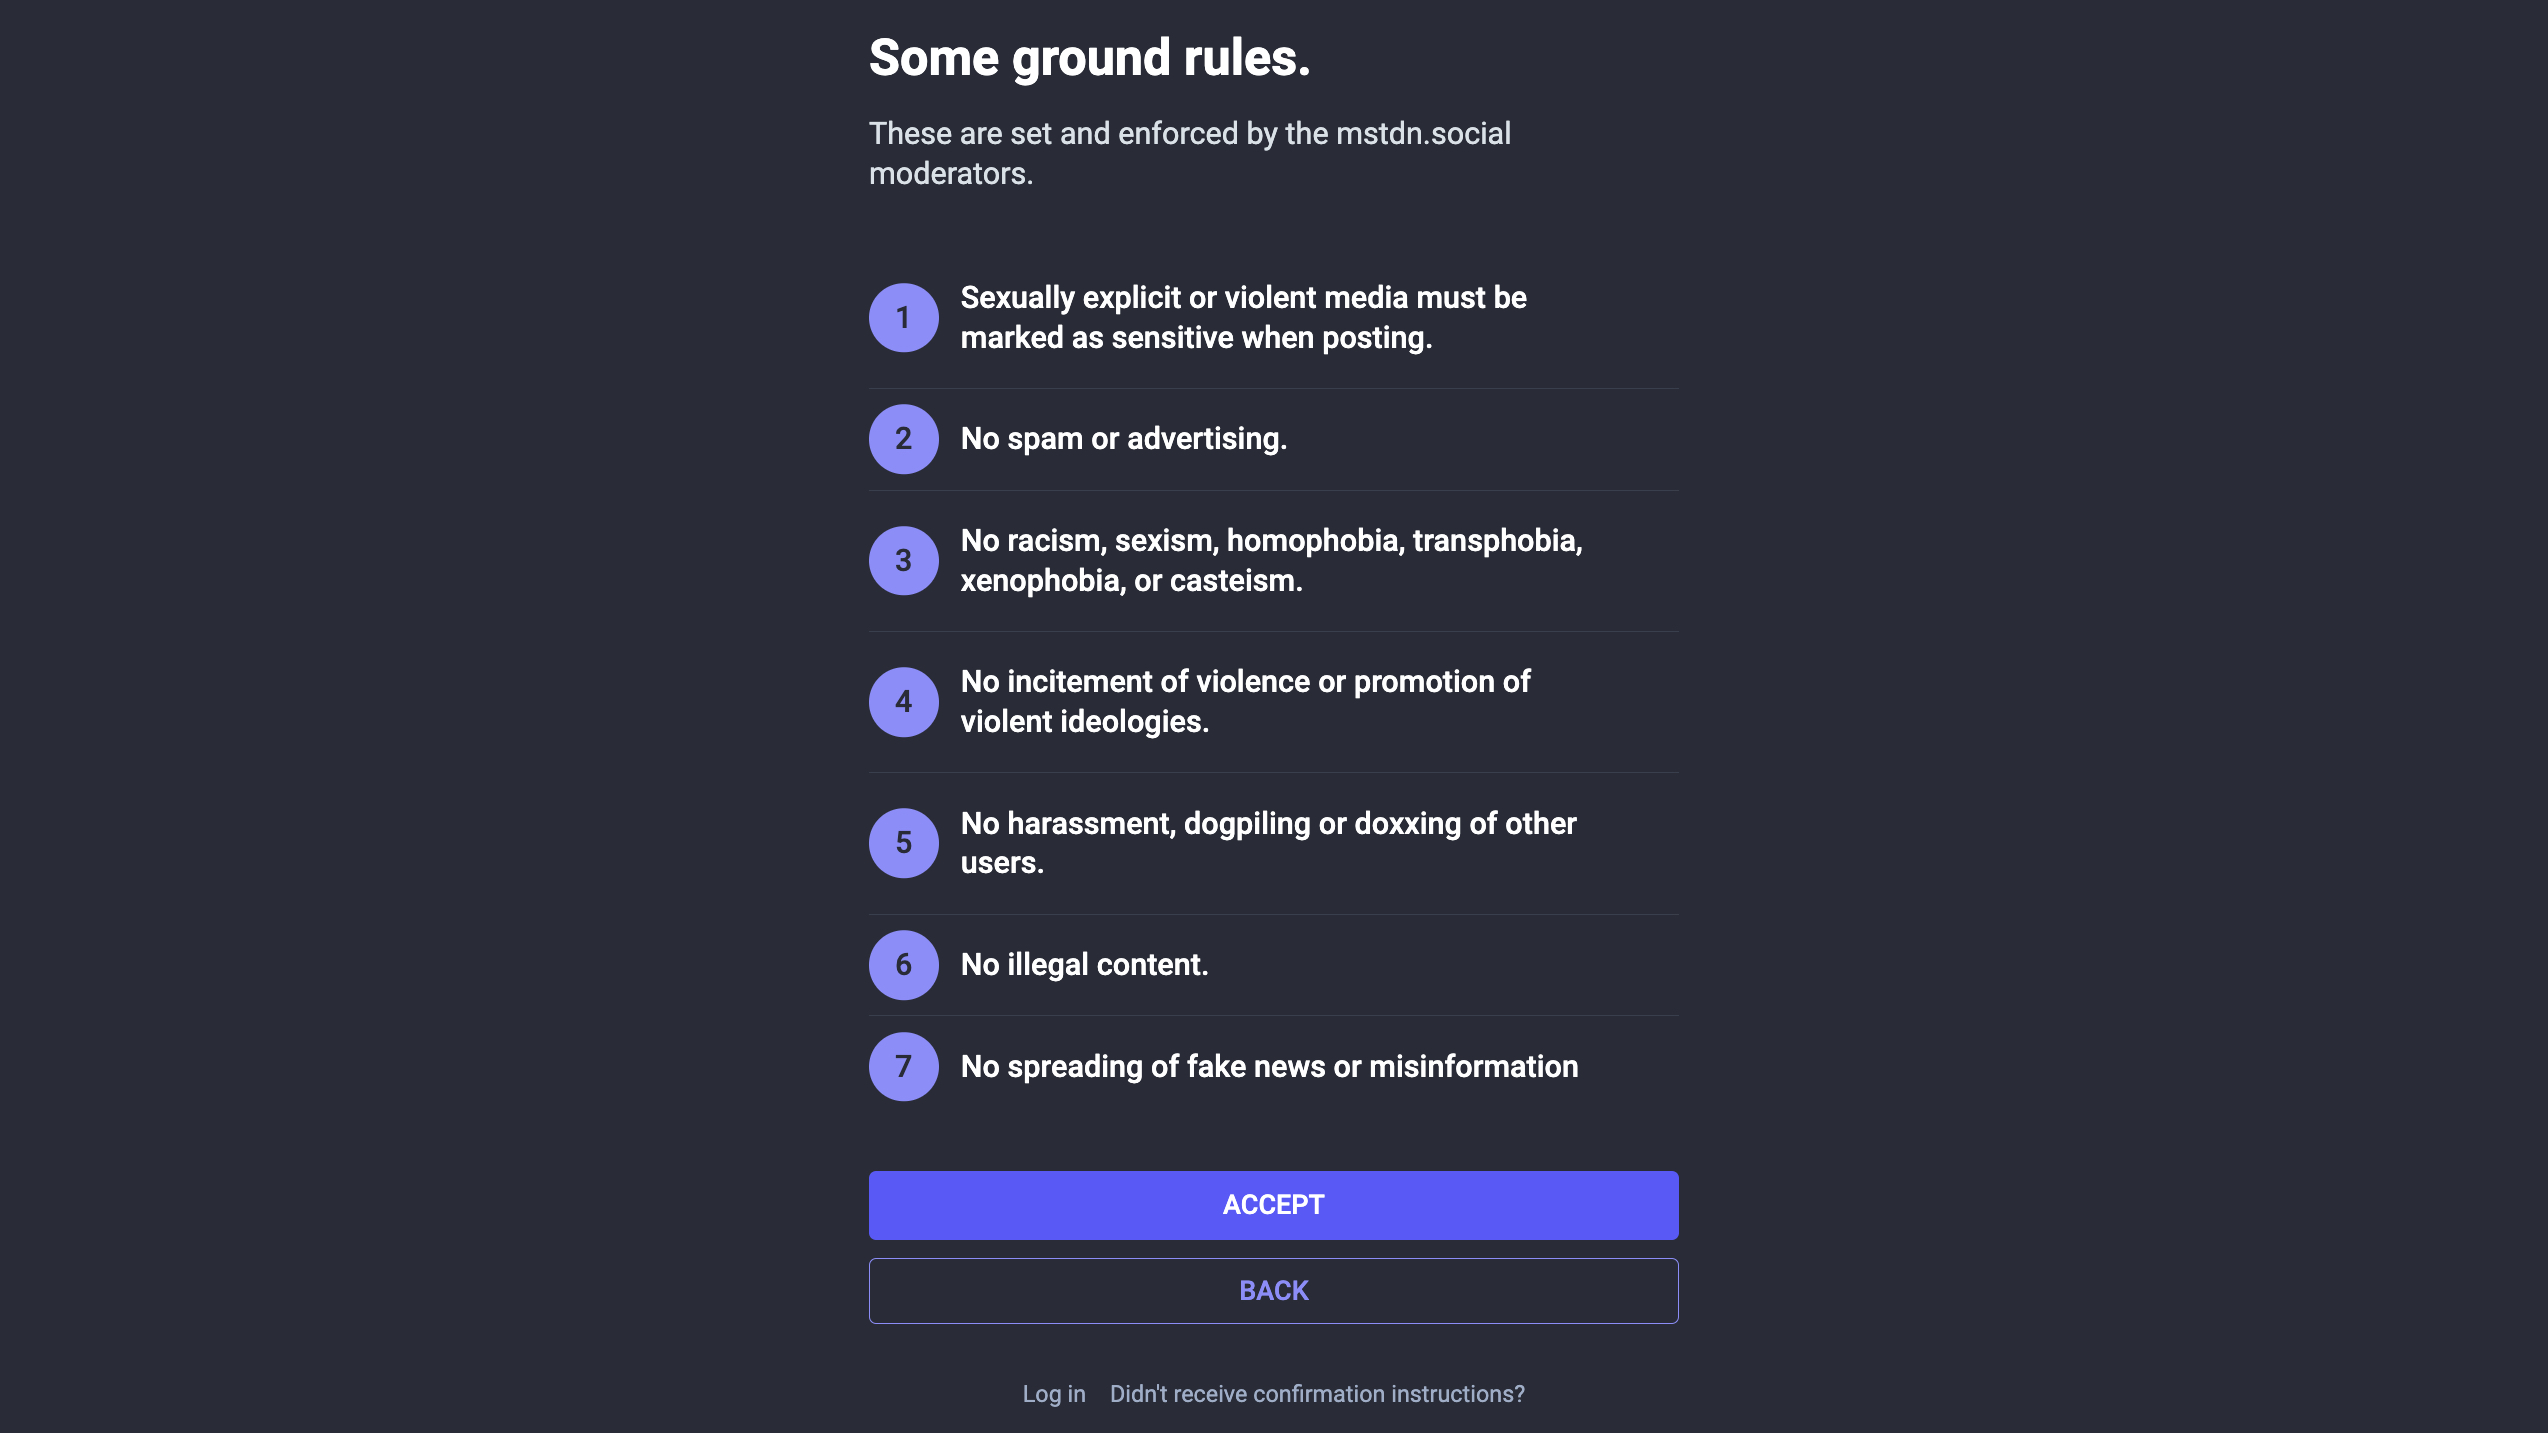
6. If applicable, read the rules of the server and/or instance.
7. Click the Accept button.
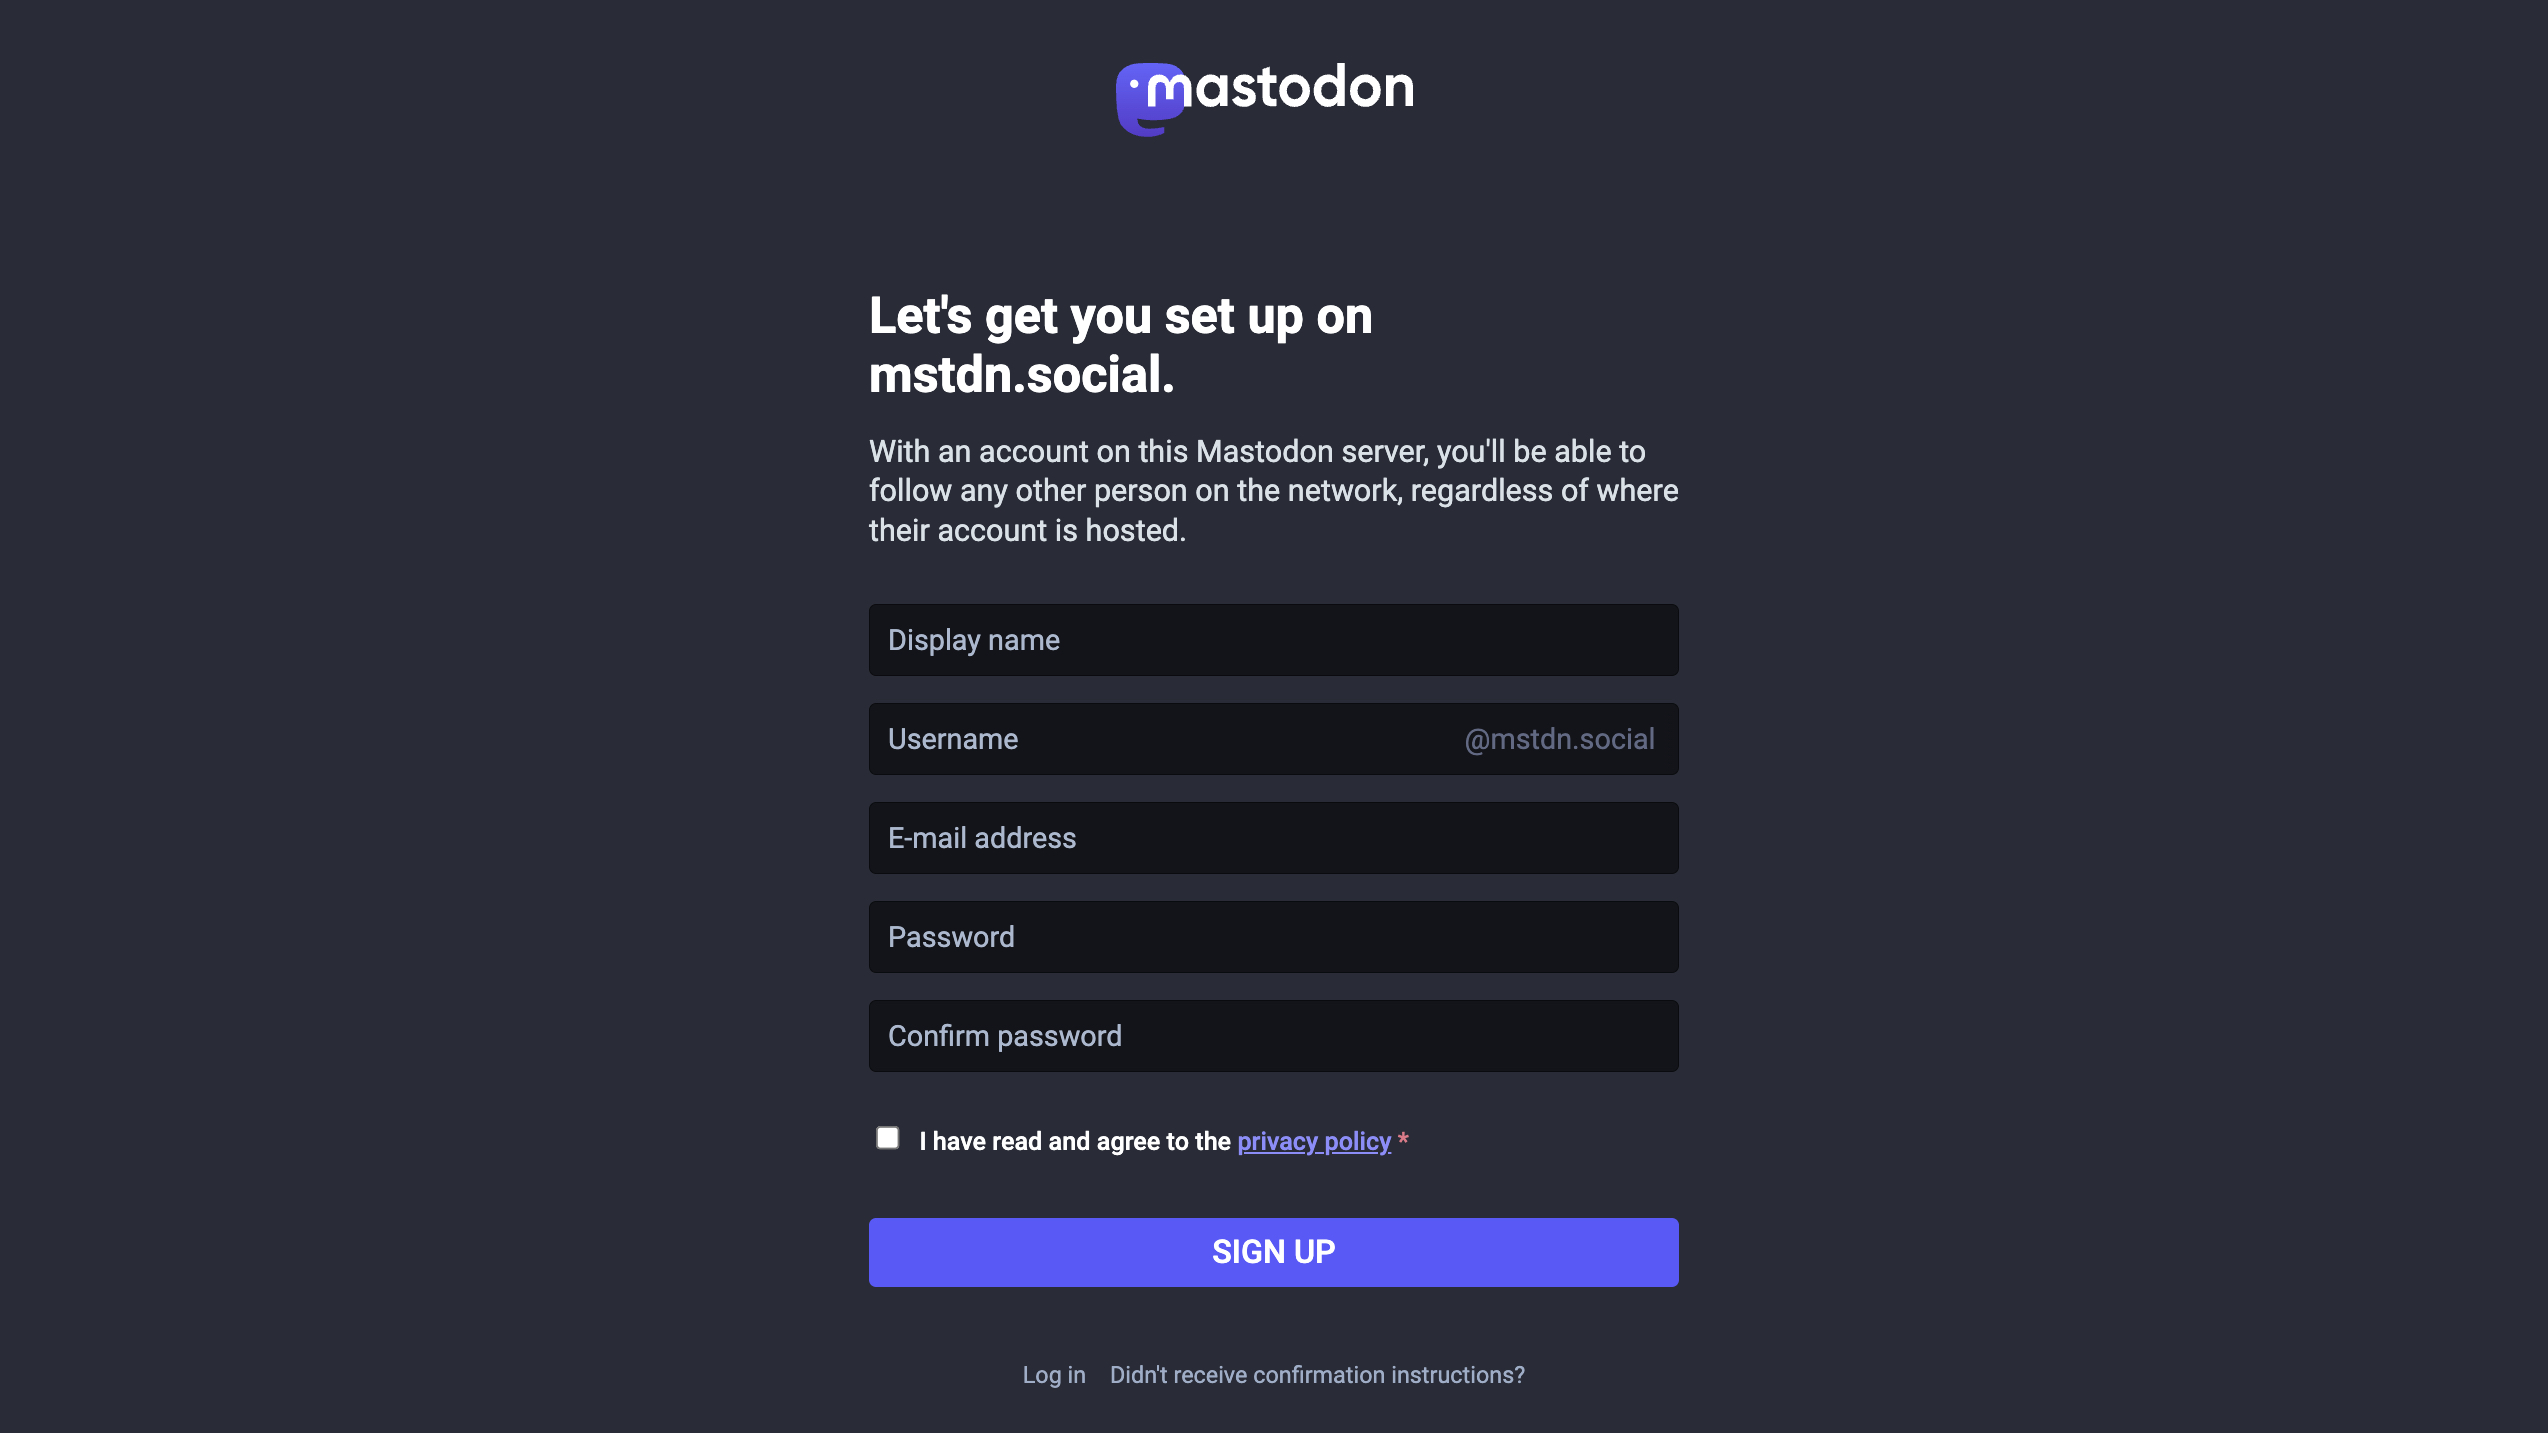
8. Enter the following pieces of information:
- Display name
- Username
- E-mail address
- Password
- Confirm password
9. Click the checkbox to agree to the privacy policy.
10. Click the Sign Up button.
Before you can start customizing your profile, you’ll likely receive a confirmation email. So head over to your email client (or web client) and click the appropriate button within the email from Mastodon to confirm your account creation.
Learning the basics
Now that you've signed up for Mastodon and are ready to get started exploring this unique social media platform, we've rounded up a few of the "basics." These include things such as customizing your profile to publishing your first post.
Create and customize your profile
1. Open the Mastodon app on your phone.
2. Log into your account for the Mastodon server you joined.
3. Tap the Profile image in the bottom right corner.
4. Tap the Edit Profile button.
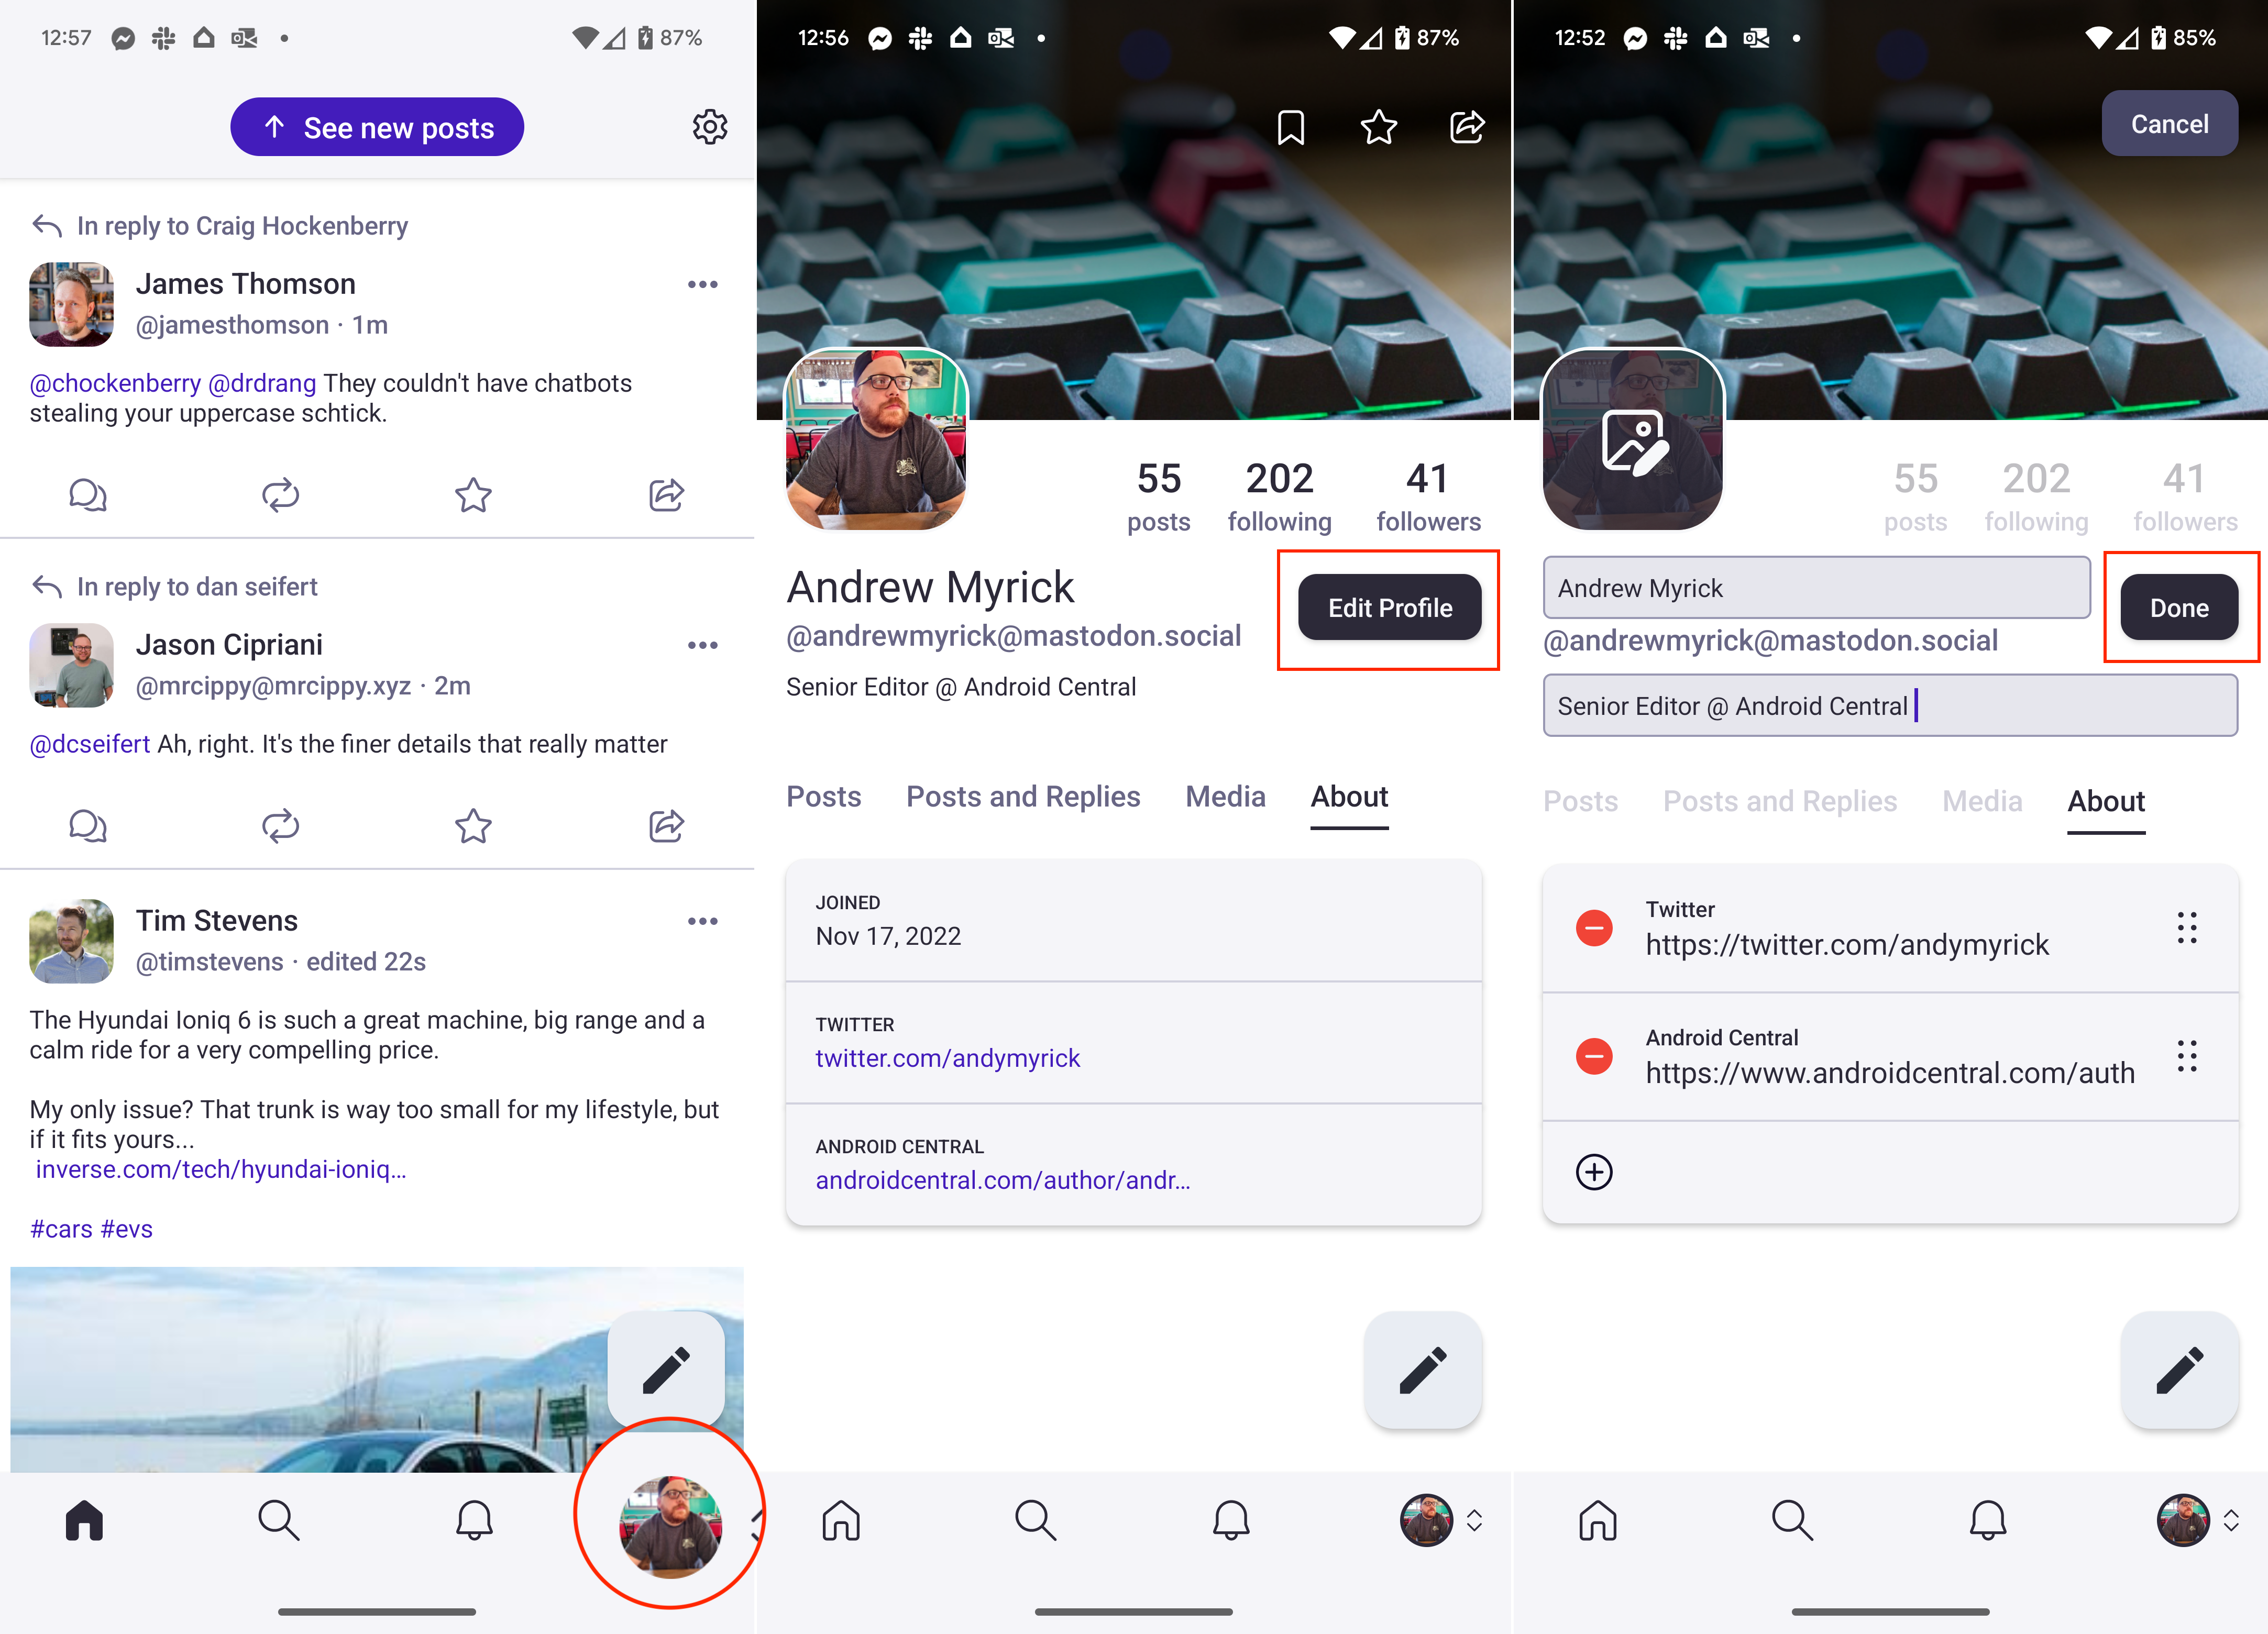
- Display name
- Bio
- Header image
- Avatar image
Once all the information has been filled out, scroll to the bottom of the page and click the Done button. Of course, you can always go back and make any adjustments to your profile that you might want.
Find and follow other Mastodon users
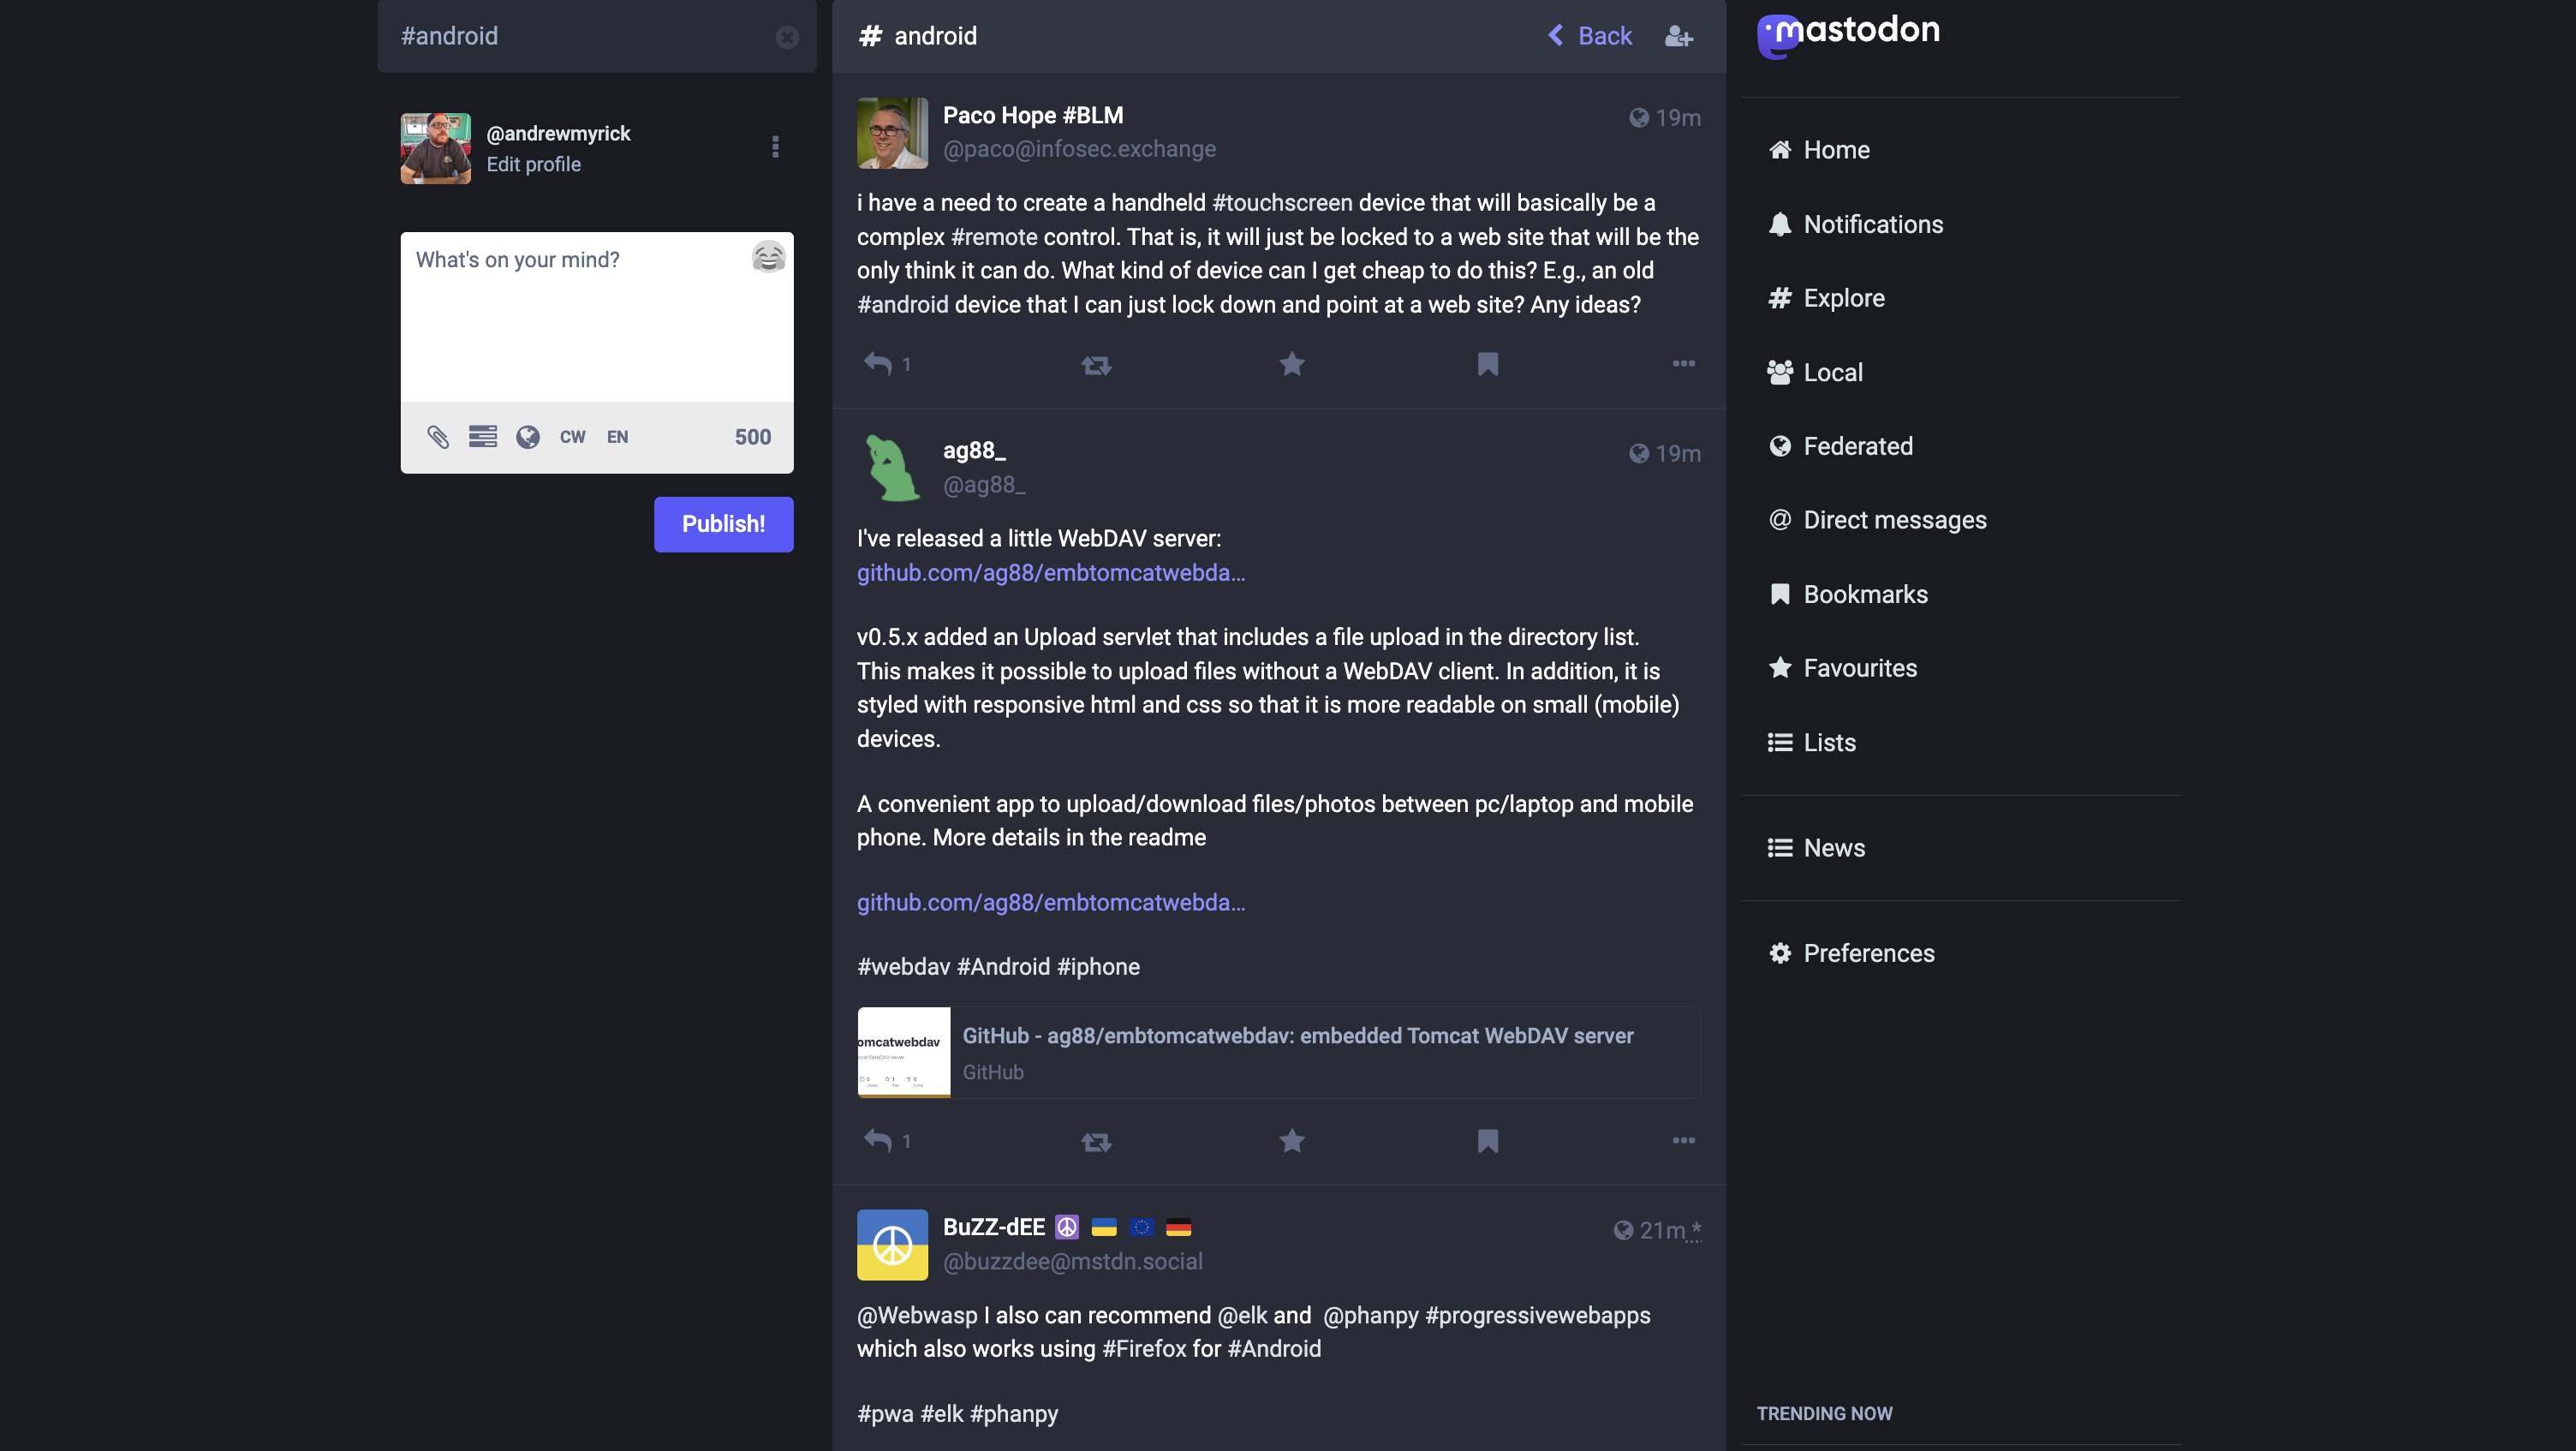
When you first sign up for Mastodon, regardless of which server you select, you'll be presented with some suggestions on who to follow. When it comes to finding other Mastodon users to follow, your best bet is to simply search for them using the services built-in search functionality.
Following Musk's acquisition of Twitter, there were several tools that relied on Twitter's API in an effort to make it easy to try and match up your Twitter following with Mastodon. However, Twitter has made drastic changes to its API, making it more difficult (or expensive) to tie into the service.
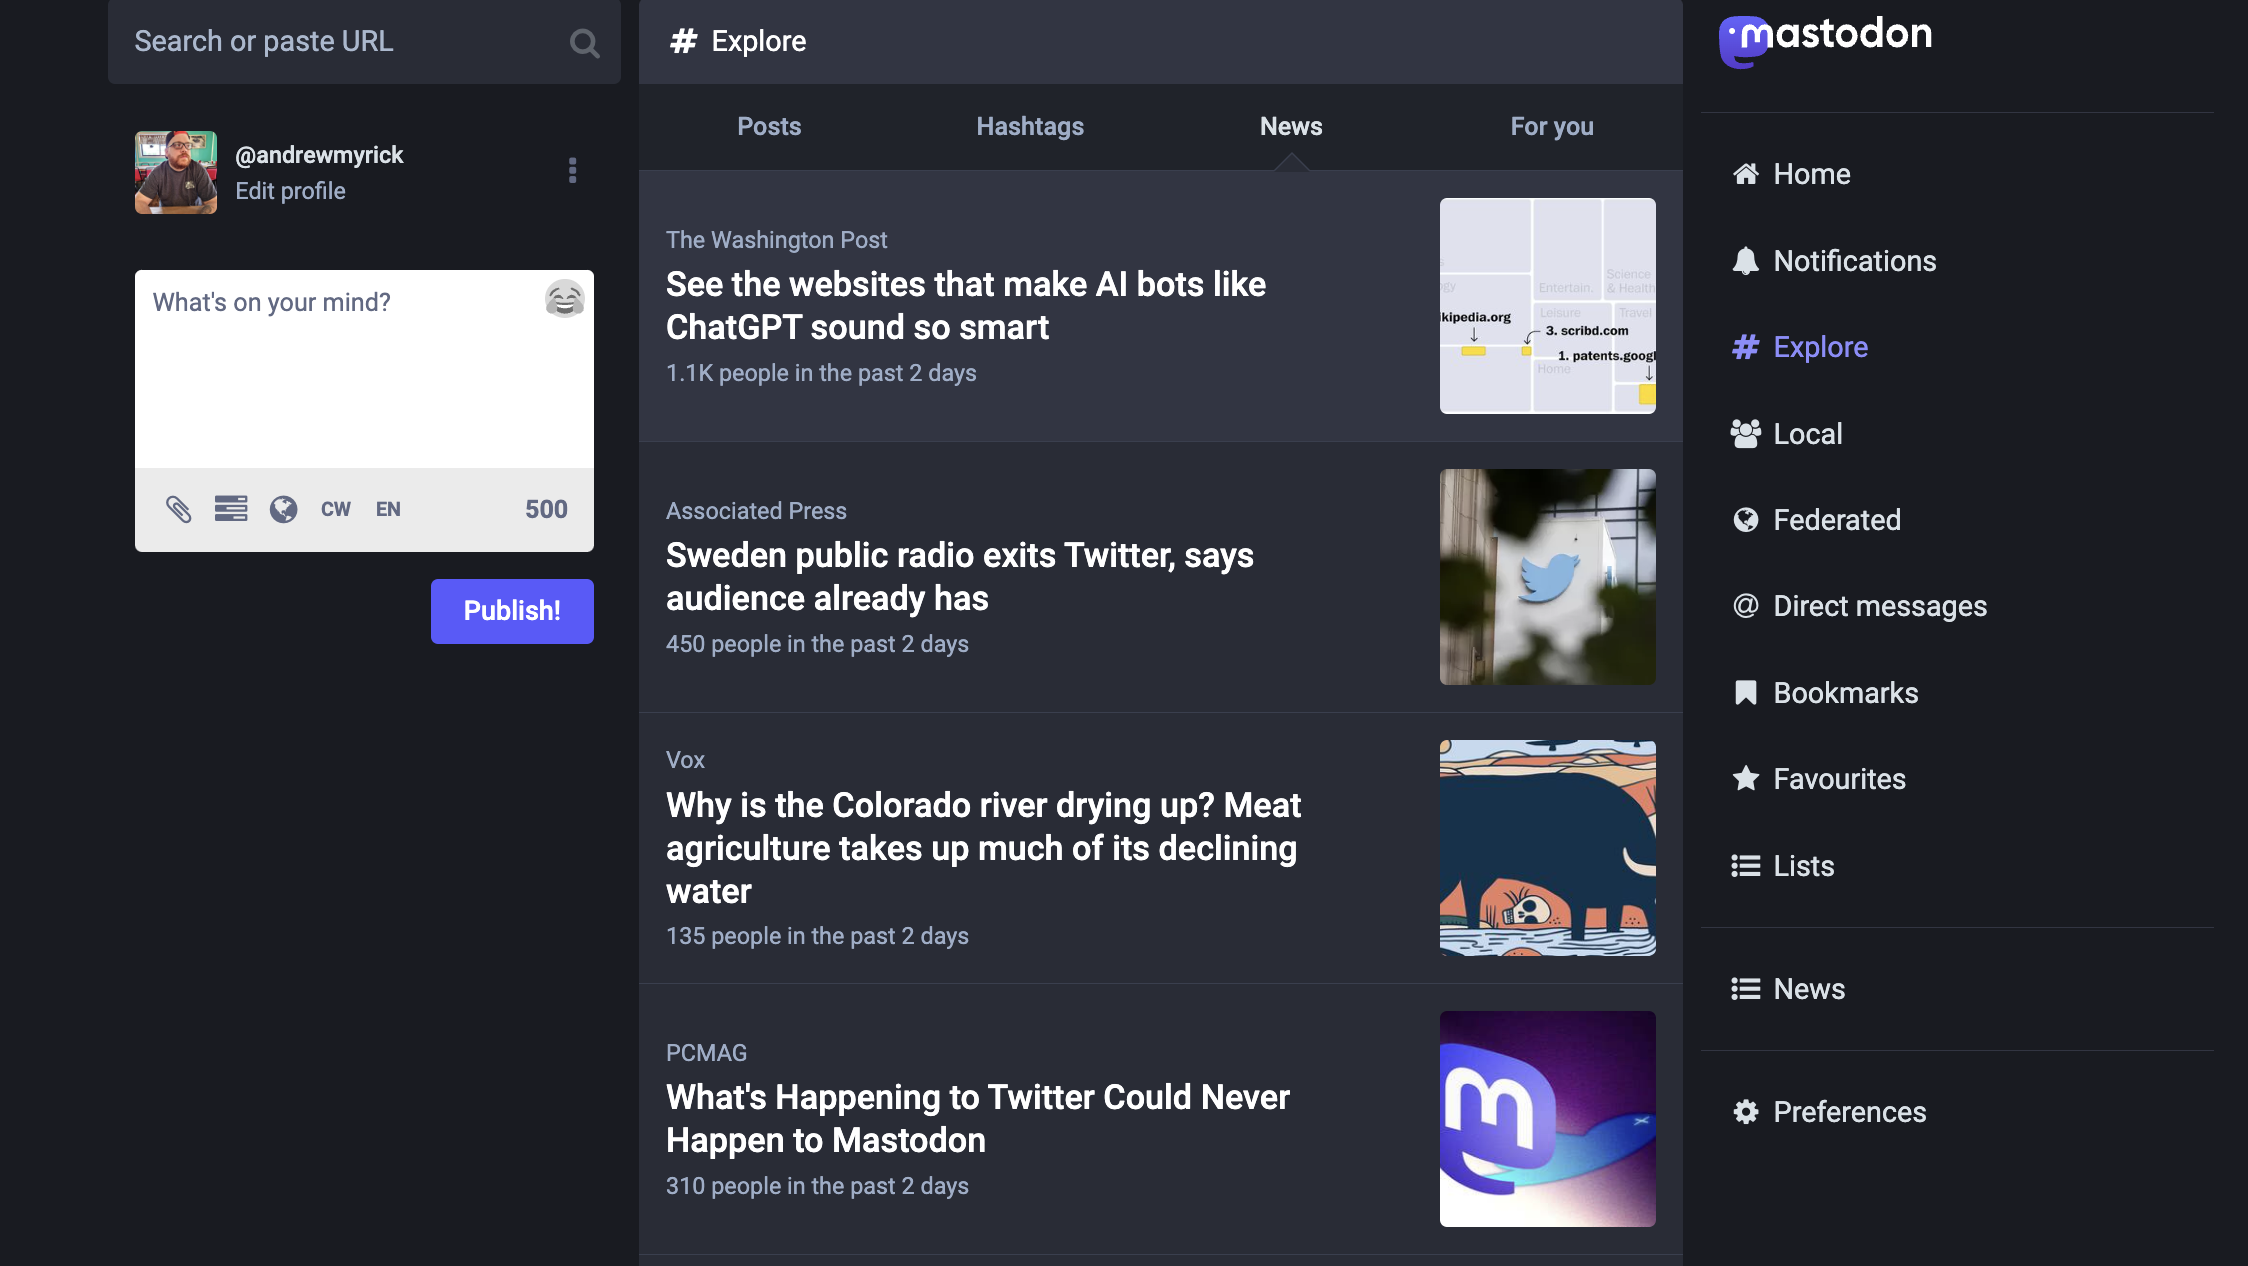
All hope is not lost, at least not yet, as there's still one service still working, as it allows you to download a CSV file of who you are following. Then, you can just import the CSV file into your Mastodon account.
There is a catch when using Twitodon, or other third-party services with similar functionality. In order to properly identify those on Twitter who have a Mastodon account, those users will need to "have linked their Twitter account to their Mastodon account." In other words, you might be following 1,500 people, but if their Twitter and Mastodon accounts aren't linked, then they won't be identified by Twitodon.
1. Open a web browser and navigate to twitodon.com.
2. Click the Sign in with Twitter link under the Get Started section.
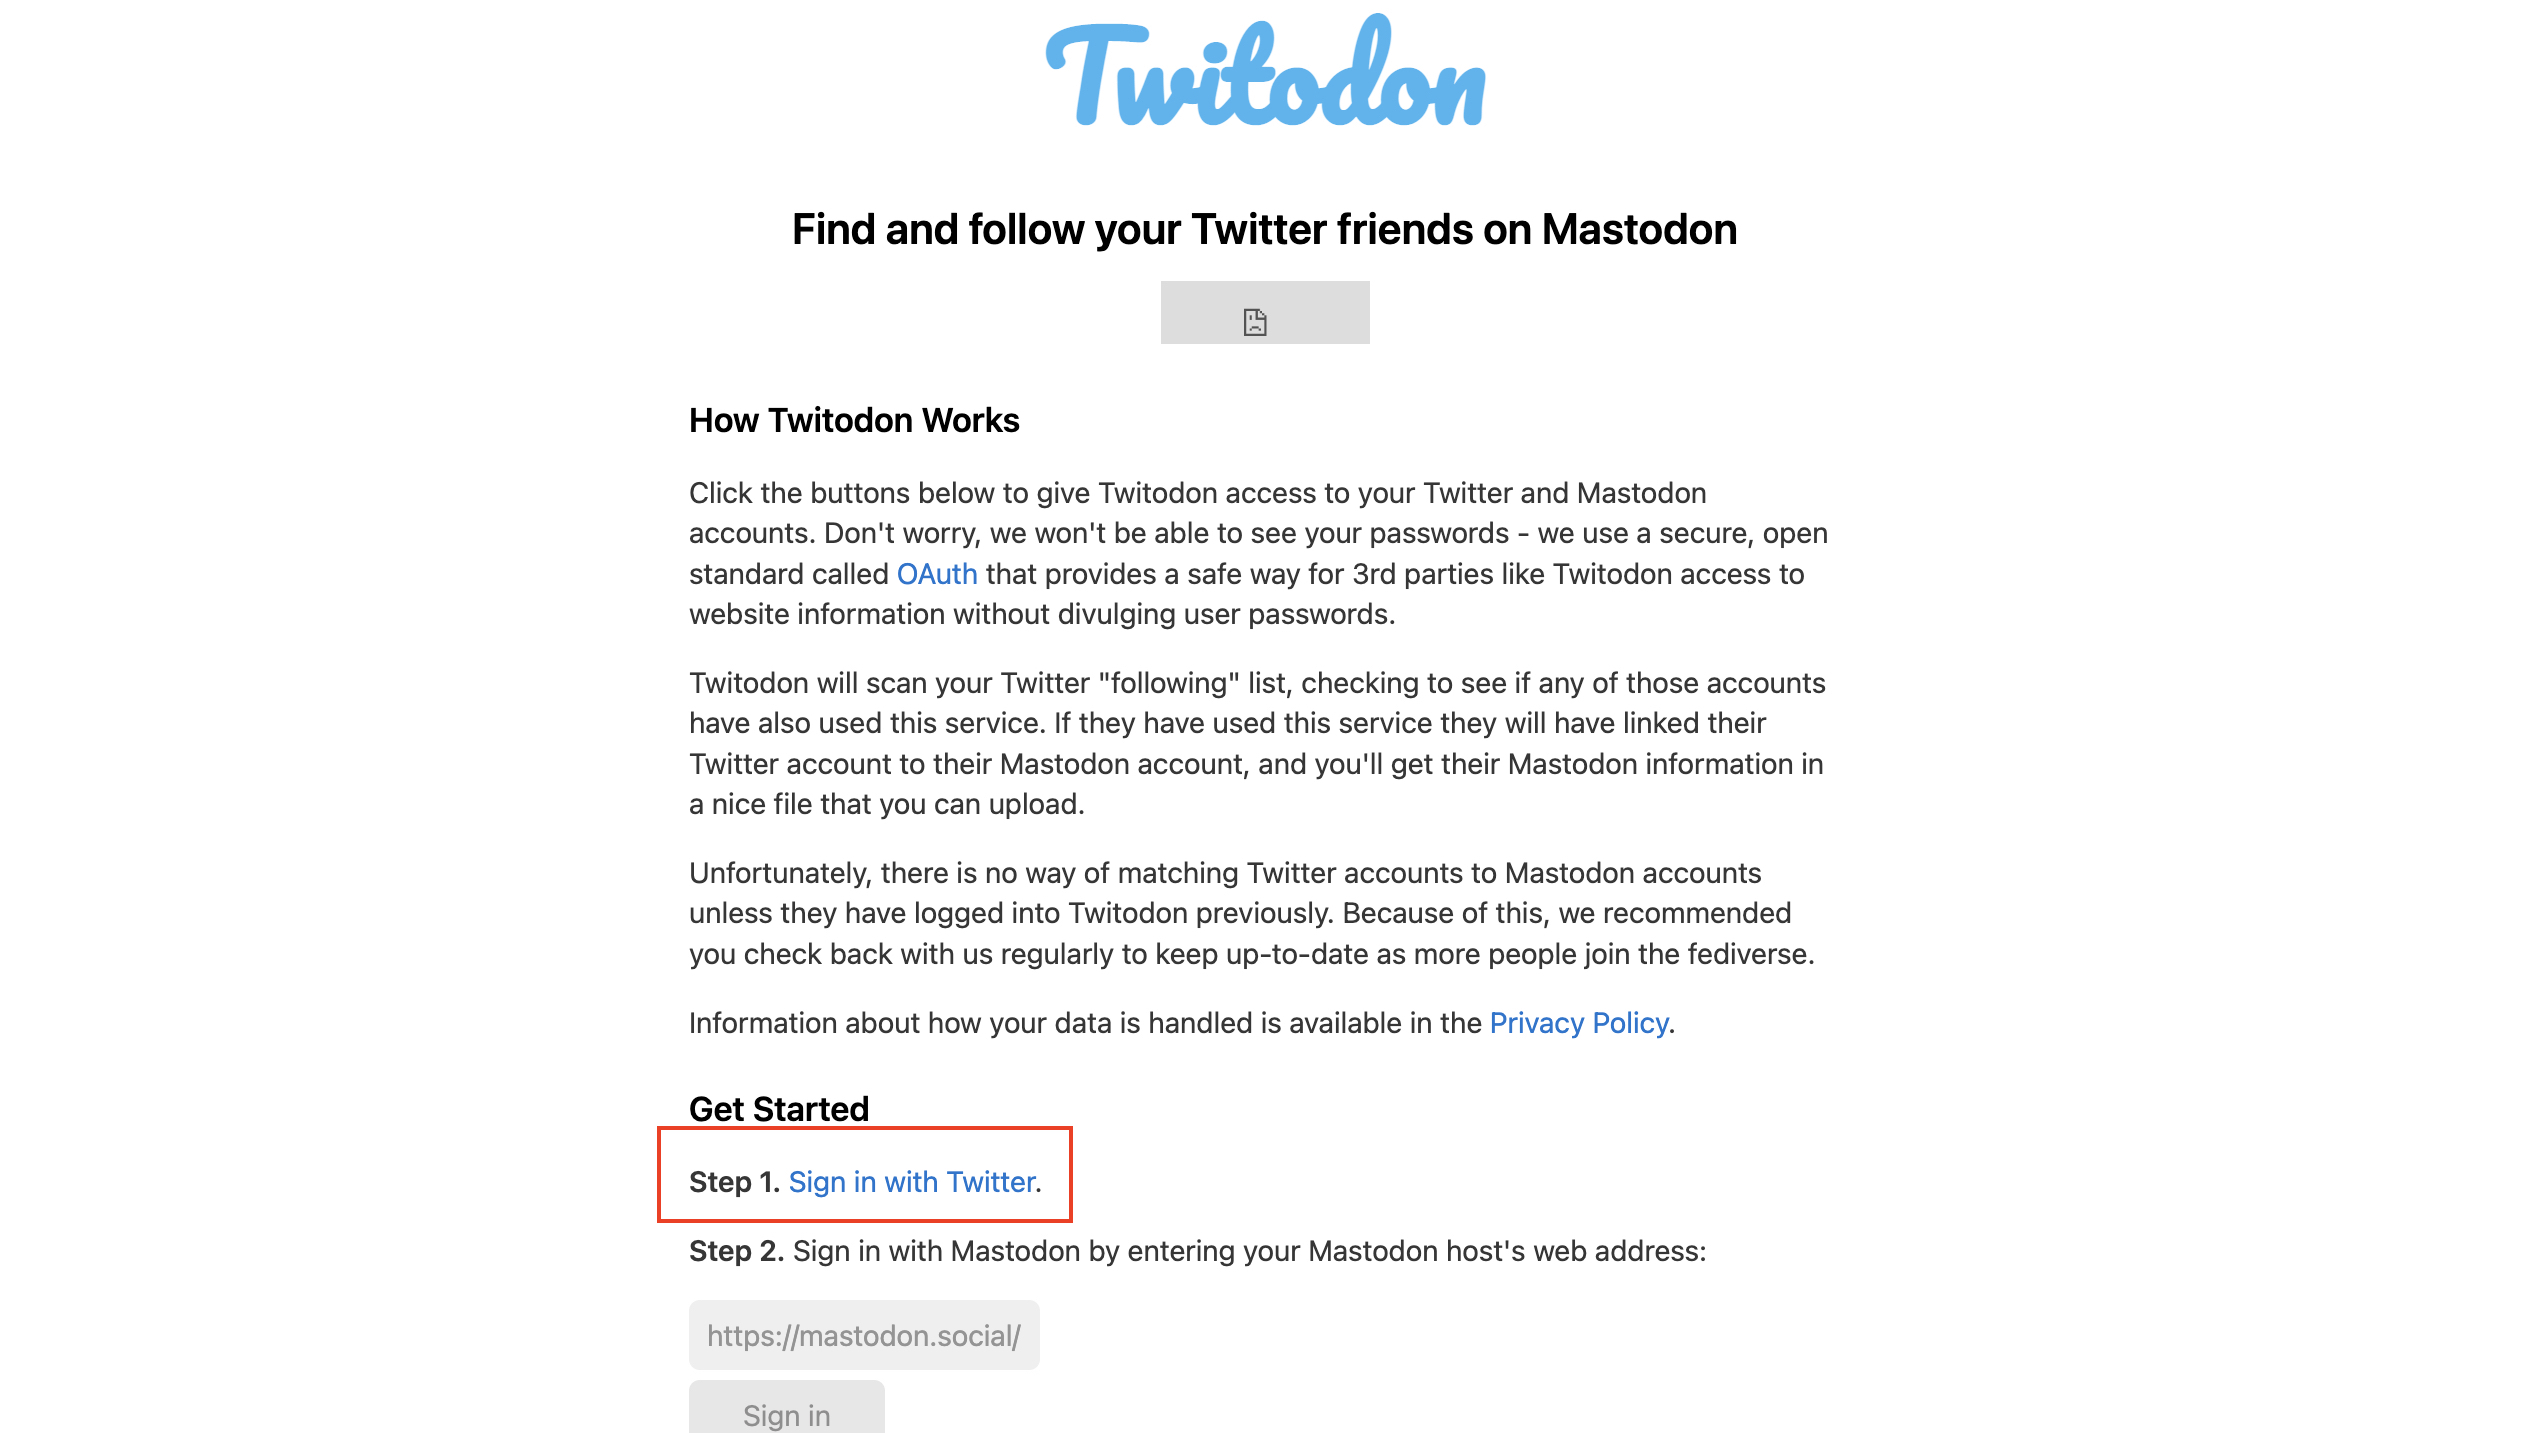
3. Follow the on-screen steps to link your Twitter account.
4. Copy and paste the Mastodon Host Web Address for your account under Step 2 and click the Sign in button.
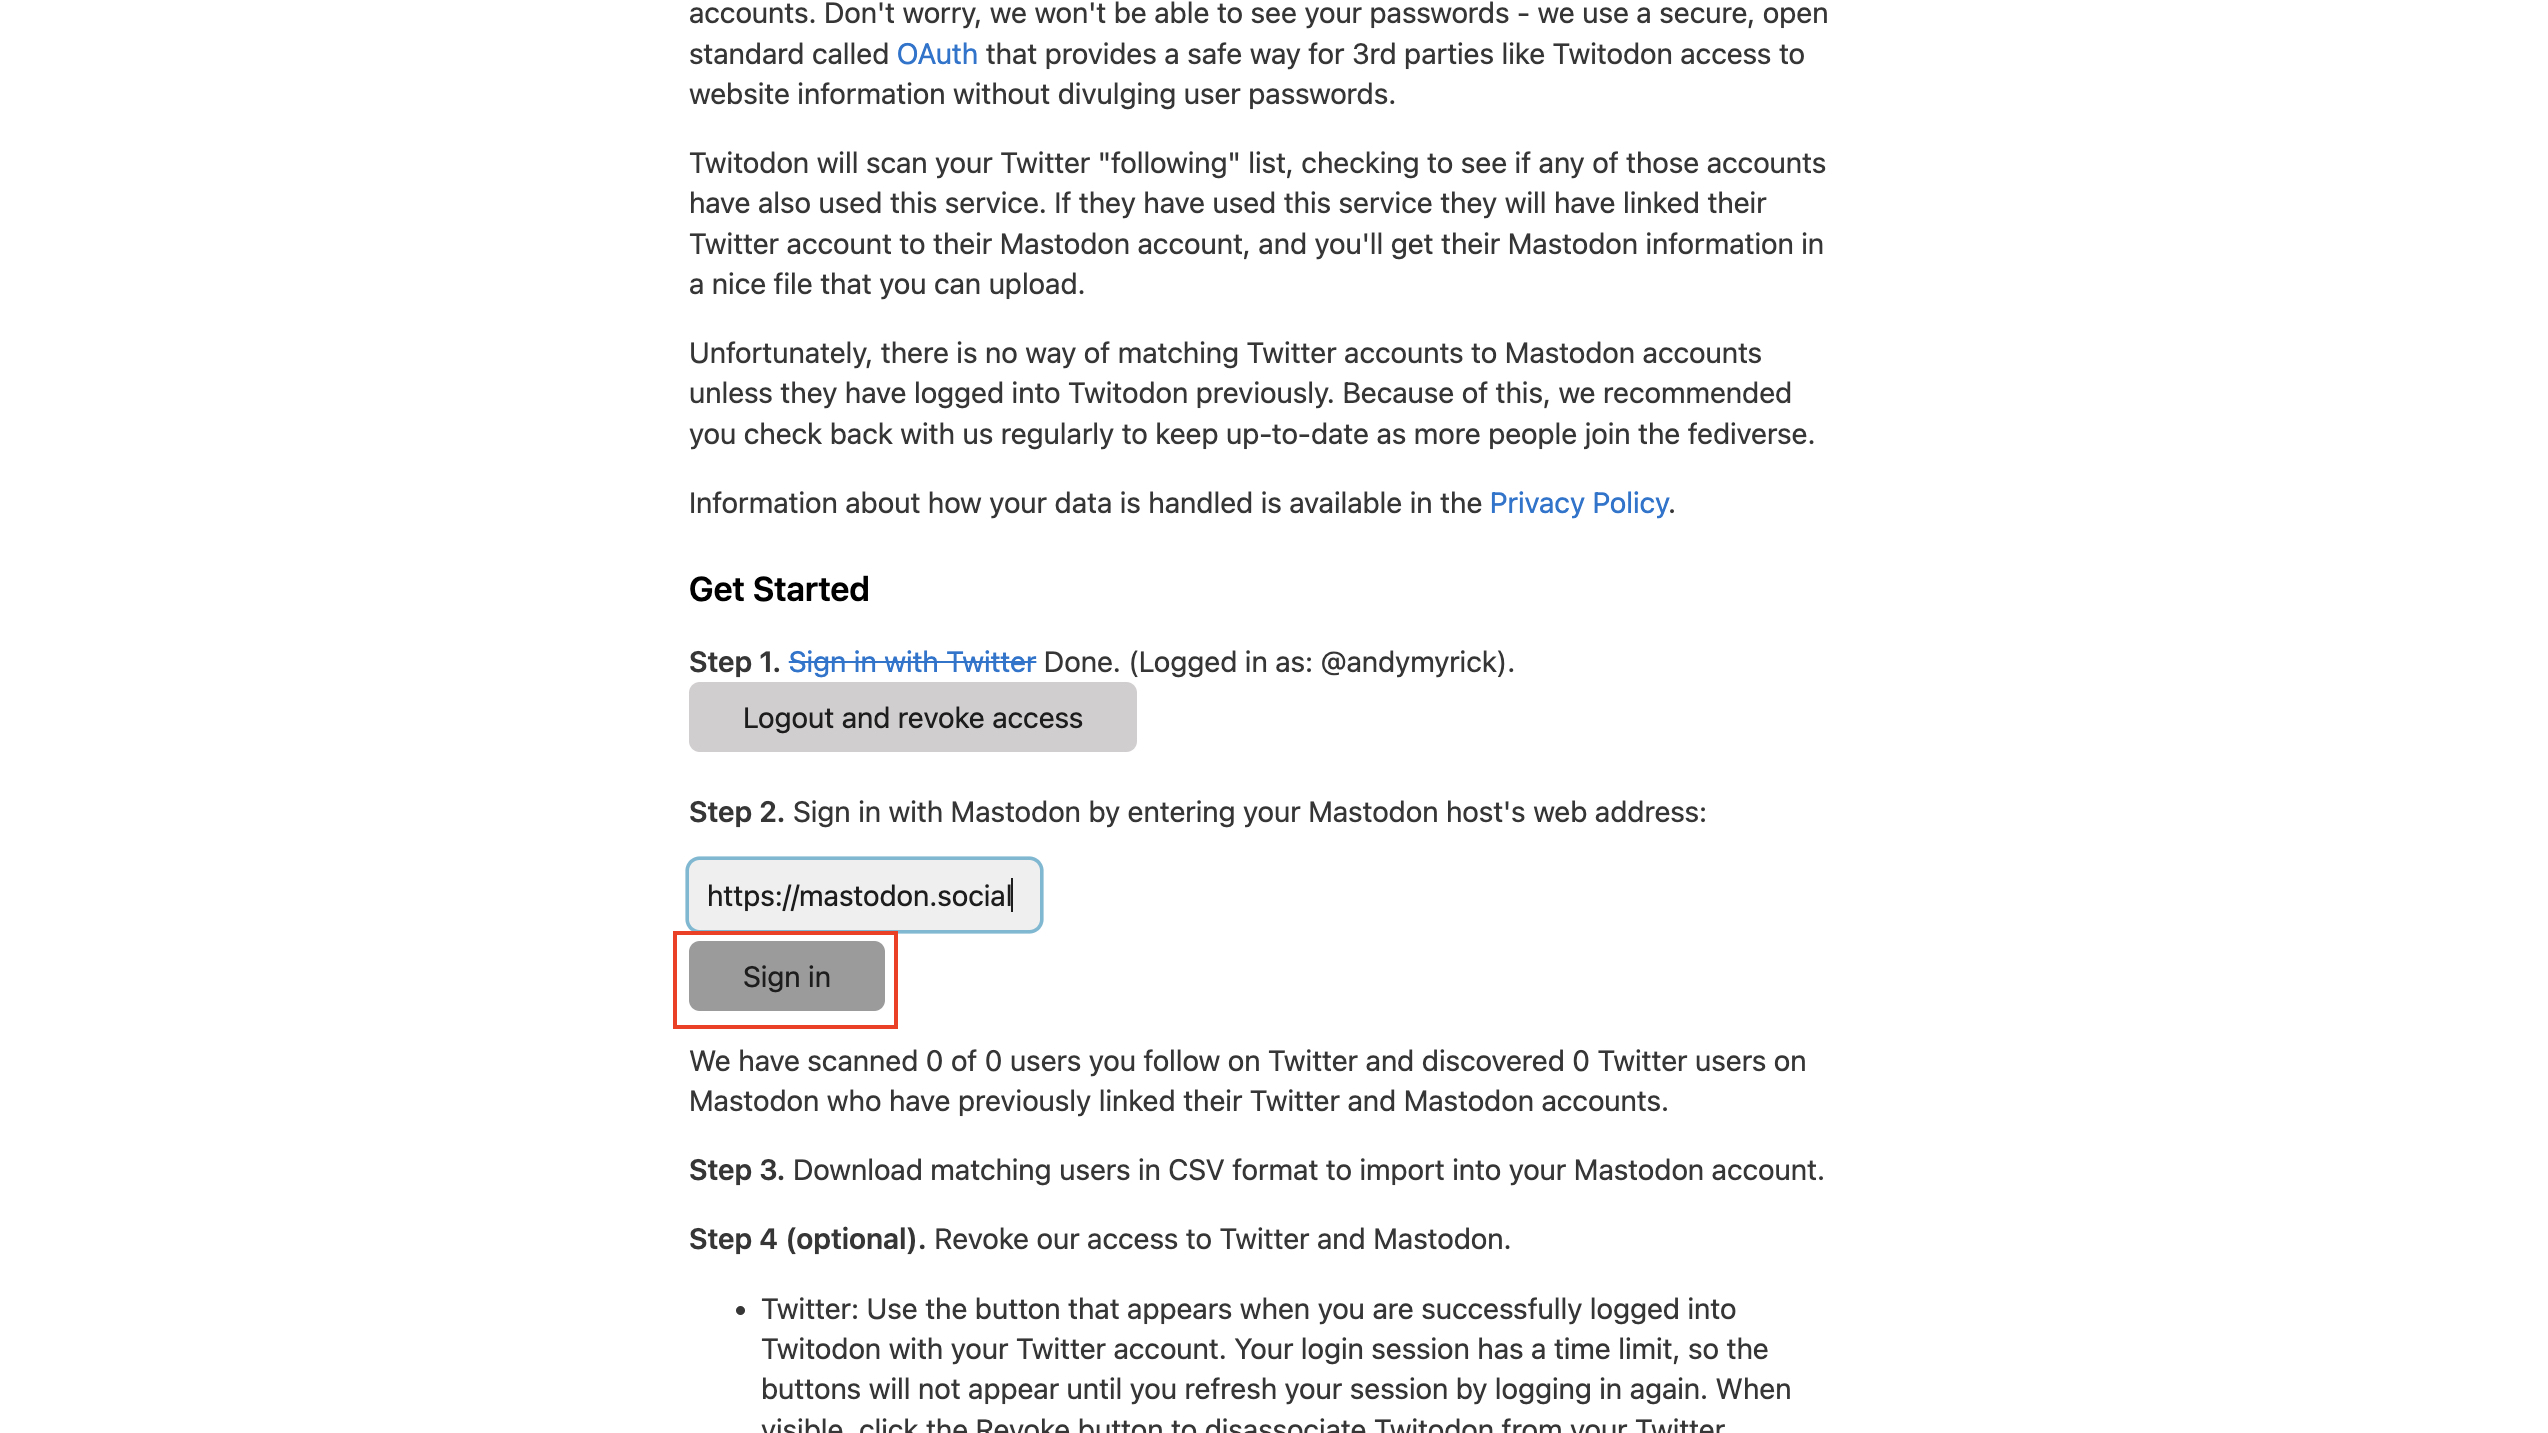
5. Wait a few moments for Twitodon to scan your Twitter account.
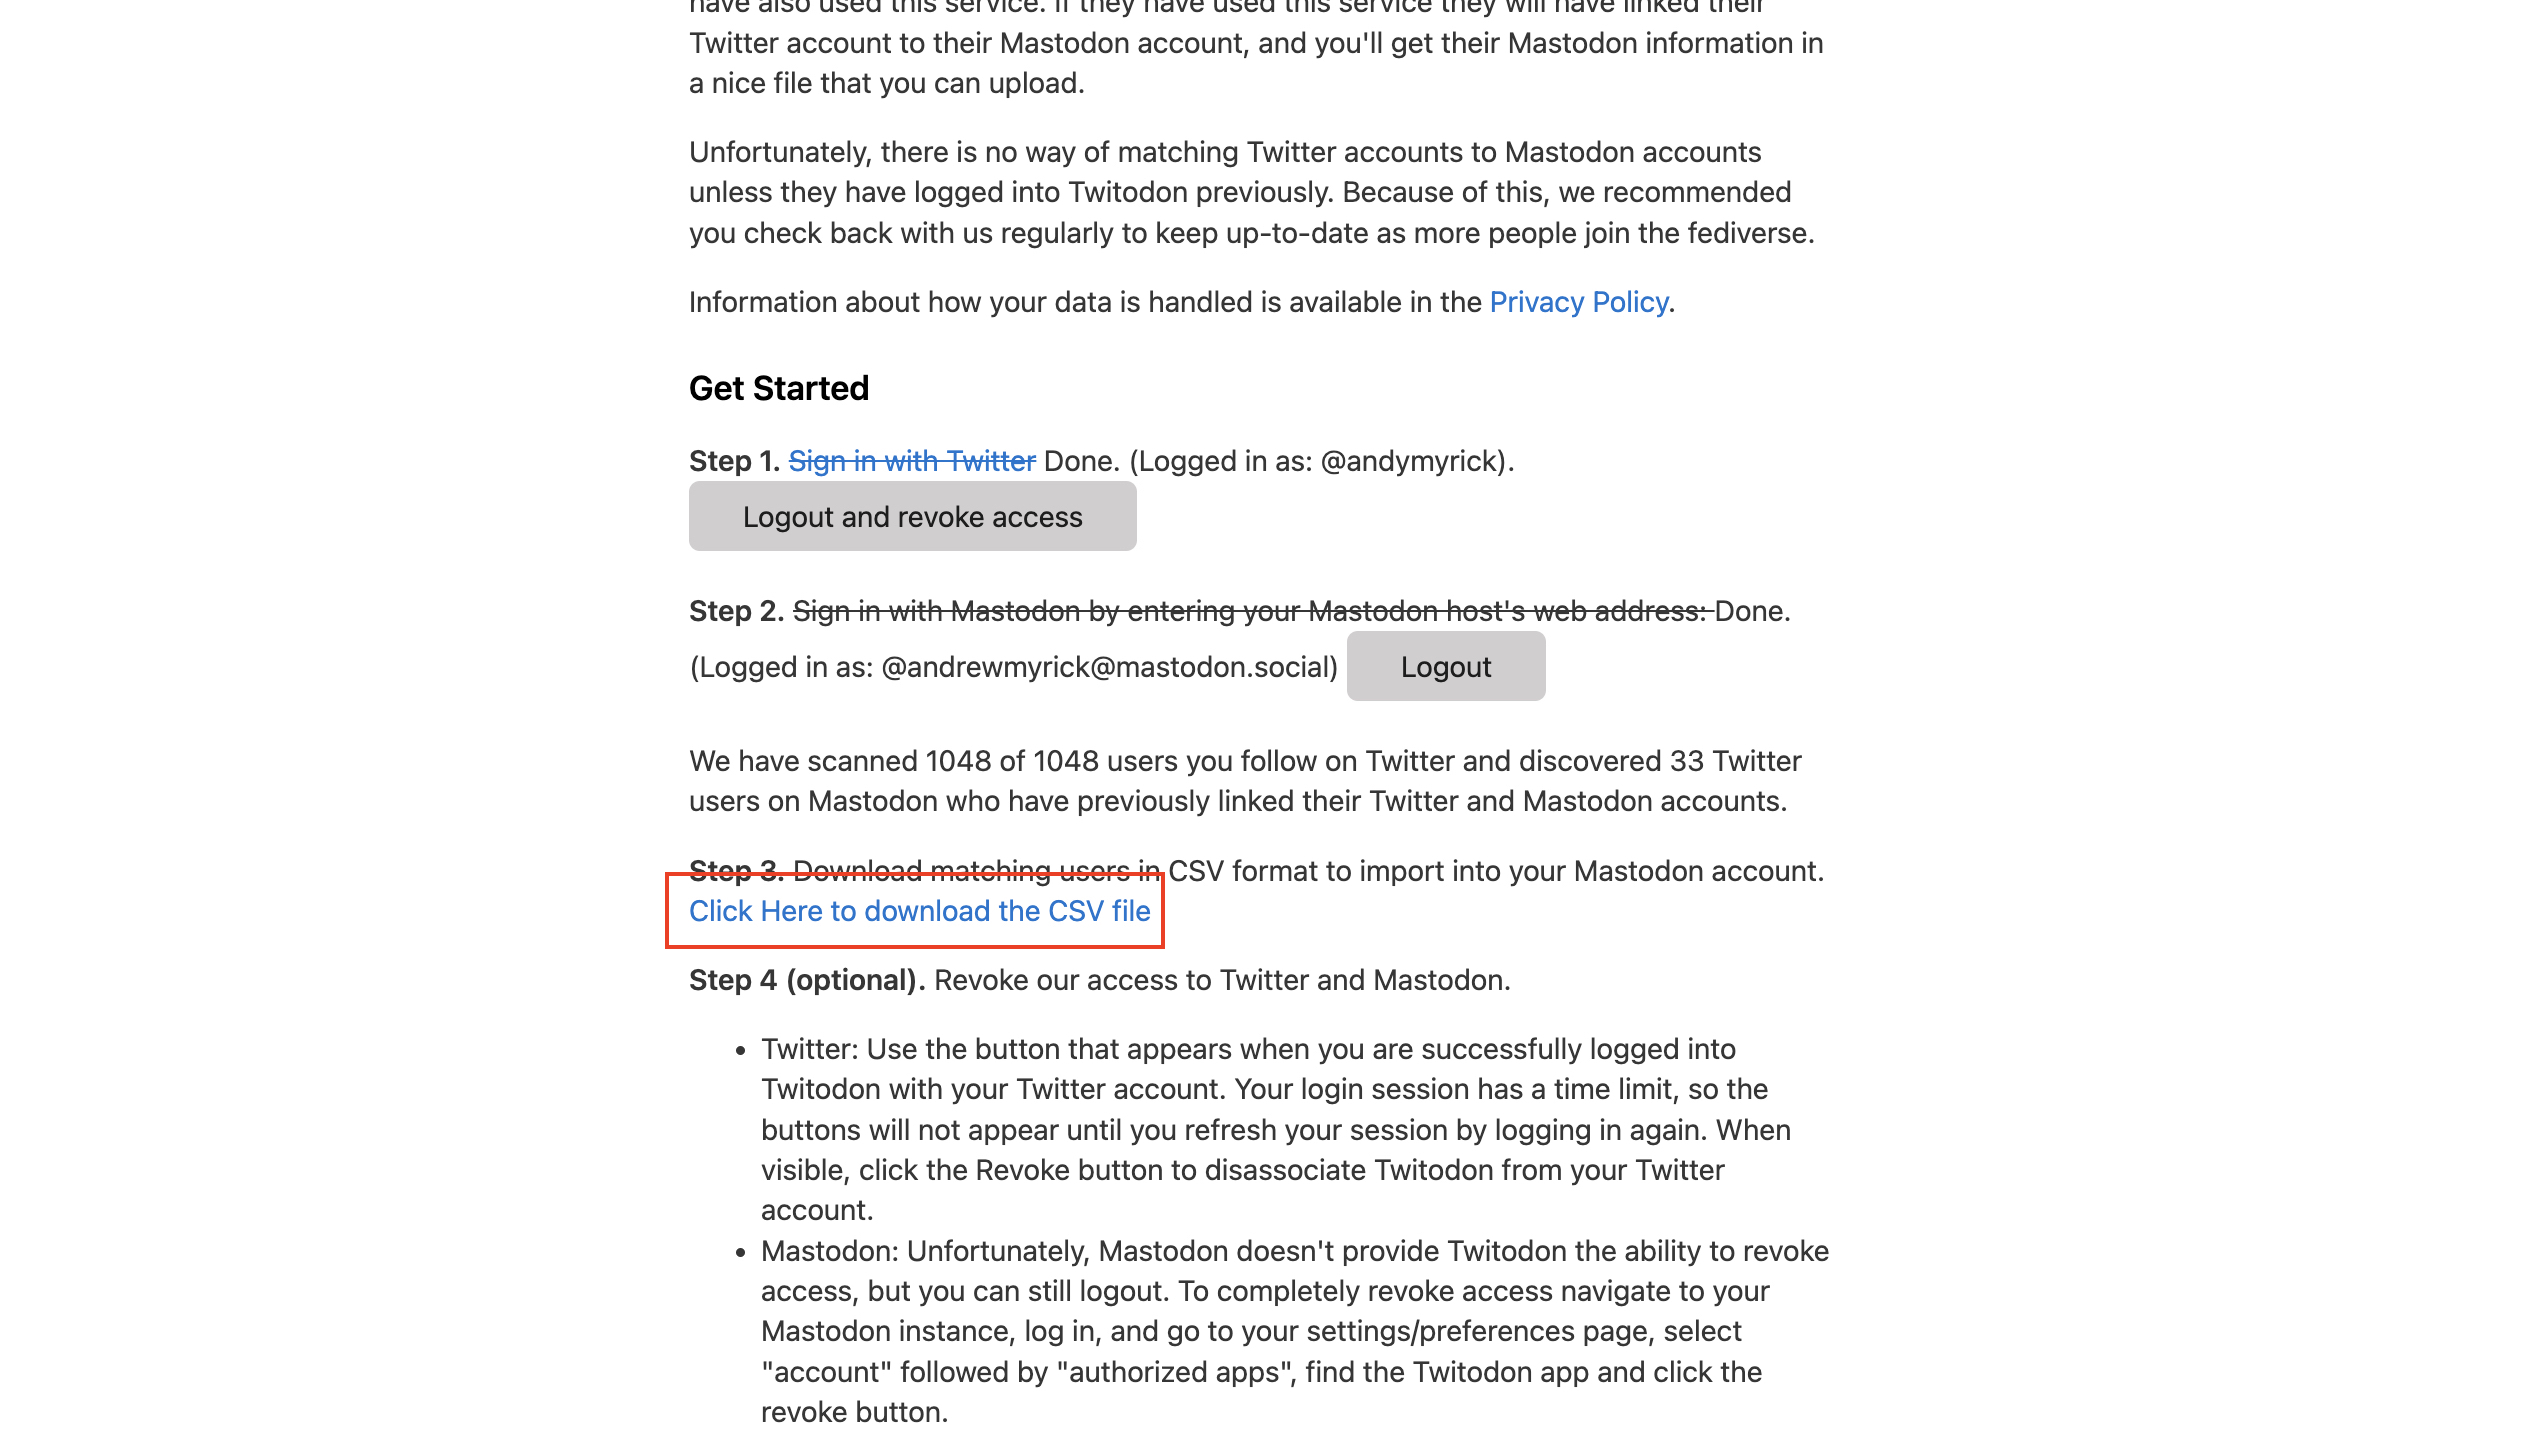
6. Click the link in Step 3 to download the CSV file.
7. Navigate to the Mastodon instance that you are a part of.
8. If necessary, sign into your Mastodon account.
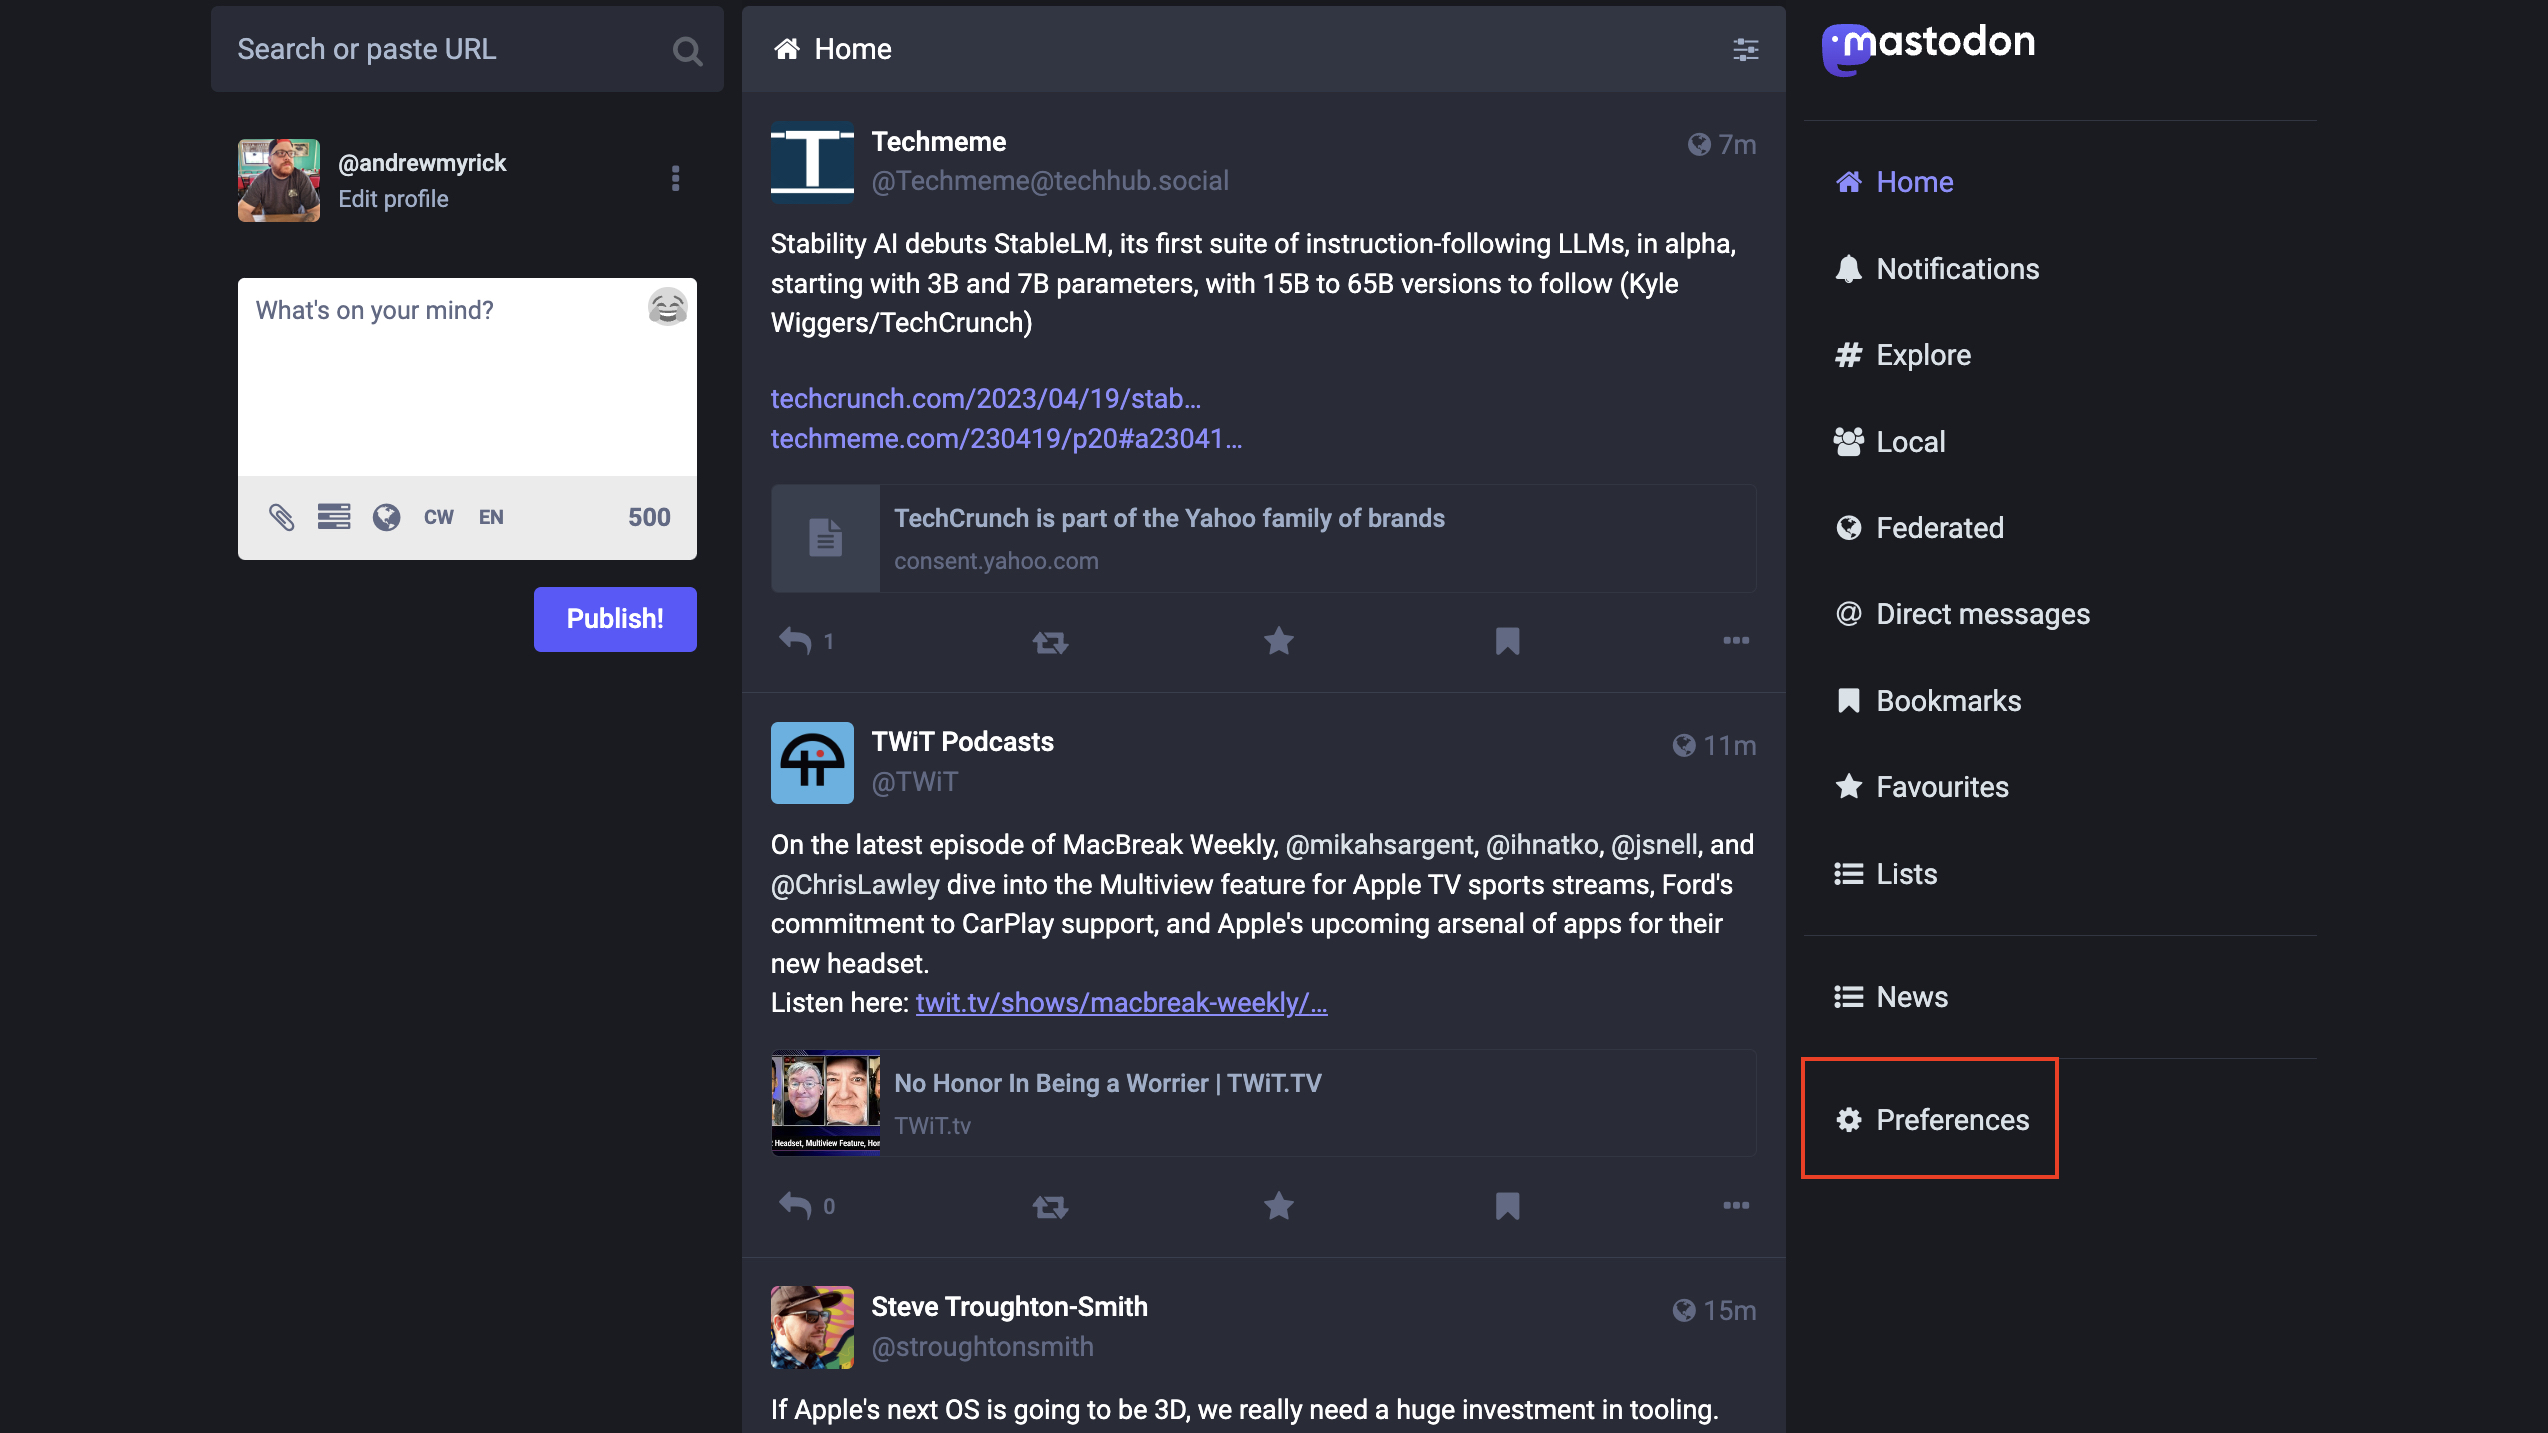
9. On the right side, click the Preferences button.
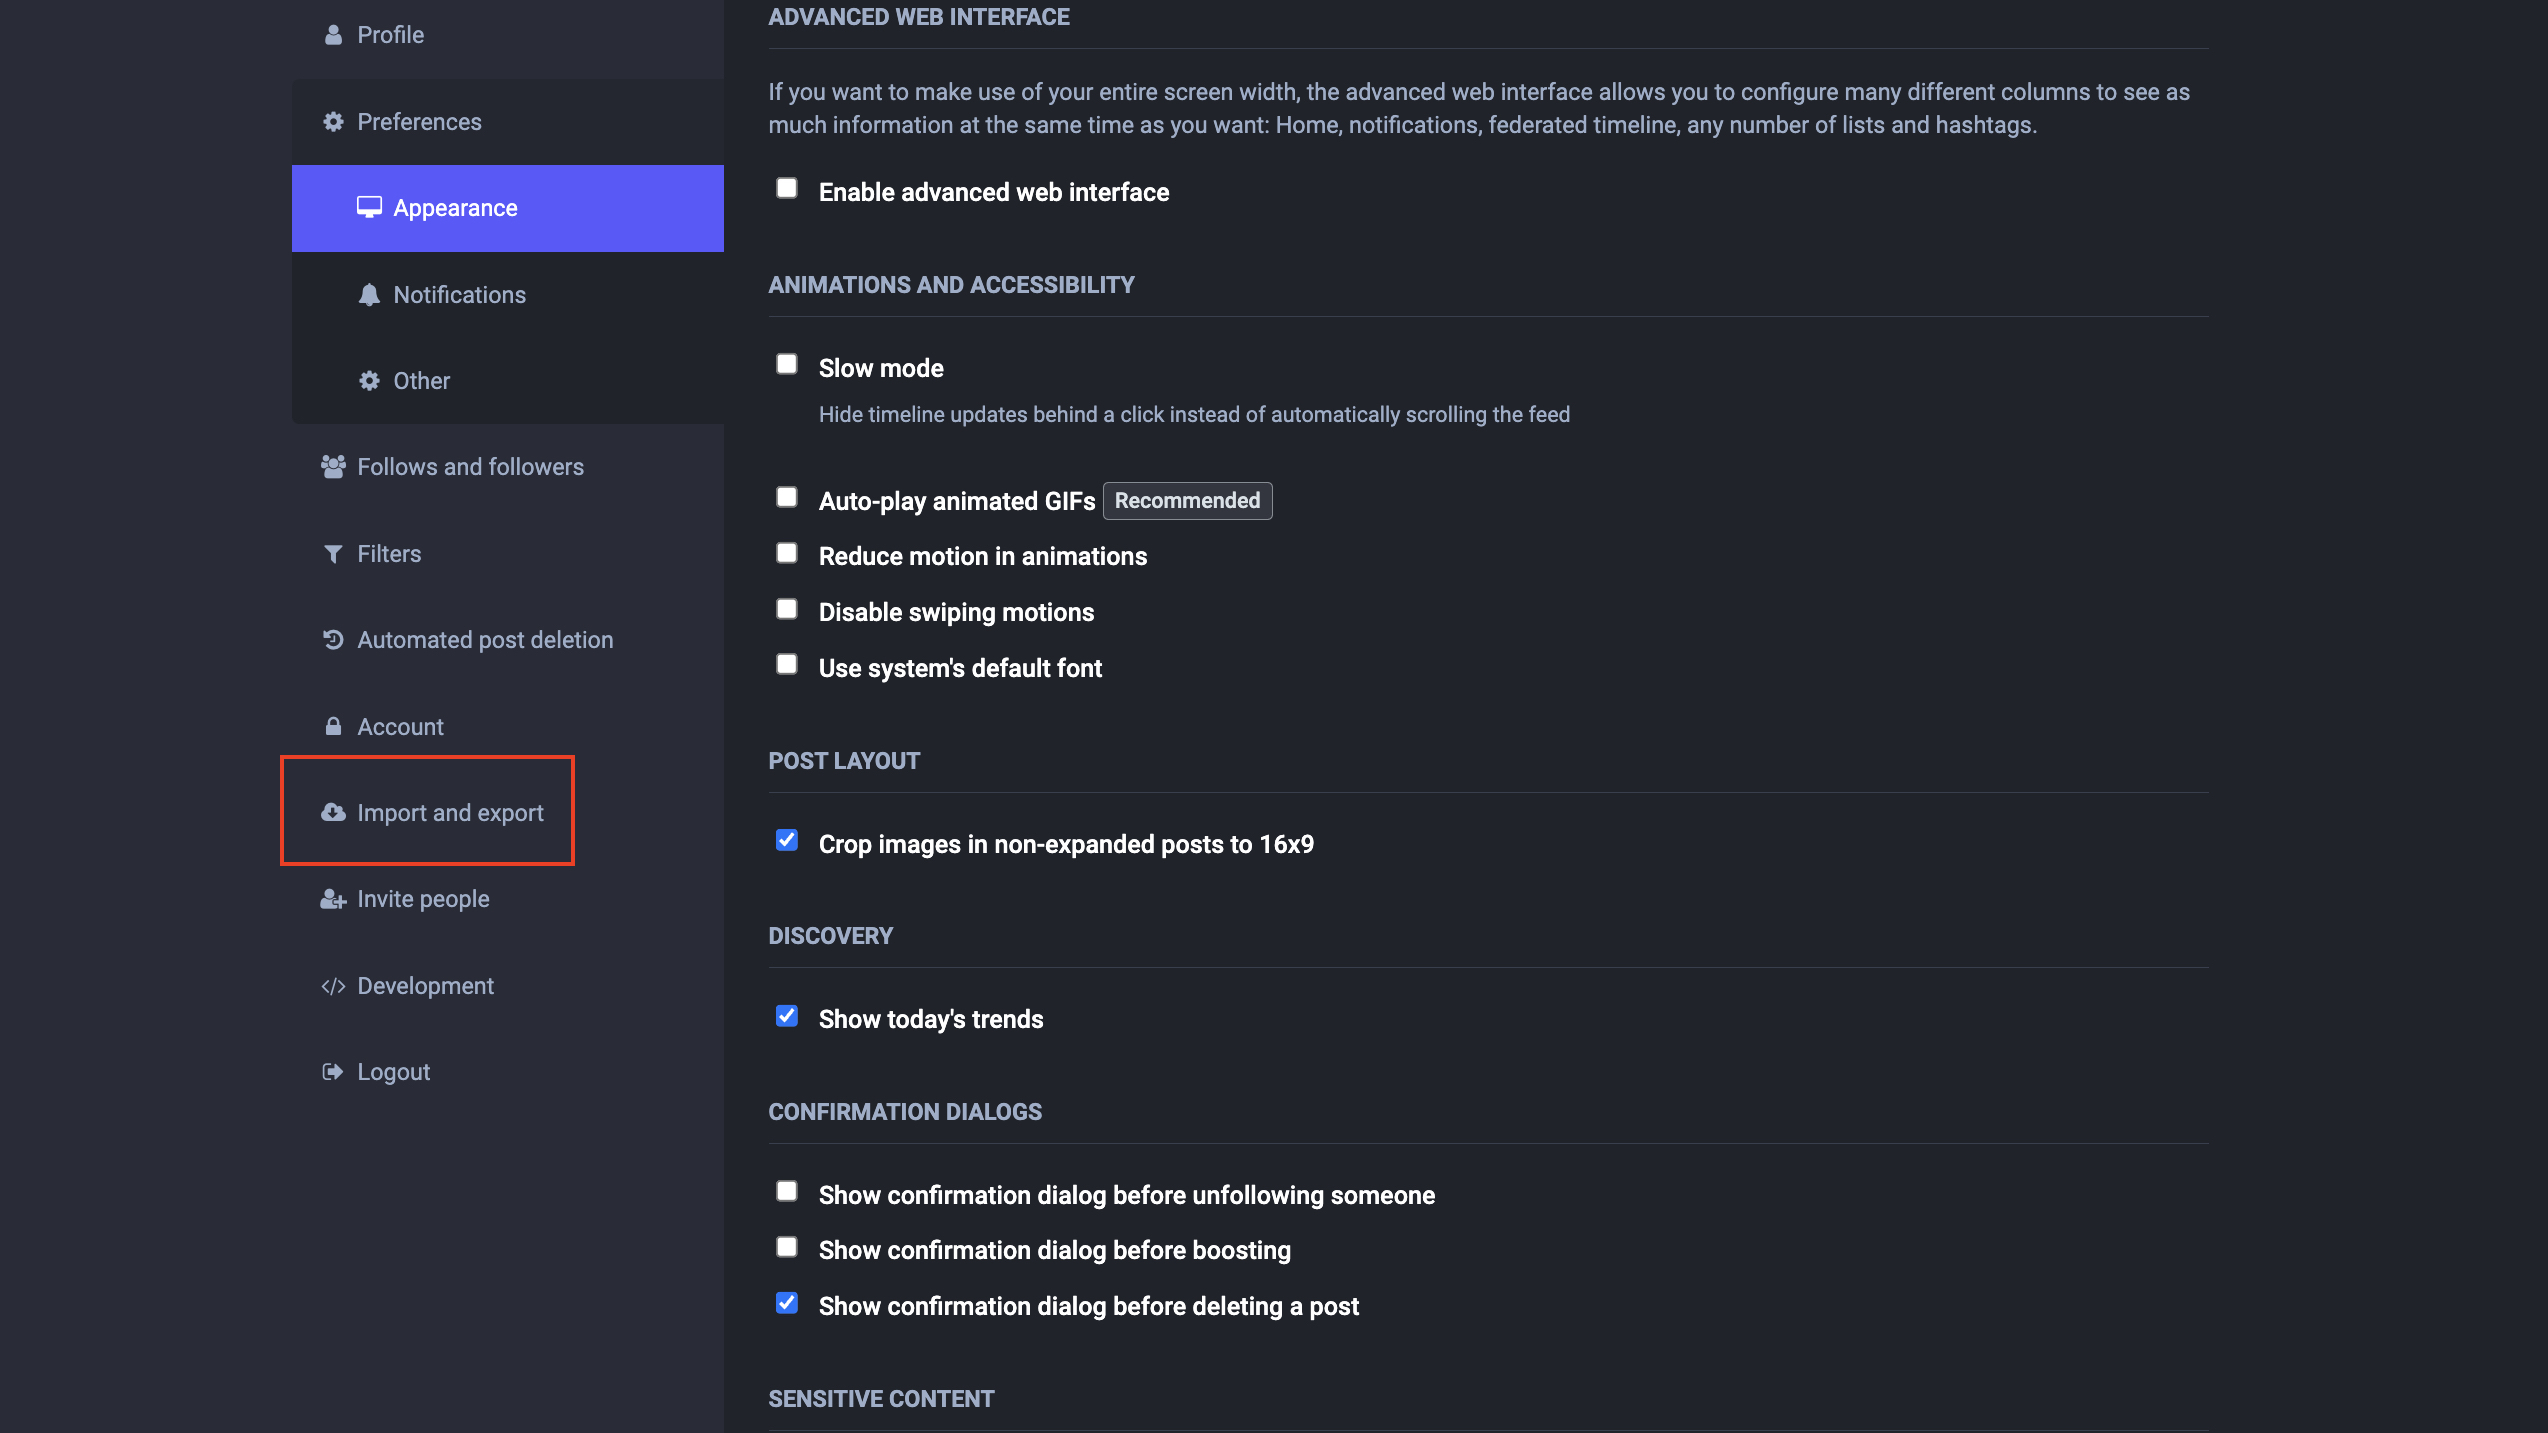
10. In the left sidebar, click Import and export.
11. Click the Import button.
12. Select the Import Type. These are your options: Following list, Blocking list, Muting list, Domain blocking list, or Bookmarks.
13. Under the Data section, click the Choose File button.
14. Locate and upload the CSV file that you previously downloaded.
15. Select either Merge or Overwrite.
16. Click the Upload button.
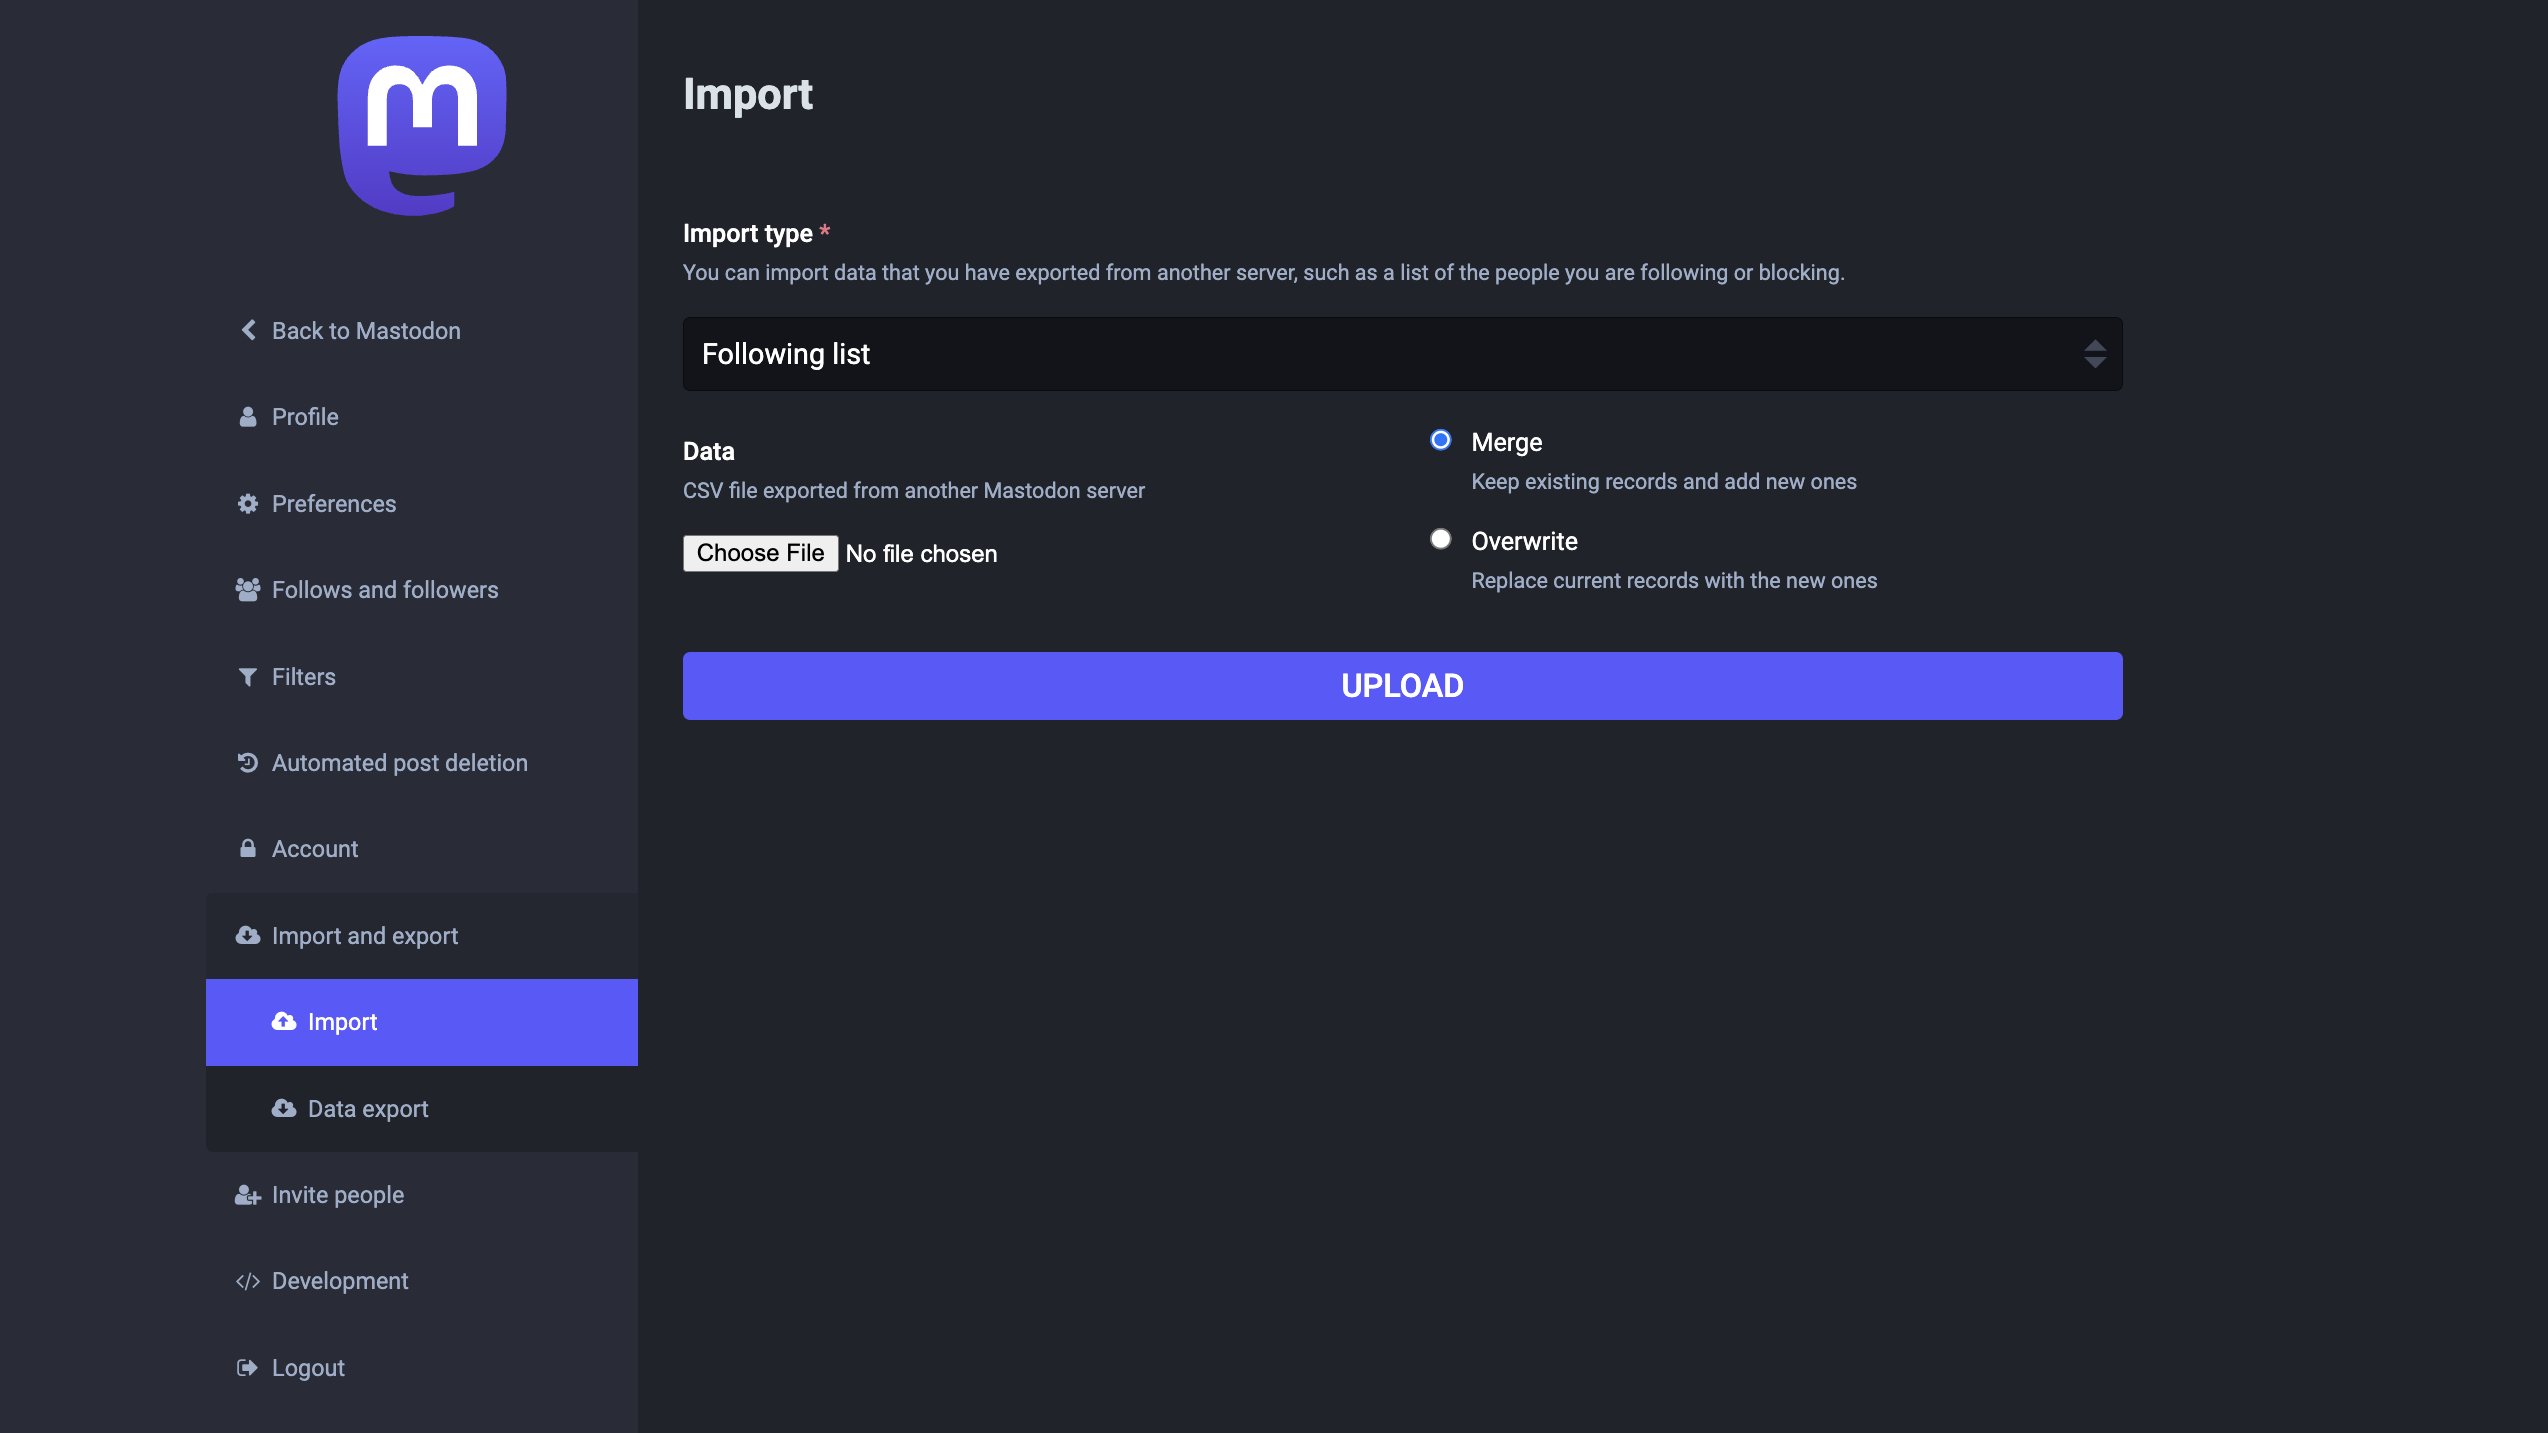
After a few moments, those Twitter accounts that can be identified as having a Mastodon link will be added to your Following list.
Creating your first "toot"
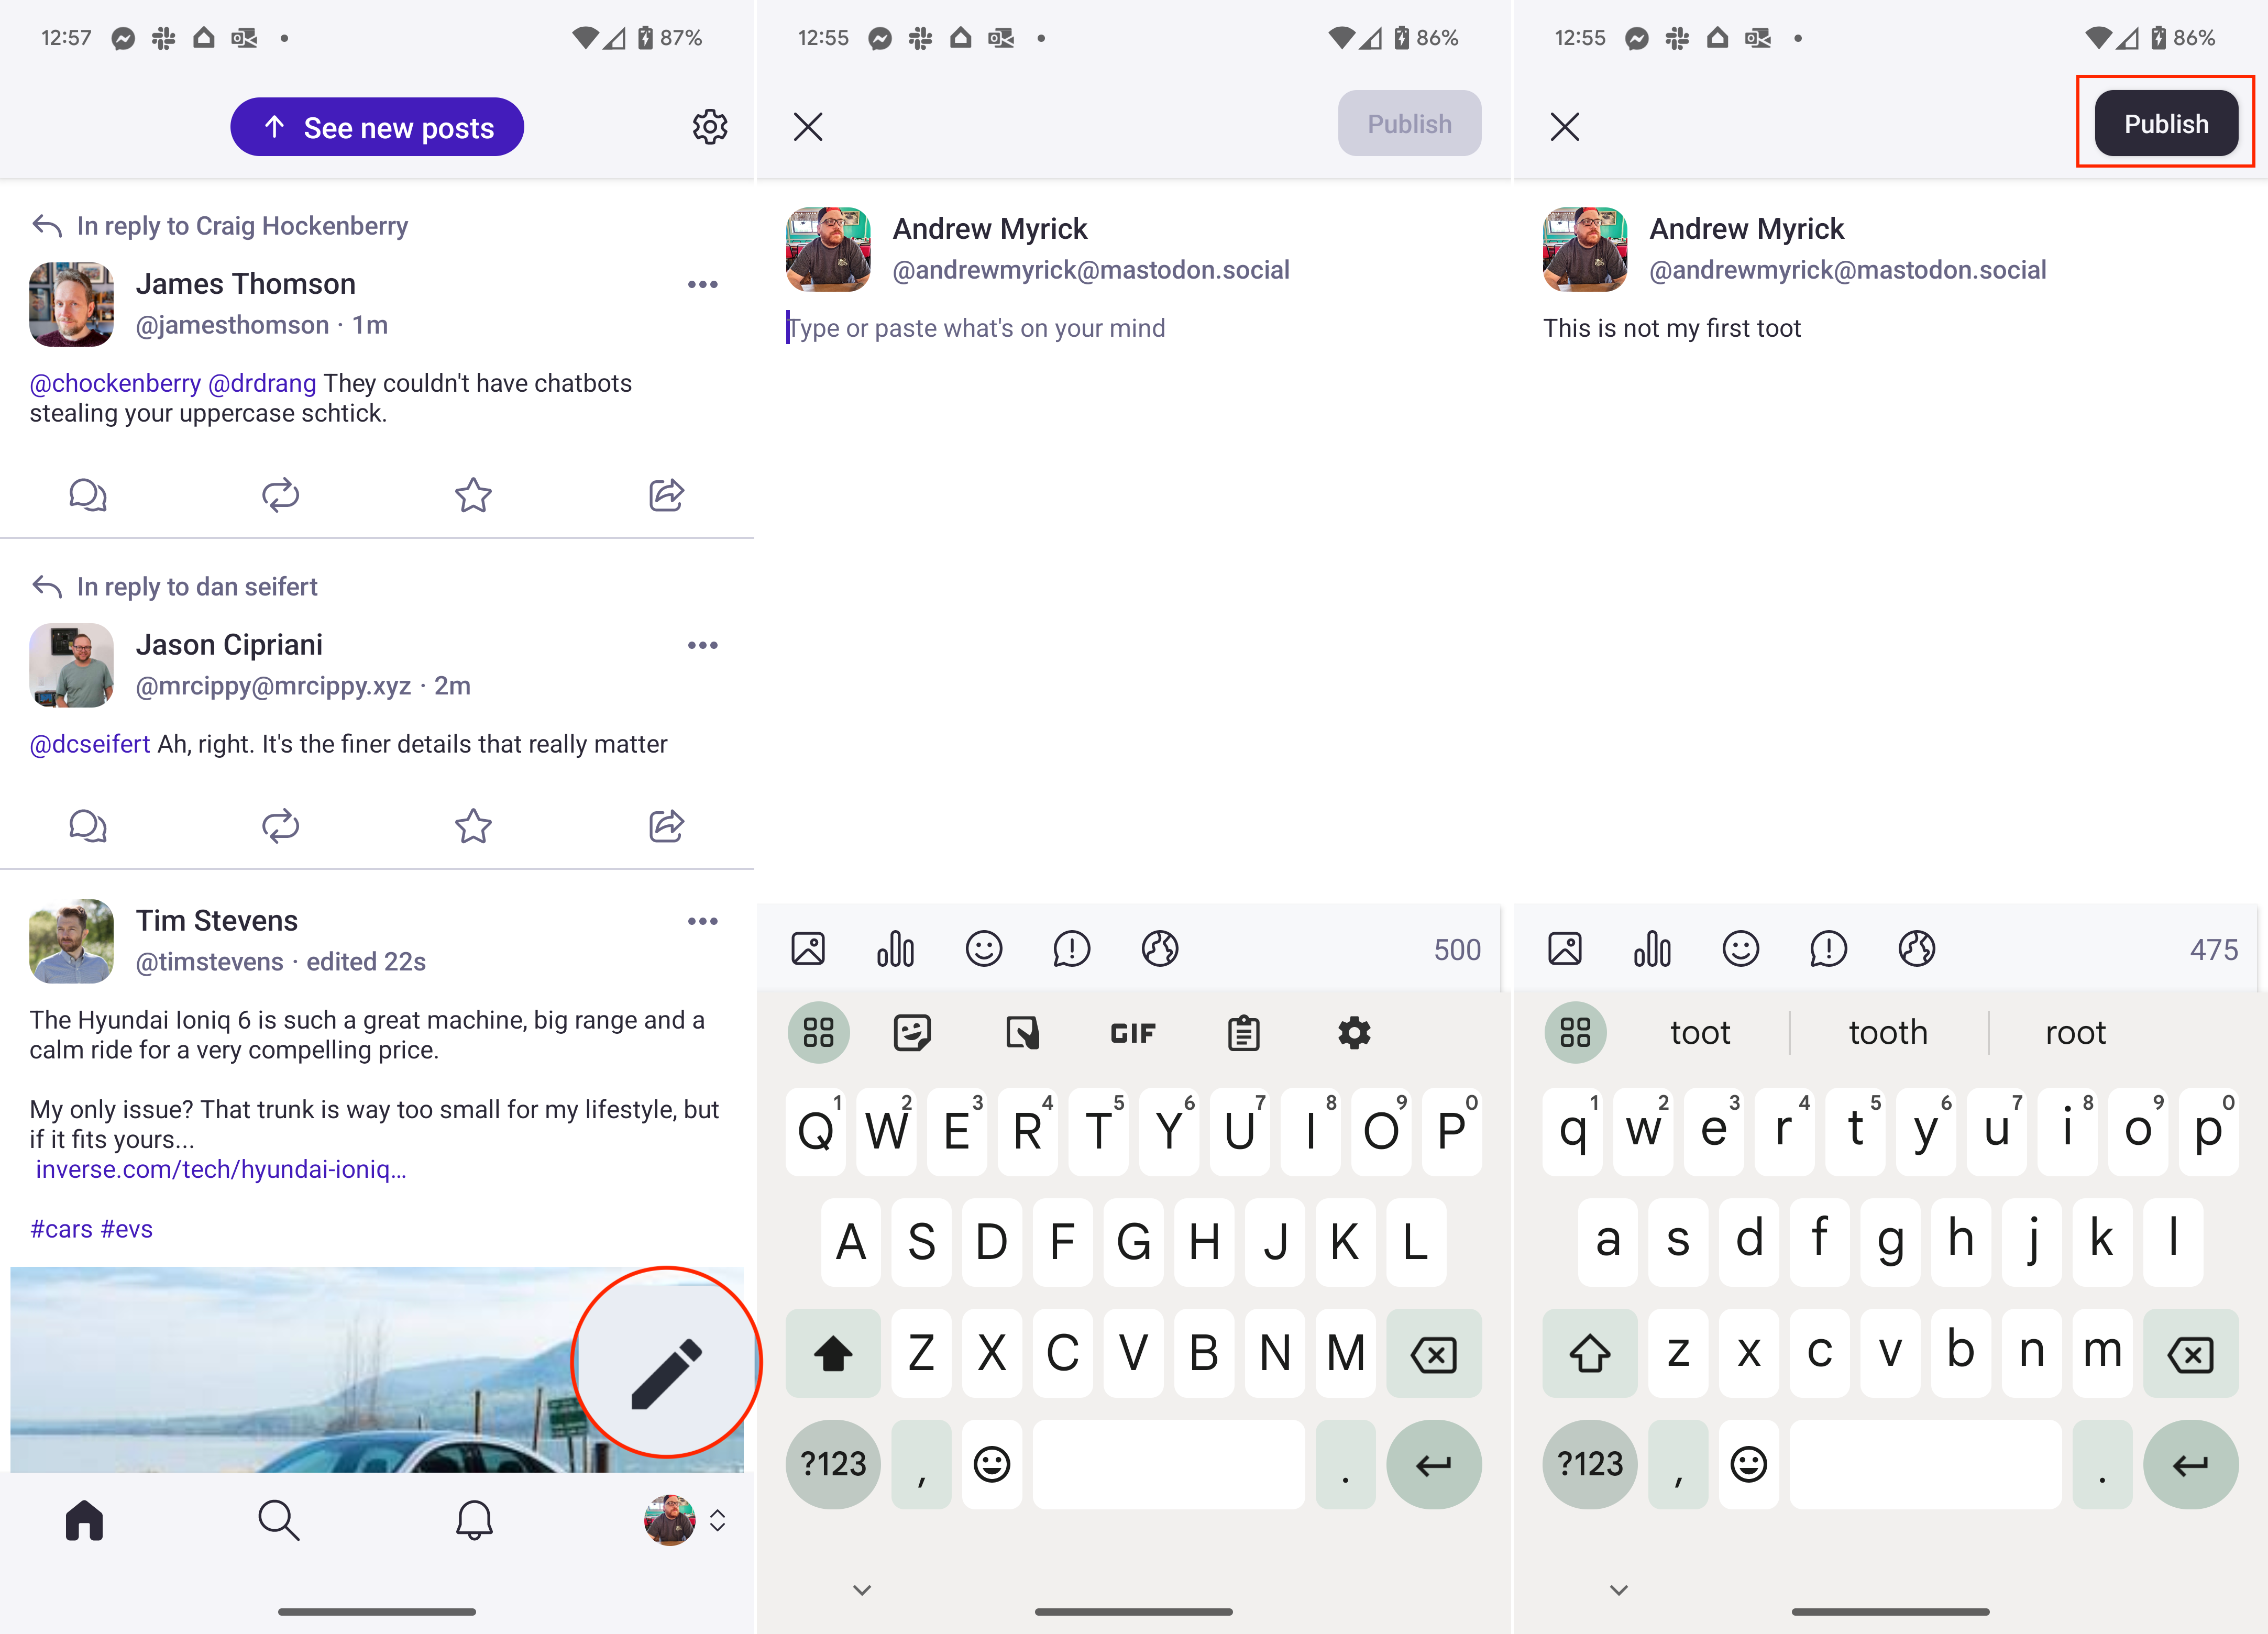
1. Open the Mastodon app on your phone.
2. In the bottom right corner, tap the Pencil button.
3. Enter the content that you want to publish.
4. Tap the Publish button in the top right corner.
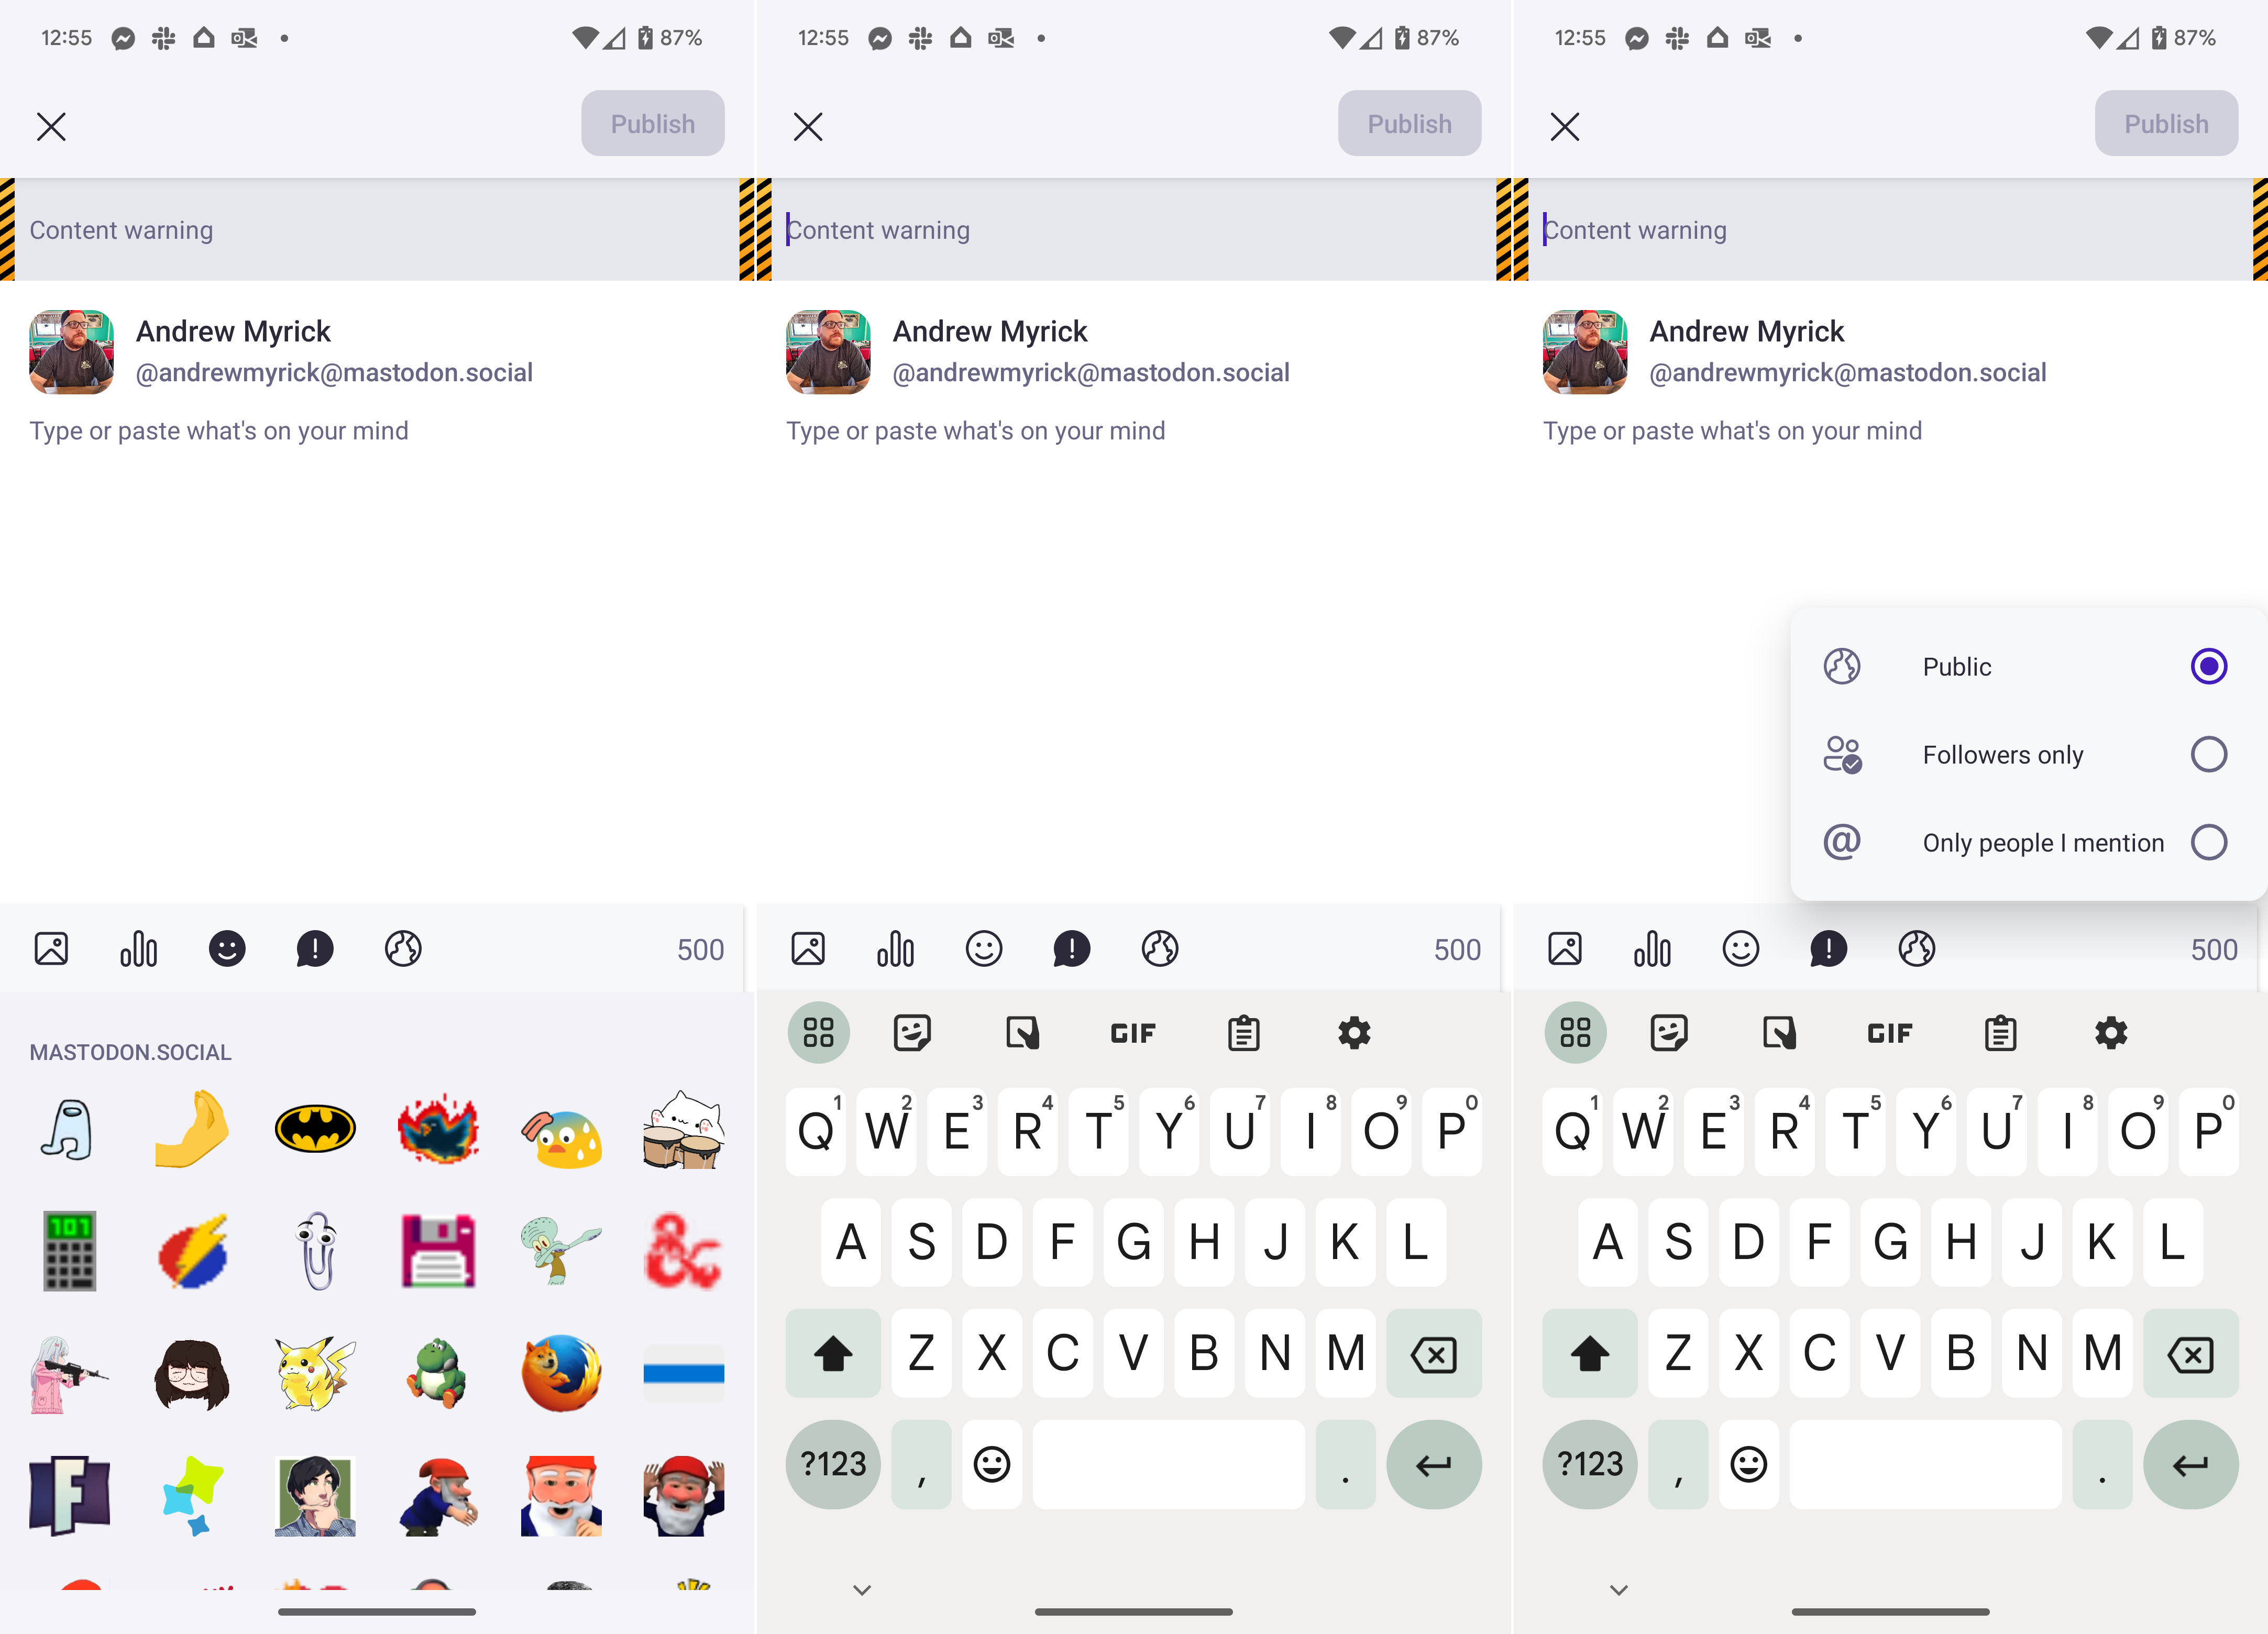
Additionally, when publishing a post on Mastodon, you have several different options. Of course, there is the main text box, where you can just throw your thoughts and hit the "Publish" button. However, here are the other options that you have when creating a post:
- Attach a photo
- Create a poll
- Add an emoji
- Add a Content warning
- Post visibility (Public, Followers only, or Only people I mention)
How long can posts be?
After years of the default character limit for a tweet being 140 characters, Twitter increased that to 280 in 2017. Recently, Twitter's character limit has exploded to 4,000 characters, provided that you are a Twitter Blue subscriber.
Many have always felt that tweets should be short and to the point, but sometimes you want to share a bit more. Mastodon understands this and takes a different approach, offering a 500-character limit on posts. However, considering that Mastodon is simply a server within the "Fediverse," there are other servers and versions of Mastodon which allow for much higher character limits
Add captions to your pictures
1. Open the Mastodon app on your phone.
2. Tap the Pencil button in the bottom right corner.
3. In the toolbar above your keyboard, tap the Gallery icon.
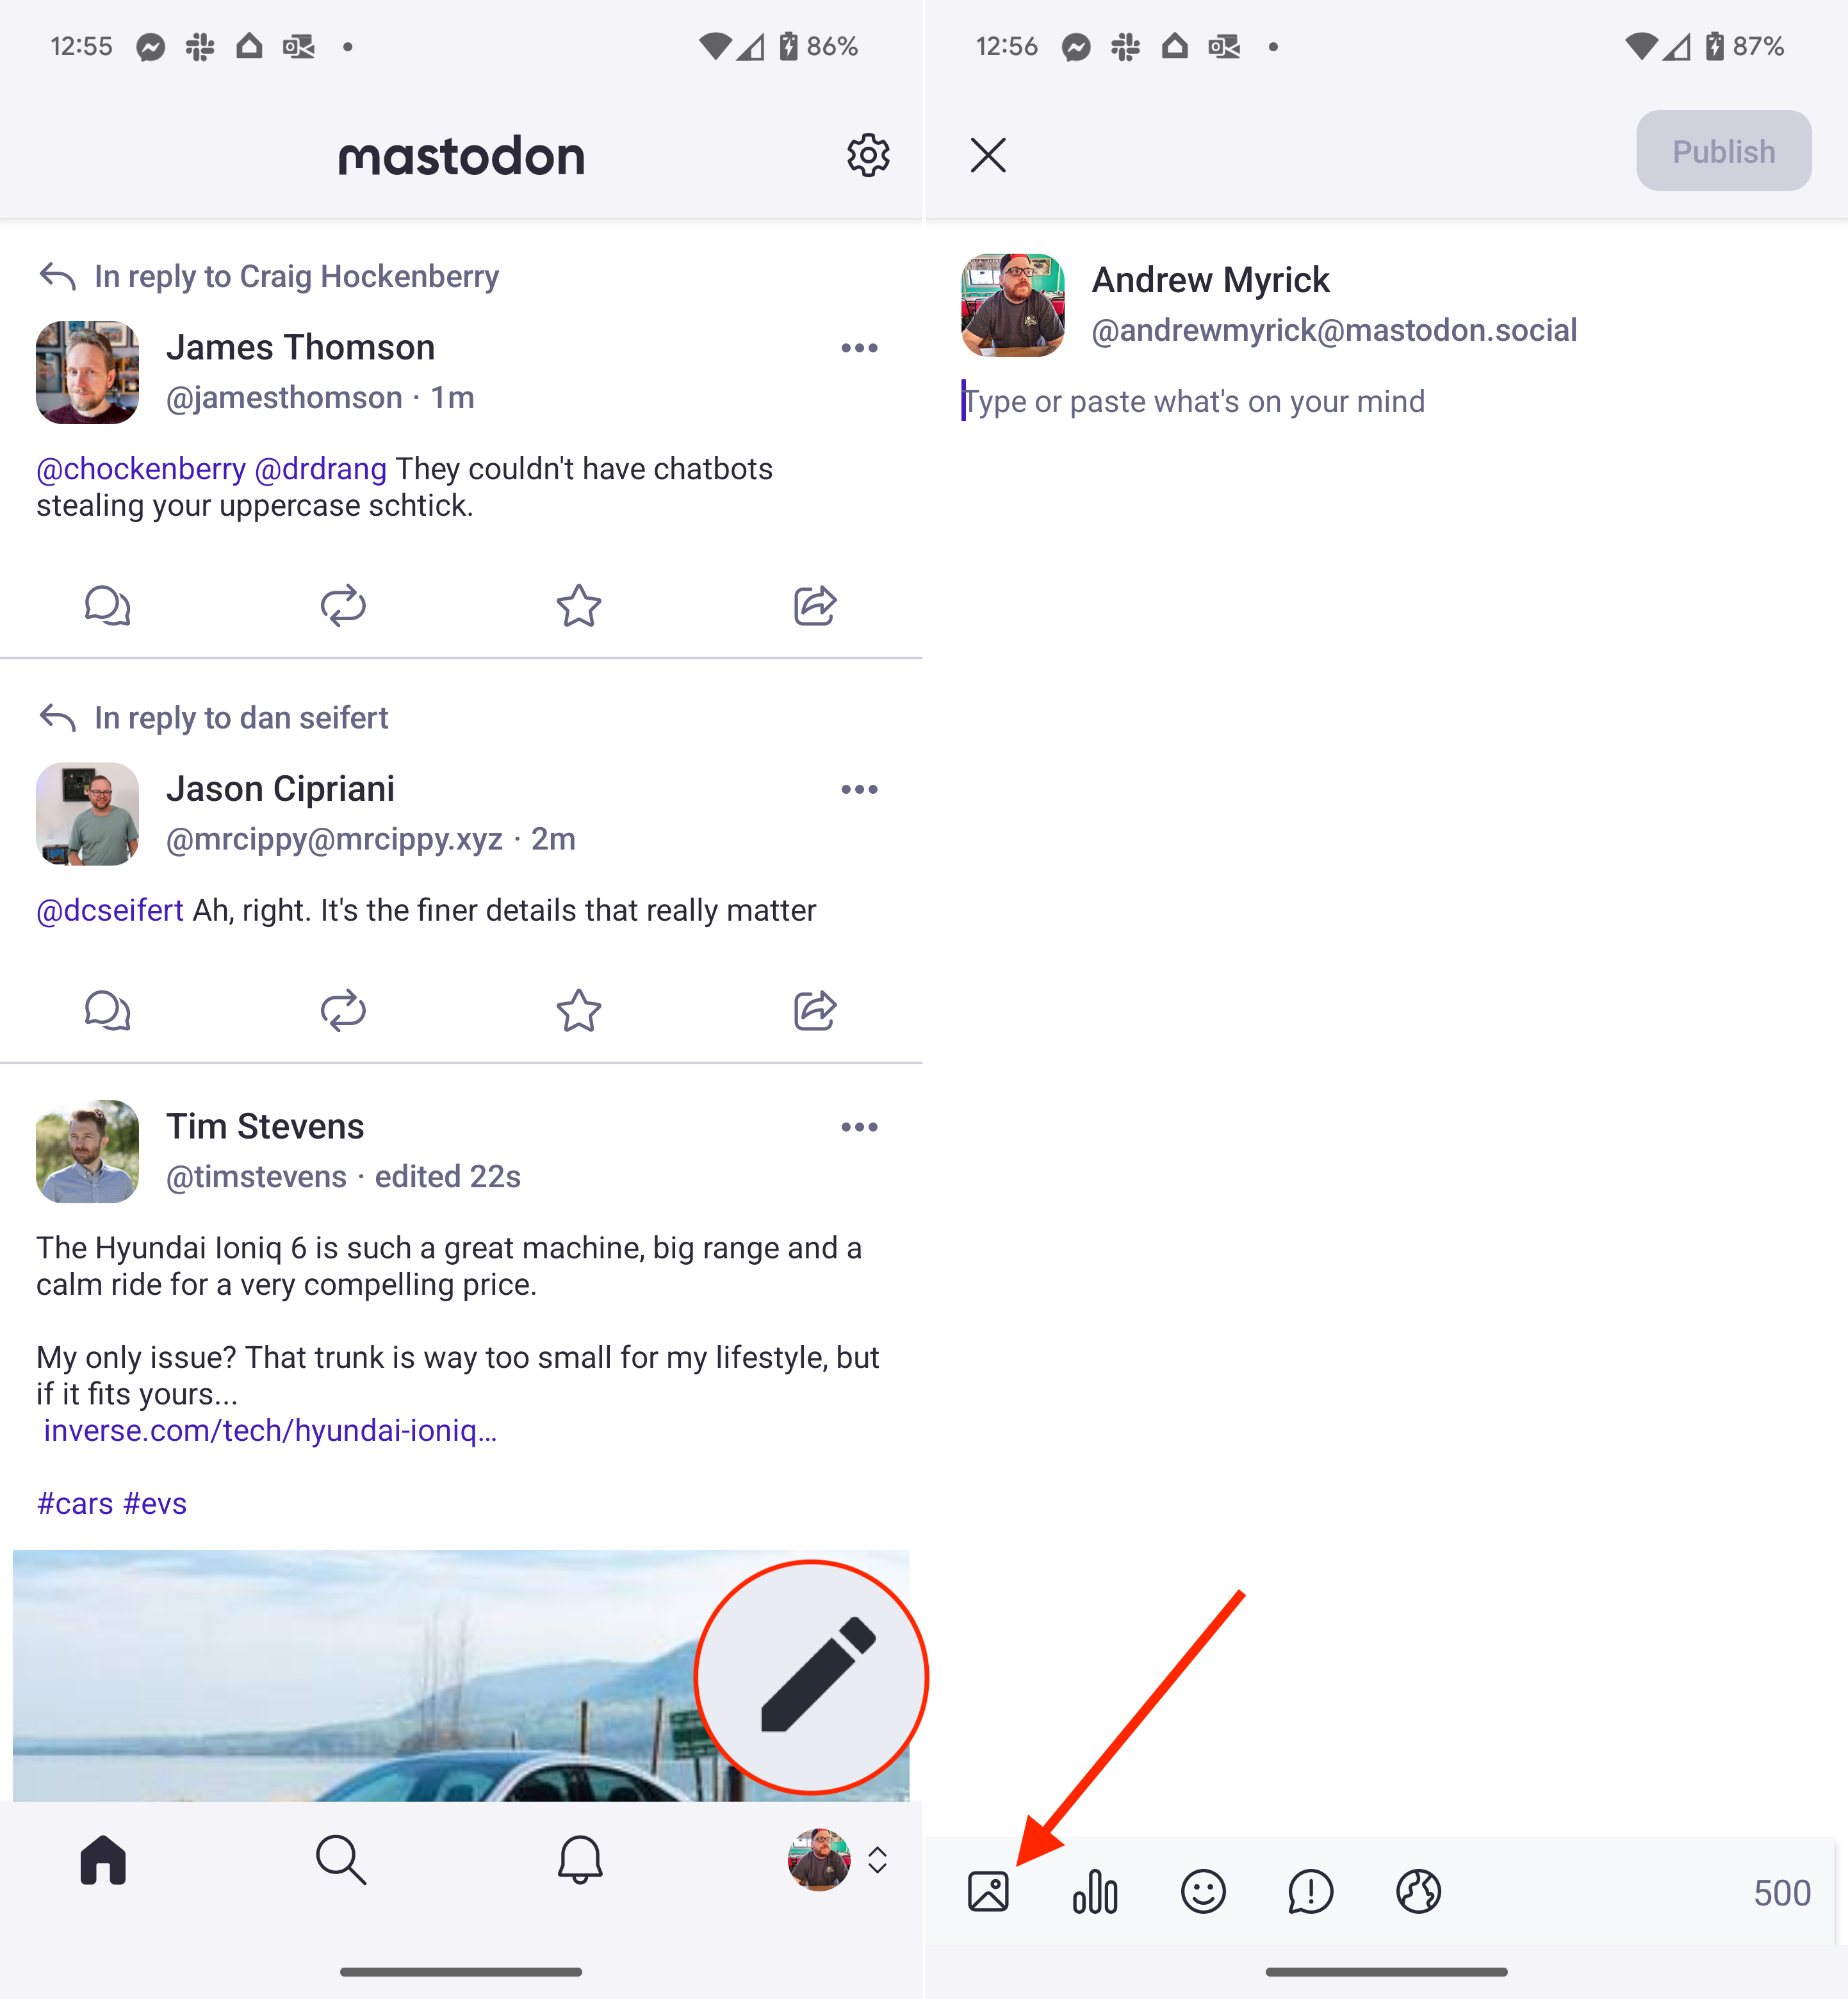
4. Select an image that you want to add.
5. Wait for the image to be uploaded to the post.
6. Tap the Add image description... text box.
7. Add the alt text for your picture(s).
8. Tap the Save button in the top right corner.
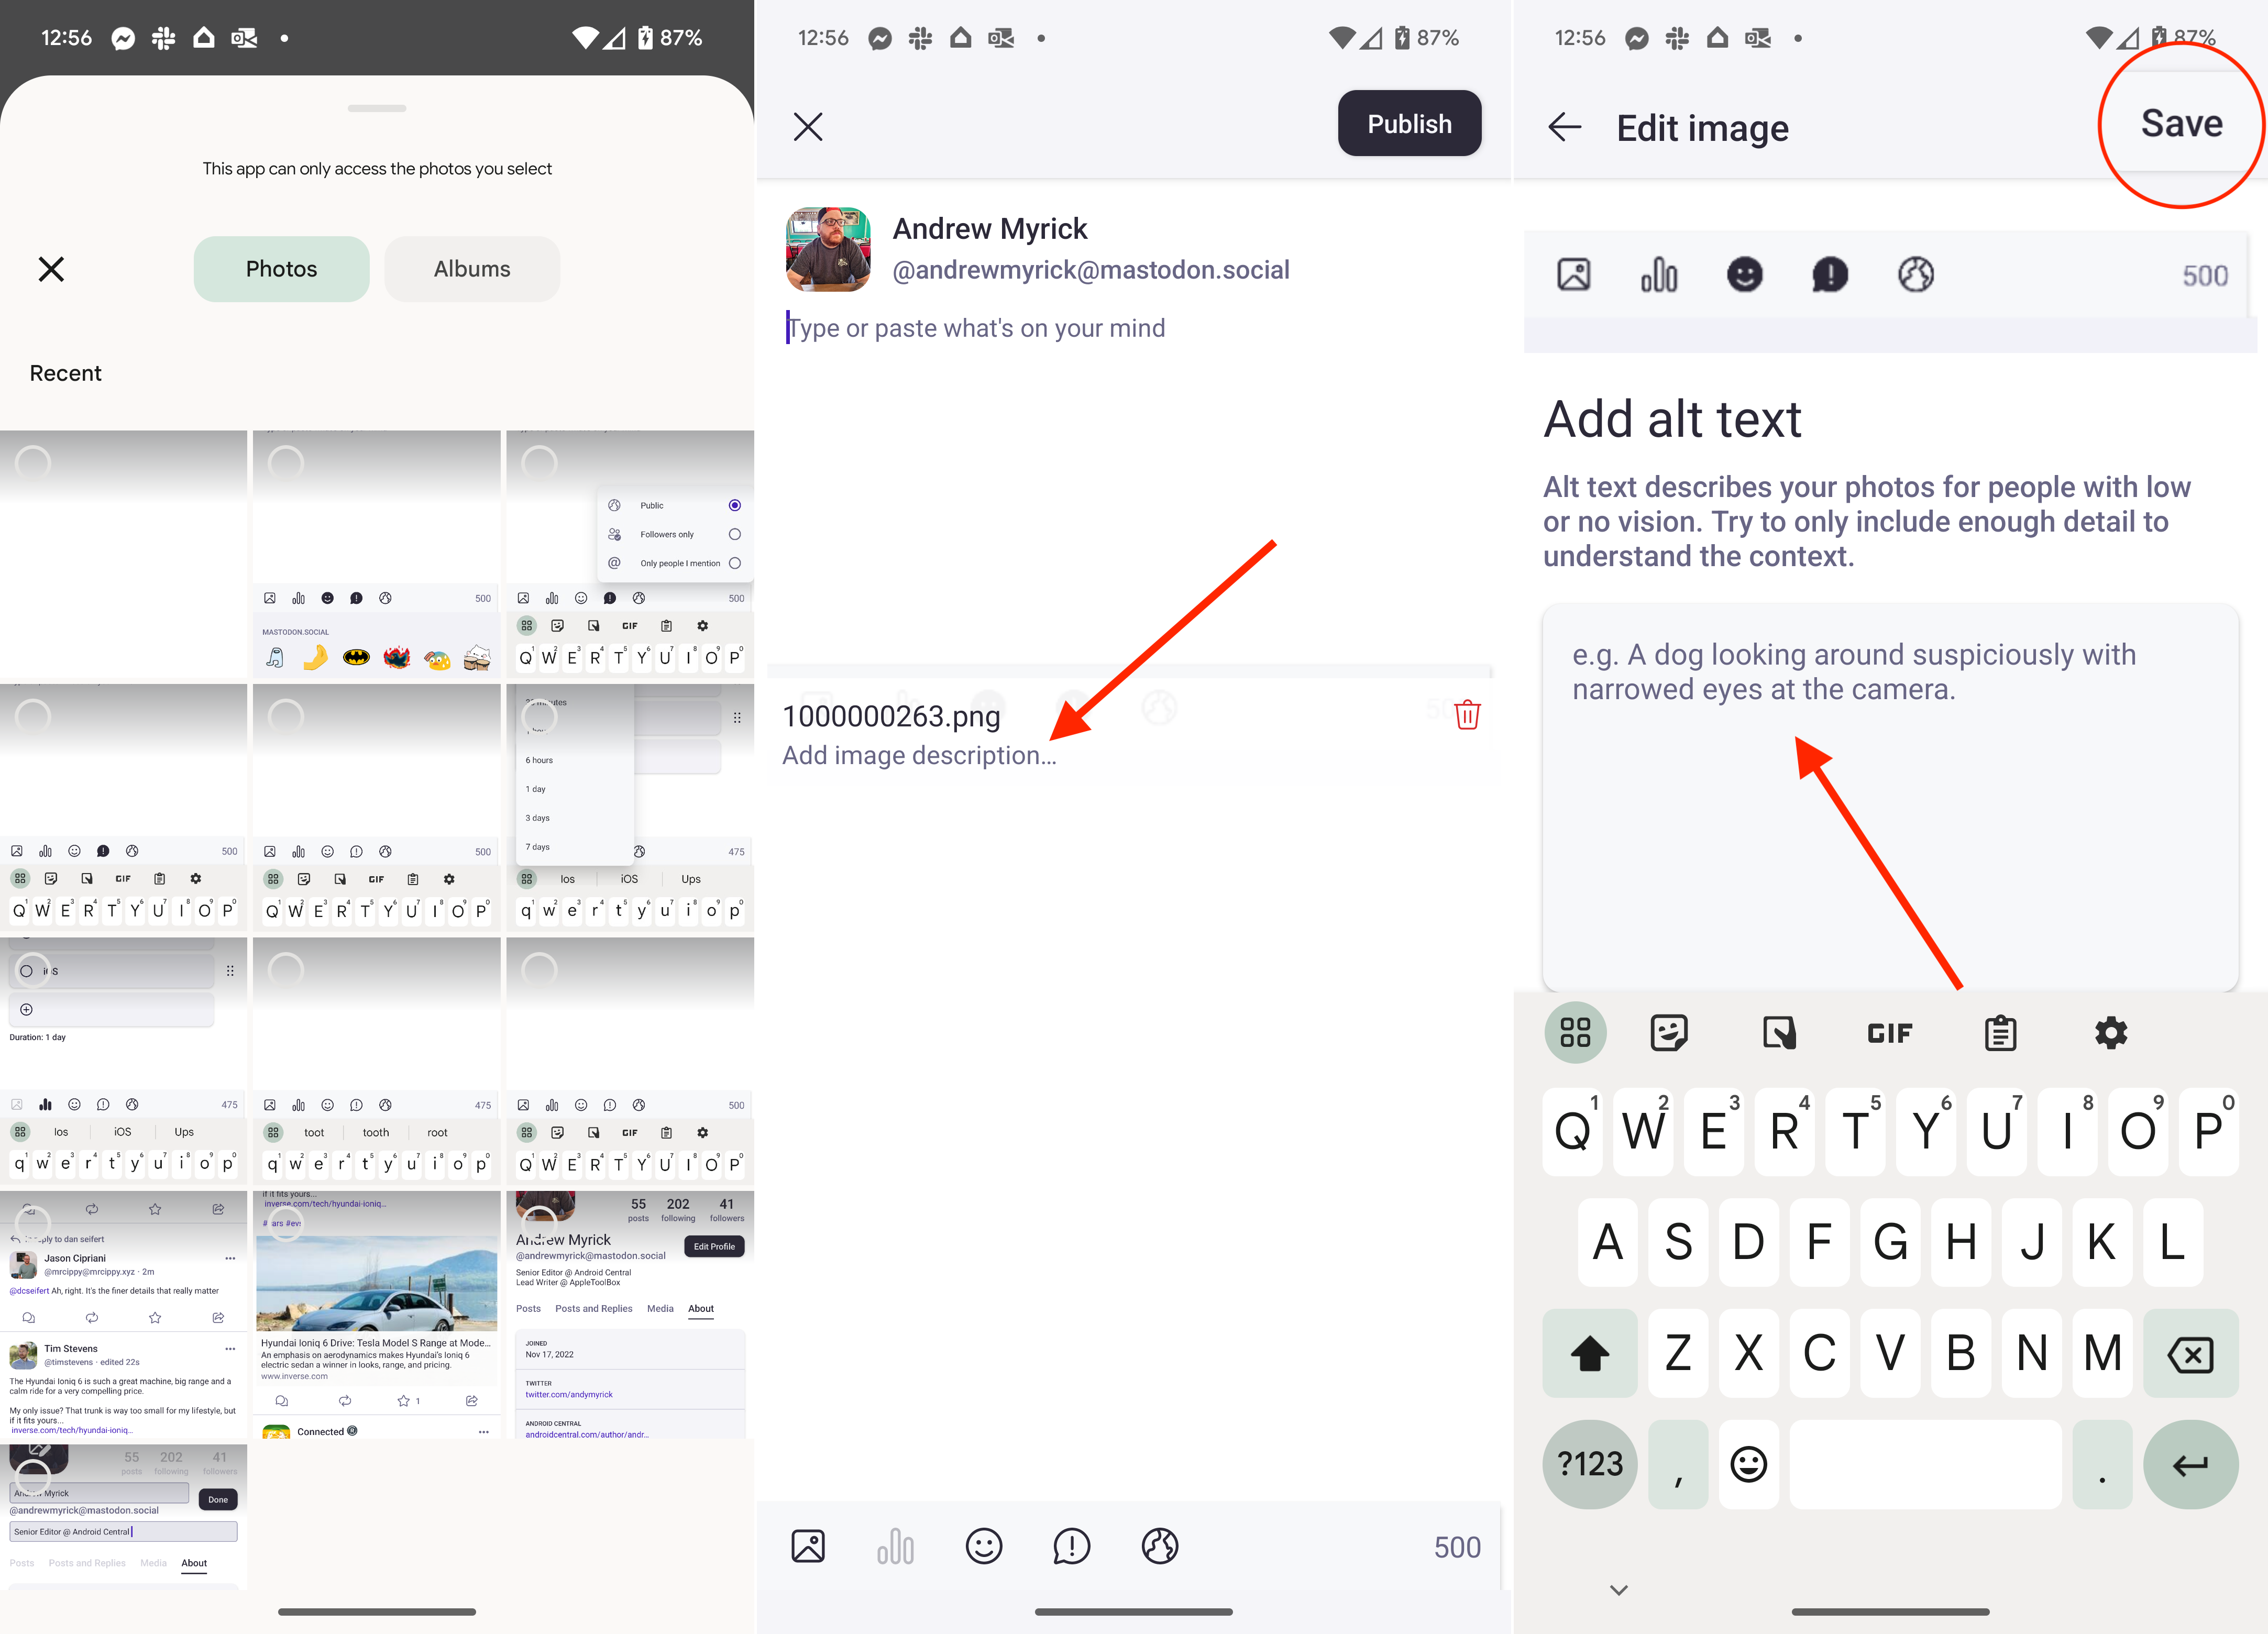
9. Once you're finished, tap the Publish button to share your picture.
Edit or delete your posts
1. Open the Mastodon app on your phone.
2. In the bottom right corner of the toolbar, tap your profile image.
3. Locate the post that you want to edit or delete.
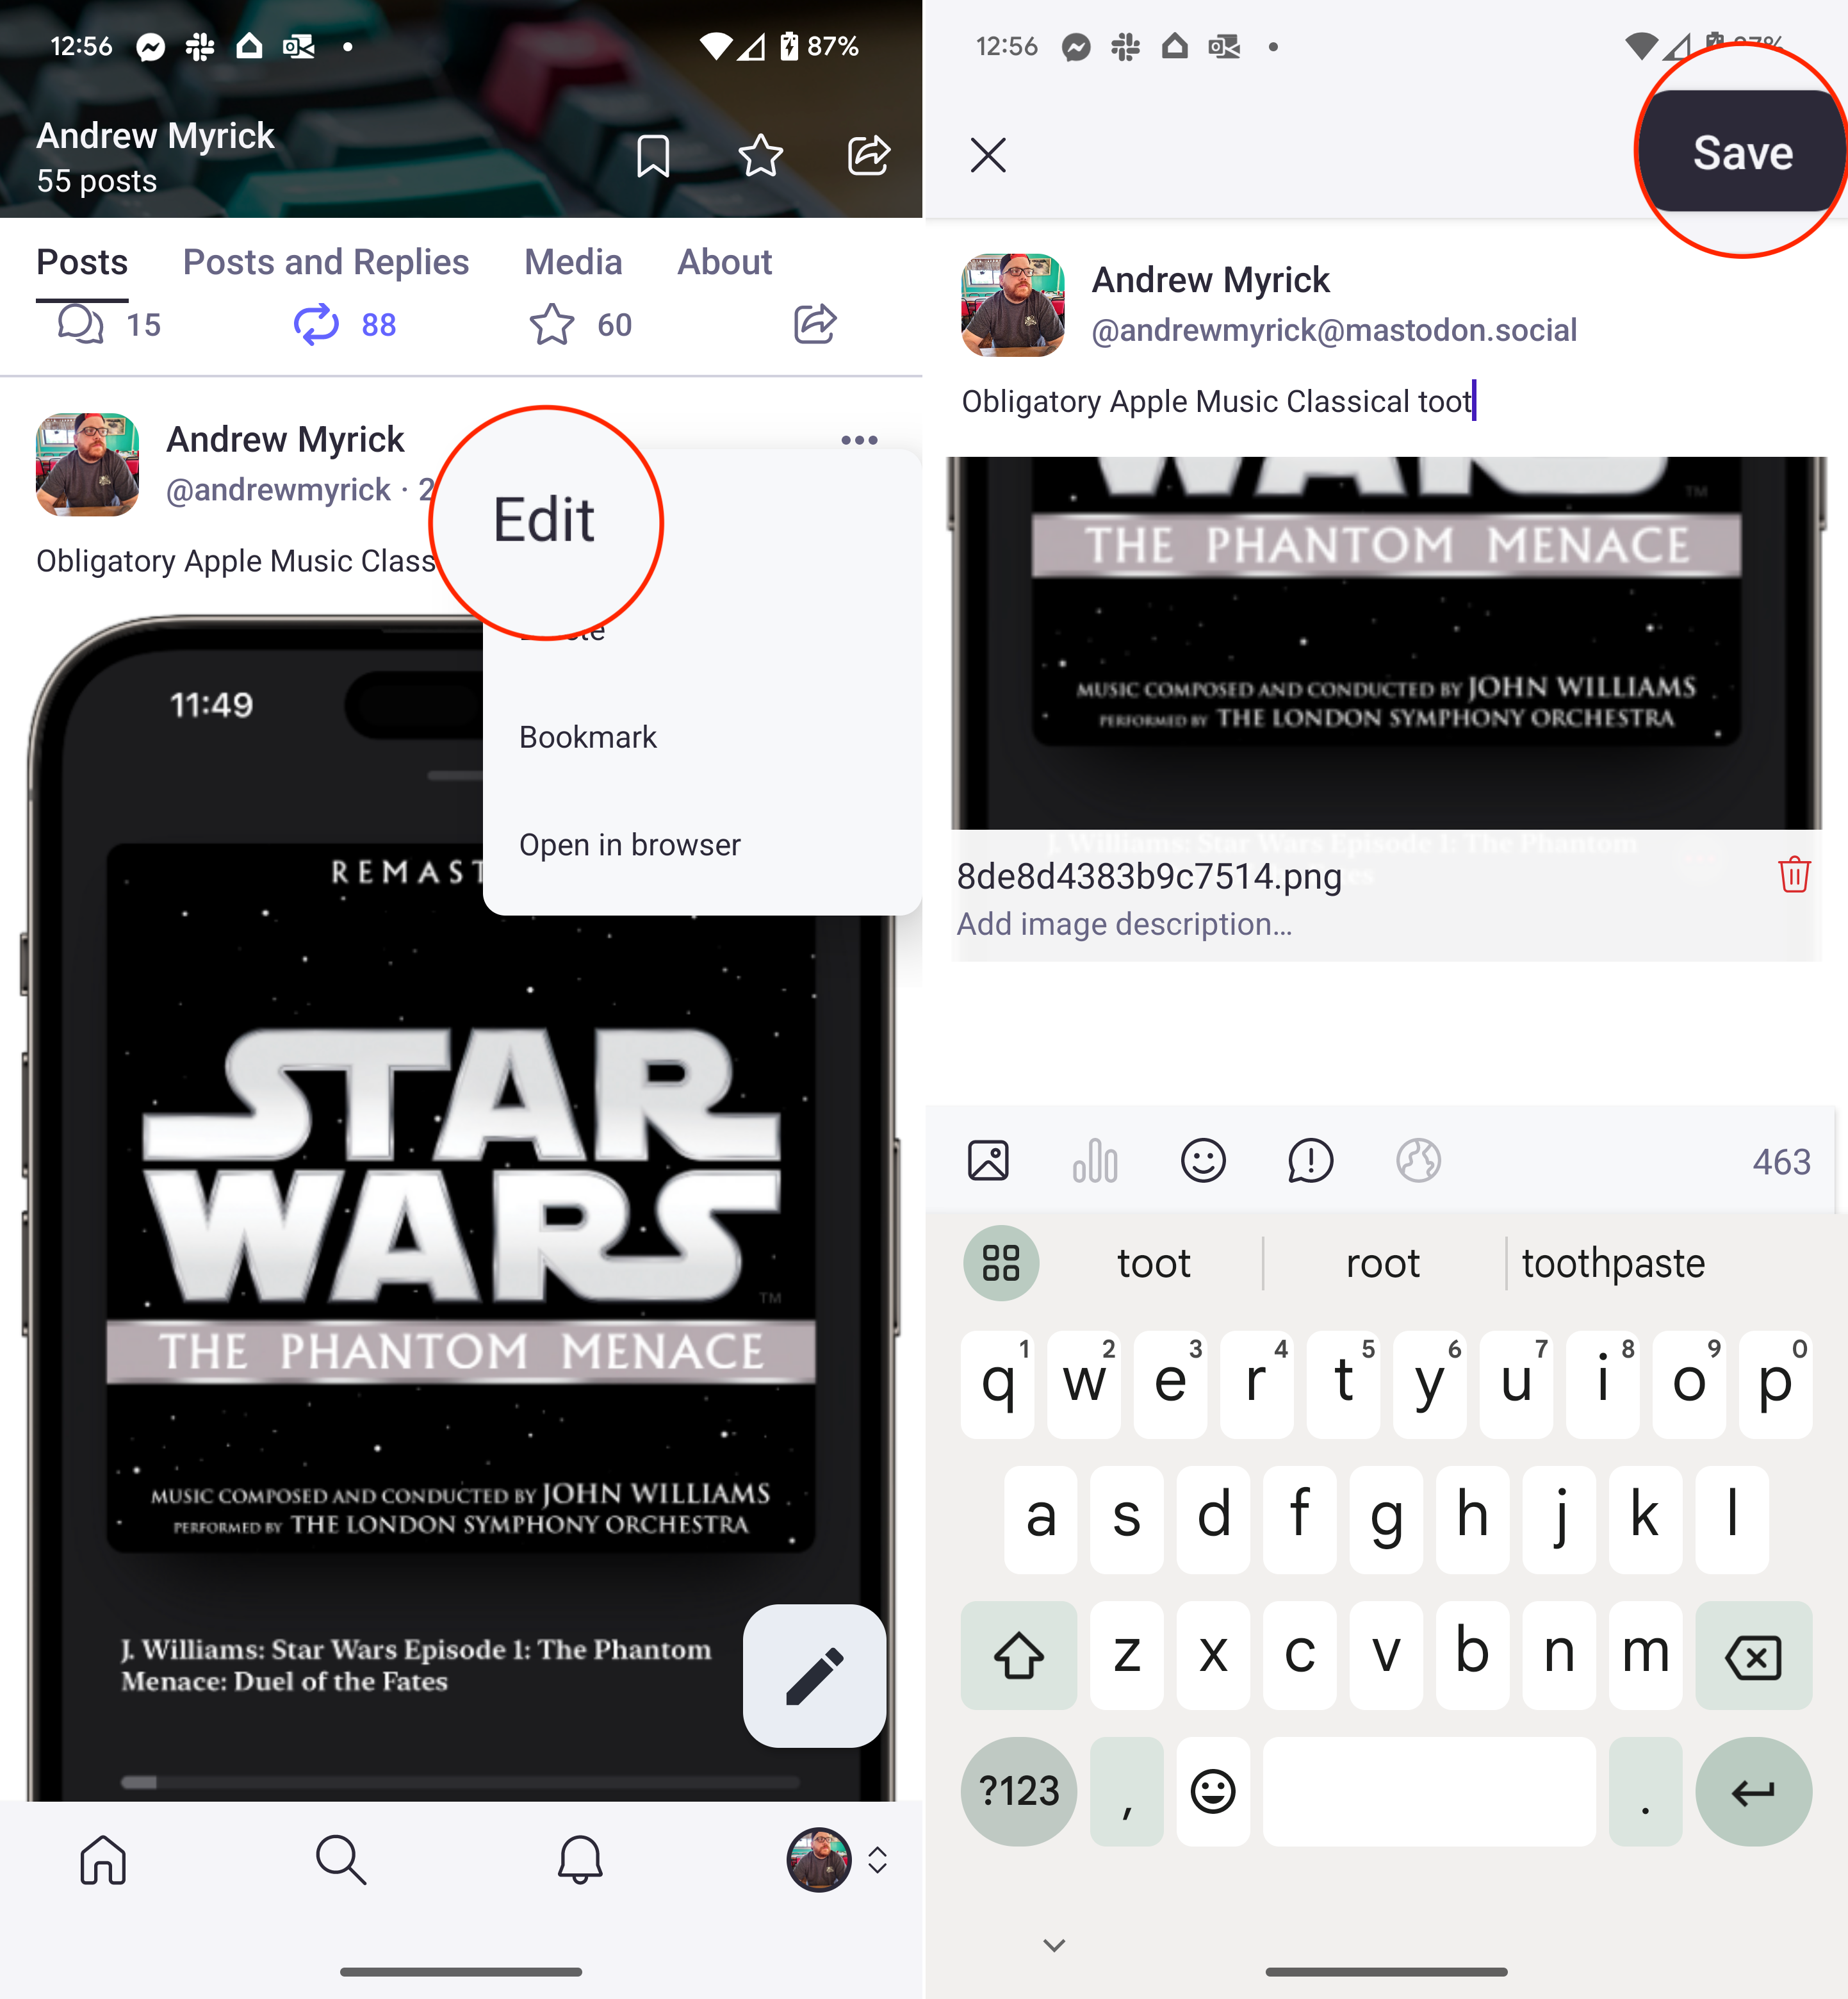
4. Tap the three horizontal dots in the top right corner of the post.
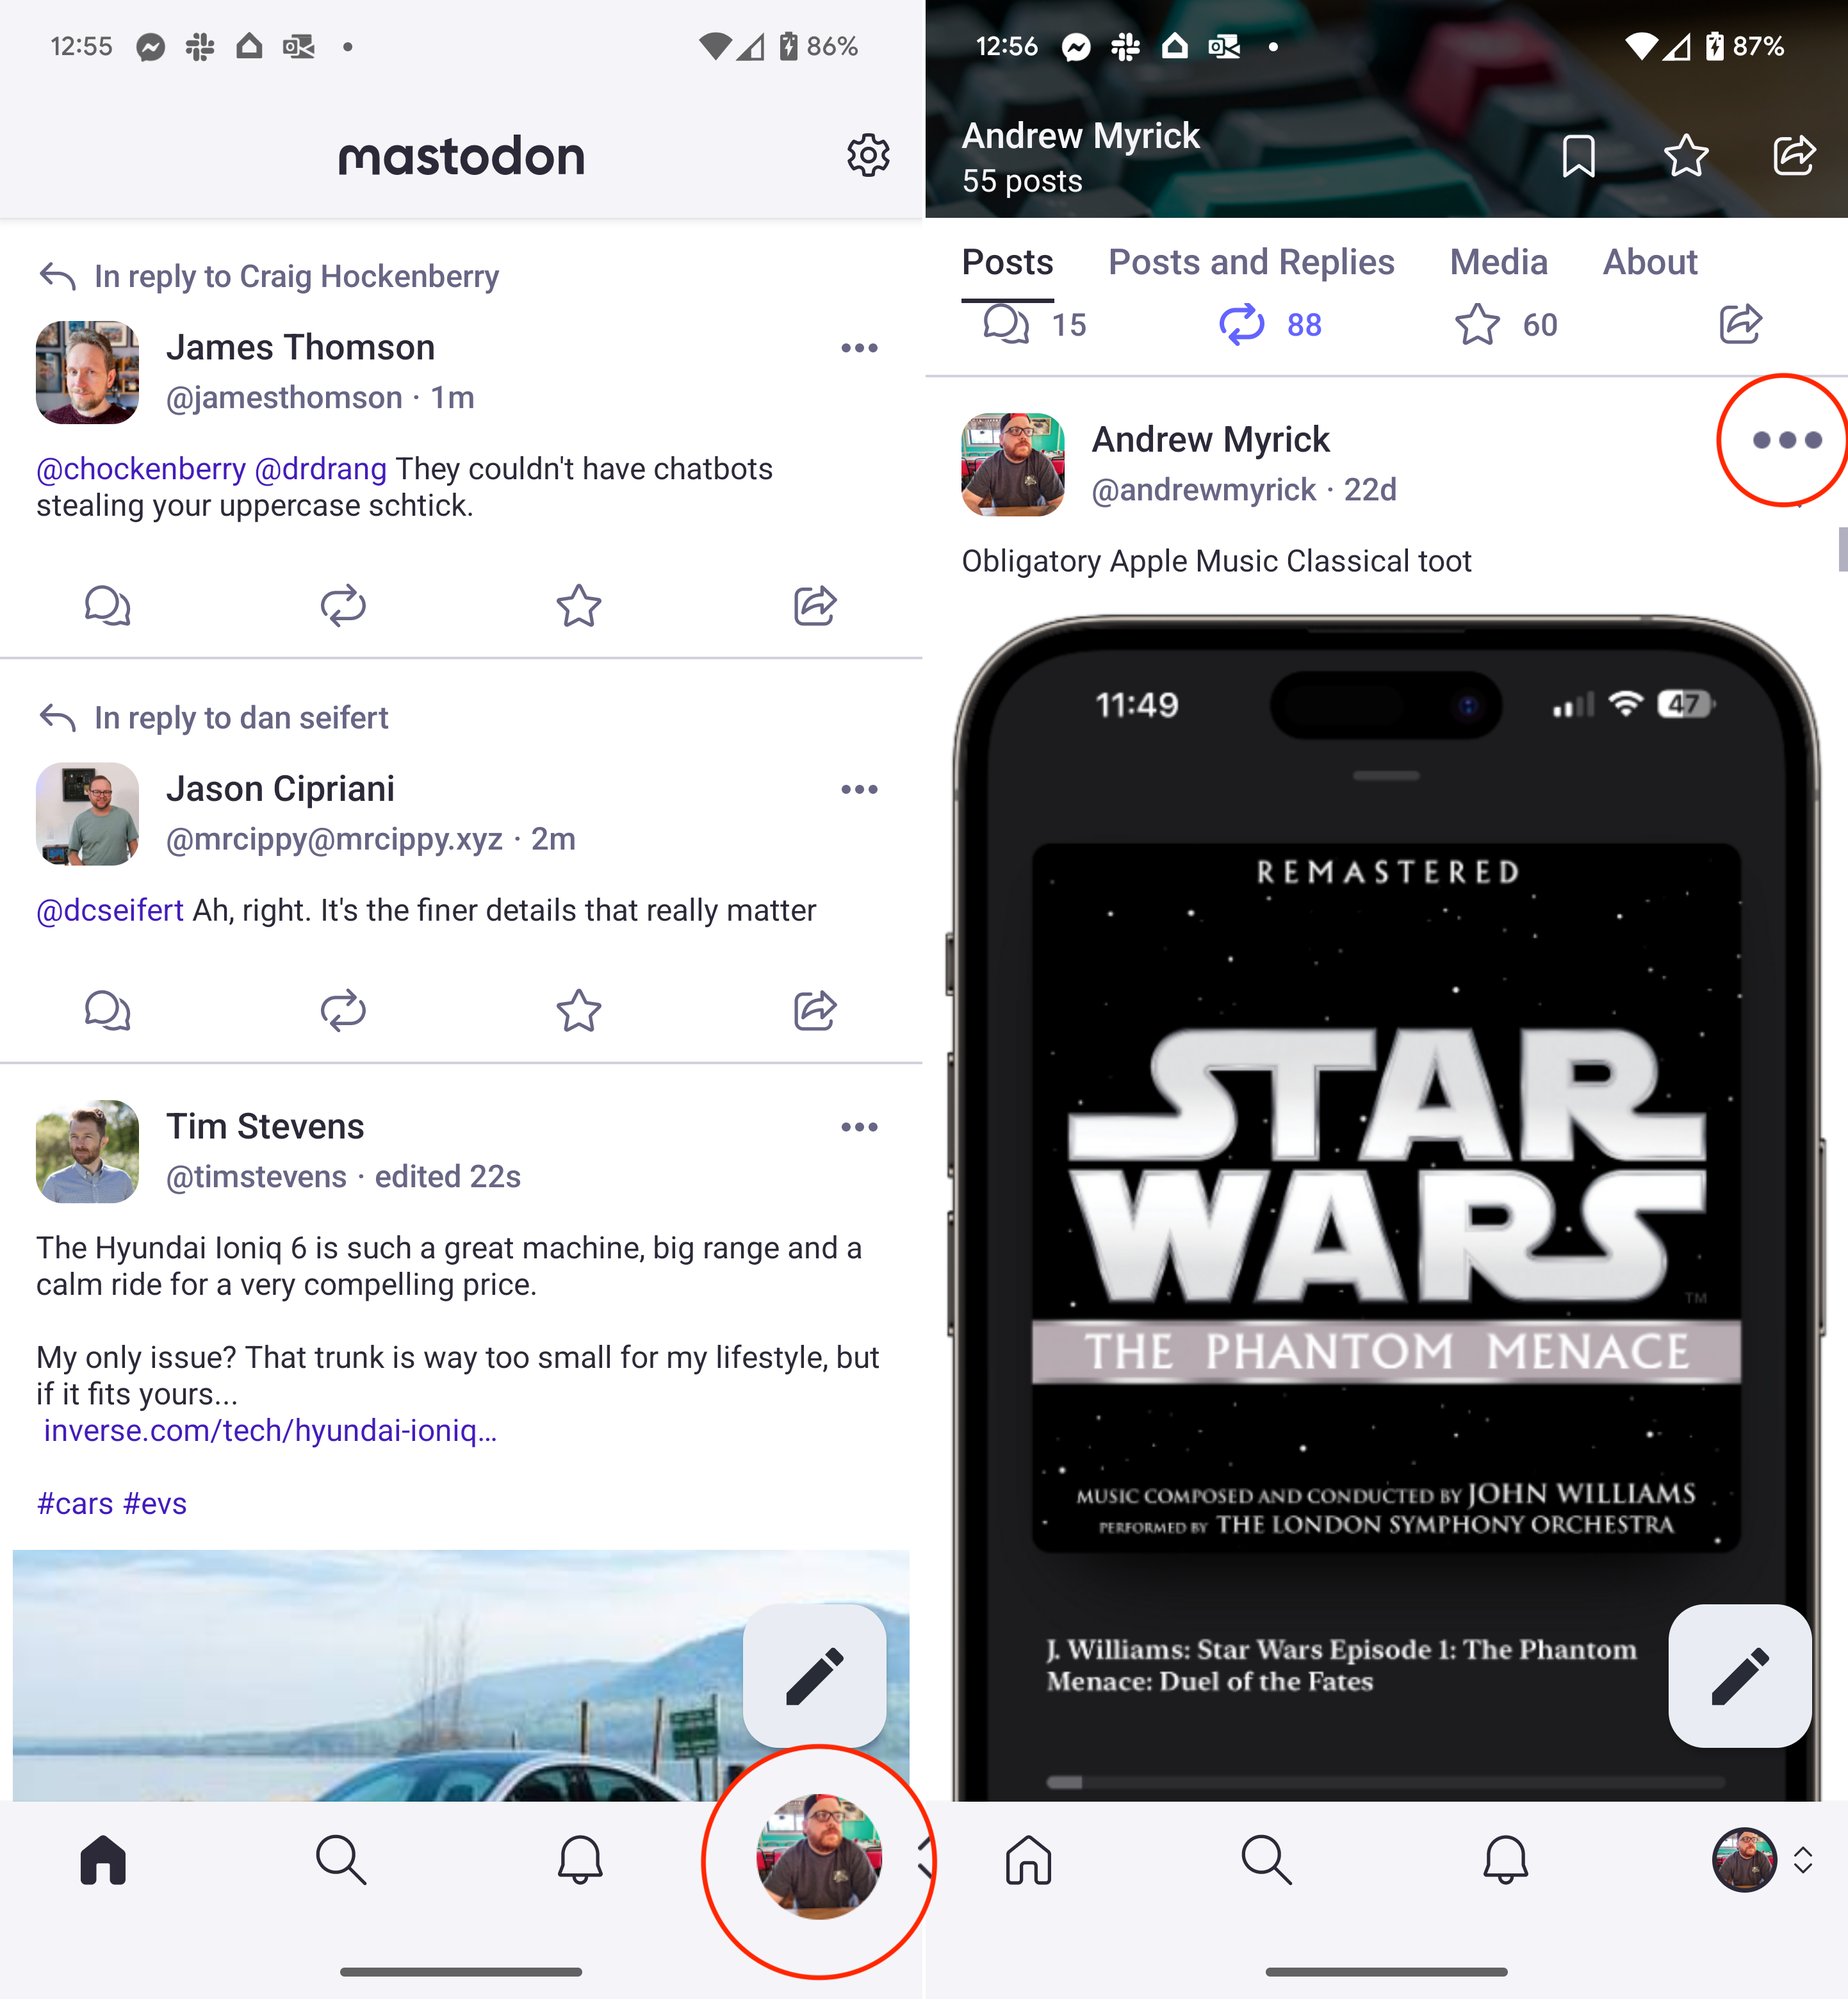
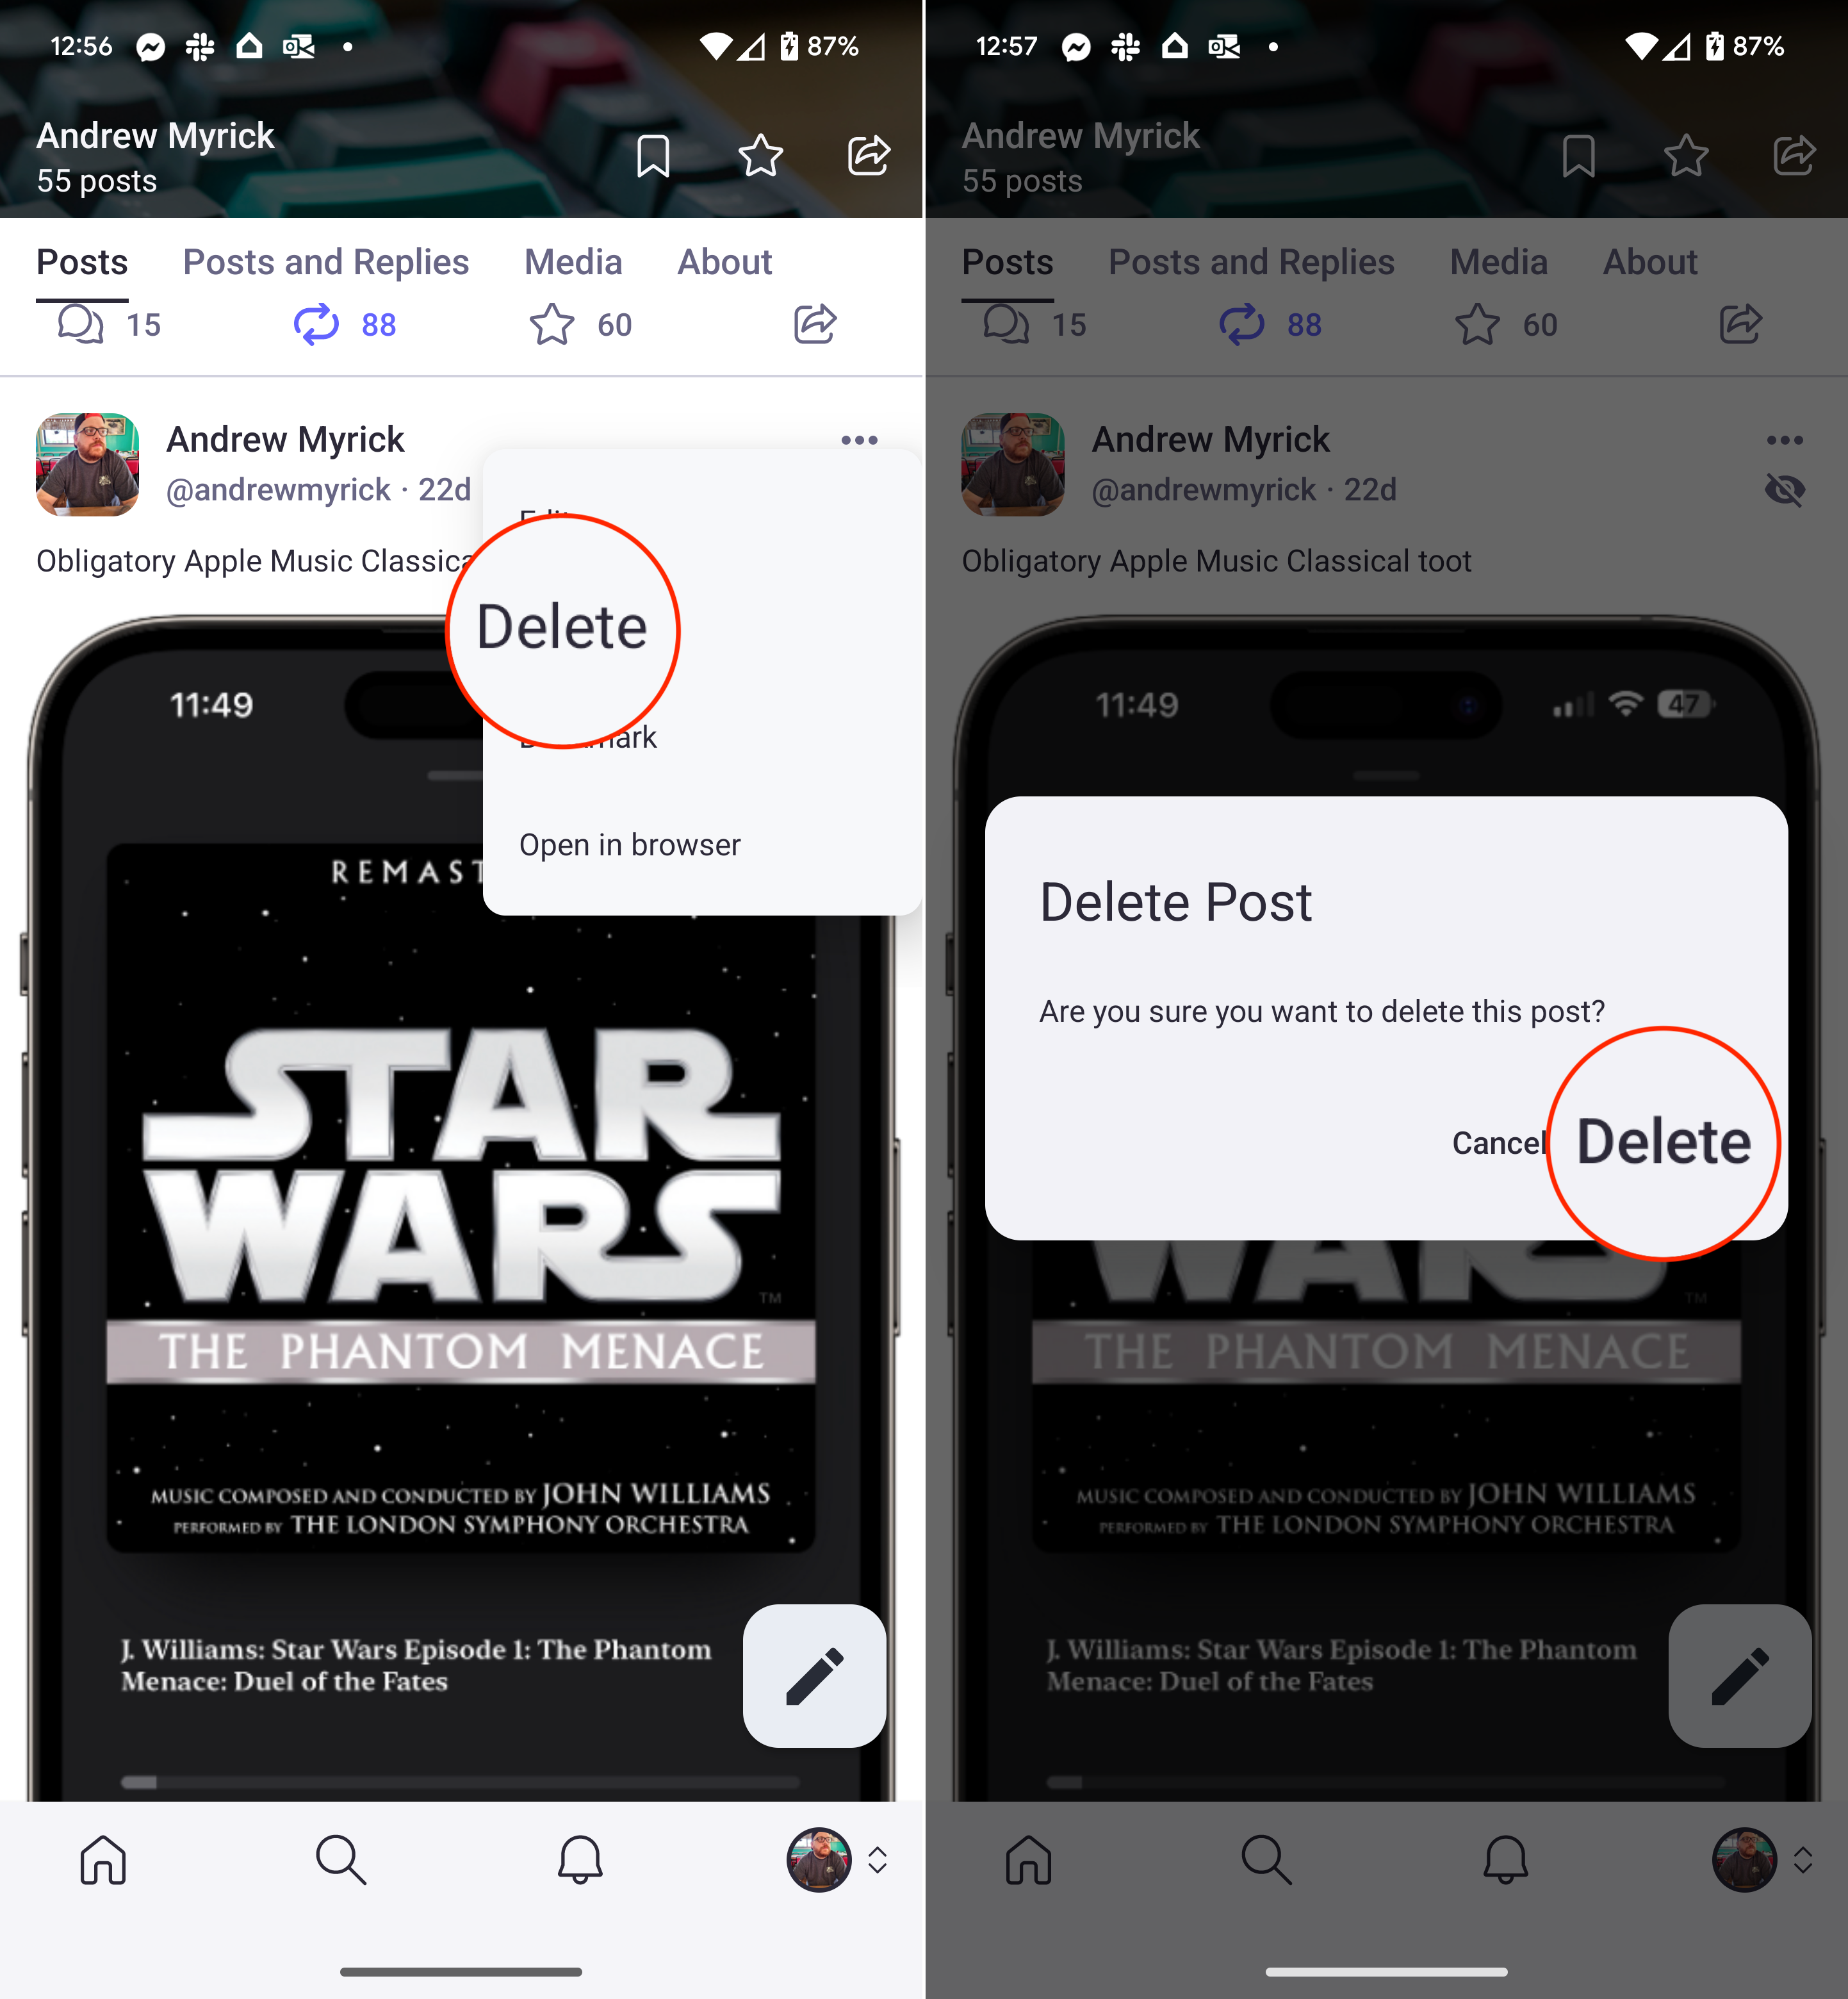
5. From the drop-down menu, tap Edit or Delete.
6. If editing, make any necessary changes, then tap the Save button.
7. If deleting, tap the Delete button to confirm.
Boosts, Favorites, and Bookmarks
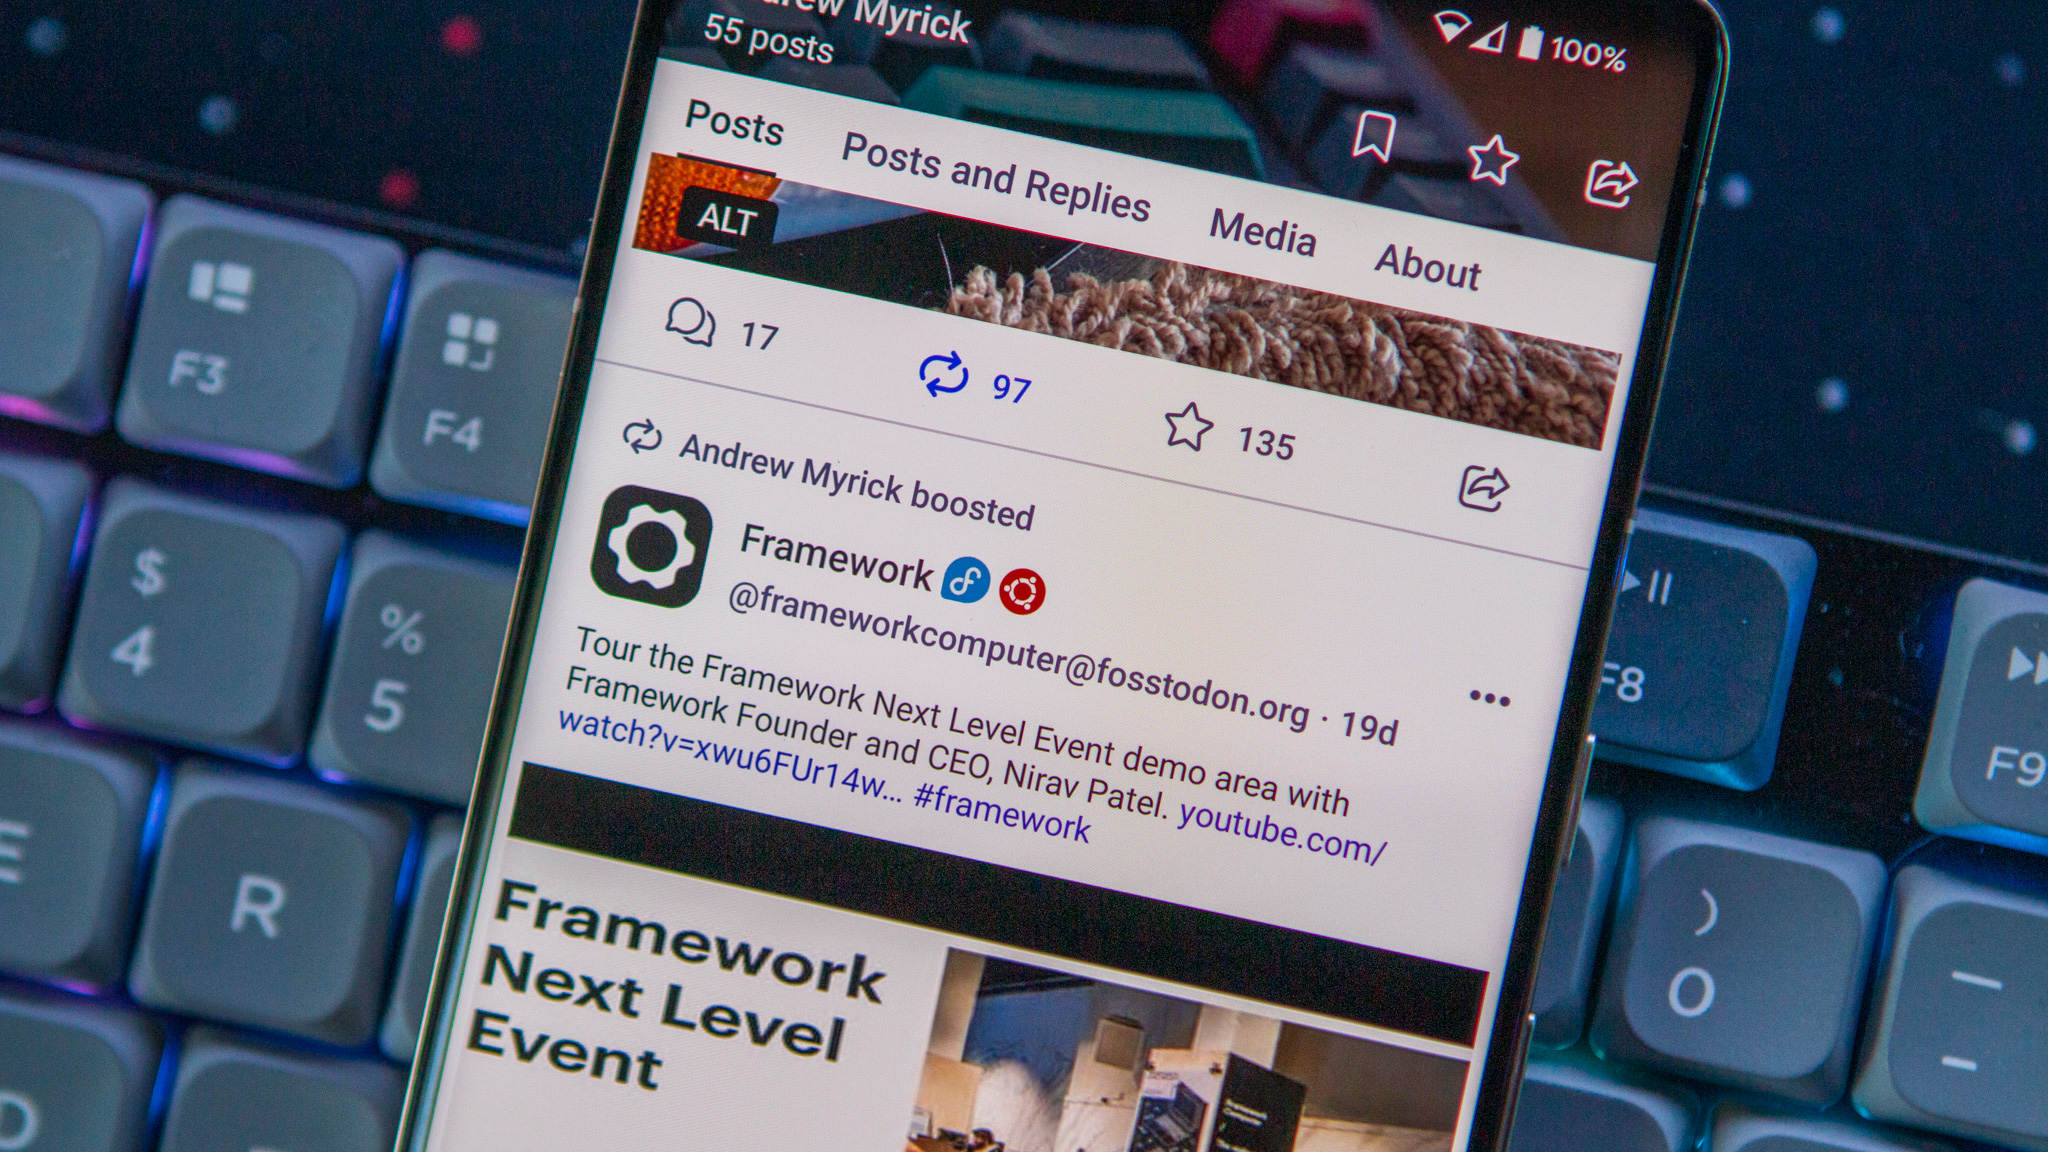
When it comes to interacting with other users on Mastodon, there are two key ways for you to do so. The first of which is "Boosts," which essentially operate similarly to a traditional "retweet" without being able to add commentary. Then, you have Favorites, which is just what you would expect it to be, while Bookmarks offers a way to save Mastodon posts for you to check out on your Android phone later.
Create a Poll on Mastodon
1. Open the Mastodon app on your phone.
2. Tap the Pencil button in the bottom right corner.
3. In the toolbar above your keyboard, tap the Poll icon.
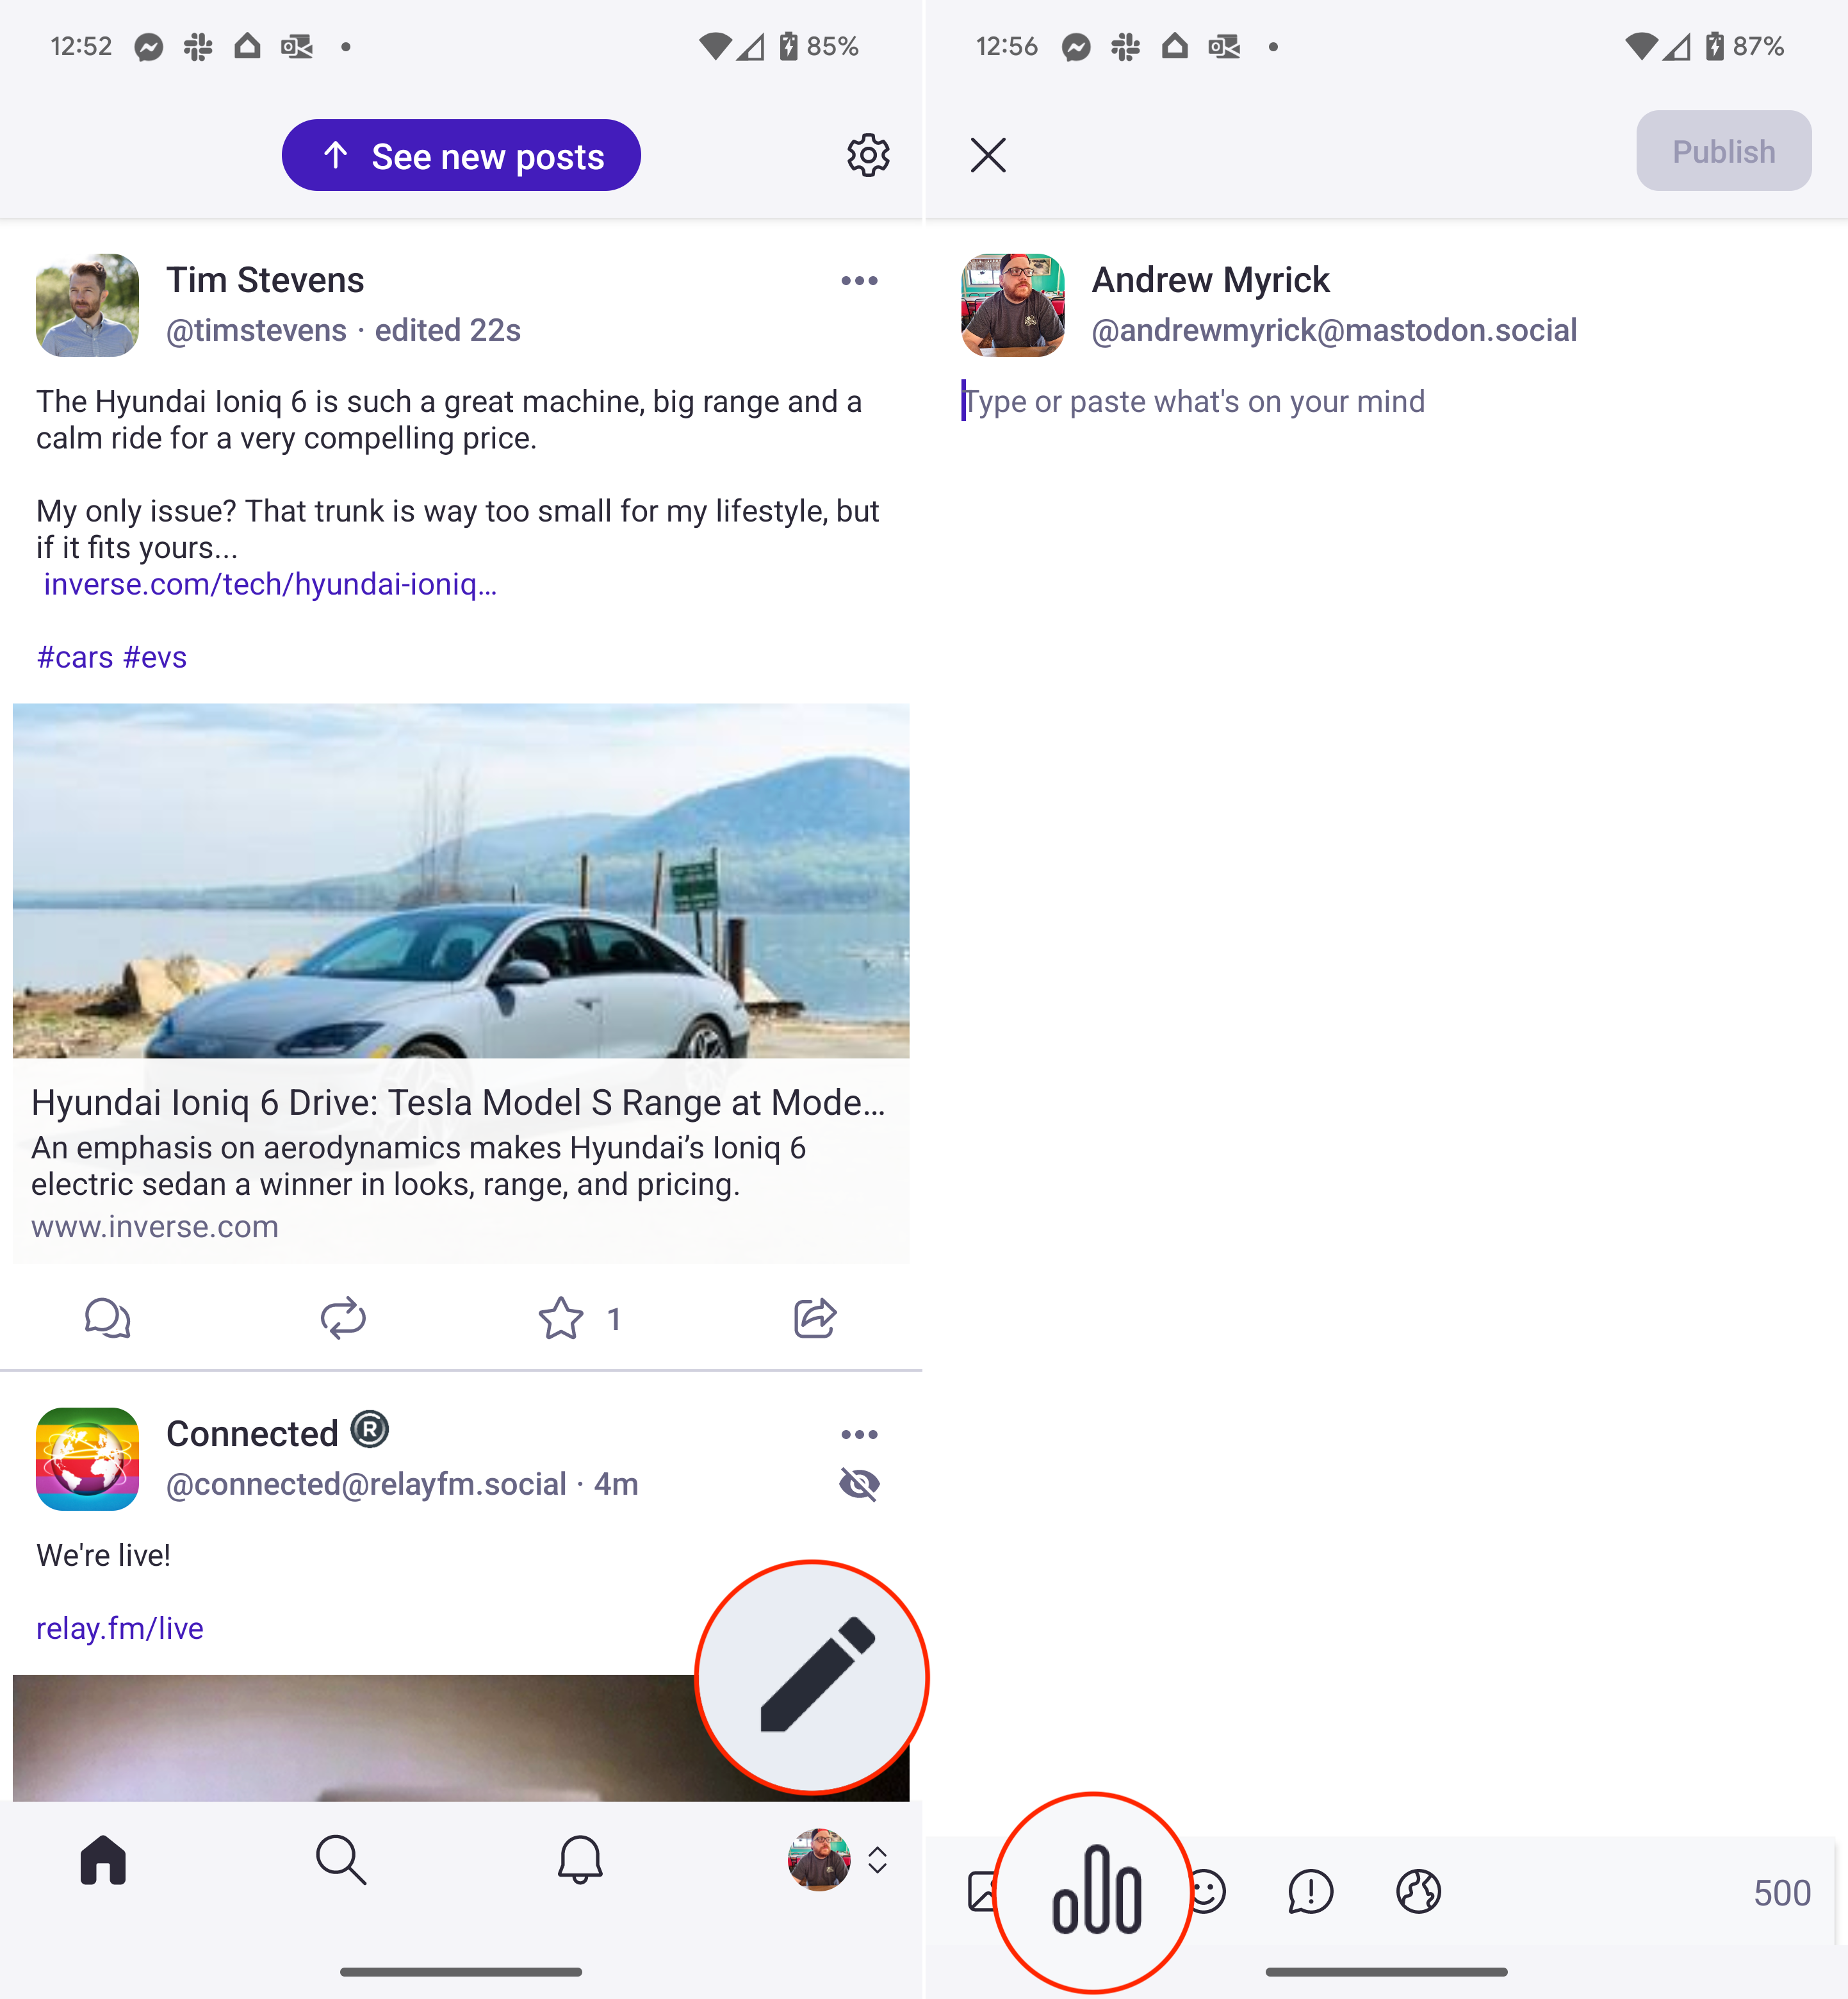
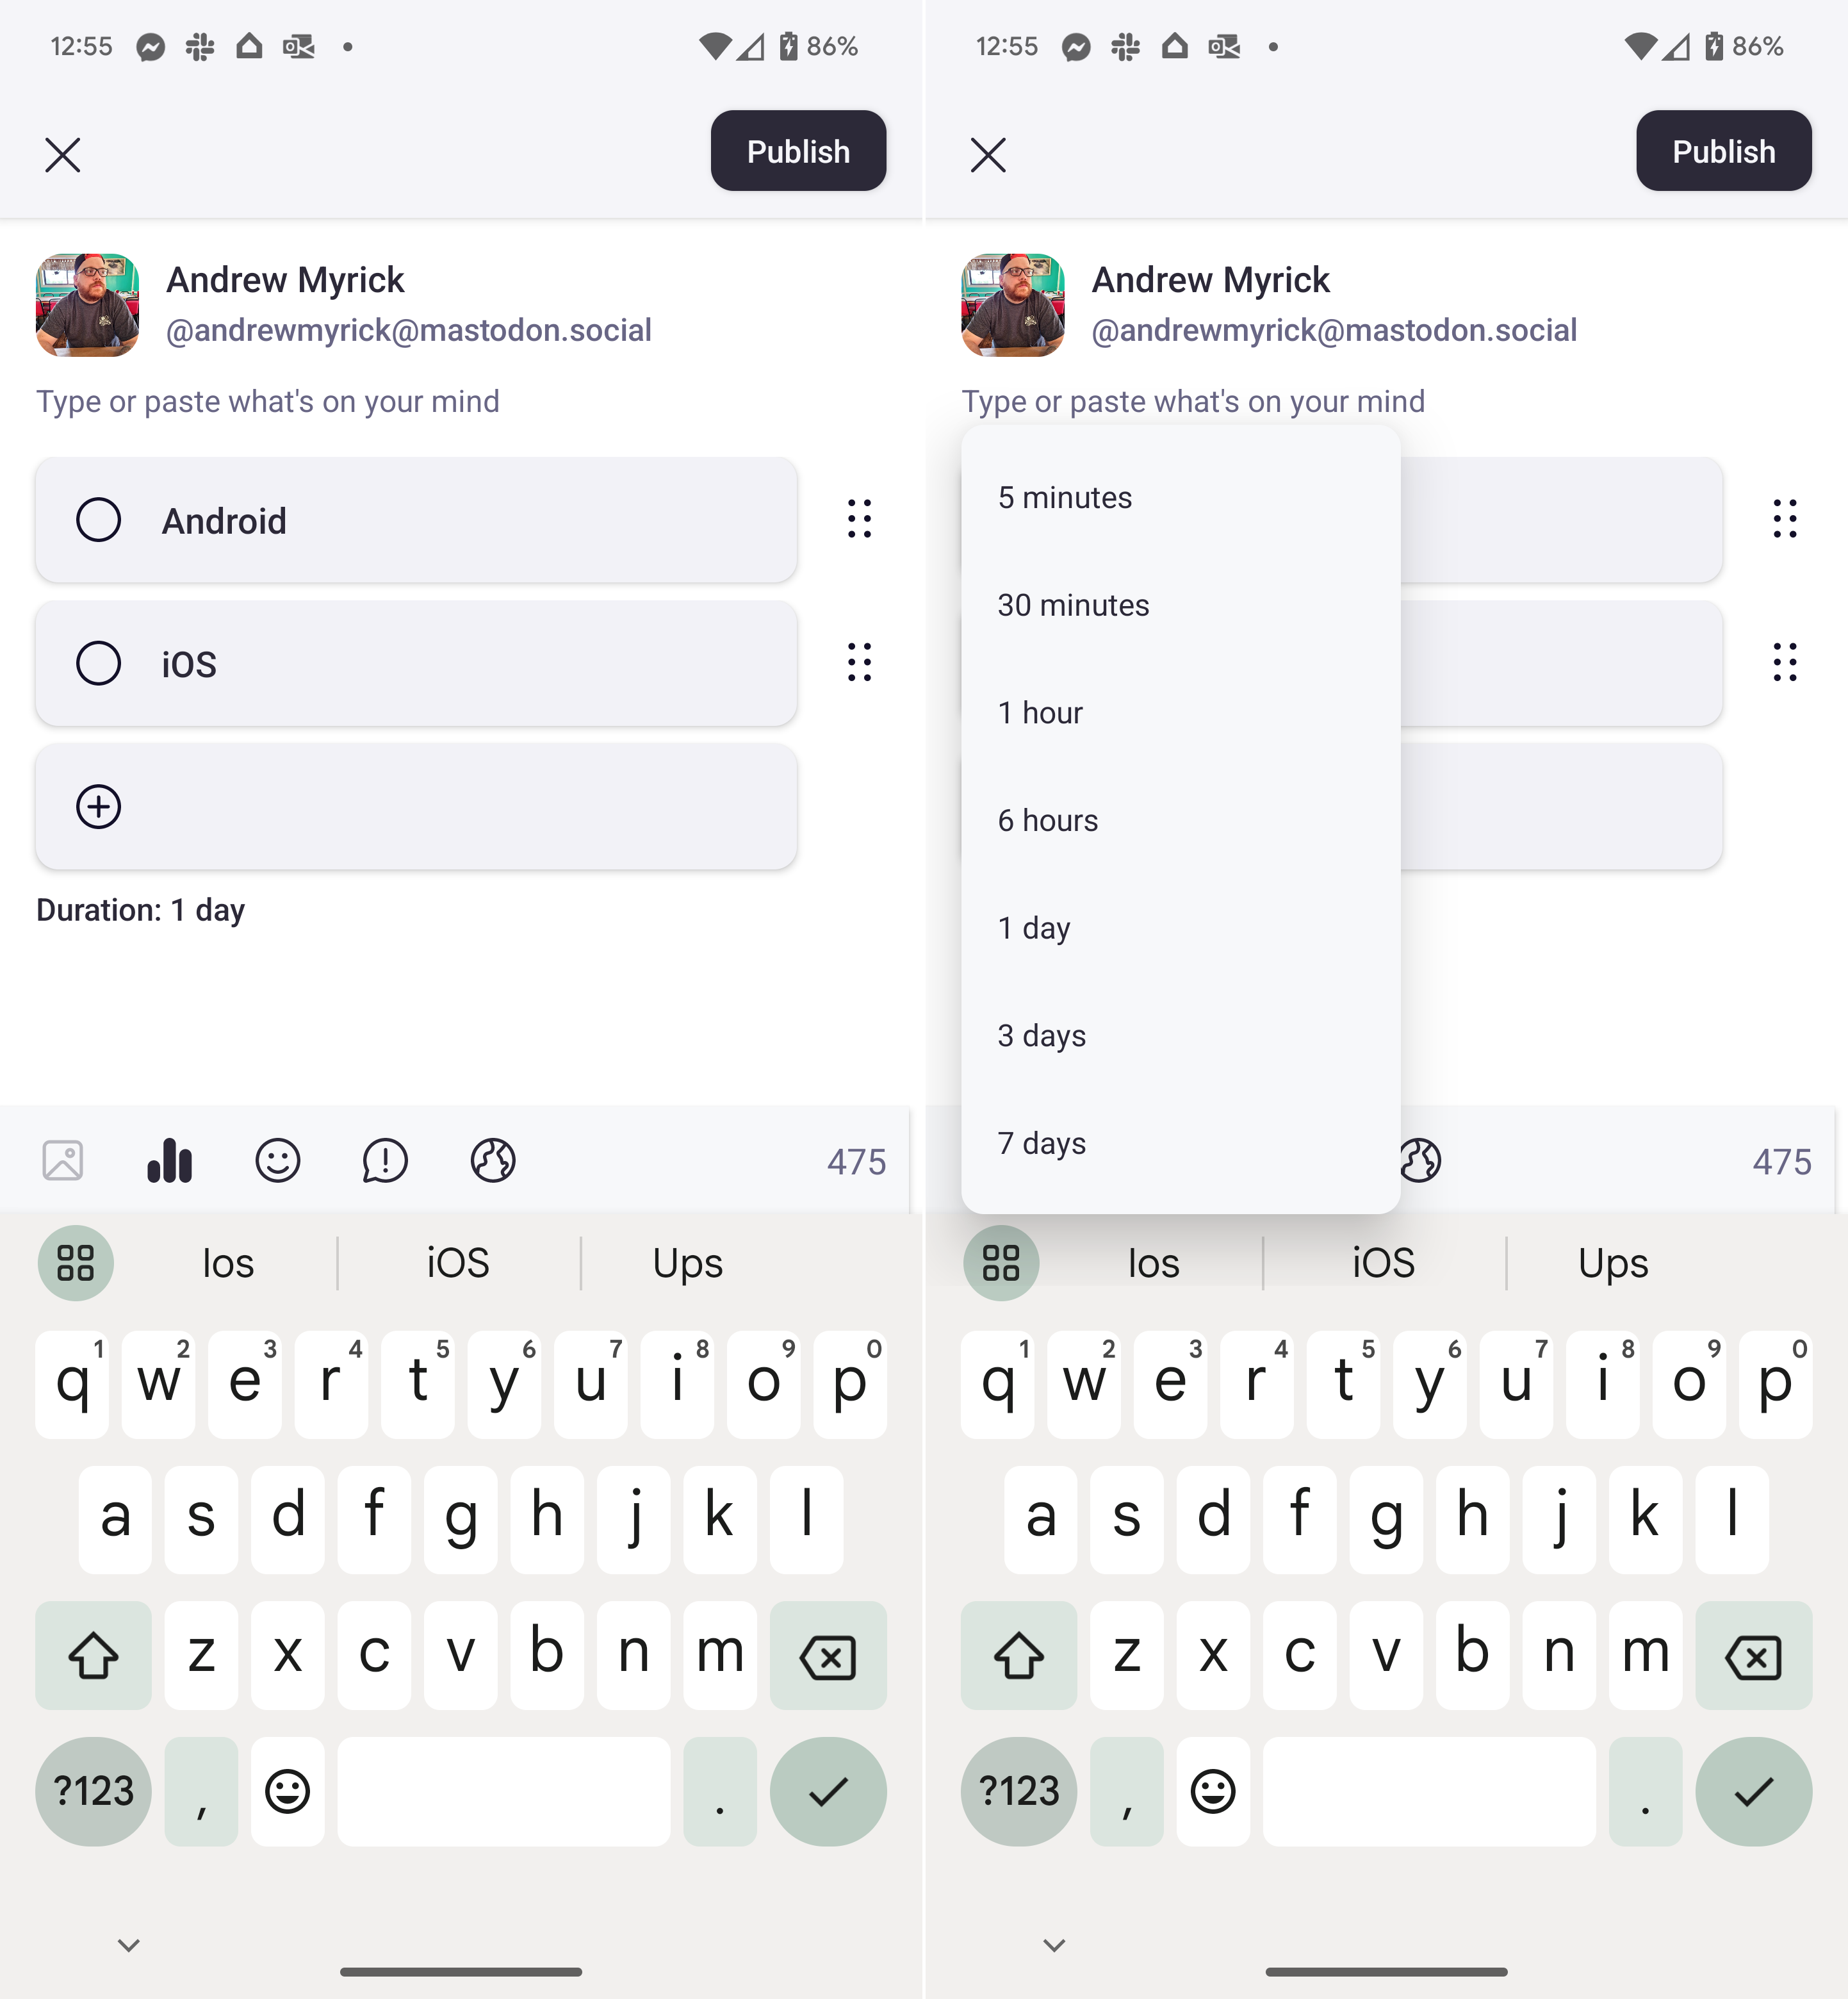
4. Fill out the question for the Poll and the various answers.
5. Select a duration. By default, polls last for one day.
6. Once complete, tap the Publish button in the top right corner.
Can you cross-post between Mastodon and Twitter?
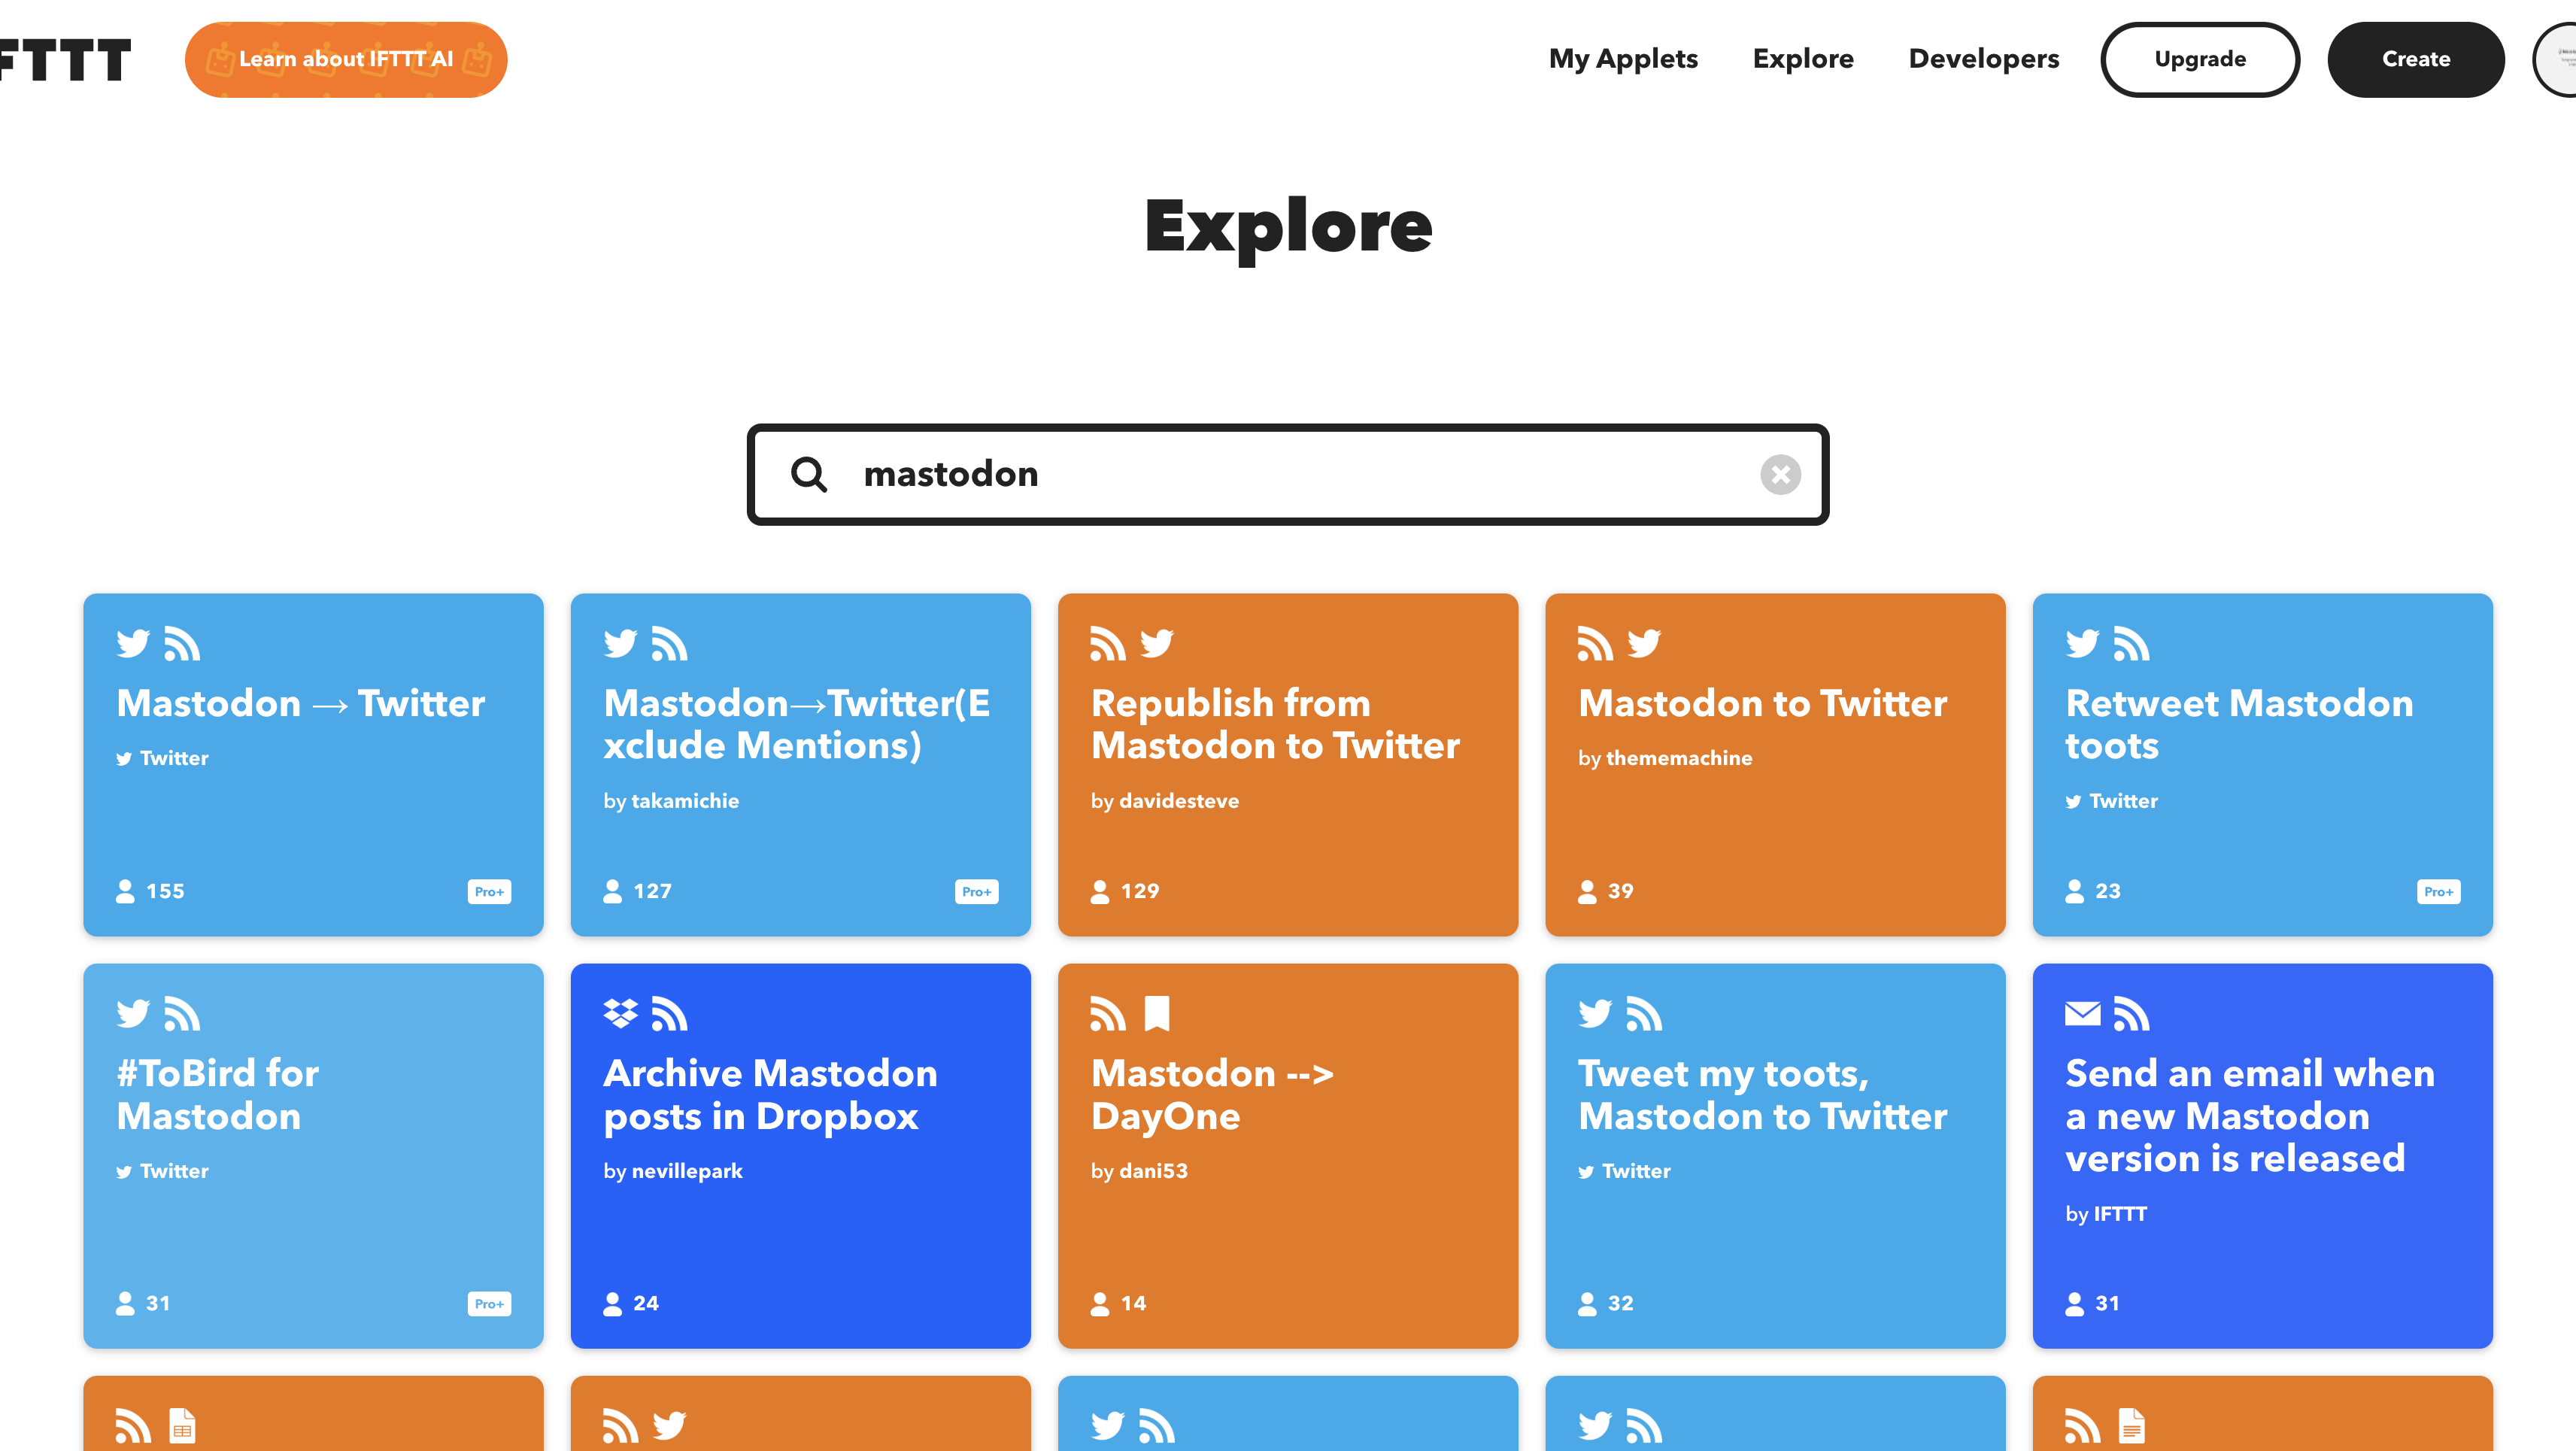
Given the changes to Twitter's API, this has removed the ability for automation services such as IFTTT or Zapier to automatically cross-post between Twitter and Mastodon. This isn't the case across the board, as you might have some luck using something like Buffer, but that is designed with professional publications in mind and isn't as user-friendly as IFTTT.
Tune your notifications
It's no secret that we already have to deal with too many notifications on a daily basis, with all of our devices buzzing or dinging, in an attempt to garner our attention. As is the case with pretty much any other app and social media platform, we recommend fine-tuning your Mastodon notifications.
The method for doing so may differ depending on which Mastodon client app you are using. But here are the steps for changing your notification preferences within the official Mastodon for Android app:
1. Open the Mastodon app.
2. Tap the Settings icon in the top right corner.
3. Scroll down to the Notifications section.
4. Toggle notifications for Favorites my post, Follows me, Boosts my post, or Mentions me.
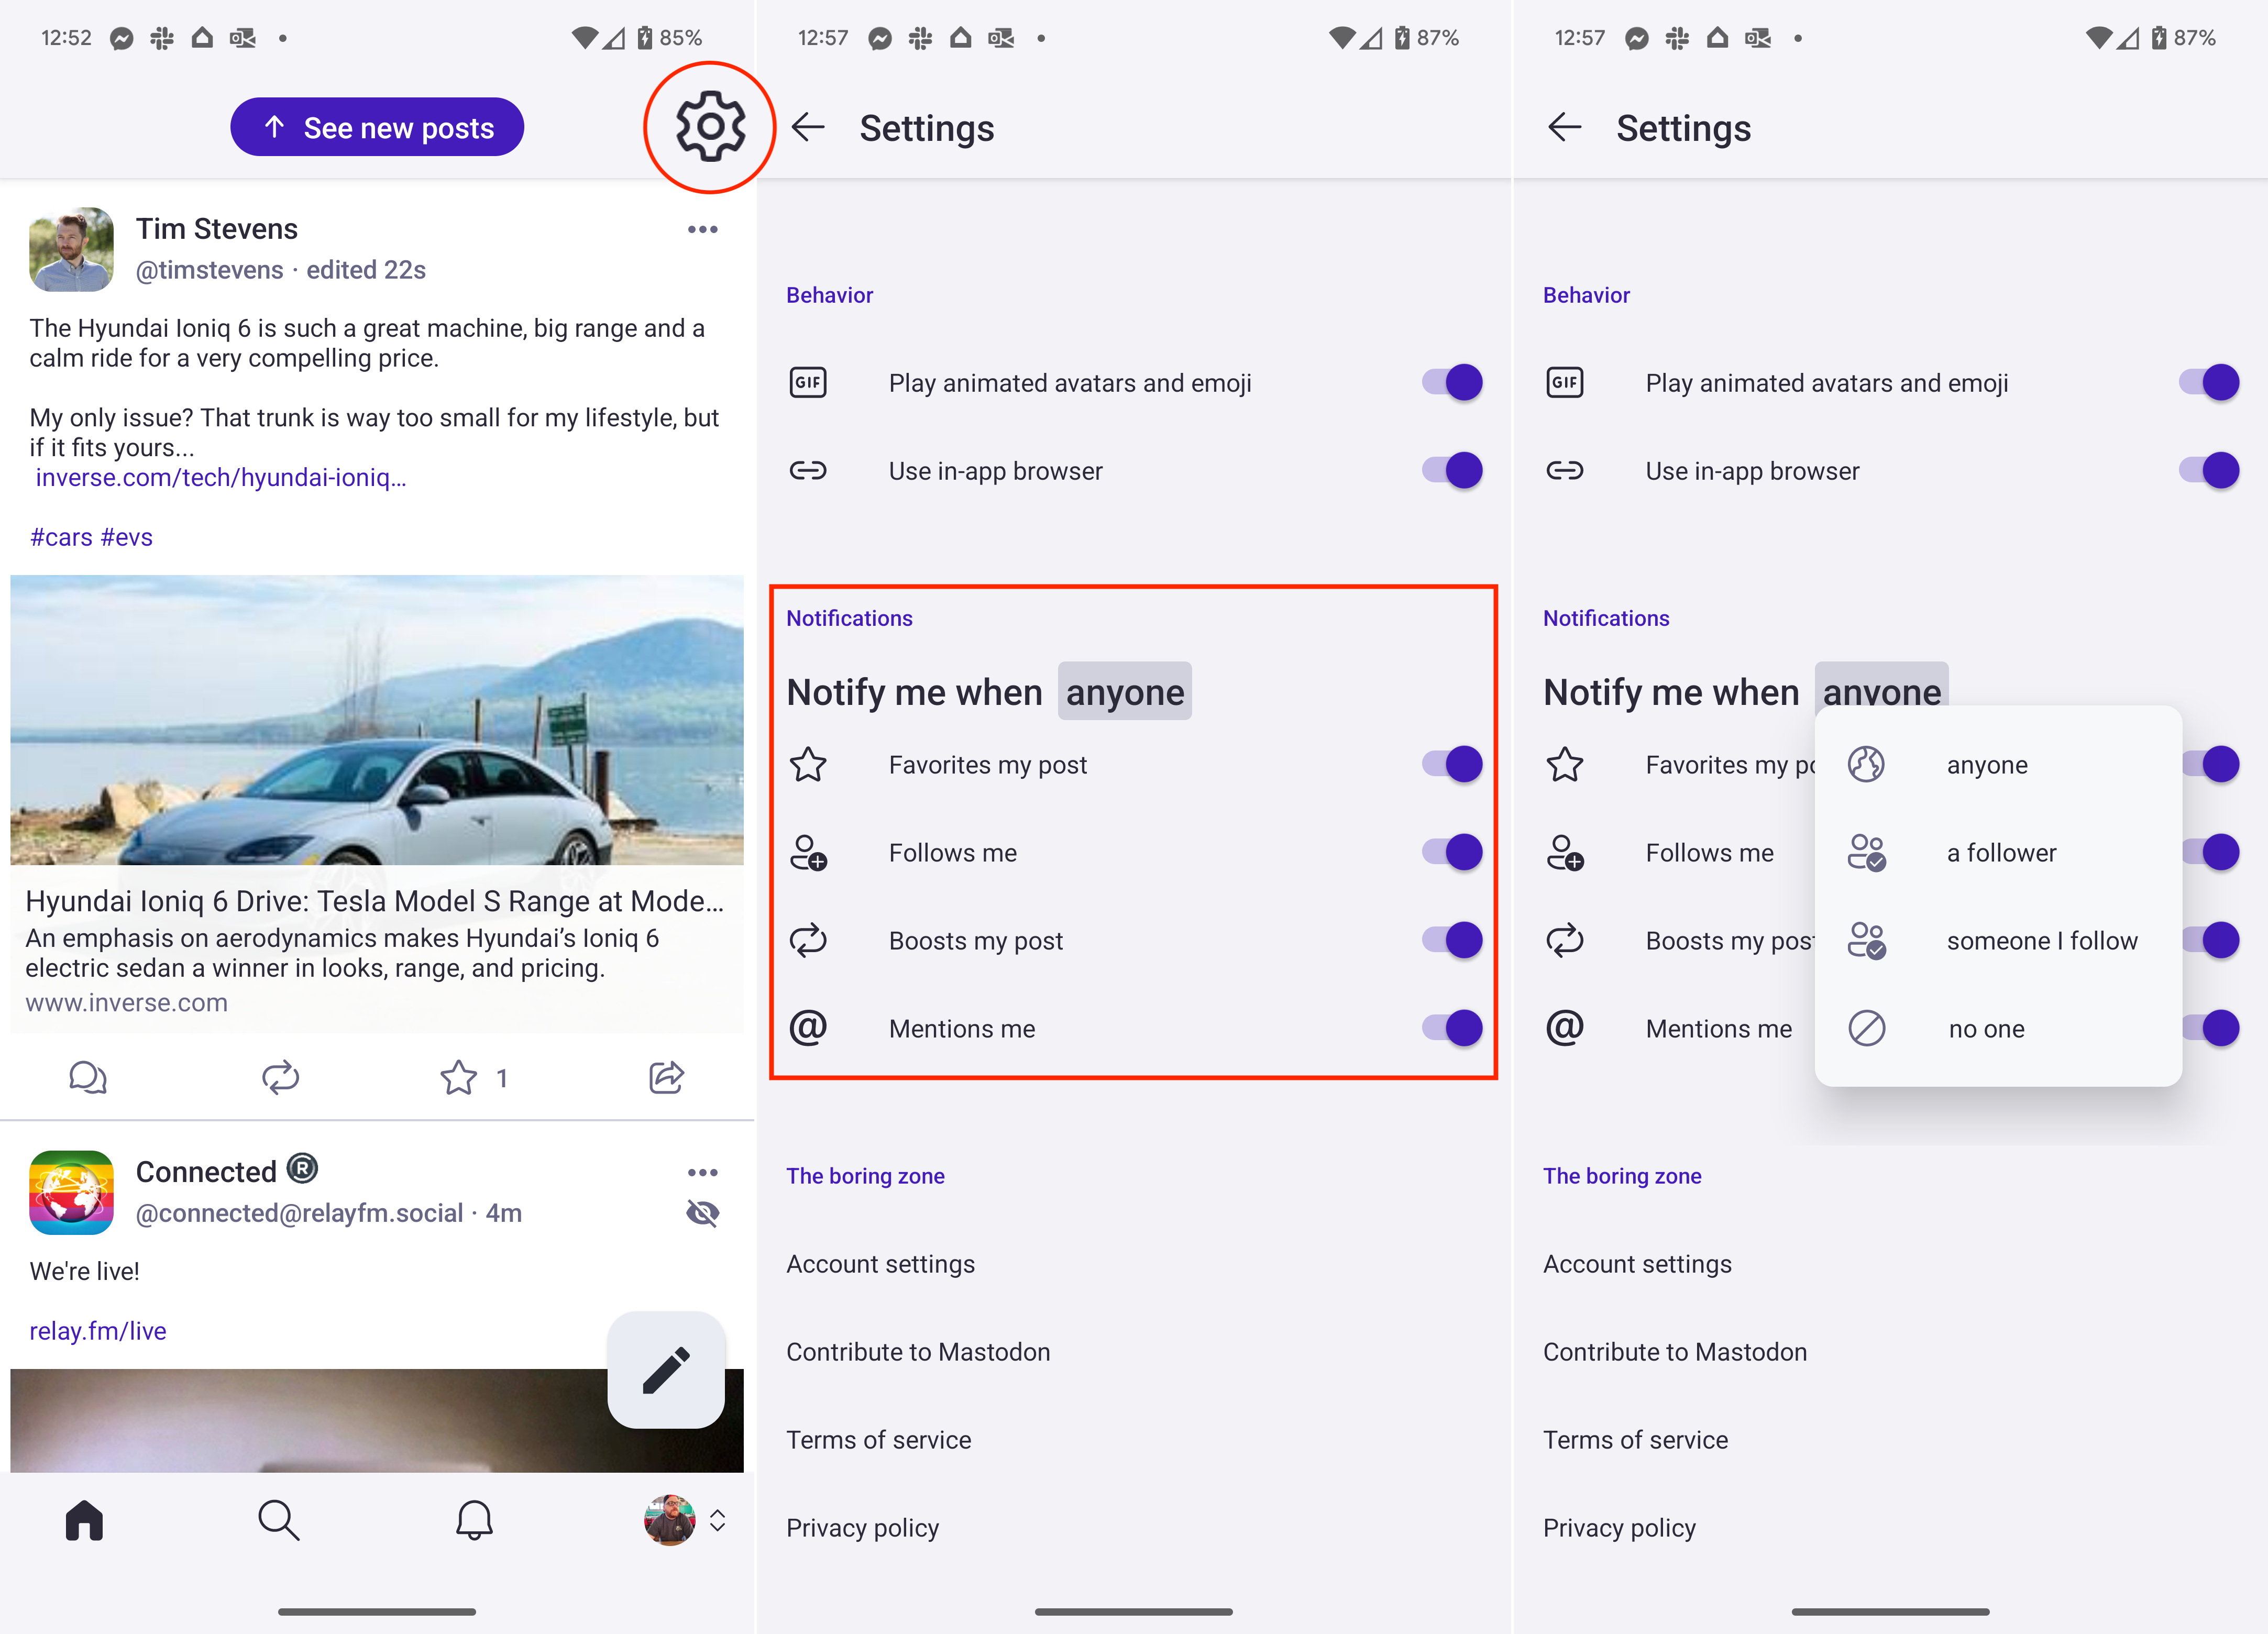
Something you might notice in the screenshots above is that the word anyone is highlighted. If you tap that, a drop-down menu will appear, allowing you to further customize your notifications. These include options for anyone, a follower, someone I follow, or no one.
Mastodon apps for Android
Another advantage that Mastodon now has over Twitter is the ability to use third-party apps to interact with the social media platform. This is something that was abruptly removed from Twitter, as you can only rely on the official mobile app, the web client, or a Progressive Web App. Thankfully, there are a few pretty great Mastodon apps on Android for you to check out and consider.
Mastodon for Android
This is the official Mastodon app for Android and is a good starting point for anyone who just signed up for the platform. The app has been regularly updated in recent months and offers similar feature-parity to what you'll find when browsing the site from your browser. It also makes the sign-up process extremely easy.
Download from: Google Play Store
Tusky for Mastodon
Tusky is an open-source client for Mastodon and can be easily downloaded from the Google Play Store, F-Droid, or even directly from Github. The app follows Google's Material Design and looks great on any Android phone.
Download from: Google Play Store
Moshidon for Mastodon
Moshidon is a "fork" of the official Mastodon app, providing a slightly different experience while "adding important features that are missing." Some of these features include having an "image description viewer," access to the "federated timeline," and more.
Download from: Google Play Store
Mastodon isn't perfect, but that's okay
Twitter has been around for so long that we can't really see a world where it doesn't exist in some form. However, the platform has changed so much, just in the last few months, that it might not be an enjoyable experience for you.
Mastodon doesn't have the same number of users but arguably has a better feature set. And in my opinion, using Mastodon has left me feeling the same excitement I did when Twitter first hit the scene. With any luck, the platform will continue to grow, but even if things stay as they are, a more tightknit community is rather comforting.

Andrew Myrick is a Senior Editor at Android Central. He enjoys everything to do with technology, including tablets, smartphones, and everything in between. Perhaps his favorite past-time is collecting different headphones, even if they all end up in the same drawer.


