Forget buying a high-priced NAS system. Build your own on Black Friday/Cyber Monday and save hundreds
It's high time I sorted out my home server mess. I use a couple of ancient desktop PCs in a closet filled with hard drives, and everything is patched together, so I have somewhere to store all of my stuff.
I also realize I don't need a NAS designed for enterprise speed and multiple users connecting to it at once, but I do need to save as much money as humanly possible. It's just my wife and me here, storing pictures or music along with the occasional document that can't get lost. A Raspberry Pi and a few hard drives are exactly what I need, and Black Friday is the time to get it all.
Here's what I need to build a NAS
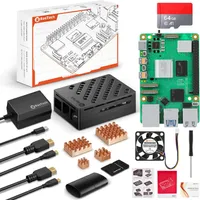
The Raspberry Pi 5 is the brains of the operation. Unless you already have one set up, buying a starter kit with a case, power supply, and accessories is a good way to save a few dollars.
You'll need a Raspberry Pi to run everything. A model 4 can work, but the newer model 5 is a lot better. We don't need excessive speed, but nobody wants to make things slower on purpose. Unless you already have one up and running, buy a kit. It will come with the board itself, a power supply, a case with heat sinks and a fan, and extras like an SD card and cables. You're going to save some money this way.
This one has it all, and it's on sale for a great price.
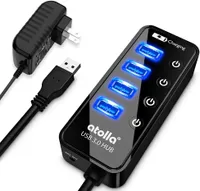
A USB Type A hub with external power is always a good idea when you're connecting a Raspberry Pi to other things. This one has individual power switches and an extra port up top for charging your phone.
Grab yourself a powered USB Type-A hub, too. A Raspberry Pi is tiny and doesn't have a robust power control circuit, so running everything from the Pi's internal USB power isn't a great idea. Using a powered hub means you're not going to see issues copying files back and forth because there isn't enough juice to go around.
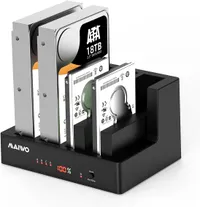
Unless you're building a custom case, a drive dock is an easy way to connect multiple drives with one cable. This one has room for four 2.5 or 3.5-inch drives, and you can save $20 on Black Friday.
Next is somewhere to put the storage. I'm 3D printing an enclosure for everything and using individual SATA to USB cables, but a drive dock is a lot easier. You can connect multiple storage drives using one USB cable, which can add up to a ton of storage.
Buying something like this one from MAIWO means you can mix and match 2.5 and 3.5-inch drives, and there's even a built-in drive cloning feature for when you decide to go bigger.
When all is said and done you'll have this dock and your Raspberry Pi case beside it so you won't need much room for it all.
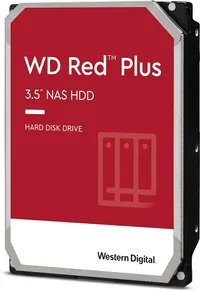
You need storage if you want to store anything! This drive from Western Digital is designed for NAS use, which means it's rated for a lot of read and write cycles. A 6TB heavy-duty hard drive for just $99 is a heck of a deal, too.
With room for four hard drives, you're going to need at least one. Most people choose spinning disk drives rather than solid-state drives for storage because they have higher capacities and cost less. Since you're not trying to run applications from the drive, speed isn't as important, and the cost-benefit makes it well worth the trade-off.
I already bought some 12TB drives over the summer because I knew I was going to do this, but to get started these 6TB drives are great. The Black Friday sale price can't be beat, either.
Whether you spend $150 bucks on a Raspberry Pi and HDD dock or $500 on a NAS from a company like Synology you're going to have to buy the hard drives.
Putting it together is easy. Follow an online guide to get your Raspberry Pi up and running once you've put the kit together. Connect the USB hub to the Pi and a wall socket, connect the HDD bay to the Hub and a wall socket, plug in your drives, and turn it all on.
You don't need any special NAS software because everything you need to share a drive across your home network (or the internet!) is built into the Raspberry Pi's operating system.
Use an online tutorial to set up Samba for sharing, and make sure you mind your permissions. Once that's done, your files and folders stored on your homemade NAS will show up through the standard Windows, Mac, and iOS "files" application, and there are plenty of Android file apps that can connect to network-shared storage.
Of course, you can go a step further and set up something like Plex or a network-aware music player on the Raspberry Pi and do more than just store stuff. You can even install OMV, a NAS operating system on the Pi, and get all the features you'll find on expensive models, too.
Enjoy doing it yourself and saving a boatload of money. I do ☺️.
Get the latest news from Android Central, your trusted companion in the world of Android

Jerry is an amateur woodworker and struggling shade tree mechanic. There's nothing he can't take apart, but many things he can't reassemble. You'll find him writing and speaking his loud opinion on Android Central and occasionally on Threads.
You must confirm your public display name before commenting
Please logout and then login again, you will then be prompted to enter your display name.
